Home-made yogurt is cheap, healthy and delicious! There are several ways to make yogurt at home, today I am going to show you the easiest method, using a yogurt maker, some milk and live culture yogurt bacteria.
First, there are a few things that you have to keep in mind when choosing the ingredients…
You’ll need :
1. One litre (33.8 fl oz, 1.75 pt uk ) of good quality milk, possibly organic, to avoid that the antibiotics contained in the milk might compromise the development of the good bacteria in the process. Unless you are on a low-fat diet, choose full-fat milk to make a creamier and smoother yogurt.
2. A live culture yogurt or a yogurt culture packet (here I am going to use a yogurt culture packet).
3. Sterilised glass jars. You can sterilise the jars by putting them (of course, without the lids) in a pre-heated oven at 100° C (212 F°) for about 8-10 minutes. Let cool before using.
Home-made yogurt (basic recipe)
Ingredients
1 litre (33.8 fl oz, 1.75 pt uk ) of good quality milk
1 live culture yogurt (1 cup) or a yogurt culture packet
Tools
a food thermometer
a yogurt maker (possibly with glass jars)
a stainer, or a cheese cloth
a spoon
a pan
a cup, or a small bowl to strain the yogurt
a measuring cup
The Method.
1. Pasteurise your milk. Heat the milk up to 85°C (185°F ), checking the temperature using a food thermometer (avoid boiling the milk, this way you can preserve the nutrients contained in it). This process will take a few minutes.
Variation. If you prefer thick yogurt, you have to boil the milk for at least 5-10 minutes and then remove the skin on the surface.
2. Let the milk cool (you have to use the milk at room temperature to make the yogurt).
3. Add the healthy bacteria. You can use a live culture yogurt (unflavoured, unsweetened and to be added at room temperature) or you can buy a yogurt culture packet. If you use a yogurt culture packet, you have to mix the culture with 2 tablespoons of milk first.
4. Mix the live culture with 1 litre of milk (or less, if you have boiled the milk to make thick yogurt). Mix everything well.
5. Set the timer (or an alarm) and keep the mixture at 38-40 °C (100-104°F) for 8-12 h. Use a yogurt maker, in this way your temperature will be constant at all times.
6. Strain your yogurt (this is optional). If you desire a thicker yogurt, you can strain the liquid using a cheese cloth (or a tea towel or a strainer). This process might take from a few up to several hours, depending on the device you use and on the thickness of the yogurt you wish to achieve. Leave the yogurt in the fridge while you do this.
Notes.
1. Store your yogurt in sterilised jars. Seal the jars with a lid and keep them in the fridge for 5-7 days (your yogurt might last even longer, if properly stored). You can freeze it and it will last up to a month.
2. If you are going to use your home-made yogurt as a starter to make a new batch, you have to do this within 5 days from the day you’ve made it, to make sure that the bacteria is fully active.
Comparing yogurts.
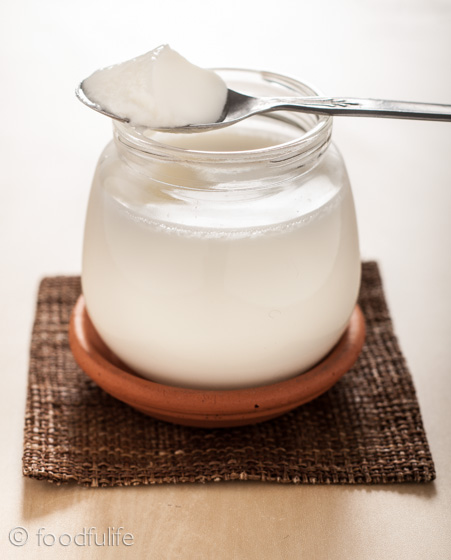
In the picture above the yogurt was made without boiling the milk.
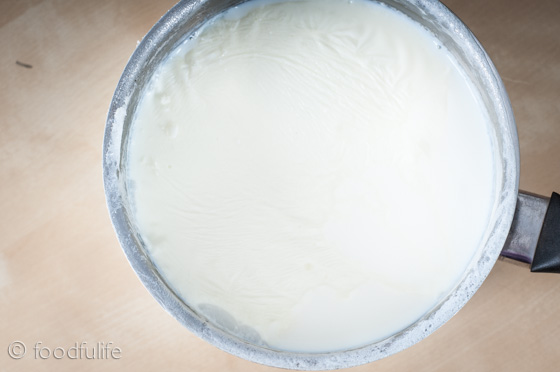
In this picture the yogurt was made boiling the milk during the process.
I hope this post was helpful. Please let me know if you having troubles with the process.
Thank you!
Come fare lo yogurt in casa.
Lo yogurt fatto in casa è economico, sano e delizioso! Ci sono diversi modi per fare lo yogurt, oggi vi mostrerò il metodo più semplice utilizzando la yogurtiera, del latte bio e dei fermenti lattici.
Prima di tutto, ci sono alcuni accorgimenti da seguire quando scegliete gli ingredienti…
Per avere un ottimo yogurt fatto in casa è necessario:
1. Acquistare latte di buona qualità (possibilmente biologico), per evitare che gli antibiotici contenuti in esso possano compromettere lo sviluppo dei batteri buoni durante il processo. A meno che non stiate seguendo una dieta povera di grassi, è consigliabile scegliere del latte intero di buona qualità per ottenere yogurt denso e cremoso.
2. Utilizzare uno yogurt con i fermenti lattici vivi, oppure acquistare un pacchetto di fermenti lattici liofilizzati, che potete trovare in farmacia (in questa dimostrazione utilizzerò i fermenti in pacchetto).
3. Sterilizzare i vasetti di vetro. Se volete uno yogurt perfettamente conservato è necessario sterilizzare i contenitori che si utilizzeranno per conservare il prodotto. È possibile farlo mettendo i vasetti (senza il coperchio) in forno preriscaldato a 100 ° C per circa 8-10 minuti, oppure si possono far bollire (eseguite questo passaggio solo se utilizzate dei contenitori di vetro, non fatelo con la plastica!). Lasciate raffreddare prima dell’uso.
Ingredienti
1 litro di latte di buona qualità
1 yogurt con fermenti lattici vivi o un pacchetto di fermenti liofilizzati per fare lo yogurt
Utensili
un termometro per alimenti
una yogurtiera (possibilmente con vasetti di vetro)
un colino molto fitto, o un panno e un colino normale
un cucchiaio
una pentola
una tazza, o una piccola ciotola per scolare lo yogurt
una caraffa graduata per misurare i liquidi
Il Metodo.
1. Pastorizzate il latte. Scaldare il latte fino a 85 ° C (185 ° F), controllando la temperatura con un termometro per alimenti. E’ bene non portare a bollore il latte per conservarne al meglio le sostanze nutritive. Questo processo richiederà alcuni minuti. Per ottenere invece uno yogurt più denso, fate bollire il latte per 5-10 minuti, poi rimuovete la pellicola che si forma in superficie e proseguite con il procedimento.
2. Lasciate raffreddare il latte. Utilizzare il latte a temperatura ambiente per fare lo yogurt.
3. Aggiungete i fermenti lattici. È possibile utilizzare uno yogurt con i fermenti lattici vivi come base per farne altro, oppure si può acquistare un pacchetto di fermenti lattici liofilizzati. Nel secondo caso, è necessario miscelare i fermenti con 2 cucchiai di latte prima di procedere.
4. Mescolate il latte con i fermenti. Utilizzate 1 litro di latte, o quello che rimane se ne avete già mischiata una parte o avete fatto bollire il latte. Mescolare bene tutto.
5. Impostate il timer (o un allarme) e mantenete la miscela a 38-40 ° C (100-108 ° F) per 8-12 h. Vi consiglio di utilizzare una yogurtiera, in questo modo la temperatura sarà mantenuta costante in ogni momento ed eviterete sorprese.
6. Filtrate il vostro yogurt. Se volete lo yogurt più denso, potete filtrarlo per eliminare il siero con un panno, un canovaccio oppure un colino molto fitto. Lasciate lo yogurt in frigo durante questa operazione. Questo passaggio può richiedere da poche a svariate ore, dipende da ciò che utilizzate e dal risultato che volete ottenere (il filtraggio è facoltativo).
Note.
Conservate lo yogurt in vasetti sterilizzati. Sigillate i vasetti con un coperchio e riponeteli in frigo per 5-7 giorni (ma il vostro yogurt potrebbe durare anche più a lungo, se correttamente conservato). Potete anche congelarlo e durerà fino a un mese. Se avete intenzione di utilizzare lo yogurt fatto in casa come base per farne di nuovo, dovete farlo entro 5 giorni dalla produzione, per essere sicuri che i batteri siano pienamente attivi.
Nelle ultime due immagini del post, potete vedere chiaramente la differente consistenza di uno yogurt fatto con il latte pastorizzato (non bollito o scaldato) e uno yogurt fatto facendo bollire il latte durante il procedimento (ultima immagine).


This looks delicious and such clear instructions too- will be giving this a go 🙂
Thank you so much Jess! I am glad you find it useful! I was inspired by a friend to write this post, she had some troubles with the yogurt maker… 🙂