Category Archives: Budget-friendly Recipes

How To Poach An Egg

Poached eggs are truly a special dish with their lovely creamy texture and wonderful delicate flavour. The low-fat cooking method used to prepare these eggs can be a little difficult to get right at first, but after a few tries your poached eggs will be cooked to perfection!

how to poach an egg

A few things to keep in mind.
1. It is very important to use really fresh eggs.
2. You have to check the consistency of the egg after 3-5 minutes of cooking time in order to get a soft but cooked egg. Remember to keep an eye on the clock because it is quite easy to overcook the egg.
3. If you cook more than one egg at a time use a large pan filled with plenty of water and just drop 4-5 eggs in it (quite quickly) without stirring the water. Just remember to remove each egg with the slotted spoon in the same sequence in which you added them into the water, so that they cook evenly.
4. You can add a few drops of white wine vinegar to the simmering water before cooking the egg…. The vinegar will make the egg white a little firmer and this will help the cooking process, however this step is totally optional. I like the natural softness and flavour of the egg, therefore I tend not to use vinegar.

DSC_1342

Poached eggs are great served with salmon, steamed vegetables, beans and toast. You can be really creative with this preparation and add a poached egg to a pizza, a baked potatoes, a creamy soup or a bruschetta!

I hope you enjoy this how-to recipe and have some fun with it! X

How to poach an egg.

Preparation time: 10 minutes
Cooking time 3-5 minutes

What you need.
1 egg
1 medium pan, filled with water
a slotted spoon
kitchen paper
a tablespoon
a ramekin
a pinch of sea salt
Method.
1. Simmer the water gently over a medium heat and add some sea salt crystals.
2. Carefully crack the egg into a ramekin.

DSC_1353

3. Using a tablespoon, make a whirlpool in the water by stirring quite quickly for a few seconds.

4. Drop (with one quick movement) the egg into the center of the whirlpool. Now let the egg poach without stirring.

DSC_1356

5. After a few minutes, check the consistency of the egg (it should be soft and with the egg white slightly firmer around the edges). When the egg is ready drain it with a slotted spoon. I usually place the egg and the slotted spoon on a strainer for a minute, in order to allow the excess water to drain completely.

DSC_1359

6. Serve your poached eggs straight away.

DSC_1362

DSC_1364

DSC_1365

DSC_1374

Quick & Easy : Grapes & Apple Smoothie

DSC_0223

A perfect seasonal breakfast smoothie, packed with antioxidants! Enjoy!

Grapes & apple smoothie

Ingredients

2 smoothies

200 g sweet black grapes

4 tablespoons greek yogurt

1 golden delicious apple

grated lemon zest

6 ice cubes

DSC_0201

Method.

  1. Wash, clean and peel the apple. Wash the grapes and place all the ingredients in a blender.
  2. Blend until smooth and serve in two large glasses.

DSC_0219

DSC_0250

DSC_0244

You can add some honey or agave syrup if you want a sweeter smoothie.

Smoothie con uva e mela.

ingredienti

per 2 smoothie

200 g di uva nera dolce

4 cucchiai di yogurt greco

1 mela golden

la scorza grattugiata di limone

6 cubetti di ghiaccio

Preparazione.

1. Lavate e sbucciate la mela, togliendo le parti indesiderate. Lavate l’uva e mettete tutti gli ingredienti nel frullatore.

2. Frullate bene fino ad ottenere un composto cremoso e servire in due bicchieri.

Potete aggiungere un po’ di miele, o sciroppo d’agave, per rendere più dolce lo smoothie.

Spaghetti With Raw Tomato ‘Sauce’ (Vegan/Dairy-free)

SER_9324

This wonderful ‘sauce’ is so easy to make, can be prepared in advance and is a delicious refreshing summer recipe! My mum makes this sauce using a smaller quantity of tomatoes (without draining the juice from the tomatoes) and lots of Parmesan cheese, but I personally prefer a healthier version of the recipe with lots of tomatoes and no cheese.

This raw tomato sauce contains anti-oxidants, lots of fibre and is low-fat….you’ll love it!!
You could also have this sauce on a bruschetta or serve it with meat, if you prefer.

SER_9314

Spaghetti with raw tomato sauce.

Serves 4

Ingredients

320 g spaghetti

350 g tomatoes

2 garlic gloves

a big bunch of fresh basil

2 tablespoons balsamic vinegar (optional)

salt and pepper to taste

4 tablespoons of extra virgin olive oil

Method.

1. Wash the tomatoes and basil, then dry them using a kitchen towel.

SER_9239

2. Crush two garlic cloves (use a knife or a garlic press).

3. Chop the tomatoes into small pieces and let them drain for about 10-15 minutes.

SER_9219

4. Then mix the tomatoes with extra virgin olive oil, balsamic vinegar, salt and pepper. Place the sauce in the fridge for at least half an hour.

SER_9240

SER_9266

5. Cook the pasta al dente, following the instructions on the packaging, then drain.

6. Mix the pasta with the sauce and serve chilled.

SER_9317

SER_9315

SER_9285

Spaghetti con “salsa” di pomodoro crudo.

Ingredienti

Per 4 persone

320 g di spaghetti

350 g di pomodori

2 spicchi d’aglio

un mazzetto grosso di basilico

2 cucchiai di aceto balsamico

olio extravergine d’oliva

sale e pepe

Preparazione.

1. Lavate e asciugate i pomodori e il basilico.

2. Utilizzando un coltello, pressate e molto tagliate finemente due spicchi d’aglio.

3. Prendete i pomodori e tagliateli in pezzetti piccoli con il coltello, poi lasciate scolare per 10-15 minuti.

4. Mescolate i pomodori con 4 cucchiai d’ olio d’oliva, 2 cucchiai di aceto balsamico, il sale e il pepe. Mescolate ancora e mettete nel frigorifero almeno per 30 minuti.

5. Cuocete la pasta al dente e scolate.

6. Condite la pasta con il sugo e servite come piatto freddo.


Pasta With Easy Fresh Tomato Sauce

SER_6228

Pasta al pomodoro is cheap, easy to make and absolutely delicious! There are several variations of this dish, made using different ingredients to personalise and flavour the sauce, but I personally prefer one of the simplest version made with fresh tomatoes.

Today I am going to show you the recipe I usually prepare at home. Basically, to make this delicious tomato sauce you’ll need just four ingredients: cherry tomatoes, garlic, fresh parsley and, of course, extra virgin olive oil. Try to use only the best quality ingredients in this recipe, it will be a little more expensive but I can assure you that it will make a huge difference in the end.

SER_6239

Tip. You can replace the garlic with a small chopped onion and the parsley with a handful of fresh basil leaves, for a more delicate flavour.

SER_6192

Pasta al pomodoro fresco.

Ingredients

For 4 servings

Easy 

350 g thick spaghetti (but you can use any pasta you like)

500 g fresh and ripe cherry tomatoes

3 cloves of garlic, chopped

a bunch of fresh parsley

5 tablespoons of extra virgin olive oil

grated Parmesan cheese to taste (optional)

salt and pepper to taste

SER_6179

Method.

1. Wash and dry the tomatoes, then cut them into small pieces. Leave in a strainer to drain.

SER_6177

2. Wash the parsley, remove the stem, then finely chop the leaves.

3. Cook the pasta al dente, following the instructions on the packaging, then drain and set aside.

4. Sauté the garlic with 5 tablespoons of extra virgin olive oil for a minute or two. At soon at the garlic softens add the chopped tomatoes. Let shimmer for about 10 minutes, then add the chopped parsley with some salt and pepper.

SER_6201

SER_6212

5. Add the pasta to the sauce, sauté for only a couple of minutes and serve with plenty of grated parmesan (but it’s optional) on top.

SER_6225

SER_6258

SER_6247

Pasta al pomodoro fresco.

Ingredienti

Per 4 persone

Facile

350 g di spaghetti grossi

500 g di pomodorini ciliegia maturi

3 spicchi d’aglio tritati grossolanamente

un mazzetto di prezzemolo fresco

5 cucchiai di olio extravergine d’oliva

parmigiano grattugiato q. b. (facoltativo)

sale e pepe

Preparazione.

1. Lavate e asciugate i pomodori, poi tagliateli a pezzetti. Lasciate i pezzetti di pomodoro in un colino per far scolare l’acqua in eccesso.

2. Lavate il prezzemolo, tagliate i gambi e tritate finemente le foglie.

3. Preparate gli spaghetti molto al dente, poi scolate e mettete da parte.

4. Fate rosolare l’aglio in una padella grande, con 5 cucchiai di olio extra vergine di oliva, per un minuto o due. Quando l’aglio sarà ammorbidito, aggiungere i pomodori tritati. Fate cuocere per circa 10 minuti, quindi aggiungete il prezzemolo tritato con il sale e il pepe.

5. Mescolate la pasta al condimento, poi fate rosolare per un paio di minuti e servire con abbondante parmigiano grattugiato.

SER_6224

SER_6274

Skinny “Fries”, My Way!

Low-fat and healthier than the real thing, oven-baked skinny “fries” can be even tastier than deep fried potatoes, if you add fresh herbs and garlic.
These skinny “fries” are super tasty and very crunchy!…None will know they are baked and not fried!!

Skinny fries with garlic and rosemary

Rosemary and garlic skinny “fries”.

Preparation time: 10 minutes

Cooking time: 30-35 minutes

4 Servings

Ingredients

a bunch of fresh rosemary

8 garlic cloves, peeled and cut in halves

4 medium-large potatoes

4 tablespoons extra virgin olive oil

salt and pepper to taste

Skinny fries with garlic and rosemary

what you need

2 large rectangular baking trays

a big bowl

some baking paper

a knife

a kitchen cutting board

Skinny fries with garlic and rosemary

Method.

1. Wash, peel and cut the potatoes into sticks.

Skinny fries with garlic and rosemary

2. Put the potatoes in a large bowl and mix with 4 tablespoons of extra virgin olive oil, salt and pepper.

Skinny fries with garlic and rosemary

3. Take 2 large baking trays, line them with baking paper and place the potatoes on the trays (not too many, otherwise they’ll stick together).

4. Top the potatoes with the rosemary and the garlic cloves, then bake for 30-35 minutes at 190°C (374° F).

Skinny fries with garlic and rosemary

5. Take the potatoes out of the oven, remove the garlic and rosemary and serve.

Skinny fries with garlic and rosemary

Skinny fries with garlic and rosemary

Skinny fries with garlic and rosemary

Skinny fries with garlic and rosemary

Patatine al forno con aglio e rosmarino.

Tempo di preparazione: 10 minuti

Tempo di cottura: 30-35 minuti

Per 4 persone

Ingredienti

un po’ di rosmarino fresco

8 spicchi d’aglio, puliti e tagliati a metà

4 patate medio-grandi

4 cucchiai di olio extra vergine d’oliva

sale e pepe q. b.

occorrono:

2 teglie grandi rettangolari

una ciotola grande

2 fogli di carta da forno

un coltello

un tagliere

Preparazione.

1. Lavate, sbucciate e tagliate le patate a bastoncini sottili.

2. Mettete le patate in una ciotola e mescolate con 4 cucchiai di olio extra vergine d’oliva, sale e pepe.

3. Prendete una teglia grande, ricoprite con carta da forno e posizionateci sopra le patate, lasciando un po’ di spazio tra un pezzo e l’altro (altrimenti si attaccano).

4. Aggiungete il rosmarino e gli spicchi d’aglio sopra le patate, poi infornate a 190 ° C per 30-35 minuti.

5. Levate le patate dal forno, poi togliete l’aglio e il rosmarino. Servite subito.

Skinny fries with garlic and rosemary

Skinny fries with garlic and rosemary

How To Make (Almost) Perfect Meringues

The basics.
A meringue is basically made with two ingredients: sugar and egg whites.
In Italian cuisine we often use three types of meringue: the classic, the French or Italian meringue.
While the classic and French meringues are both baked, the Italian meringue is usually pasteurised (“cooked” at a very low temperature) by adding hot sugar syrup during the preparation process and it is generally used in creamy desserts or cake decorations/ fillings.

How to make perfect meringues

Classic or French meringue?
The main difference between French and classic meringues is in the preparation methods. In fact, both these meringues are made with the same ingredients and cooking methods, but they differ in the way in which the sugar is added to the recipe and (slightly) in their final consistency. In the classic meringue the sugar is added at the end of the process, incorporating the sugar with a spatula when the egg whites are firmly whipped; while in the French meringue the sugar is added gradually during the whipping process.

DSC_3006-2

DSC_2997-4

In this article we will see the preparation process for the French meringue, which is quite light and crispy.

How to make perfect meringues

…And yes, it’s hard to get it right, but not impossible!

Basic French meringue recipe.

Preparation time: 10 minutes

Cooking time: 3 hours

Ingredients

For 25 meringues (two oven trays)

100 g egg whites

200 g granulated sugar (use icing sugar for a finer grain)

How to make perfect meringues

Method.

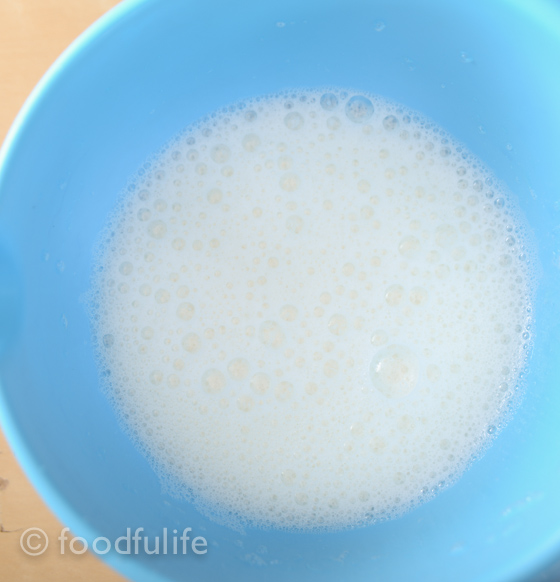
1. Using an electric beater, beat the egg whites with 1/3 of sugar (about 66 g) starting with a medium-low power.

How to make perfect meringues

2. Once the egg whites have doubled in volume, add another 1/3 of sugar and beat at a medium-high power.

How to make perfect meringues

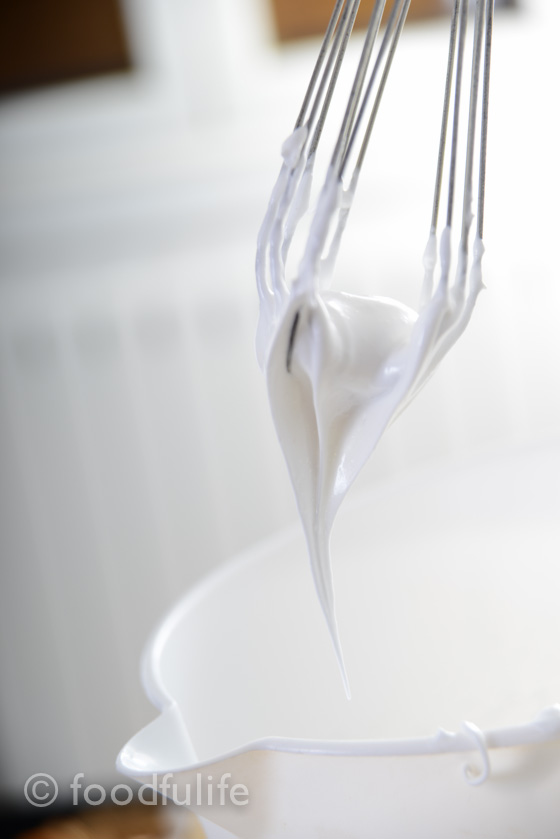
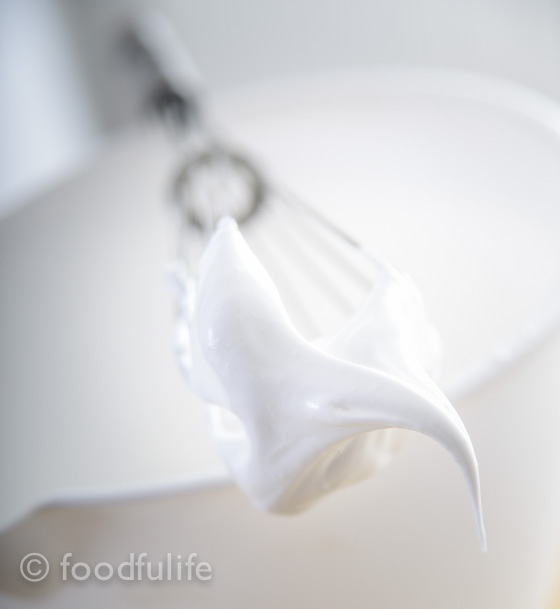
3. When the egg whites are almost stiff, add the rest of the sugar and continue to beat until the mixture is thick and glossy.

How to make perfect meringues

How to make perfect meringues

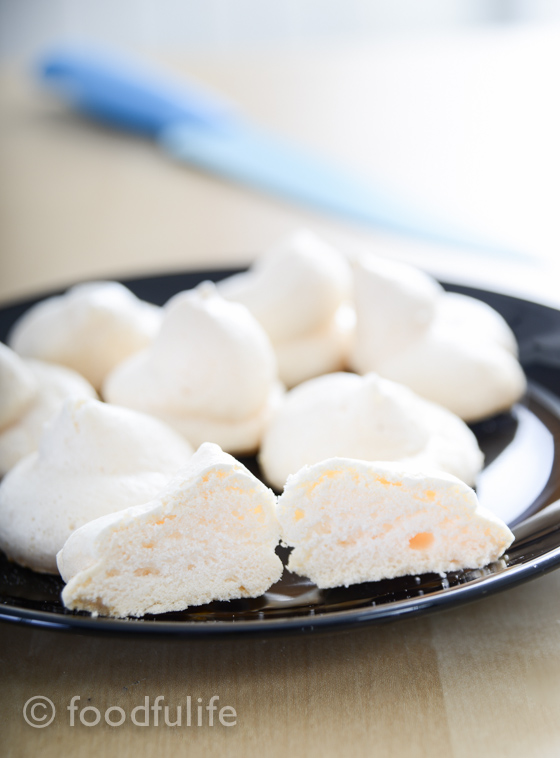
4. Line the base of an oven tray with baking paper, then, using a piping bag, make the meringues (5 cm wide x 3 cm thick).

How to make perfect meringues

How to make perfect meringues

5. Bake at 85-100° C ( 185- 212°F) for 3 hours (the cooking time depends also on the oven you use). Let cool completely on wire rack and then place in a airtight container.

How to make perfect meringues

How to make perfect meringues

How to make perfect meringues

A few things to keep in mind…

About the ingredients.

1. As a basic rule, the weight of the sugar must be double compared to that of the egg whites.

2. You can add something a little acidic, like lemon juice, to help the whipping process. The doses: use 1/2 a teaspoon of lemon juice for 100 g of egg whites.

3. It is possible to add a little cornstarch in order to better maintain the shape of the meringues during the cooking process.

4. Don’t add any salt because it won’t help the whipping process. Some recipes might suggest the opposite, but it is not correct.

About the preparation method.

1. Separate the egg whites from the yolks well, even small traces of egg yolk will compromise the end result.

2. The equipment used during the whipping process should have been properly cleaned, dried and possibly quite cold. All these elements will help you to achieve the perfect meringue!

About the cooking method.

1. Cook the meringues at a very low temperature to avoid any changes in colour or cracks on the surface (basically the meringues have to dry out slowly in the oven). Best cooking temperature: 85 -100 ° C ( 185- 212°F).

2. If you want to dry the meringues completely, to preserve them for longer, you can leave them in the oven (turned off) for a few hours, after the cooking process.

How to make perfect meringues

Ricetta base per la meringa francese.

Tempo di preparazione: 10 minuti

Tempo di cottura: 3 ore

Ingredienti

Per 25 meringhe (per 2 teglie rettangolari)

100 g di albumi

200 g di zucchero semolato (potete usare zucchero a velo per una meringa con grana più fine)

Preparazione.

1. Con uno sbattitore elettrico (utilizzando una potenza medio-bassa), incominciate a montare gli albumi con 1/3 di zucchero (circa 66 g).

2. Quando gli albumi saranno raddoppiati di volume, aggiungete ancora 1/3 di zucchero e aumentate la potenza.

3. Ad albumi quasi montati a neve, aggiungere il resto dello zucchero e continuare a montare fino ad ottenere un composto denso e lucido.

4. Ricoprite la base di una teglia con carta da forno, poi, utilizzando un sac à poche, date la forma alle meringhe (5 cm di larghezza x 3 cm di altezza).

5. Infornare a 85-100 ° C per 3 ore (il tempo di cottura però dipende dal forno utilizzato). Fate raffreddare bene, poi conservate le meringhe in un contenitore a chiusura ermetica.

Note.

Per gli ingredienti.

1. Come regola generale, il peso dello zucchero deve essere il doppio di quello degli albumi.

2. Si può utilizzare del succo di limone per far montare meglio gli albumi. Dosi consigliate: 1/2 cucchiaino di succo di limone per 100 g di albumi.

3. Aggiungendo un po ‘ di amido di mais le meringhe manterranno meglio la forma durante la cottura.

4. Il sale non aiuta a montare meglio gli albumi, se potete non utilizzatelo.

Per la preparazione.

1. Separate bene gli albumi dai i tuorli, perché piccole tracce di tuorlo possono compromettere il risultato finale.

2. L’ attrezzatura deve essere pulita, asciugata e possibilmente fredda.

Per la cottura.

1. Le meringhe devono cuocere a temperatura molto bassa per evitare un cambiamento di colore o la formazione di piccole crepe sulla superficie. La temperatura di cottura più indicata è tra 85-100 ° C.

2. Le meringhe si conservano a lungo quando sono molto asciutte. A cottura terminata, potete lasciare le meringhe nel forno per qualche ora  per farle asciugare completamente.

How to make perfect meringues

Quick And Easy Recipe: Sautéed Carrots

This is an easy and extremely delicious carrot recipe! You can add the quantity of extra virgin olive oil and butter you desire, or you can have a healthy dish with just a little extra virgin olive oil in it. You can adapt this recipe according to your taste.

Sautéed Carrots

Preparation time: 5 minutes

Cooking time: 15-20 minutes

Ingredients

For 6 servings

1 kg carrots, washed and peeled

2 garlic cloves, chopped

4-5 tablespoons extra virgin olive oil

2 tablespoons finely chopped parsley

salt to taste

a little bit of butter (optional)

Method.

1. Steam the carrots until a little bit tender.

2. Slice the carrots and then sauté (for 5-10 minutes) with the extra virgin olive oil, a little bit of butter (optional), the chopped garlic and parsley.

3. Add some salt and serve.

sautéed carrots

Carote saltate in padella.

Temo di preparazione: 5 minuti

Tempo di cottura: 15-20 minuti

Ingredienti

Per 6 porzioni

1 kg di carote, già pulite

2 spicchi d’aglio (tritati)

4-5 cucchiai di olio extra vergine di oliva

2 cucchiai di prezzemolo tritato

sale q. b.

un po’ di burro (facoltativo)

Preparazione.

1. Cuocete a vapore le carote, fino a renderle più tenere.

2. Tagliare le carote e poi fatele rosolare (per 5-10 minuti) con l’olio extra vergine di oliva, un po’ di burro (facoltativo), l’aglio e il prezzemolo.

3. Aggiungete un po’ di sale e servite.

Traditional Recipe: Baked Peppers Au Gratin

A great dish to serve if you have a large number of guests to feed, because it is so easy to prepare and cook. Baked Peppers Au Gratin are a wonderful appetiser and side, served with meat or seafood, but you can have them as a vegetarian meal, with a nice salad. You can prepare a gluten-free version of this Italian traditional dish using instant polenta, instead of bread crumbs. You can also make a vegan version without the cheese.

DSC_1181

Serve Peppers Au Gratin hot or cold, they are delicious either way! But in the summer I prefer this dish cold, straight from the fridge, because the peppers need some time to absorb all the different flavours.

This is the right season to eat fresh bell peppers and there are plenty of choices when it comes to great traditional recipes with this wonderful ingredient.
Here are some other recipes using bell peppers that I have published recently on Foodfulife:

La peperonata

Roasted Bell Peppers with Garlic Vinaigrette

DSC_1210

Baked Peppers Au Gratin.

Preparation time: 10 minutes

Cooking time: 40 minutes

6 servings

Easy

Ingredients

3 large bell peppers (red and yellow)

6 tablespoons breadcrumbs

80 g freshly grated Parmesan cheese

1 tablespoon of fresh parsley, finally chopped

1/2 a tablespoon of dried oregano

2-3 cloves of garlic, crushed and finally chopped

salt and pepper to taste

extra virgin olive oil

DSC_1087

Method.

1. In a small bowl, mix the herbs with the breadcrumbs, the grated cheese, the garlic and season with some salt and pepper.

DSC_1099

2. Wash and dry the bell peppers.

DSC_1041

DSC_1053

3. Using a knife, cut the peppers in half and remove the stem, the seeds and the white parts.

DSC_1071

4. Place the peppers onto an oven tray, previously greased with a couple of tablespoons of extra virgin olive oil. With a spoon, spread the breadcrumb mixture evenly onto the peppers.

DSC_1104

5. Bake in the oven at 200°C (392° F) , until the peppers are tender and the breadcrumb mixture becomes very crunchy.

DSC_1209

DSC_1194

DSC_1193

Peperoni Gratinati Al Forno.

Tempo di preparazione: 10 minuti

Tempo di cottura: 40 minuti

6 persone

Facile

Ingredienti

3 peperoni grandi (rosso e giallo)

6 cucchiai di pangrattato

80 g di Parmigiano Reggiano, grattugiato fresco

1 cucchiaio di prezzemolo fresco, tritato finemente

1/2 cucchiaio di origano secco

2-3 spicchi d’aglio, schiacciato e tritato finemente

sale e pepe

olio extra vergine di oliva

Preparazione.

1. In una terrina, mescolate il pan grattato con l’aglio, l’origano, il prezzemolo, il parmigiano e un pò di sale e pepe.

2. Lavate e asciugate bene i peperoni.

3. Con un coltello, tagliate e rimuovete la calotta superiore del peperone. Tagliate a metà gli ortaggi e rimuovete la parte interna, con i filamenti e i semi.

4. Disponete i peperoni sopra una teglia, unta con un filo d’olio. Riempite i peperoni con il composto di pangrattato e sapori, ma senza esagerare.

5. Condite con un po’ d’olio e infornate a 200° C. Quando i peperoni saranno morbidi e il ripieno croccante spegnete il fuoco.

Traditional Recipe: Roasted Bell Peppers With Garlic Vinaigrette

Bell peppers are delicious, rich in vitamin C and antioxidants and come in a variety of colours. In Italy we usually cook red and yellow peppers and we don’t use green peppers as much, because they are more acidic and bitter in taste. Bell peppers are usually roasted, fried, grilled or stewed with different ingredients. Today we are going to roast the peppers and season them with a light vinaigrette made with extra virgin olive oil, a splash of balsamic vinegar and enriched with fresh herbs and garlic.

Roasted peppers are a very simple but effective appetiser or side dish, I personally really like them and I could eat lots! If you prefer a more complex dish you can use them to make a sauce to complement or season pasta and meat dishes, or simply used them as a tasty ingredient in salads.

DSC_0574

Roasted bell peppers with garlic vinaigrette.

medium difficulty

Ingredients

for 4 people

3 large bell peppers.

DSC_0545

For the garlic vinaigrette.

4 tablespoons of extra virgin olive oil

1 clove of garlic, crushed

1/2 tablespoon of dried oregano

1/2 tablespoon of finely chopped fresh parsley

1 tablespoon of good balsamic vinegar

salt and pepper to taste

Method.

1. Wash and dry the bell peppers.

DSC_0523

2. Roast the whole peppers in the oven at 200°C (392° F ) on a baking sheet (The cooking time will vary depending on the size and thickness of the peppers. When the skin starts darkening slightly and detaching from the flesh, the peppers are ready).

DSC_0531

3. Once the peppers are slightly soft, turn off the oven. Put the hot peppers in plastic bags (or an airtight container) and seal well (In this way, the steam will make removing the skin from the flesh mush easier).

4. Let cool, then remove the pepper from the bag and throw away the water created from the steam. Remove the skin on each pepper, using a small sharp knife.

DSC_0538

5. Slice the peppers vertically into two, then remove and discard the stem and the seeds. Slice each pepper vertically into 8 pieces and serve cold with the garlic and herb vinaigrette.

DSC_0546

DSC_0579

For the vinaigrette.

Mix 4 tablespoons of extra virgin olive oil with the herbs, the garlic and some salt and pepper. Season and serve.

Tip. For extra flavour you can add half a tablespoon of anchovy paste to the sauce.

DSC_0543

DSC_0571

Peperoni arrosto con vinaigrette all’ aglio.

media difficoltà

Ingredienti

Per 4 persone

3 peperoni abbastanza grossi (rossi e gialli)

Per la vinaigrette all’ aglio

4 cucchiai di olio extra vergine di oliva

1 spicchio d’aglio, sbucciato e ben schiacciato

1/2 cucchiaio di origano essiccato

1/2 cucchiaio di prezzemolo fresco tritato

1 cucchiaio di aceto balsamico

sale e pepe q.b.

Preparazione.

1. Lavate bene i peperoni e asciugateli.

2. Mettete i peperoni interi a cuocere in forno a 200° C ( uso una teglia grande ricoperta da un foglio di carta da forno). Il tempo di cottura varierà a seconda della grandeza e dello spessore dei peperoni; quando la buccia si colorirà e si staccherà dalla polpa, i peperoni sono pronti.

3. Mettete i peperoni ancora caldi in un contenitore con il coperchio, poi chiudete bene e lasciate raffreddare (con questo metodo il vapore farà staccare con più facilità la buccia dalla polpa).

4. Aprite e buttate via l’acqua che si è formata per il vapore. Con un coltello, levate la buccia ai peperoni.

5. Tagliate a metà i peperoni e rimuovete la parte interna con i semi. Tagliate ancora i peperoni in verticale fino ad ottenere 6-8 fette lunghe per peperone.

Per la vinaigrette.

Mescolate l’olio extra vergine di oliva con le erbe, l’aglio, il sale e pepe. Condite i peperoni e servire.

Tip. Per insaporire ulteriormente si può aggiungere mezzo cucchiaio di pasta d’acciughe al condimento.

DSC_0588

Traditional Recipe: Fried Sage Leaves

DSC_6398

This is another lovely traditional recipe from Genoa; an extremely easy and cheap dish to prepare, especially if you have a sage plant in the garden! Sage is usually a very tough plant, in this cooking process the leaves become very tender and the aroma of this wonderful aromatic herb gets very delicate and pleasant to taste. It is a wonderful starter, but also a great side dish.
You need the kind of sage with big leaves, not all varieties are suitable for this method of preparation.

DSC_6198

DSC_6202

Fried Sage Leaves.

For 4 people

Ingredients

200 g (7.05 oz) large leaves of sage, washed and dried

100 g (3.5 oz) of plain flour

1 egg white (as a vegan option, make the batter without egg white)

100 ml (3.38 us fl oz) light beer

1 tablespoon extra virgin olive oil

extra virgin olive oil (for frying)

salt

DSC_6190

Method.

1. In a bowl, add 1 tablespoon of olive oil and a pinch of salt to the flour. Then slowly pour in the beer, stirring the mixture with a whisk. Cover with a kitchen towel, then let the batter rest for about 30 minutes.

DSC_6146

2. Whip the egg whites until stiff, then stir them gently into the batter, just before frying.

DSC_6179

3. Heat the extra virgin olive oil, meanwhile, dip the sage into the batter. Fry a few leaves at a time, in plenty of oil.

DSC_6165

DSC_6182

4. Drain the leaves and place them on a plate with plenty of paper towels, to absorb the excess oil. Season with salt and serve.

DSC_6313

DSC_6376

DSC_6355

DSC_6409

Salvia fritta in pastella.

per 4 persone

Ingredienti

200 g di foglie grosse di salvia, lavate e asciugate

100 g di farina

1 albume (per una dieta vegana, si può fare la pastella senza uovo)

100 ml di birra chiara

1 cucchiaio di olio extra vergine d’oliva (per la pastella)

olio extra vergine d’oliva (per friggere)

sale

Preparazione.

1. In una terrina, unite 1 cucchiaio d’olio, un pizzico di sale alla farina. Versate poi a filo la birra, mescolando con una frusta l’impasto. Ricoprite con un canovaccio e lasciate riposare l’impasto per 30 minuti.

2. Montate l’albume a neve e incorporate delicatamente nella pastella, poco prima di friggere.

3. Fate scaldare l’olio e immergete la salvia nella pastella. Friggete alcune foglie per volta in olio abbondante.

4. Scolate le foglie e appoggiatele su un piatto con abbondante carta assorbente. Salate e servite.

 DSC_6195