Tag Archives: Tutorial

Genoese Sage Focaccia! (more a tutorial than a recipe)

This focaccia alla salvia, a typical Genoese focaccia, is very aromatic, wonderful served with cheese, soups and cold cuts. To make this focaccia you follow the focaccia recipe method and then you add the fresh sage at the end. You have to chop the sage really finely, in order to blend it nicely with the dough. The focaccia dough also needs to rise for several hours, so we are going to make a starter that you can make in advance, in order to make the preparation method a little more manageable.

The longer the dough rises, the better the focaccia will become, so don’t rush it! This is why in the traditional method we repeat the leavening process a few times…However you can shorten the process by skipping the second leavening (step 3) and mixing all the flour together straight away, if you don’t have much time.

DSC_0062

I suggest you make the focaccia during the weekends (or in your spare time), as it needs to be looked after during the preparation method…It is a long process but it’s worth it!!!

Note. To make the starter there are two options: you can use normal yeast or you can use sourdough.

All you need (for the entire method).
250-300 g plain flour (depending if you use sourdough or yeast)
250 g durum wheat semolina flour
12 g yeast (or 50 g of sourdough)
a big bunch of fresh sage, very finally chopped
fine sea salt
lots of extra virgin olive oil
water
a little sugar
baking sheet
a baking tray (24 cm x 28 cm)
a bowl
cling film

Note. I am going to divide the ingredients and the preparation method into 4 main steps.

DSC_0004

HOW TO MAKE SAGE FOCACCIA.

Step 1. Make the starter

For the starter with yeast

Ingredients

100 g plain flour

12 g yeast

water

a little sugar

Method with yeast.

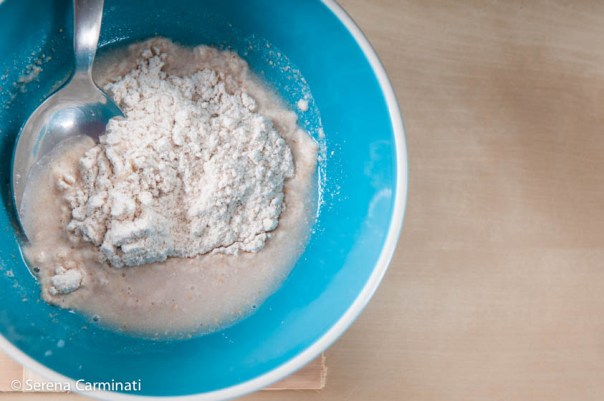
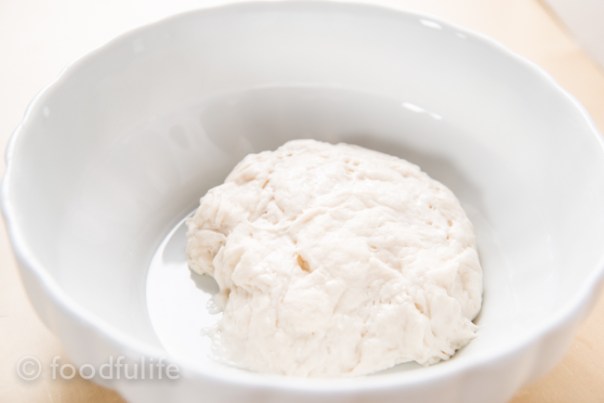
Mix the yeast with a few spoons of warm water, a little flour and a little sugar. When it forms some bubbles add the rest of the flour, more water and work it until you get a small dough (keep it quite moist). Put the dough into a small bowl, then cover it with cling film and let rise overnight at room temperature.

For the starter with sourdough (natural yeast).

Ingredients

50 g plain flour

50 g sourdough

water

a little sugar

Method with sourdough.

Mix the flour, a pinch of sugar and the sourdough with some water, until you get a soft and moist dough. Place in a small bowl, then cover it with cling film and let rise overnight.

DSC_9944

DSC_9948

Step 2. The first leavening.

Ingredients

the starter we prepared earlier (with yeast or sourdough)

100 g of plain flour

100 g of durum wheat semolina flour

water

a little sugar (to help the leavening process)

Method.

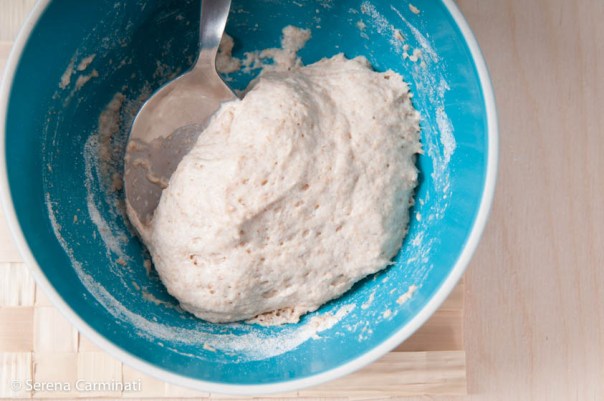
In the morning, mix the starter with 100 g of plain flour, 100 g of durum wheat semolina flour and a little sugar, then add enough water to make a soft dough. Work well, then place the dough in a bowl, cover it with a cling film and let rise until it doubles in volume.

DSC_9950

DSC_9985

Step 3. The second leavening.

Ingredients

the dough we prepared earlier

100 g plain flour

100 g durum wheat semolina four

water

a little sugar

Method.

Take the dough and add the flour with a little sugar, then mix with enough water and work well. Cover with cling film and let rise until it doubles in volume.

DSC_9991

Step 4. Adding all the ingredients and baking.

Ingredients

the dough we prepared earlier

50 g of durum wheat semolina flour

a big bunch of fresh sage, very finely chopped

fine sea salt

50 ml extra virgin olive oil (and you’ll need some more to drizzle before baking)

100 ml of water

DSC_9994

DSC_0005

Method.

1. This is the final step! Take the dough and mix it with 50 g durum wheat semolina flour, finally chopped fresh sage leaves, some fine sea salt (but we are going to add more later) and mix just enough to blend the ingredients. Add 50 ml of extra virgin olive oil, previously mixed with 100 ml of water. Mix everything (just enough, don’t overwork it or you’ll lose the leavening strength of the dough).

DSC_0009

2. Take a baking tray, line with baking paper, drizzle with olive oil and place the dough so that it covers the tray. Let rise for about an hour.

DSC_0011

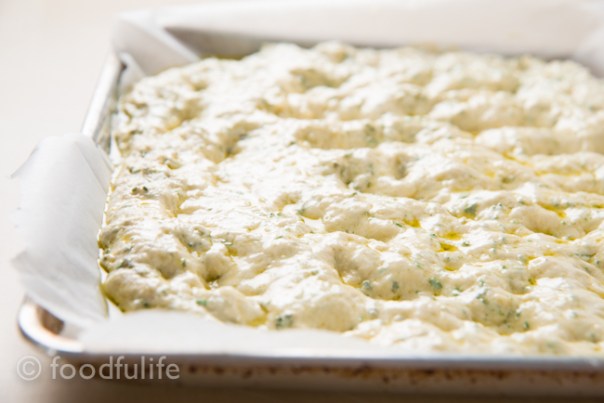
3. Once it has risen, press the dough with the tip of your fingers in order to create wells. Drizzle with more olive oil mixed with water, season with plenty of salt and bake at 200° C (392 °F) for 30-35 minutes.

DSC_0023

DSC_0030

DSC_0060

DSC_0073

Make The Best Pizza Dough ( Part 2)

I already published a basic pizza dough recipe with normal yeast a few weeks ago, this is basically the same recipe adapted for sourdough. Before getting started with the recipe, let me say a few things about sourdough.

Why sourdough?
Sourdough is a natural yeast created by fermenting flour with water. It is a long process, which is not particularly complicated, but it takes some time and care.
Basically, you create the natural yeast, then you feed it and keep it in good shape, that’s really all there is to it! In exchange, your sourdough will reward you with a lot of flavour, leavening strength and satisfaction!
Moreover, sourdough is healthier and much more digestible than commonly used yeast. Another good reason to use it is the difference in taste, as sourdough’s flavour is much more delicate and pleasant than all the other yeasts.
So, don’t give up if you haven’t tried yet, instead give it a go and you’ll see the difference, I promise you!
To get started with sourdough you can follow the step by step recipe here.

DSC_7541

Some things you have to know before you go on with the recipe:

1. The flour-sourdough ratio in recipes is usually 3 to 1 (3 parts of flour plus 1 part of sourdough). In order to prepare approximately 500 g of dough we will use 375 g of flour with 125 g of sourdough. You can use this recipe to make sourdough bread as well as pizza.

2. Semi-liquid sourdough contains a lot of water, therefore you have to add less water than in normal yeast pizza and bread recipes. My advice is to add a little bit of water gradually.

3. Sometimes it’s useful to make the dough in the evening and then keep it in the fridge with some extra water over night. The following day, take it out of the fridge two hours before you use it (knead the dough a little, then make the pizzas and let them rise for a couples of hours at room temperate). During this process the dough will rise much better and faster.

DSC_7548

Sourdough Pizza Crust.

Ingredients

For 2 large pizzas

Recipe No. 1

210 g flour 00 (or plain, unbleached all-purpuse flour)

135 g whole spelt flour

30 g durum wheat flour (semolina)

125 g sourdough (semi-liquid and made ​​with manitoba flour)

10 g salt

a pinch of barley malt (optional)

extra virgin olive oil to taste

water

Note.

If you use the sourdough starter made ​​from flour 00 (or plain, unbleached all-purpose flour) the ingredient ratio changes slightly:

Recipe No. 2

130 g flour 00 (or plain, unbleached all-purpuse flour)

135 g whole spelt flour

80 g Manitoba flour

30 g durum wheat flour (semolina)

125 g sourdough (semi-liquid and made with flour 00 of plain, unbleached all-purpuse flour)

10 g salt

a pinch of barley malt (optional)

extra virgin olive oil to taste

water

Method.

1. Sift and mix the flour on a wooden board or a large bowl (use a fine sieve). Mix the flour with the sourdough and a little bit of water. Add the salt and, if you want, you can also add 2 tablespoons of extra virgin olive oil with a pinch of malt.

DSC_7477-2

2. knead vigorously, until you get an elastic dough. Let the dough rise in a sheltered place for 3-6 hours (the rising time varies depending on different factors, the dough is ready when it has doubled in volume).

DSC_7487

DSC_7490

3. Take two large oven trays, cover them with baking paper and brush them with plenty of extra virgin olive oil. Roll out the dough with a rolling pin, make two pizza bases and then add the other ingredients (I am going to make a pizza with mozzarella cheese and crescenza, a nice sweet and creamy Italian cheese)

DSC_7509

DSC_7512

DSC_7519

4. Let the pizzas rise for about 1 hour, then bake in a preheated oven at 190° (374°F) for 20-30 minutes.

DSC_7533

DSC_7555

Impasto base per la pizza con lievito madre.

Ingredienti

2 pizze grandi

Ricetta n°1

210 g di farina 00

135 g di farina di farro integrale

30 g di semola rimacinata

125 g di lievito madre (semiliquido, a base di farina manitoba)

acqua q. b.

10 g di sale

pochissimo malto d’orzo (facoltativo)

olio extra vergine d’olio d’oliva q. b.

Nota.

Se usate il lievito madre a base di farina 00 gli ingredienti variano leggermente:

Ricetta n° 2

130 g di farina 00

135 g di farina di farro integrale

80 g di farina manitoba

125 g di lievito madre (semiliquido con base di farina 00)

30 g di semola rimacinata

10 g di sale

acqua q. b.

pochissimo malto d’orzo (facoltativo)

olio extra vergine d’olio d’oliva q. b.

Metodo.

1. Mescolate, setacciate le farine e sistematele a fontana su una spianatoia o mettetele in una ciotola grande. Unite il lievito madre alla farina con un po d’acqua. Mescolate leggermente, poi aggiungere il sale con cucchiai d’ olio extra vergine di oliva e un pizzico di malto, se desiderate aggiungerli.

2. Lavorate energicamente gli ingredienti, fino ad ottenere un impasto omogeneo ed elastico. Lasciate lievitare l’impasto in un luogo riparato per 3-6 ore (il tempo di lievitazione varia a seconda di diversi fattori, l’impasto è pronto quando sarà raddoppiato di volume).

3. Prendete due teglie grandi, ricopritele con carta da forno e spennellatele con abbondante olio extra vergine d’oliva. Stendete la pasta con un matterello e fate due basi per pizza, poi aggiungere gli altri ingredienti (in questo caso faremo una pizza bianca con crescenza e mozzarella).

4. Lasciate lievitare le pizze per circa 1 ora, poi fate cuocere a 190° C in forno preriscaldato per 20-30 minuti (dipende dallo spessore della pasta).

DSC_7558

Make the Best Pizza Dough (Part 1)

Making your own pizza dough, for the first time, is probably one of the most satisfying things you can ever experience in your kitchen. There is something magical about the whole process, from the moment you first see the dough rising, up to the moment you actually see your beautiful creation coming out of the oven. I personally enjoy everything about this process and this is why I don’t buy it anymore. Moreover, once you start experimenting with different flours and ingredients, especially if you use natural yeast (but we will see this in part 2), home-made pizza can become a truly special dish to make.

DSC_6063

 A few words on the preparation.

To prepare (approximately) 500 g of dough for pizza or bread you must use 500 g of flour, 15 g of yeast, 10 g salt and some water.

For this recipe I used different kinds of organic flour which have very different qualities from one another and help to create a certain harmony of flavours and textures. The amount of water in the dough and the leavening time may vary, depending on the ingredients used. This type of dough can be used, not only to make pizza but it’s also great to make focaccia and other breads.

Notes. You can decide to add extra virgin olive oil and barley malt (or honey) to the recipe or not, depending on your personal taste. The extra virgin olive oil gives a crunchier crust and the malt (or honey) will help the leavening process, but both these ingredients will add some extra calories to your recipe, so if you are on a diet,  don’t use them.

DSC_5964

I am giving you two options here, choose the dough with the ingredients that you prefer.

Basic pizza dough (with normal yeast)

 Ingredients 

For two large pizzas

to prepare (approximately) 500 g of bread dough or pizza base

 for a wholemeal dough 

250 g plain flour (unbleached all-purpose flour)

100 g whole spelt flour (or farro flour)

100 g Manitoba flour

50 g durum wheat semolina flour

15 g yeast

200-250 ml warm water (but add more if necessary)

10 g salt

extra virgin olive oil to taste

a big pinch of barley malt or honey (optional)

 for a plain flour dough 

If you prefer a dough made mostly with plain flour, then use:

250 g plain flour

250 g manitoba flour (or durum wheat semolina flour)

15 g yeast

200-250 ml warm water (add more if you need to)

10 g salt

extra virgin olive oil to taste

a big pinch of barley malt or honey (optional)

DSC_5972

 Method (for both doughs). 

1. Break up the yeast into small pieces and mix it with a bit ‘of warm water and a few tablespoons of flour. Create a small dough and let it double in volume.

DSC_5991

DSC_5998

DSC_6019

2. Sift the remaining flour with a fine sieve and make a well on a wooden board, then pour 200-250 ml warm water (gradually) and salt in the centre (also add 1 tablespoon of extra virgin olive oil and a pinch of malt, if you wish). Mix the ingredients.

DSC_6022

3. Add the yeast dough (from step 1) to the mixture and knead vigorously.

DSC_6027

4. Let it rise in a sheltered place until the dough has doubled volume (it might take between one or two hours).

DSC_6030

5. Take two large oven trays, cover them with baking paper and brush the paper with plenty of extra virgin olive oil. Roll out the dough with a rolling pin and then add the other ingredients (mozzarella, tomatoes, olives etc.).

DSC_6089

DSC_6090

DSC_6100

6. Let it rise again for 30 minutes, then bake in preheated oven at 190 ° C (374° F) for 20-30 minutes.

DSC_6134-2

This pizza is called “Marinara” and is made with anchovies, tomatoes and crushed garlic. A very cheap and simple dish, but full of flavour!

DSC_6170

See also Make the best pizza dough part 2 (with sourdough)

Impasto per la pizza (con lievito di birra).

Per preparare 500 g di pasta per la pizza o da pane generalmente si utilizzano 500 g di farina, 15 g di lievito di birra, 10 g di sale e acqua.

In questo caso utilizzerò farine biologiche di vario tipo, che presentano qualità molto diverse tra loro e che aiutano a creare una certa armonia di fragranza e croccantezza. La quantità d’ acqua necessaria da utilizzare potrebbe variare leggermente, a seconda delle farine e degli altri ingredienti utilizzati, così come il tempo di lievitazione. Questo tipo di impasto può esse utilizzato anche per preparare focacce e pane.

Nota. Ho aggiunto l’ olio extravergine d’oliva e il malto d’orzo nella lista degli ingredienti, perché servono a creare una crosta più croccante e a far lievitare meglio l’impasto (nel caso del malto).

Vi darò due ricette, così potete scegliere l’impasto con gli ingredienti che preferite.

Impasto base per la pizza (con lievito di birra)

Ingredienti 

Per due pizze grandi

per preparare 500 g di pasta da pane o per pizza

Impasto con farina integrale

250 g farina 00

100 g farina di farro integrale

100 g Manitoba

50 g semola di grano duro rimacinata

15 g di lievito di birra

200-250 ml di acqua tiepida

10 g di sale

olio extra vergine d’oliva q. b.

una punta di cucchiaio di malto d’orzo (facoltativo)

Impasto con farina 00

Se preferite un’impasto semplice con farina bianca allora utilizzate i seguenti ingredienti:

250 g di farina 00

250 g di farina Manitoba

15 g di lievito di birra

200-250 ml di acqua tiepida

10 g di sale

olio extra vergine d’oliva q. b.

una punta di cucchiaio di malto d’orzo (facoltativo)

 Metodo (per entrambi gli impasti). 

1. Spezzate il lievito in piccoli pezzi e mischiatelo con un po’ d’ acqua tiepida e qualche cucchiaio di farina, fino a creare un panetto. Lasciate raddoppiare il panetto di volume.

2. Setacciate il resto della farina e disponetela a fontana su una spianatoia con 200-250 ml d’ acqua tiepida e il sale (aggiungete anche l’olio e il malto, se volgete utilizzarli). Mescolate leggermente.

3. Aggiungete il panetto di lievito e impastate tutto energicamente.

4. Lasciate lievitare in un luogo riparato, finché il volume dell’impasto sarà raddoppiato (una o due ore).

5. Utilizzate due teglie grandi, ricopritele con della carta da forno e spennellate con abbondante olio extra vergine d’oliva. Stendete l’impasto con un matterello, aggiungete gli   altri ingredienti (mozzarella, pomodori, origano ecc.) e infornate a forno preriscaldato a 190° C per 20-30 minuti.

Fresh Egg Pasta with Flour 00 (Step by Step)

This week we are going to prepare plain fresh egg pasta, using flour 00. This pasta can be used as a base for making a variety dishes, prepared with all sorts of creative stuffings and sauces, but we will see this in the next posts.

I generally tend to use more complex and heavier types of flour, because they are tastier and rich in nutrients. In some recipes , however, it’s better to use a finer and more delicate flour, in order to avoid covering the flavour of the other ingredients. For this recipe the Italian flour 00 is perfect for making pasta, because it is finer than normal flour, however, if you can’t find it use plain flour.

DSC_5166

tips.

1. The ingredients listed are for 400 g of (uncooked) pasta, but if you need a different quantity, just bear in mind that for every 100g of flour you have to add an egg. For example, if you need 200 g of pasta just halve the ingredients (and use 2 small eggs).

2 . It is important to sift the flour before using it to avoid lumps or impurities (I don’t usually say this but you should always do it).

3. Here I am using a rolling pin, but if you are planning to make large quantities of fresh pasta I strongly advise you to get a pasta machine, to make things easier.

DSC_5342-4

Fresh Egg Pasta (with flour 00)

 Ingredients

for 400 g (14 oz) of pasta (approximately)

300 g (10.5 oz)  flour 00 (or plain flour)

3 eggs

salt to taste

 Tools

a clean kitchen cloth

an airtight container

a long rolling pin

a wooden board (with a rough surface) or a table

 Method

1. Sift the flour with a sieve, add some salt, make a well and crack three eggs in the centre. With a fork, beat the eggs lightly, in order to mix the whites with the yolks. Still using a fork, combine the flour with the eggs starting from the outer edge, then continue mixing the ingredients with your fingers and begin to knead.

DSC_5018

DSC_5022

DSC_5024

DSC_5029

2. Knead until you get a smooth dough, then wrap in a clean cloth and place in an airtight container (or use cling film). Let stand for about an hour at room temperature (if you don’t have much time, 30 minutes is fine).

DSC_5037

DSC_5045

DSC_5047

3. After an hour (or 30 minutes), take the dough and divide it into 3-4 pieces. Dust the working surface with some flour and, using a rolling pin, roll a very thin sheet of pasta. Repeat this process with the other pieces and cut the sheets as required by the recipe you are going to prepare.

DSC_5128

DSC_5140

DSC_5163

Notes.

You can make lasagne, ravioli, cannelloni and many varieties of pasta from these sheets. We will see how in the next few weeks. See also the post on spelt (farro) pasta for more ideas.

Pasta fresca all’uovo.

Ingredienti

per circa 400g di pasta

300g di farina 00

3 uova

sale q.b.

 Utensili

uno panno pulito

un contenitore a chiusura ermetica

un matterello lungo

una spianatoia di legno (con superficie ruvida)

 Preparazione.

1. Setacciate la farina con un colino grande (oppure un setaccio) e disponetela a fontana con tre uova al centro. Con una forchetta sbattete leggermente le uova, in modo da mischiare il bianco al tuorlo. Sempre con una forchetta, unite la farina all’uovo partendo del bordo esterno, poi proseguite con le dita e incominciate ad impastare.

2. Lavorate bene l’impasto, poi avvolgetelo in un panno pulito e mettetelo in un contenitore con chiusura ermetica (potete anche utilizzare la pellicola). Lasciate riposare un’ oretta (oppure 30 minuti, se non avete molto tempo).

3. Prendete l’impasto, dividetelo in 3-4 pezzi e incominciate a stendere la pasta (infarinando bene le superfici), fino ad ottenere una sfoglia molto sottile. Ripetete l’operazione con gli altri pezzi e tagliate la pasta come richiede la ricetta che state preparando.

Make the Best Home-made Yogurt!

DSC_0946

Home-made yogurt is cheap, healthy and delicious! There are several ways to make yogurt at home, today I am going to show you the easiest method, using a yogurt maker, some milk and live culture yogurt bacteria.

First, there are a few things that you have to keep in mind when choosing the ingredients…

DSC_4196-2

You’ll need :

1. One litre (33.8 fl oz, 1.75 pt uk ) of good quality milk, possibly organic, to avoid that the antibiotics contained in the milk might compromise the development of the good bacteria in the process. Unless you are on a low-fat diet, choose full-fat milk to make a creamier and smoother yogurt.

2. A live culture yogurt or a yogurt culture packet (here I am going to use a yogurt culture packet).

3. Sterilised glass jars. You can sterilise the jars by putting them (of course, without the lids) in a pre-heated oven at 100° C (212 F°) for about 8-10 minutes. Let cool before using.

DSC_4267

Home-made yogurt (basic recipe)

Ingredients

1 litre (33.8 fl oz, 1.75 pt uk ) of good quality milk

1 live culture yogurt (1 cup) or a yogurt culture packet

Tools

a food thermometer

a yogurt maker (possibly with glass jars)

a stainer, or a cheese cloth

a spoon

a pan

a cup, or a small bowl to strain the yogurt

a measuring cup

DSC_4205-4

The Method.

1. Pasteurise your milk. Heat the milk up to 85°C (185°F ), checking the temperature using a food thermometer (avoid boiling the milk, this way you can preserve the nutrients contained in it). This process will take a few minutes.

Variation. If you prefer thick yogurt, you have to boil the milk for at least 5-10 minutes and then remove the skin on the surface.

DSC_4236

DSC_4246

2. Let the milk cool (you have to use the milk at room temperature to make the yogurt).

DSC_4256

3. Add the healthy bacteria. You can use a live culture yogurt (unflavoured, unsweetened and to be added at room temperature) or you can buy a yogurt culture packet. If you use a yogurt culture packet, you have to mix the culture with 2 tablespoons of milk first.

DSC_4276

4. Mix the live culture with 1 litre of milk (or less, if you have boiled the milk to make thick yogurt). Mix everything well.

DSC_4299

5. Set the timer (or an alarm) and keep the mixture at 38-40 °C (100-104°F) for 8-12 h. Use a yogurt maker, in this way your temperature will be constant at all times.

DSC_4313

DSC_4318

6. Strain your yogurt (this is optional). If you desire a thicker yogurt, you can strain the liquid using a cheese cloth (or a tea towel or a strainer). This process might take from a few up to several hours, depending on the device you use and on the thickness of the yogurt you wish to achieve. Leave the yogurt in the fridge while you do this.

DSC_3857

 Notes.

1. Store your yogurt in sterilised jars. Seal the jars with a lid and keep them in the fridge for 5-7 days (your yogurt might last even longer, if properly stored). You can freeze it and it will last up to a month.

2. If you are going to use your home-made yogurt as a starter to make a new batch, you have to do this within 5 days from the day you’ve made it, to make sure that the bacteria is fully active.

Comparing yogurts.

DSC_4331

In the picture above the yogurt was made without boiling the milk.

DSC_4214-2

In this picture the yogurt was made boiling the milk during the process.

I hope this post was helpful. Please let me know if you having troubles with the process.

Thank you!

Come fare lo yogurt in casa. 

Lo yogurt fatto in casa è economico, sano e delizioso! Ci sono diversi modi per fare lo yogurt, oggi vi mostrerò il metodo più semplice utilizzando la yogurtiera, del latte bio e dei fermenti lattici.

Prima di tutto, ci sono alcuni accorgimenti da seguire quando scegliete gli ingredienti…

Per avere un ottimo yogurt fatto in casa è necessario: 

1. Acquistare latte di buona qualità (possibilmente biologico), per evitare che gli antibiotici contenuti in esso possano compromettere lo sviluppo dei batteri buoni durante il processo. A meno che non stiate seguendo una dieta povera di grassi, è consigliabile scegliere del latte intero di buona qualità per ottenere yogurt denso e cremoso.

2. Utilizzare uno yogurt con i fermenti lattici vivi, oppure acquistare un pacchetto di fermenti lattici liofilizzati, che potete trovare in farmacia (in questa dimostrazione utilizzerò i fermenti in pacchetto).

3. Sterilizzare i vasetti di vetro. Se volete uno yogurt perfettamente conservato è necessario sterilizzare i contenitori che si utilizzeranno per conservare il prodotto. È possibile farlo mettendo i vasetti (senza il coperchio) in forno preriscaldato a 100 ° C per circa 8-10 minuti, oppure si possono far bollire (eseguite questo passaggio solo se utilizzate dei contenitori di vetro, non fatelo con la plastica!). Lasciate raffreddare prima dell’uso.

Ingredienti

1 litro di latte di buona qualità

1 yogurt con fermenti lattici vivi o un pacchetto di fermenti liofilizzati per fare lo yogurt

Utensili

un termometro per alimenti

una yogurtiera (possibilmente con vasetti di vetro)

un colino molto fitto, o un panno e un colino normale

un cucchiaio

una pentola

una tazza, o una piccola ciotola per scolare lo yogurt

una caraffa graduata per misurare i liquidi

Il Metodo. 

1. Pastorizzate il latte. Scaldare il latte fino a 85 ° C (185 ° F), controllando la temperatura con un termometro per alimenti. E’ bene non portare a bollore il latte per conservarne al meglio le sostanze nutritive. Questo processo richiederà alcuni minuti. Per ottenere invece uno yogurt più denso, fate bollire il latte per 5-10 minuti, poi rimuovete la pellicola che si forma in superficie e proseguite con il procedimento.

2. Lasciate raffreddare il latte. Utilizzare il latte a temperatura ambiente per fare lo yogurt.

3. Aggiungete i fermenti lattici. È possibile utilizzare uno yogurt con i fermenti lattici vivi come base per farne altro, oppure si può acquistare un pacchetto di fermenti lattici liofilizzati. Nel secondo caso, è necessario miscelare i fermenti con 2 cucchiai di latte prima di procedere.

4. Mescolate il latte con i fermenti. Utilizzate 1 litro di latte, o quello che rimane se ne avete già mischiata una parte o avete fatto bollire il latte. Mescolare bene tutto.

5. Impostate il timer (o un allarme) e mantenete la miscela a 38-40 ° C (100-108 ° F) per 8-12 h. Vi consiglio di utilizzare una yogurtiera, in questo modo la temperatura sarà mantenuta costante in ogni momento ed eviterete sorprese.

6. Filtrate il vostro yogurt. Se volete lo yogurt più denso, potete filtrarlo per eliminare il siero con un panno, un canovaccio oppure un colino molto fitto. Lasciate lo yogurt in frigo durante questa operazione. Questo passaggio può richiedere da poche a svariate ore, dipende da ciò che utilizzate e dal risultato che volete ottenere (il filtraggio è facoltativo).

Note. 

Conservate lo yogurt in vasetti sterilizzati. Sigillate i vasetti con un coperchio e riponeteli in frigo per 5-7 giorni (ma il vostro yogurt potrebbe durare anche più a lungo, se correttamente conservato). Potete anche congelarlo e durerà fino a un mese. Se avete intenzione di utilizzare lo yogurt fatto in casa come base per farne di nuovo, dovete farlo entro 5 giorni dalla produzione, per essere sicuri che i batteri siano pienamente attivi.

Nelle ultime due immagini del post, potete vedere chiaramente la differente consistenza di uno yogurt fatto con il latte pastorizzato (non bollito o scaldato) e uno yogurt fatto facendo bollire il latte durante il procedimento (ultima immagine).

Cake Design Tutorial: Silk Clutch Bag (advanced).

Some time ago I helped a friend make a cake design tutorial. Although it’s definitely not a simple one, actually quite complicated, we decided to put it online anyway. Laura made a very sleek silk clutch bag cake design and it took several pictures and steps to be able to partially explain the process. We did our best, we hope you enjoy it. Feel free to comment on this post.

If you wish to see more of Laura Barcellonio’s cake design visit her facebook page : https://www.facebook.com/pages/Cake-Deluxe/265825503502411?fref=ts

Follow us on facebook : https://www.facebook.com/Foodfulife

Silk Clutch Bag Cake

Designed by Laura Barcellonio

dsc_5137

The material used:
A chopping board and a wide, pointed knife (small size)
A pizza or pastry cutting wheel (with a straight blade)
A metal working board to use as a cut mat and a cutting knife (a scalpel)
paper, pencil and scissors
Basic kitchen tools, a silicone spatula and a food brush
Few toothpick and straws
A base for cakes (a thick cardboard coated ) and a white ribbon

For the cake:

1 kg white sugar paste for the cake, plus 500 g for the base

ivory and black food colouring, (and edible pearl food dust optional)

vanilla buttercream

A sponge or a madeira cake ( quite thick)

A few raw pieces of spaghetti

Coloring the sugar paste:

Take 1 kg of white sugar paste. Using a toothpick, start mixing some ivory food colouring with a small amount of white sugar paste. Increase the amount of white sugar paste until you get the desired colour. Take a small piece of ivory paste and add the black color (just a little) , to create a uniform grey paste.

DSC_5145

Preparation of the pieces to dry:

With the ivory paste shape and cut the handle of the bag. Make 6 grey pearls (1 cm in diameter each) and insert them, three at a time, into two small pieces of spaghetti.

 Untitled-2.4

Then shape two grey drops, just a little bit bigger than the pearls. Let all the pieces dry for about an hour.

 DSC_5172

Cake shaping technique.

Using tracing paper, draw and cut the outlines of your clutch bag. Draw the base of the bag (22 x 12 cm, considering the widest points) , and the side ( 22 x 18 cm, considering the maximum width and height),then cut out your sketches. Take the sponge cake, mark the base and cut out two equal pieces in order to overlap them.

Untitled 1

You can use part of the buttercream to make the filling. Following the outline of your drawings, cut the cake until you obtain the desired shape.

Coat crumb with plenty of butter cream and put the cake to cool in the refrigerator for 15 minutes.

Roll out some ivory paste with a rolling pin, until you have a thin sheet, then cut out a rectangular shape and place it gently over the cake.

Untitled 2.1

Cut a trapeze out of the sugar paste sheet and use the straws to calculate 9 folds. Now shape the folds with your fingers and cut out any excess paste. Brush one side of the cake with water and cover it with the sugar paste layer. Repeat this procedure to cover both sides.

Untitled-2.2

DSC_5251

Cut another two smaller trapezoids and calculate 6 folds for each piece. Shape the folds, brush the surface, and apply the trapezoids to the small sides.

Untitled-3

For the handle:

Roll out the grey sugar paste, shape a small thick sheet and cut out two narrow strips, equal in size. Moisten the part on top of the cake with water, then place and mould the strips.

Take the two pieces of spaghetti with the pearls, pierce the grey stripes and place the handle on top of the cake. Using two pieces of spaghetti place the two drops in the center (see the final picture).

Untitled-4

For roses:

Roll out a thin sheet of ivory sugar paste ( 25 cm x 10 cm). Fold the sheet in half and roll it up to shape a rose. Remove any excess paste. Pierce the back of the rose with a small piece of spaghetti and place the rose on the cake.

Untitled-5

For the base:

Roll out a large chunk of ivory paste and cover the entire base of the cake. Roll out some thin stripes of white sugar paste, then fold them to create a fabric-like effect on the base of the cake.

Use a white ribbon to cover the edges. Place the cake on top of the base and brush the surface of the clutch bag with a pearl food colour powder,  diluted in a little bit of alcohol (this step is optional).

Untitled-2.3

Cake Design Tutorial: Pochette di seta

Qualche tempo fa ho aiutato un’ amica a fare un tutorial di cake design. Laura ha fatto una meravigliosa torta a forma di una pochette di seta, un elegantissimo esempio di cake design che richiede un po’ di impegno nella preparazione. Speriamo che vi piaccia.

Se volete vedere di più di cake design di Laura Barcellonio visitare la sua pagina facebook: https://www.facebook.com/pages/Cake-Deluxe/265825503502411?fref=ts

Seguiteci su Facebook:https://www.facebook.com/Foodfulife

Designed by Laura Barcellonio

dsc_5137

Il materiale:
Un tagliere grande e un piccolo coltello largo e stretto
Una rotella taglia pasta
Un piano di lavoro su cui tagliare e un cutter
delle cannucce e qualche stecchino
carta, matita e forbici
Attrezzi base da cucina, una spatola in silicone e un pennello per alimenti
una base per torte spessa di cartone rivestito e un nastro bianco
Per la torta:
1 kg di pasta di zucchero bianca per la torta, più altri 500 g per la base
2 coloranti alimentari concentrati tinta avorio e nero  (il perlato in polvere é facoltativo)
Crema al burro 
Torta di pan di spagna o plumcake allo yogurt
Zucchero a velo q b
alcuni spaghetti (pasta) per le applicazioni


Preparazione della pasta di zucchero:

Prendete 1 kg di pasta di zucchero bianca. Infilate la punta di uno stuzzicadenti nel colore alimentare avorio (ivory) e colorate una piccola quantità di pasta di zucchero. Aggiungete della pasta di zucchero bianca fino ad ottenere il colore desiderato. Fate lo stesso procedimento usando la pasta avorio e pochissimo colorante alimentare nero per creare una pasta grigia.

DSC_5145

Preparazione dei pezzi da far asciugare:

Con la pasta avorio modellate il manico (1 cm di diametro) e tagliate le estremità. Preparate 6 palline grigie uguali (1 cm circa di diametro) e infilzatele, tre a tre, con due pezzi di spaghetti.

Untitled-2.4

Preparate anche due gocce poco più grosse delle palline.

 DSC_5172

Fate asciugare per un’oretta.

Tagliamo la torta.

Disegnate e tagliate le sagome della pochette. La sagoma dell’ellisse della base ha come massime dimensioni 22 x 12 cm, mentre quella della proiezione del lato misura 22 x 18 cm. Segnate la base della torta con la sagoma di carta e tagliate con il coltello due pezzi uguali da sovrapporre.

Untitled 1

Tagliate e farcite la torta a piacere (con una crema bianca o crema al burro) .  Scolpite la torta seguendo la forma delle sagome. 

Procedete ricoprendo abbondantemente la superficie con crema al burro (crumb coating). Mettete la torta a raffreddare in frigorifero per 15 minuti. 

Stendete con il matterello un pezzo di pasta di zucchero (avorio) , tagliate un rettangolo sottile e stendetelo delicatamente sopra la torta.

Untitled 2.1

Tagliate un rettangolo di sfoglia e calcolate 9 pieghe usando le cannucce. Tagliate e modellate la pasta con le dita. Inumidite la parte su cui applicherete la sfoglia usando un pennello per alimenti. Stendete la pasta delicatamente sulla torta, infilando il materiale in eccesso sotto la base. Ripetete l’operazione fino a coprire entrambi i lati. 

Untitled-2.2

DSC_5251

Tagliate altri due trapezi piccoli dalla sfoglia e procedete misurando 6 pieghe a trapezio con le cannucce. Modellate, tagliate la pasta e infine applicate ai due lati scoperti della torta.

Untitled-3

Per il manico:

Stendete la pasta grigia fino ad ottenere una sfoglia spessa e tagliate due strisce strette, di uguali dimensioni. Inumidite la parte in cima alla torta e appoggiate le strisce sopra la parte inumidita, modellandole con le mani. 

Prendete le palline, infilzate le strisce grigie con gli spaghetti e posizionatevi sopra il manico. Aggiungete le due gocce nel centro usando due pezzi di spaghetti (vedi foto finale).

Untitled-4

Per le rose:

Stendete con il matterello una sfoglia di pasta di zucchero molto sottile. Formate una striscia (25 cm x 10 cm circa), piegatela in due e arrotolatela delicatamente, per formare una rosa.  Strozzate alla base il fiore con le dita e togliete la pasta in eccesso. Infilzate la rosa con uno spaghetto e applicate il fiore sulla torta.

Untitled-5

Per la base:

Stendete una grossa quantità di pasta di zucchero (color avorio), e usatela per coprire interamente la base di cartone della torta. Stendete qualche piccolo rettangolo di pasta di zucchero bianca e riponete le sfoglie sulla base, arricciandole per creare l’effetto della stoffa.

Applicate un nastrino intorno alla base e appoggiate la torta al centro della composizione. Per finire, spennellate la vostra pochette con un colorante alimentare perlato in polvere diluito in alcool (passaggio facoltativo).

Untitled-2.3