Category Archives: Desserts

Almond And Raisin Genoese Pandolce (Sweet Bread)

Each Christmas, as you probably know by now,  I make my own Pandolce recipe using different ingredients, depending on the flavour and texture I wish to achieve. This year, however, I’ve decided to stick to a more traditional version of this wonderful cake.

Preparation time: 15 minutes + the resting time (15 minutes)

Cooking time: 50 minutes

Ingredients

For 8-10 servings

220 g Manitoba flour (or spelt flour)

100 g unbleached all purpose flour (or Italian flour 00 )

100 g softened butter

1 egg

1 and a half tablespoons of honey

90 g sugar

1 teaspoon baking powder

1 teaspoon baking soda

a few drops of vanilla essence

150 g shelled almonds (you could replace some almond with pine nuts, to make it even more traditional)

200 g of raisin

80 g of candied fruit cut into small pieces

milk to taste (a few tablespoons, just enough to make a soft dough)

Method.

1. Mix the butter with the sugar and the egg, then add the honey. Add two drops of vanilla essence, then stir until the mixture is soft and creamy.

2. Separately, mix the two flours with the baking soda and the baking powder; then add the almonds, the raisins and the candied fruit. Combine the ingredients with the creamy mixture, add a few tablespoons of milk and work the dough for a few minutes. If the dough is too sticky add some flour. Then place in the refrigerator for 15 minutes.

3. Remove the dough from the refrigerator and bake at 170 ºC /388º ,with the fan of the oven running, for 40-50 minutes. Keep the door open with a metal object until the cake is cooked, in order to let the steam out (I use a small padlock).

I Wish You A Merry Christmas!!! <3<3<3

Pandolce con uvetta e mandorle.

Tempo di preparazione: 15 minuti + tempo di riposo (15 minuti)

Tempo di cottura: 50 minuti

Ingredienti

Per 8-10 porzioni

220 g di farina di manitoba (o farina di farro)

100 g di farina 00

100 g di burro ammorbidito

1 uovo

1 cucchiaio e mezzo di miele

90 g di zucchero

1 cucchiaino di lievito per dolci

1 cucchiaino di bicarbonato di sodio

alcune gocce di essenza di vaniglia

150 g di mandorle sgusciate (potete sostituire un po’ di mandorle con i pinoli, per renderlo ancora più tradizionale)

200 g di uva passa

80 g di frutta candita tagliata a pezzettini

latte q. b.  (pochi cucchiai, quel tanto che basta per fare un impasto morbido)

Metodo.

1. Mescolate il burro con lo zucchero e l’uovo, quindi aggiungete il miele. Aggiungete due gocce di essenza di vaniglia, poi mescolate fino ad ottenere un composto morbido e cremoso.

2. Separatamente, unite le due farine con il bicarbonato e il lievito; quindi aggiungete le mandorle, l’uvetta e i canditi. Unite gli ingredienti al composto cremoso, aggiungete qualche cucchiaio di latte e lavorate l’impasto per alcuni minuti. Se l’impasto risultasse troppo appiccicoso potete aggiungere un po’ di farina. Mettete l’impasto in frigorifero a riposare per 15 minuti.

3. Togliete l’impasto dal frigorifero e infornate a 170 ºC per 40-50 minuti, con la ventola in funzione. Tenete la porta aperta con un oggetto metallico (uso un lucchetto di un paio di centimetri di spessore) per tutta la durata della cottura, in modo da far uscire il vapore.

Pandoro Recipe With Sourdough (Il Pandoro A Lievitazione Naturale)

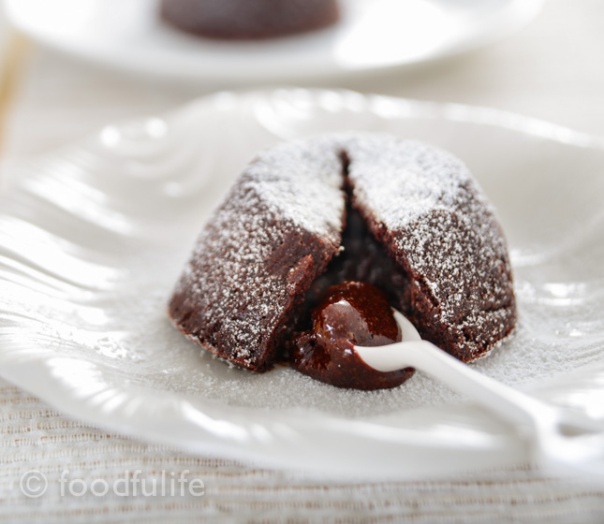
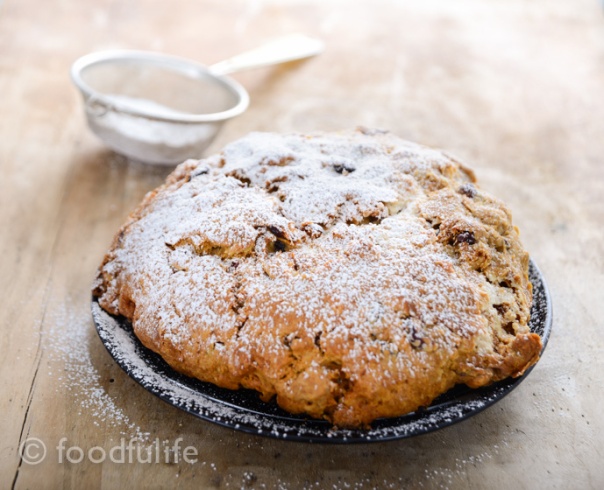
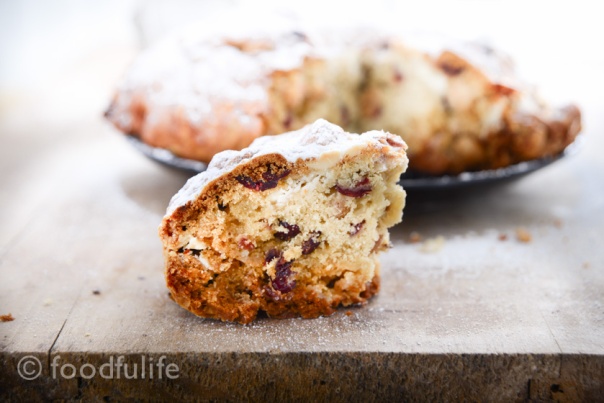
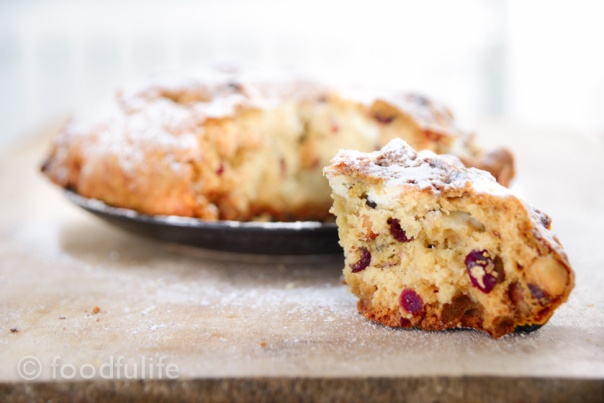
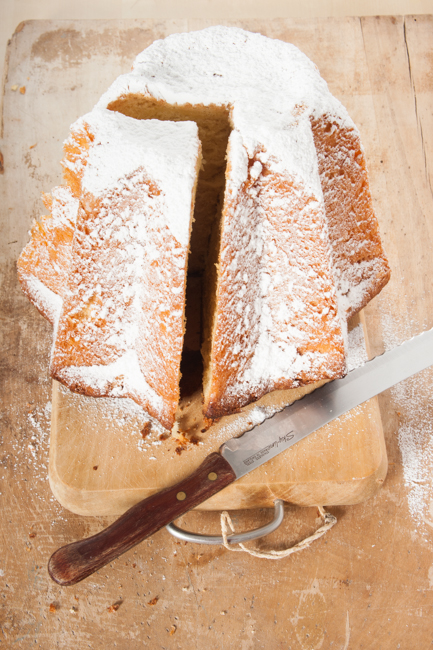
Pandoro is a wonderful Christmas cake from Verona. The recipe I am publishing today is very similar to the traditional recipe, however I made some variations in order to use sourdough. In this recipe there is a very long preparation method with several leavening phases, but the most difficult part is when you have to combine the butter with the dough (see step 5). Having said that, it is one of the best plain cakes that I have ever eaten! A quiet day, during the holiday is probably the best time to prepare this cake.

I wish you all a wonderful Christmas and an amazing New Year ❤

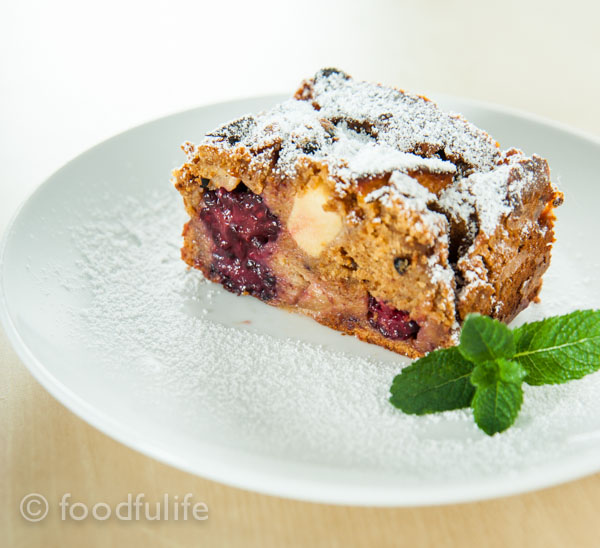
Pandoro with sourdough (Italian Traditional Christmas cake)

For 10 servings

Ingredients

440 g sifted manitoba flour (add more if needed), or a strong, highly-refined white bread flour

50 g sourdough

250 g soft butter (keep the butter at room temperature)

a little vanilla extract

2 eggs

4 egg yolks

140 g sugar (+ icing sugar )

water

Notes. You need a large Pandoro mould ( 1 kg capacity), but you can find it easily on Amazon. Use a good dough mixer if you have one, it will make your life a lot easier!

Method.

Day 1.

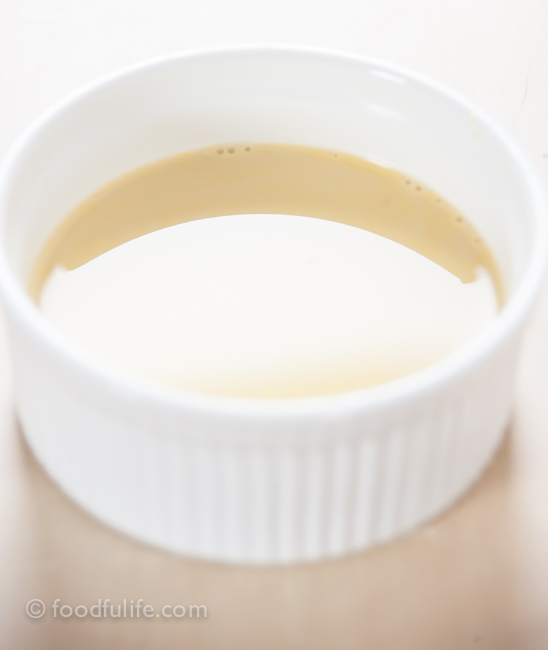
1. Making the starter. In the evening, prepare the starter with 50 g of yeast with 50 g of flour with a tablespoon of sugar and enough water to make a soft dough. Cover with some cling film and let rise overnight.

SER_2416

Day 2.

1. First leavening. First thing in the morning, mix the starter with 80 g of flour, a tablespoon of sugar and enough water to make a soft dough. Let rise until the dough has doubled in volume.

SER_2420

2. Second leavening. Mix the dough with 80 g of flour, a tablespoon of sugar and a little water. Make a soft dough and let rise until it doubles in volume.

SER_2432

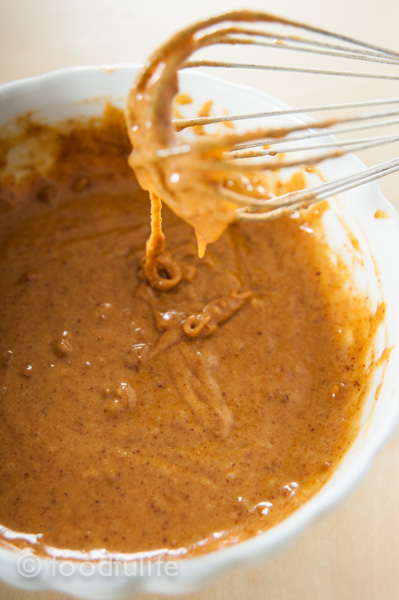
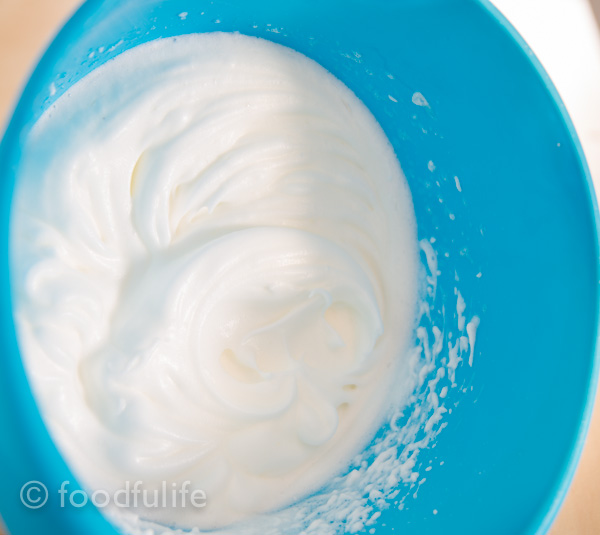
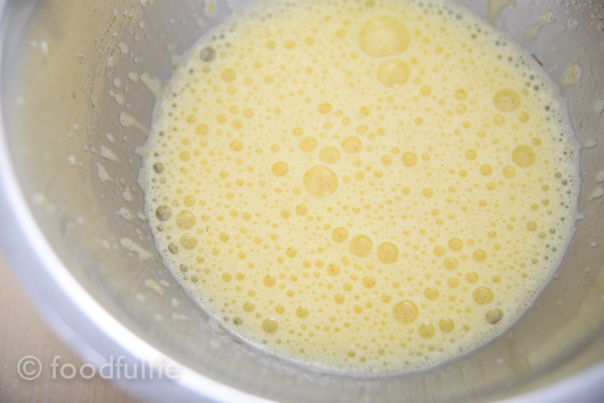
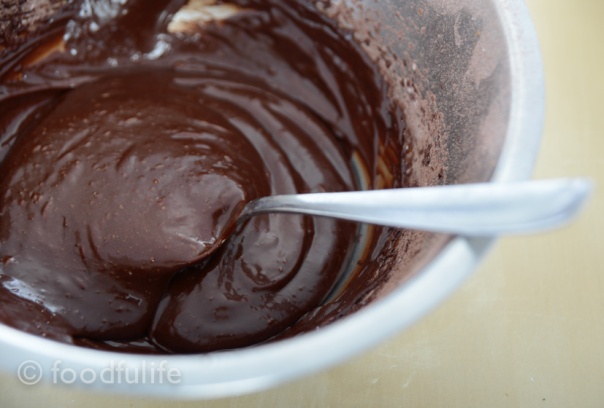
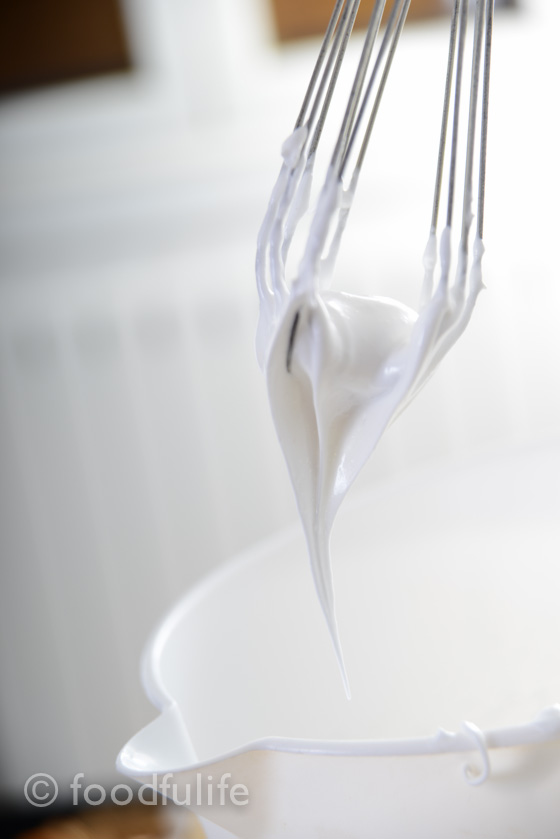
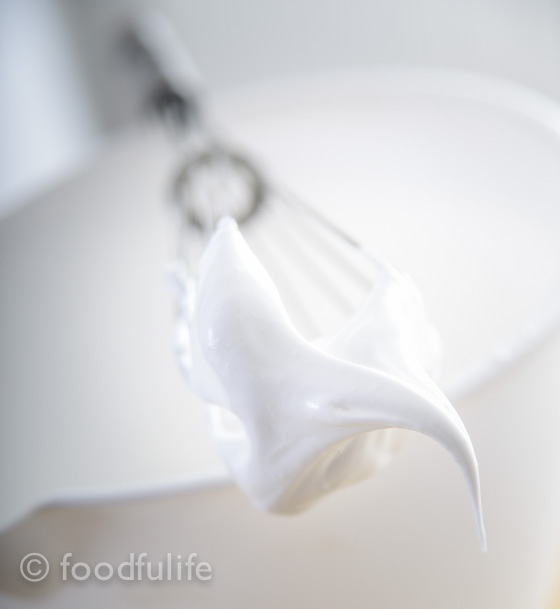
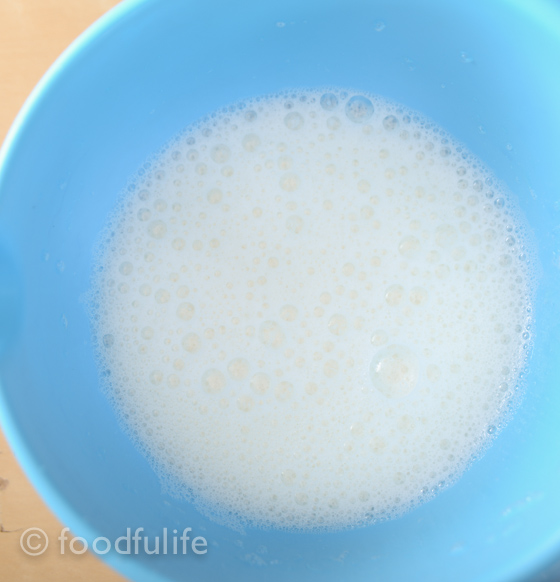
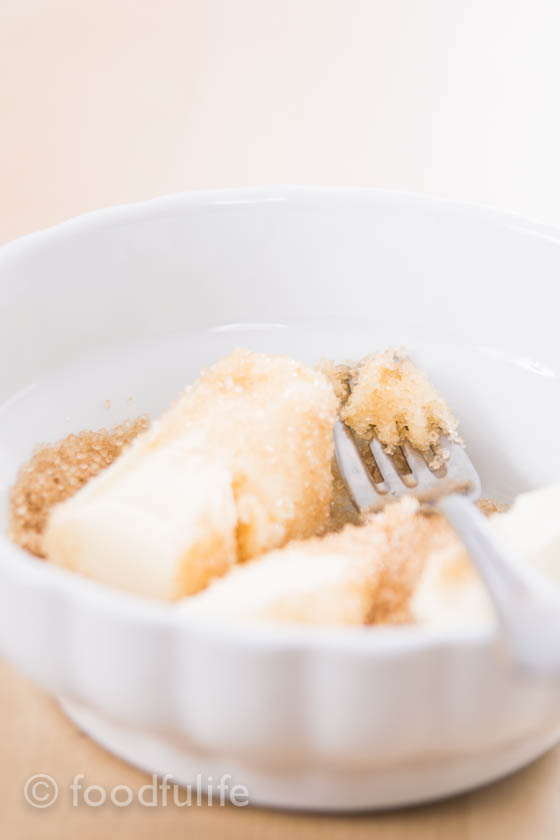
3. Third leavening. In a large bowl whisk the remaining sugar with a little vanilla extract, 2 whole eggs and 4 egg yolks. Then add 30 g of soft butter and 230 g sifted flour (add the flour gradually). Mix well. Now combine the mixture with the dough and knead very well. Add a little bit of flour if needed and let rise until the dough has doubled in volume.

SER_2513

SER_2519

4. Working the dough (during this operation dust with plenty of flour the rolling pin and the working surface). Take the dough and roll it out with a rolling pin to make a thick rectangular sheet (without pressing too much). Cut the remaining butter into small pieces and place it in the centre of the dough, then fold the sheet of dough to cover the butter. Roll the dough using a rolling pin and fold it again. Roll once more and place the dough in the refrigerator for 15-20 minutes.
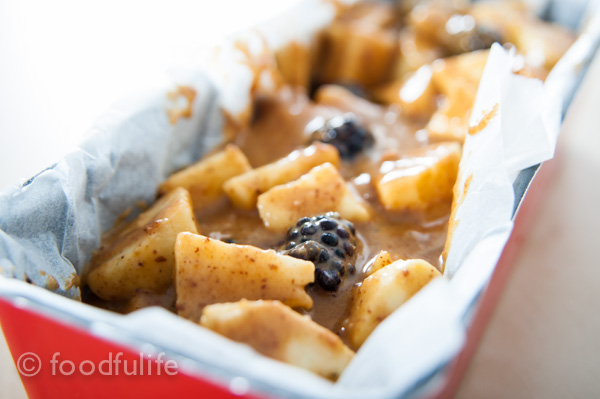
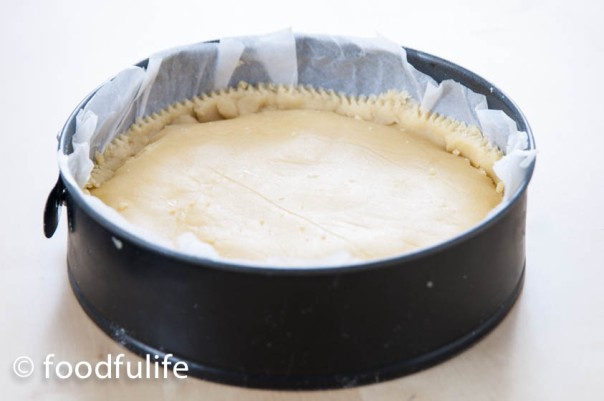
Take the dough, roll it out and fold it three times, then roll it again and place it in the fridge for another 15-20 minutes. Now knead the dough for a few minutes and place it in the Pandoro mould (previously buttered).

SER_2526

SER_2535

SER_2533

SER_2534

5. Fourth leavening. Let rise until the dough reaches the edge of the mould (this will take from 5-6 hours).

SER_2546

SER_2550

SER_2552

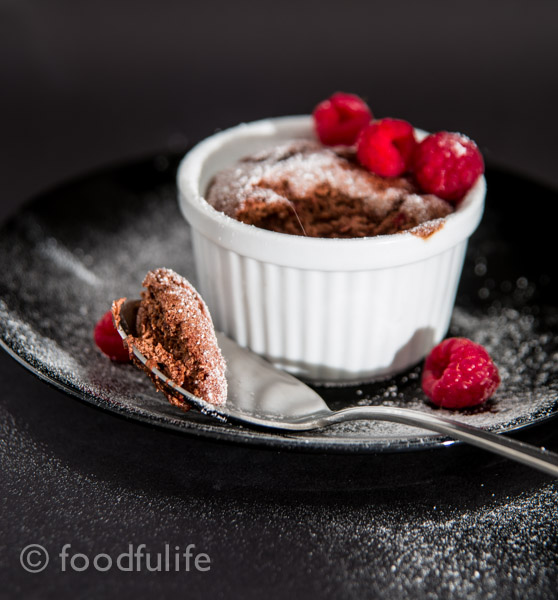
6. Baking. Bake the Pandoro at 180 ° C (356° F) for fifteen minutes, then change the temperature to 160 ° C (320°F) and bake for another 30 minutes. When the Pandoro is ready place it on a rack to cool. Dust with plenty of icing sugar before serving.

SER_2558

SER_2567

SER_2572

SER_2578

SER_2470

SER_2468

Pandoro (con lievito madre)

Per 10 persone (con stampo da 1 kg) 

Ingredienti

440 g di farina manitoba setacciata (e un po’ di più da aggiungere nelle ultime fasi della ricetta)

50 g di lievito madre

250 g di burro morbido (a temperatura ambiente)

qualche goccia di estratto di vaniglia (o una busta di vanillina)

2 uova

4 tuorli d’uovo

140 g di zucchero (+ lo zucchero a velo)

acqua q. b.

Nota. E’ meglio utilizzare una planetaria per facilitare la lavorazione dell’impasto.

Preparazione.

Il primo giorno.

1. Il lievitino. La sera prima preparate il lievitino unendo 50 g di lievito madre con 50 g di farina, un cucchiaio di zucchero e acqua sufficiente per ottenere un impasto morbido. Coprite con un po’ di pellicola trasparente e lasciate lievitare per tutta la notte.

il secondo giorno.

1. Prima lievitazione. Al mattino, mescolate la pasta lievitata con 80 g di farina, un cucchiaio di zucchero e abbastanza acqua per ottenere un impasto morbido. Poi lasciare lievitare fino a quando la pasta sarà raddoppiata di volume.

2. Seconda lievitazione. Prendete la pasta lievitata e aggiungete 80 g di farina, un cucchiaio di zucchero e un po’ d’acqua. Lavorate gli ingredienti fino ad ottenere un impasto liscio e morbido. Fate lievitare fin quando l’impasto sarà raddoppiato di volume.

3. Terza lievitazione. In una terrina, amalgamate lo zucchero rimasto, con 2 uova intere, 4 tuorli d’uovo e qualche goccia di estratto di vaniglia (o una busta di vanillina). Quindi aggiungete 30 g di burro morbido e 230 g di farina setacciata (da aggiungere gradualmente). Mescolate bene, poi unite la pasta lievitata al composto. Impastate bene, aggiungendo un po’ di farina (se necessario) e poi lasciate lievitare.

4. Lavorazione impasto sfogliato (durante questa operazione infarinate bene il matterello e il piano di lavoro). Prendete la pasta lievitata e stendetela con il matterello per ottenere una sfoglia rettangolare e spessa (senza fare troppa pressione). Tagliate il burro rimasto a pezzetti e mettetelo al centro della pasta, quindi ripiegate la pasta per coprire il burro. Stendete la pasta con il matterello e ripiegatela in tre, poi stendetela ancora  e mettetela nel frigorifero per 15-20 minuti.
Passato il tempo necessario prendete la pasta, stendetela con il matterello e piegatela in tre; poi stendetela ancora e riponetela nel frigorifero per altri 15-20 minuti. Una volta rassodata, lavorate la pasta per qualche minuto e mettetela nello stampo (precedentemente imburrato).

5. Quarta lievitazione. Lasciate lievitare finché la pasta raggiunge il bordo dello stampo (ci vorranno 5-6 ore).

6. La cottura. Cuocete il Pandoro a 180 ° C per il primo quarto d’ora, poi abbassate la temperatura a 160 ° C e cuocete per altri 30 minuti. A cottura terminata, togliete il Pandoro dallo stampo e mettetelo su una griglia a raffreddare. Spolverate con abbondante zucchero a velo prima di servire.

SER_2479

Cooked Apple “Pudding” With Chocolate Sauce (Gluten-free, Low-fat)

Today we are going to make an easy cooked apple and walnut “pudding ” served with an aromatic cocoa sauce to celebrate the apple season.  This is a refreshing low-fat dessert, easy to make and can be prepared in advance with no problem. In the recipe method I considered an individual portion, but you can make as many as you like, simply doubling the amount of ingredients.

SER_1699

This recipe is gluten-free and relatively low-fat, however you can make it even lighter by cooking the apple in a little bit of water instead of using butter…But with a small amount of butter it will definitely taste better! 🙂

SER_1723

I hope you enjoy it! ❤

Cooked apple “pudding” with cocoa sauce.
Ingredients
For 1 serving
1 apple (I used a fuji apple)
1 tablespoon of naturally dark brown sugar
a pinch of cinnamon
two pieces of lemon zest
3 walnuts
a small knob of butter (optional)
water

For the sauce.
a spoonful of naturally brown sugar
half a tablespoon of cocoa powder (actually a little bit more)
1 egg yolk
100 ml of milk

Method.
1. Wash and peel the apple. Cut the apple into chunks, then sauté the fruit with the walnuts, the lemon zest and a pinch of cinnamon in a little bit of butter (only for a few minutes).

2. Add a tablespoon of sugar with one tablespoon of water and cook over a medium heat until the apple is tender.

3. When the apple is ready remove the lemon zests, increase the heat to evaporate the juice and then let cool.

4. Put the cooked apple and walnuts into a mould and store in the refrigerator for about 30 minutes.

SER_1683

SER_1704

SER_1701

For the cocoa sauce.
1. In a saucepan, whisk half a tablespoon of cocoa powder with an egg yolk and a tablespoon of sugar.

2. Pour the milk gradually and stir. Simmer (stirring slowly and continuously), until you get a thick sauce.

SER_1679

3. Let cool and serve with the apple “pudding”.

SER_1723

See also spelt flour apple cake (with no refined sugar and dairy-free) and spelt cake with blackberries and apples

SER_1721

“Tortino” di mela cotta e noci con salsa al cacao

Ingredienti

Per 1 porzione

1 mela (ho usato una mela fuji)

1 cucchiaio abbondante di zucchero integrale di canna

un pizzico di cannella

due pezzetti di scorza di limone

4 gherigli di noce

una noce di burro (facoltativo)

acqua q. b.

Per la salsa

1 cucchiaio abbondante di zucchero integrale di canna

mezzo cucchiaio di cacao (abbondante)

1 tuorlo d’uovo

100 ml di latte

Preparazione.

1. Lavate e pelate la mela. Tagliate la polpa a dadini e fate rosolare per qualche minuto con i gherigli di noce, le bucce di limone, la cannella e una piccola noce di burro.

2. Aggiungete un cucchiaio abbondante di zucchero integrale di canna con un po’ d’acqua. Lasciate cuocere a fuoco medio-basso fino a quando le mele saranno tenere.

3. Quando le mele saranno pronte, levate le bucce di limone e alzate il fuoco per far ritirare il liquido delle mele. Fate raffreddare.

4. Mettete la polpa della mela con le noci in uno stampino e riponete nel frigorifero per 30 minuti.

Preparazione della salsa al cacao.

1. In un pentolino, mescolate con una frusta mezzo cucchiaio di cacao con un tuorlo d’uovo e un cucchiaio di zucchero integrale di canna.

2. Aggiungete gradualmente il latte e mescolate. Quindi cuocete a fuoco lento per qualche minuto (mescolando lentamente e continuativamente), fino ad ottenere una crema densa.

3. Fate raffreddare la crema e servite con il “tortino” di mela e noci.

SER_1733

Vedere anche Torta di mele con farina di farro (senza latticini e con il miele) Torta di farro con more e mele

Tangerine Custard Pots

SER_1584

SER_1597

A delicately flavoured tangerine custard cream, baked in small pots. This dessert is super easy to make and is a great alternative to plain custard. I added some cardamom seeds in the recipe, however it ‘s totally up to you if you want to add them or not. Cardamom seeds can give a nice spicy kick to the dessert, however you have to add just a hint of really finely ground seeds (not like in the pictures) or you might get a strong bitter flavour.

You can use this tangerine custard as a cake filling if you cook it in a pan on a moderate heat instead of baking it. Have fun with this recipe and be creative with it! 🙂

SER_1505

Tangerine custard pots.

Ingredients

For 2 small terracotta pots

300 ml of milk

4-5 seedless tangerines (organic)

a piece of lemon zest

2 egg yolks

1 spoonful of cornstarch

3 finely ground cardamom seed (just the seeds, not the pods)

2 tablespoons of sugar for the custard and 2 more tablespoons for the syrup

Method.

1. Wash the tangerine really well, then peel the skin off and place the slices on the side.

2. Place the tangerine and the lemon skin in a small pan, add 300 ml of milk, then bring to the boil. Boil for a few minutes, until the tangerine skins release their flavour.

3. In a small bowl, whisk 1 spoonful of cornstarch with two tablespoons of sugar and two egg yolks, until you get a creamy mixture. Gradually pour the boiling milk into the egg mixture (but remove the skins with a strainer) and whisk well.

SER_1520

4. Pour the mixture into two pots and place on a thick oven tray filled with water. Bake at 160° C (320 ° F) until the custard has thickened.

SER_1529

SER_1571

SER_1583

For the decoration.

In a small pan put 2 tablespoons of sugar and then cover with water, then add the tangerine slices and bring to the boil. Continue to cook at a moderate heat until you have a syrup. Decorate the custard pots with the tangerine slices, a hint of finely ground cardamom seeds and then pour some syrup on top.

Terrine di crema cotta al mandarino.

Ingredienti

2 stampini piccoli di terracotta

300 ml di latte

4-5 mandarini non trattati (senza semi e a buccia sottile)

un pezzo di scorza di limone

2 tuorli d’uovo

1 cucchiaio di amido di mais

3 semi di cardamomo, finemente macinati (non il baccello, ma i semi)

2 cucchiai di zucchero, per fare la crema pasticciera

2 cucchiai di zucchero, per fare lo sciroppo.

Preparazione.

1. Lavate bene i mandarini, quindi levate le bucce e mettete gli spicchi da parte.

2. Mettete le scorze dei mandarini e del limone con 300 ml di latte in un pentolino e portate ad ebollizione. Fate bollire per alcuni minuti.

3. Mescolate 1 cucchiaio abbondante di amido di mais con due cucchiai di zucchero e due tuorli d’uovo, fino ad ottenere un composto cremoso. Versate gradualmente il latte bollente nel composto e, contemporaneamente, levate le bucce dei mandarini filtrando con un colino. Mescolate bene.

4. Riempite due stampini piccoli di terracotta con il composto e metteteli in una teglia riempita d’acqua (x cuocere nel forno la crema a bagnomaria). Infornate a 160 ° C e fate cuocere fino a quando la crema si sarà rassodata. Lasciare raffreddare.

Per la decorazione.

Mettete 2 cucchiai di zucchero e ricoprire con un po’ d’acqua, poi aggiungete le fette di mandarino e portate ad ebollizione. Continuate la cottura a fuoco moderato fino a quando si dispone di uno sciroppo. Decorate le crema pasticciera con le fette di mandarino, un pizzico di semi di cardamomo finemente macinate e lo sciroppo.

SER_1596

Spelt Cake With Blackberries And Apples.

SER_3175

First of all I have to apologise for publishing fewer recipes than normal this month. Unfortunately, my photography project has taken up most of my time lately, as I am trying to build up my creative portfolio. I love writing recipes though, so I’ll try to publish a few more next month…. But I hope you enjoy the picture-a-day project as my as I do! In fact, I am having a lot of fun with it and I’ll continue publishing new photographs, if you like the idea.

Anyway, speaking of recipes, today I am publishing an old Foodfulife classic, slightly revisited! We are going to make my spelt apple cake (the one without butter and refined sugar) with some fresh blackberries and ground almonds. This recipe was requested by friend who wanted to add a different kind of fruit to the original recipe. At first, I gave it a go changing a few ingredients, but then I realised that the batter was just right as it was…So I left it pretty much the same, with the exception of two ingredients, but I also I had to adjust the quantity of the apples and milk to balance.
Of course, you can replace the blackberries with whichever fresh berries you like.

Tip. Toast the almonds in the over for a few minutes at 160° C /320° F, before using them. Toasted almonds will add flavour to the cake.

SER_3146

Spelt with blackberries and apple.

Ingredients

300 g golden apples (1 and half big apples, or 2 smaller apples)

100 g of blackberries (about 25 big ones)

100 g whole spelt flour

1 egg

80 ml almond milk

60 g of finely ground almonds

1 egg

3 tablespoons of organic sunflower oil

3 tablespoons of barley malt

3 tablespoons of honey

1/2 teaspoon of baking powder

1 pinch of cinnamon

the zest of an organic lemon

a pinch of salt

Method.

1. Wash the blackberries and let dry for a while.

2. In a bowl, mix the flour with the baking powder.

3. In a second bowl, mix the honey with the barley malt, then add the egg and mix well. Once you have a creamy mixture add the milk with the ground almonds and the lemon zest.

4. Mix the flour with the egg mixture. Add a pinch of cinnamon and a pinch of salt.

SER_3078

5. Peel the apples, remove the core and cut into pieces. Add the apple chunks and the blackberries to the batter.

SER_3081

6. Line a cake tin with baking paper, then fill with the batter and bake at 180 ° C/356°F for 50 minutes (or maybe for a little longer, just keep an eye on the cake!). Here I used a 25 cm long x10 cm wide tin.

SER_3104

SER_3148

SER_3153

SER_3181

SER_3186

Torta di farro con more e mele.

Ingredienti

300 g di mele golden (una mela grande, più mezza mela)

100 g di more (circa 25 grandi)

100 g di farina di farro integrale

1 uovo

80 ml di latte di mandorla

60 g di mandorle macinate finemente

1 uovo

3 cucchiai di olio di girasole biologico e spremuto a freddo

3 cucchiai di malto d’orzo

3 cucchiai di miele

1/2 cucchiaino di lievito in polvere

1 pizzico di cannella

la scorza di un limone biologico

un pizzico di sale

Metodo.

1. Lavate bene le more e lasciatele asciugare.

2. Mescolate la farina e il lievito in una terrina.

3. A parte, unite il miele al malto d’orzo, poi aggiungere l’uovo e mescolare bene.
Una volta ottenuto un composto cremoso, aggiungete il latte di mandorla, le mandorle tritate e la scorza di un limone.

4. Unite la farina al il composto cremoso, poi aggiungete un pizzico di cannella e di sale.

5. Sbucciate le mele, levate il centro con i semi e tagliate la polpa a pezzi. Unite i pezzi di mela e le more al composto.

6. Foderate una teglia con carta da forno (uso una teglia rettangolare lunga 25 cm e larga 10 cm), quindi riempite la teglia con l’impasto e infornate a 180 ° C per 50 minuti (magari anche un po’ più a lungo, tenete comunque d’occhio la torta durante la cottura).

Dark Chocolate Soufflé With Fresh Raspberries

Dark Chocolate Soufflé With Fresh Raspberries-8

A melt-in-the-mouth dark chocolate and raspberry soufflé is definitely a wonderful way to indulge during a romantic Valentine’s evening.
I know, making a soufflé for the first time can be a little bit scary, however it is quite a simple dessert to make, despite its reputation….Just remember to handle the soufflé with great care and serve it as soon as it comes out of the oven, otherwise this dessert will lose its lift.

Cooking tip. Grease and chill the soufflé dishes for at least 5 minutes before cooking, then grease again with a little butter before pouring in the soufflé mixture. This operation will prevent the soufflé sticking to the dishes during the cooking process.

DSC_3822

Dark chocolate soufflé with raspberries.

Medium difficulty

Ingredients

Serves 2-3

2 small egg yolks (at room temperature)

3 small egg whites (at room temperature)

60 g dark chocolate (70% cocoa solids)

60 g fresh raspberries, washed and dried (at room temperature)

15 g butter, plus a little bit more for greasing the moulds

45 g honey, or agave syrup

1 teaspoon lemon juice

Method.

1. Melt the chocolate in a bain-marie.

DSC_3814

2. Grease 2-3 soufflé moulds (8 cm in diameter, or larger if you use only 2).

3. Stirring gently, add the butter and the honey to the melted chocolate. Let cool a little.

4. Add the egg yolks and then the raspberries, crushing them lightly using a fork. Mix well.

Dark Chocolate Soufflé With Fresh Raspberries-4

5. Separately, whip the egg whites with a teaspoon of lemon juice (the lemon juice will help the whipping process).

Dark Chocolate Soufflé With Fresh Raspberries-3

6. Combine the whipped egg whites with the other ingredients. Mix all the ingredients gently using a spatula.

7. Fill the moulds up to 2/3 and bake at 160 ° C for 20 minutes. Garnish with fresh raspberries and serve immediately.

Dark Chocolate Soufflé With Fresh Raspberries-6

Dark Chocolate Soufflé With Fresh Raspberries-8

Dark Chocolate Soufflé With Fresh Raspberries-9

Dark Chocolate Soufflé With Fresh Raspberries-10

Soufflé di cioccolato ai lamponi.

Media difficoltà

Ingredienti

Per 2-3 persone

2 tuorli piccoli (a temperatura ambente)

3 albumi piccoli (a temperatura ambiente)

60 g di cioccolato findente al 70 %

60 g di lamponi freschi (a temperatura ambiente)

15 g di burro e un po’ di più per imburrare gli stampi

45 g di miele (oppure sciroppo d’agave)

1 cucchiaino di succo di limone (per montare meglio gli albumi)

Preparazione.

1. Fate sciogliere il cioccolato a bagnomaria.

2. Imburrate 2-3 stampini da soufflé di circa 8 cm di diametro (o anche un po’ più grandi, se ne usate solo due).

3. Unite il miele e il burro al cioccolato sciolto, mescolando dolcemente. Lasciate intiepidire.

4. Aggiungete gradualmente anche i tuorli e i lamponi. Schiacciate leggermente i lamponi con una forchetta e mescolate bene.

5. A parte, montate a neve gli albumi con un cucchiaino di succo di limone.

6. Unite gli albumi montati agli altri ingredienti, mescolando delicatamente dal basso verso l’alto.

7. Riempite gli stampini fino a 2/3 e infornate a 160° C per 20 minuti. Guarnite con dei lamponi freschi e servite subito.

Dark Chocolate Lava Cakes With A Kick! (Gluten-Free)

DSC_3359

Decadent, hot and velvety creamy inside, this dessert is to die for!
It took me several days to get this recipe right! It is quite difficult to achieve the right consistency, when you make this kind of dessert without flour or caster sugar. However, the result it is simply superb!!

Yes, these wonderful lava cakes are gluten and refined sugar free (I added a little icing sugar on top, in order to take better pictures, but you don’t have to)… No one will know they are secretly healthy!

…But be careful, because the chocolate-chilli combination can be very addictive!

DSC_3337

Dark chocolate lava cakes with a kick (gluten and refined sugar free)

Cooking time: 18-19 minutes

Preparation time: 25 minutes

Ingredients

for 4 small cakes (4 servings)

80 g dark chocolate (70% cocoa solids)

40 g almonds (with skin)

2 medium eggs, plus 1 yolk

1 pinch of salt

10 g unsweetened cocoa powder (plus a little more to dust the cake moulds)

80 g butter

100 g acacia honey (or the honey of your choice)

2 small dried chilli peppers (or a pinch of chilli powder)

icing sugar to decorate (optional, don’t use it if you don’t want refined sugar in the cakes)

4 small disposable aluminium cake moulds

Method.

1. Melt the chocolate in a bain-marie. When the chocolate is completely melted, add the butter, let it melt and mix well; then remove from the heat.

DSC_3190

2. Lightly toast the almonds in the oven at 170° C / 338° F (just for a few minutes). Let cool, then, using a food processor, grind the almonds with the cocoa powder and the dried chillies.

3. Separately, beat the eggs with honey with an electric beater, until the mixture is soft and fluffy.

DSC_3194

4. Incorporate the melted chocolate and butter with egg mixture. Beat for a few more minutes, then add the cocoa with the ground almonds and chillies.

DSC_3214

5. Grease 4 small cake moulds with butter, then dust with a little cocoa powder.

DSC_3216

DSC_3231

6. Bake at 160 ° C/ 320° F for 18-19 minutes.

DSC_3303

7. Garnish with icing sugar (optional) and serve hot.

DSC_3324

DSC_3335

DSC_3319

Note. The cakes should be cooked on the outside and slightly soft in the centre, make sure you don’t overcook them…One more minute can make a huge difference!

Tortini con cuore fondente al peperoncino (senza glutine)

80 g di cioccolato fondente al 70 %

40 g di mandorle (con la buccia)

2 uova medie, più un tuorlo

1 pizzico di sale

10 g di cacao amaro

80 g di burro

100 g di miele di acacia (oppure il miele che preferite)

due peperoncini secchi (oppure un po’ di peperoncino in polvere)

zucchero a velo per decorare (facoltativo, non usatelo se non volete lo zucchero nella ricetta)

4 stampini di alluminio (usa e getta)

Preparazione.

1. Fate sciogliere il cioccolato a bagnomaria. Quando il cioccolato sarà completamente sciolto, aggiungete il burro e mescolate bene.

2. Tostate leggermente le mandorle nel forno caldo per qualche minuti. Lasciate raffreddare, poi tritate molto finemente insieme al cacao e i peperoncini con un tritatutto (fate qualche pausa per non riscaldare troppo le lame).

3. A parte, sbattete le uova con il miele, fino ad ottenere un composto soffice e spumoso.

4.  Incorporate il burro e il cioccolato sciolto alle uova. Sbattete ancora per qualche minuto, poi aggiungete il cacao con la farina di mandorle e il peperoncino. Mescolate bene.

5. Imburrate gli stampini in alluminio e ricoprite con una spolverata di cacao amaro.

6. Infornate a 160° C per 18-19 minuti (non di più perché i tortini rischiano di solidificarsi troppo, mentre al centro devono restare cremosi).

7. Decorate con zucchero a velo (facoltativo) e servite i tortini caldi.

DSC_3292

Cranberry And White Chocolate Pandolce

Pandolce is a wonderful Genoese Christmas cake, traditionally made with raisins, candied fruits and pine nuts; so simple but rich in flavours, because we use only the best quality ingredients.

Cranberry, white chocolate and hazelnut Pandolce

For this Christmas I prepared (as usual) my own version, giving a foodfulife twist to the traditional recipe! I made a Pandolce packed with delicious cranberries, white chocolate and hazelnuts. This dessert is sweet bread (actually more like a cookie dough), perfect if you want to surprise your guests with something truly special for Christmas!

Believe me, it doesn’t get any better than this!

Cranberry, white chocolate and hazelnut Pandolce

If you prefer something a little less rich but still delicious, you can try my Chocolate and hazelnut Pandolce, made with dark chocolate and with less sugar and a little less butter.

Cranberry, white chocolate and hazelnut Pandolce

Cranberry and white chocolate Pandolce.

Preparation time: 15 minutes + the resting time

Cooking time: 50 minutes

Ingredients

For 8-10 servings

220 g Manitoba flour (that you can replace with whole spelt flour, or any strong flour)

100 g unbleached all purpose flour

80 g soft butter

60 g milk

1 egg

1 and a half tablespoons of honey

70 g brown sugar

grated zest of 1 organic lemon

2 tablespoons rum

1 teaspoon baking powder

1 teaspoon baking soda

a few drops of vanilla essence

150 g shelled and roasted hazelnuts (whole)

100 g white chocolate, cut into pieces and frozen (that you can replace with dark chocolate)

100 g dried cranberries

icing sugar to taste

tip. Freeze the white chocolate before making the cake, otherwise it will melt too much during the cooking time.

Cranberry, white chocolate and hazelnut Pandolce

Method.

1. Mix the softened butter with the brown sugar and the egg, then add the honey and 60 g of milk. Add two tablespoons of rum, two drops of vanilla essence, then stir until the mixture is soft and creamy.

2. Separately, mix the two flours with the baking soda and the baking powder; then add the hazelnuts, the zest of a lemon, the white chocolate and the cranberries. Combine these ingredients with the creamy mixture.

Cranberry, white chocolate and hazelnut Pandolce

3. Knead well, adding a little bit of flour to prevent the dough from sticking to your hands and place in the refrigerator for 15 minutes.

4. Line the base of an oven tray with baking paper, then place and shape the Pandolce on the tray.

Cranberry, white chocolate and hazelnut Pandolce

5. Bake in a preheated oven at 170 ° C/388°F  (with the fan running) for 50 minutes.

 Note. The oven door must remain slightly open during the entire cooking time to release the steam (you can do that by placing a metal object, like a padlock, between the door and the oven, in order to live a 1-2 cm gap).

Cranberry, white chocolate and hazelnut Pandolce

Cranberry, white chocolate and hazelnut Pandolce

6. Let the Pandolce cool completely, then dust with plenty of icing sugar.

Cranberry, white chocolate and hazelnut Pandolce

Cranberry, white chocolate and hazelnut Pandolce

Cranberry, white chocolate and hazelnut Pandolce

Cranberry, white chocolate and hazelnut Pandolce

Pandolce con mirtilli rossi e cioccolato bianco.

Preparazione: 15 minuti + il riposo

Cottura: 50 minuti

Ingredienti

Per 8-10 servings

220 g di manitoba (che potete sostituire con farina integrale di farro)

100 g di farina 00

80 g di burro morbido

60 g di latte

1 uovo

1 cucchiaio e mezzo di miele

70 g di zucchero di canna

la scorza grattugiata di un limone, non trattato

2 cucchiai di rum

1 cucchiaino di lievito per dolci

1 cucchiaino di bicarbonato

qualche goccia di essenza di vaniglia

150 g di nocciole tostate intere, senza buccia

100 g di cioccolato bianco, rotto in pezzi e surgelato (che potete sostituire con il cioccolato fondente)

100 g di mirtilli rossi essiccati (cranberries)

zucchero a velo q. b.

Nota.

Congelate il cioccolato bianco per evitare che si sciolga troppo durante la cottura.

Preparazione.

1. Amalgamate bene il burro con lo zucchero e l’uovo. Aggiungete 60 g di latte, il rum, l’essenza di vaniglia e un cucchiaio e mezzo di miele, poi mescolate fino ad ottenere un impasto cremoso.

2. Separatamente, mischiate le farine e poi aggiungete le nocciole, i mirtilli rossi, il cioccolato bianco (surgelato), la scorza di un limone, il bicarbonato e il lievito. Mescolate tutti gli ingredienti insieme, unendo l’impasto asciutto a quello cremoso.

3. Amalgamate bene, aggiungendo un po’ di farina per evitare che l’impasto si appiccichi alle mani, poi lasciate riposare nel frigorifero per 15 minuti.

4. Ricoprite la teglia con la carta da forno, poi mettete l’impasto sulla teglia e date la forma al Pandolce.

5. Infornate quindi a 170°C per 50 minuti (con la ventola in funzione).

Nota. La porta del forno deve restare socchiusa (con una fessura di 1 o 2 cm), in modo da far uscire il vapore (potete posizionare un oggetto di metallo, ad esempio un lucchetto, tra la porta e il forno).

6. Fate raffreddare completamente, poi decorate il Pandolce con abbondante zucchero a velo.

Cranberry, white chocolate and hazelnut Pandolce

How To Make (Almost) Perfect Meringues

The basics.
A meringue is basically made with two ingredients: sugar and egg whites.
In Italian cuisine we often use three types of meringue: the classic, the French or Italian meringue.
While the classic and French meringues are both baked, the Italian meringue is usually pasteurised (“cooked” at a very low temperature) by adding hot sugar syrup during the preparation process and it is generally used in creamy desserts or cake decorations/ fillings.

How to make perfect meringues

Classic or French meringue?
The main difference between French and classic meringues is in the preparation methods. In fact, both these meringues are made with the same ingredients and cooking methods, but they differ in the way in which the sugar is added to the recipe and (slightly) in their final consistency. In the classic meringue the sugar is added at the end of the process, incorporating the sugar with a spatula when the egg whites are firmly whipped; while in the French meringue the sugar is added gradually during the whipping process.

DSC_3006-2

DSC_2997-4

In this article we will see the preparation process for the French meringue, which is quite light and crispy.

How to make perfect meringues

…And yes, it’s hard to get it right, but not impossible!

Basic French meringue recipe.

Preparation time: 10 minutes

Cooking time: 3 hours

Ingredients

For 25 meringues (two oven trays)

100 g egg whites

200 g granulated sugar (use icing sugar for a finer grain)

How to make perfect meringues

Method.

1. Using an electric beater, beat the egg whites with 1/3 of sugar (about 66 g) starting with a medium-low power.

How to make perfect meringues

2. Once the egg whites have doubled in volume, add another 1/3 of sugar and beat at a medium-high power.

How to make perfect meringues

3. When the egg whites are almost stiff, add the rest of the sugar and continue to beat until the mixture is thick and glossy.

How to make perfect meringues

How to make perfect meringues

4. Line the base of an oven tray with baking paper, then, using a piping bag, make the meringues (5 cm wide x 3 cm thick).

How to make perfect meringues

How to make perfect meringues

5. Bake at 85-100° C ( 185- 212°F) for 3 hours (the cooking time depends also on the oven you use). Let cool completely on wire rack and then place in a airtight container.

How to make perfect meringues

How to make perfect meringues

How to make perfect meringues

A few things to keep in mind…

About the ingredients.

1. As a basic rule, the weight of the sugar must be double compared to that of the egg whites.

2. You can add something a little acidic, like lemon juice, to help the whipping process. The doses: use 1/2 a teaspoon of lemon juice for 100 g of egg whites.

3. It is possible to add a little cornstarch in order to better maintain the shape of the meringues during the cooking process.

4. Don’t add any salt because it won’t help the whipping process. Some recipes might suggest the opposite, but it is not correct.

About the preparation method.

1. Separate the egg whites from the yolks well, even small traces of egg yolk will compromise the end result.

2. The equipment used during the whipping process should have been properly cleaned, dried and possibly quite cold. All these elements will help you to achieve the perfect meringue!

About the cooking method.

1. Cook the meringues at a very low temperature to avoid any changes in colour or cracks on the surface (basically the meringues have to dry out slowly in the oven). Best cooking temperature: 85 -100 ° C ( 185- 212°F).

2. If you want to dry the meringues completely, to preserve them for longer, you can leave them in the oven (turned off) for a few hours, after the cooking process.

How to make perfect meringues

Ricetta base per la meringa francese.

Tempo di preparazione: 10 minuti

Tempo di cottura: 3 ore

Ingredienti

Per 25 meringhe (per 2 teglie rettangolari)

100 g di albumi

200 g di zucchero semolato (potete usare zucchero a velo per una meringa con grana più fine)

Preparazione.

1. Con uno sbattitore elettrico (utilizzando una potenza medio-bassa), incominciate a montare gli albumi con 1/3 di zucchero (circa 66 g).

2. Quando gli albumi saranno raddoppiati di volume, aggiungete ancora 1/3 di zucchero e aumentate la potenza.

3. Ad albumi quasi montati a neve, aggiungere il resto dello zucchero e continuare a montare fino ad ottenere un composto denso e lucido.

4. Ricoprite la base di una teglia con carta da forno, poi, utilizzando un sac à poche, date la forma alle meringhe (5 cm di larghezza x 3 cm di altezza).

5. Infornare a 85-100 ° C per 3 ore (il tempo di cottura però dipende dal forno utilizzato). Fate raffreddare bene, poi conservate le meringhe in un contenitore a chiusura ermetica.

Note.

Per gli ingredienti.

1. Come regola generale, il peso dello zucchero deve essere il doppio di quello degli albumi.

2. Si può utilizzare del succo di limone per far montare meglio gli albumi. Dosi consigliate: 1/2 cucchiaino di succo di limone per 100 g di albumi.

3. Aggiungendo un po ‘ di amido di mais le meringhe manterranno meglio la forma durante la cottura.

4. Il sale non aiuta a montare meglio gli albumi, se potete non utilizzatelo.

Per la preparazione.

1. Separate bene gli albumi dai i tuorli, perché piccole tracce di tuorlo possono compromettere il risultato finale.

2. L’ attrezzatura deve essere pulita, asciugata e possibilmente fredda.

Per la cottura.

1. Le meringhe devono cuocere a temperatura molto bassa per evitare un cambiamento di colore o la formazione di piccole crepe sulla superficie. La temperatura di cottura più indicata è tra 85-100 ° C.

2. Le meringhe si conservano a lungo quando sono molto asciutte. A cottura terminata, potete lasciare le meringhe nel forno per qualche ora  per farle asciugare completamente.

How to make perfect meringues

Dark Chocolate And Marrons Glacés Tart

As promised, this week I continue my series of recipes dedicated to the chestnut season, with a wonderful dark chocolate and marrons glacés tart. This is a rich dark chocolate tart, enriched with an hint of sweet chestnut flavour and with a luscious creamy filling that will definitely warm you up nicely!

DSC_1677

I know that marrons glacés (candied chestnuts) can be expensive, however, in this recipe I used just 100 g, to add some sweetness and flavour…Believe me, it is worth it! You can buy marrons glacés in pieces, which are a little bit cheaper. I also added a little bit of chestnut flour in the shortcrust, which works quite nicely with the other ingredients, without overpowering their flavours.

DSC_1685

Dark chocolate and marrons glacés tart

(I used a ceramic cake pan of 24 cm of diameter)

Ingredients

180 g plain unbleached flour

40 g chestnut flour

50 g brown sugar

120 g softened butter

1 egg yolk

a pinch of salt

For the dark chocolate and marrons glacés filling

200 ml of milk

200 g of dark chocolate (I used 100 g chocolate with minimum 50% of cocoa solids and 100 g with 70% cocoa solids)

100 g marrons glacés (candied chestnuts)

2 tablespoons dark rum

2 eggs

60 g brown sugar

DSC_1642

Method.

1. Prepare the dough. Work the butter with 50 g of brown sugar and 1 egg yolk. Add the flour with a pinch of salt, then knead well (without overworking) and put in refrigerator for 30 minutes.

DSC_1647

DSC_1649

2. Prepare the filling. Separately, puree the marrons glacés using a fork. Then add 2 tablespoons of rum and mix until you get a jam-like consistency.

DSC_1607

3. Melt the chocolate in a bain-marie (double boiler). Combine the melted chocolate with the marrons glacés puree, then gradually add 2 eggs and 200 ml of milk. Mix well and put the filling in the refrigerator.

DSC_1615

DSC_1621

4. Prepare the tart crust.Take the dough and roll it out on a sheet of baking paper, using a rolling pin. Place the pastry (with the baking paper) on the cake pan and then cut off the excess paper. Pierce the base of the tart a few times with a fork.

DSC_1653

5. Fill the tart crust with the chocolate and marrons glacés filling. Bake at 180 ° C (356°F) for about 50 minutes (the cooking time depends on the oven, check on the cake!).

DSC_1659

DSC_1684

6. Let cool, cut and serve.

DSC_1696

DSC_1704

DSC_1715

DSC_1724

Crostata al cioccolato fondente e marrons glacés

Ho usato una tortiera di ceramica di 24 cm di diametro

Ingredienti

180 g di farina 00

40 g di farina di castagne

50 g di zucchero di canna

120 g di burro morbido

1 tuorlo d’uovo

un pizzico di sale

Per la crema al cioccolato fondente e marrons glacés

200 ml di latte

200 g di cioccolato fondente (ho usato una tavoletta da 100 g al 50% di contenuto di cacao e una sempre di 100 g al 70% di contenuto di cacao)

100 g di marrons glacés

2 cucchiai di rum scuro

2 uova

60 g di zucchero di canna

Preparazione.

1. Lavorate il burro con il tuorlo e 50 g di zucchero. Aggiungete la farina con un pizzico di sale e amalgamate bene l’impasto, senza lavorarlo troppo. Lasciate riposare in frigorifero per 30 minuti.

2. A parte, schiacciate bene i marrons glacés con una forchetta. Aggiungete due cucchiai di rum scuro e mescolate, fino ad ottenere la consistenza di una marmellata.

3. Fate sciogliere a bagnomaria il cioccolato. Mescolate il cioccolato sciolto con la purea di marrons glacés, due uova e il latte (aggiungete uova e latte molto gradualmente). Mettete la crema nel frigorifero a rassodare.

4. Prendete l’impasto dal frigorifero e stendetelo con il matterello su un foglio di carta da forno. Trasferite la sfoglia di pasta (con la carta) sulla teglia e tagliate la carta in eccesso. Forate più volte la pasta con la forchetta.

5. Riempite la base della torta con la crema al cioccolato e marrons glacés. Infornate a 180° C per circa 50 minuti (la cottura dipende dal forno, controllate la torta).

6. Fate raffreddare, tagliate e servite.

DSC_1702