Tag Archives: Fatto in casa

A Steamed Alternative to Vegetable Stock.

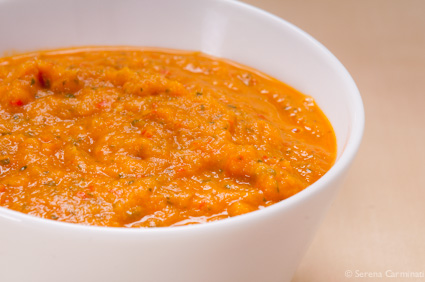
Home-made (steamed) vegetable stock.

DSC_2467

This stock-like sauce is prepared by gently steaming vegetables, using ingredients naturally rich in flavour like wine, sesame seeds and fresh herbs. It ‘s a great alternative to commercial vegetable stocks (or vegetable broth) and a little bit healthier than homemade ones. This fragrant, rich-in-nutrients sauce will blend in nicely with most of your dishes, improving every recipe ( I use it with roast meat, stews, sauces or soups). As a homemade product, made ​​only with fresh vegetables and no artificial preservatives, this stock should be kept well sealed in the fridge and used up within a few days, while in the freezer will keep well for several months. This recipe is high in salt, a natural preservative, therefore should be used in moderation.

DSC_2301

Ingredients

4 tablespoons olive oil (1 of which is to be added at the end)

1 kg  ( 2 lb) fresh vegetables:

1 medium tomato

3-4 stalks of celery

2-3 carrots

a medium potato

1 red bell pepper (optional)

2 medium onions

2 cloves of garlic

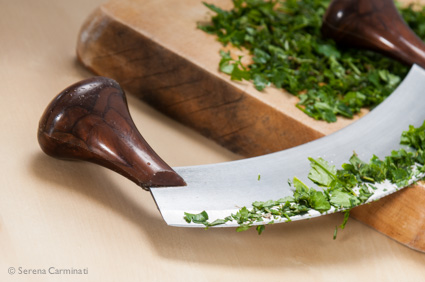
A bunch of herbs to taste (I used parsley, marjoram and some oregano and rosemary)

150 ml (5 fl oz) white wine or Marsala wine

150 ml (5 fl oz) water

1 tablespoon salt

2 tablespoons sesame seeds (finely ground)

Fry the onions and garlic with 3 tablespoons of olive oil. When the onions are golden brown, pour the wine into a pan and let it cook at a low heat to make a sauce.

DSC_2320DSC_2327

In the meantime, wash and cut the vegetables into chunks, and put them in a steamer basket.

DSC_2355

Put the basket on top of the pan, cover with a lid and cook with the steam of the wine sauce for 20-30 minutes. Half way through the cooking time (after 10-15 minutes), pour the water into the wine sauce, then cover and continue cooking.

DSC_2372

When the vegetables are almost ready, add the herbs ( finely chopped) to the sauce.

DSC_2369

DSC_2386

Put the vegetables back on top of the pan and continue to simmer until they are tender.

DSC_2380

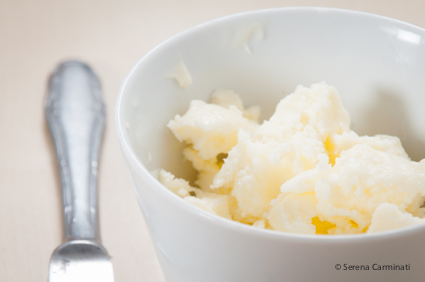
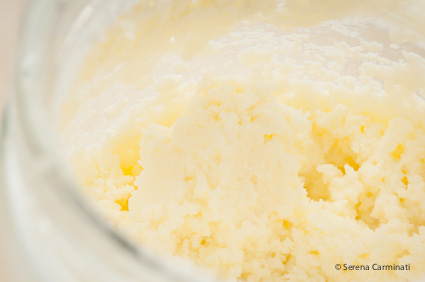
Turn off the heat, pour the vegetable into the wine sauce and, using an immersion blender, blend everything together.

DSC_2402

Finely grind the sesame seeds with a food processor. Add the seeds, a tablespoon of salt and one of olive oil to the vegetables stock. Mix well.

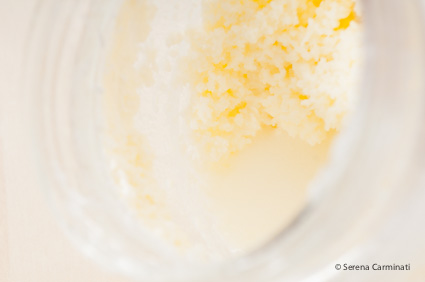
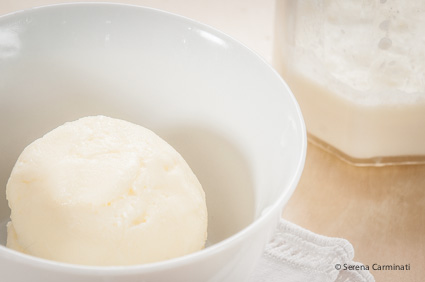
Pour the stock into small jars (previously sterilized with boiling water or alcohol at 90 °), seal and store in the fridge and/or in the freezer.

DSC_2463

Dado di verdure (cotte a vapore) fatto in casa

Questo condimento si prepara facendo cuocere delicatamente le verdure al vapore, utilizzando ingredienti naturalmente aromatizzanti come il vino,i semi di sesamo e le erbe fresche profumate. E’ un’ottima alternativa al brodo fatto in casa o al classico dado del supermercato. Il risultato sarà una pasta profumatissima e ricca di sostanze nutritive che arricchirà ogni piatto, senza appesantirlo. Questa salsa, o dado, si può utilizzare per fare un brodo vegetale leggero, oppure ci si possono condire e insaporire svariate pietanze, come arrosti o sughi di vario genere. Essendo un prodotto preparato con ingredienti freschi e senza conservanti artificiali,  se tenuto in frigorifero è consigliabile utilizzarlo entro pochi giorni, mentre nel freezer si manterrà benissimo per diversi mesi. Il sale contenuto nella ricetta ne aiuta la conservazione, ma ovviamente bisogna moderarne le quantità nella preparazione delle vostre ricette.

Ingredienti

4 cucchiai d’olio di oliva (di cui 1 va aggiunto a cottura avanzata)

1 kg di verdure fresche:

1 pomodoro medio piccolo

qualche gambo di sedano

2-3 carote

una patata medio piccola

1 peperone rosso (facoltativo)

Un mazzetto di erbe aromatiche a piacere ( ho messo prezzemolo, maggiorata e in minore quantità  origano e rosmarino)

2 cipolle

2 spicchi d’aglio

150 ml di vino bianco o di Marsala

150 ml d’acqua

1 cucchiaio abbondante di sale

2 cucchiai di semi di sesamo (macinati finemente)

Fate rosolare il soffritto di cipolle e aglio con 3 cucchiai di olio d’oliva. Quando le cipolle saranno ben dorate allungate con un po’ di vino. Nel frattempo, lavate le verdure, tagliatele e mettetele nel cestello per la cottura a vapore. Riponete il cestello sopra la pentola del soffritto, chiudete con il coperchio e lasciate cuocere per 20-30 minuti con il vapore del vino.

A metà cottura (dopo 10-15 minuti) allungate il vino con 150 ml d’acqua, coprite la pentola e continuate a cuocere. Quasi a termine cottura, aggiungete le erbe aromatiche (tritate e pulite) al vino e lasciate insaporire a fuoco molto basso.  Spegnete la fiamma quando tutte le verdure saranno morbide, poi unitele alla salsa di vino e frullate il tutto con un frullatore ad immersione, fino a creare una crema densa. Nel caso il risultato fosse troppo liquido, fatelo un po’ ritirare a fuoco lento.

A questo punto, tritate i semi di sesamo finemente e aggiungeteli con un cucchiaio di sale (fino) alla nostro dado di verdura. Inumidite con un cucchiaio di olio crudo e mescolate bene tutto.Mettete il dado in diversi vasetti di vetro (precedentemente sterilizzati con acqua bollente o alcool a 90°) e riponeteli nel frigorifero e nel freezer.

Home-made butter: easy to prepare and healthier to eat.

Home-made butter.

DSC_2174

Butter is made by churning cream until the solid fat (butter) is separated from the liquid (buttermilk). Commercial butter is produced using industrial churning techniques and is a byproduct of cheese, rich in saturated fats, harmful to health. Home-made butter, which is obtained by whipping cream with a mixer, contains a much higher percentage of unsaturated fats, vitamins and water, therefore it’s a healthier and lighter product, but it doesn’t last for long.

In this article I will explain, step by step, how to make fresh butter using an electric mixer with a simple method.

Conservation.

Fresh butter will last in the refrigerator for a few days and in the freezer up to a week or more. Salted butter will last for longer ( 2-3 weeks in the fridge) because salt acts as a preservative but salted butter can have a limited use. Keep your butter sealed in a light-proof container, to avoid exposure to direct sunlight or unwanted odours that can ruin this fresh and delicate product.

Doses.

With 500 ml of cream you can obtain 200 g of butter (I use whipping cream but you can also use double cream, which is richer, therefore you might end up with slightly different results).

DSC_2091

The process.

Place a whisk and a bowl or a large glass jar  (all previously sterilized with boiling water or ethanol, at 95 °) to cool in the freezer for 30 minutes. Cool the cream, but careful not to freeze it. When everything is very cold, pour the cream in the bowl (or in the jar) and whip it until the color and texture changes, and the solid fat separates completely from the liquid.

DSC_2101

DSC_2103

Now separate the buttermilk (the liquid) from the butter (the fat mass) using a strainer.

DSC_2111

Rinse with cold water and squeeze the butter with a spotless cloth to drain. Whip the butter in the sterilized bowl (or in a sterilized jar) for another 30 seconds, to expel the remaining buttermilk (whipping twice is not necessary if the butter is firm). Rinse the butter again and squeeze well with a cloth. Repeat this process until the water in the bowl is completely clear. Remember to handle the butter as little as possible to avoid melting.

DSC_2117

Place the fresh butter in a sealed sterilized container and store in the refrigerator or in the freezer. This product can be easily mixed with different ingredients, like salmon and herbs,  while buttermilk is used to prepare breads, cakes and drinks.

DSC_2134


Fare il burro in casa.

Il burro si ricava, molto semplicemente, montando la panna fino a far separare i grassi solidi da quelli liquidi. Il burro che si trova in commercio generalmente si ottiene con la tecnica ad affioramento ed è un sottoprodotto dei formaggi, ricco di lipidi saturi, nocivi alla salute. Quello fatto in casa con il metodo a centrifuga, contiene una quantità di grassi inferiore con una percentuale maggiore di grassi insaturi, vitamine e acqua, perciò è più leggero e meno dannoso, ma si conserva meno a lungo.

In questo breve articolo vi spiegherò, passo per passo, come ottenere burro fresco usando un frullino elettrico, con un metodo semplice e relativamente veloce.

La durata e la conservazione.

Il burro fresco si può conservare in frigorifero per 2-3 giorni al massimo e nel freezer per una settimana o due. Con l’aggiunta di sale il burro si conserva in frigo fino a 2-3 settimane, ma questo procedimento può limitarne l’utilizzo in alcune ricette, quindi è meglio aggiungerne poco.

Essendo un prodotto molto delicato, è opportuno conservare il panetto in un contenitore ben chiuso e al riparo da odori indesiderati o dalla luce solare, che ne modifica il colore.

Le dosi.

Con 500 ml di panna (da montare) si otterranno 200 g di burro.

Il procedimento.

Fate raffreddare nel freezer per 30 minuti la frusta e la ciotola (o un contenitore di vetro) che userete per montare la panna (tutto deve essere precedentemente sterilizzato con acqua bollente o alcool etilico a 95°). Raffreddate la panna facendo attenzione a non congelarla. Quando tutto sarà molto freddo, mettete la panna nella ciotola (o nel contenitore di vetro) e montatela fino a quando cambierà colore e si formerà una massa solida.

Quindi separate il latticello ( la parte liquida) dal burro (la massa di grassi), aiutandovi con un colino.

Il burro va lavato con acqua fredda e strizzato in un panno pulitissimo. Riponete il burro in una terrina sterilizzata e frustate ancora per 30 secondi o un minuto, per espellere tutto il latticello rimasto (se il risultato è già molto compatto continuate a lavorare il burro solo con il panno, senza usare la frusta elettrica una seconda volta). Quindi, risciacquate ancora il burro e strizzatelo bene usando il panno. Ripetete questo procedimento fino a quando l’acqua rimasta nella ciotola sarà completamente limpida. E’ importante che ci siano meno residui liquidi possibile per una buona conservazione del prodotto, però fate attenzione a maneggiare il burro il meno possibile, per evitare che si sciolga.

Mettete il burro in un contenitore con il coperchio (entrambi precedentemente sterilizzati) e conservate in frigorifero o nel congelatore.

Il burro fatto in casa è ottimo miscelato con altri ingredienti come il salmone e le erbe. Anche il latticello si conserva e può essere utilizzato nella preparazione di pani, dolci o alcune bevande.