Tag Archives: Traditional recipe

Traditional Recipe: La Farinata Genovese (Genoese Socca)

Basically made from 3 ingredients (chickpea flour, olive oil and water), la farinata, or socca (as it is called in Nice), is a kind of chickpea focaccia, which doesn’t contain gluten and is dairy free.  It is quite easy to prepare and it’s perfect for vegan and vegetarian diets, because it is a good source of proteins.

DSC_2043

Before getting the method and recipe right it might take a few tries, especially when it comes to finding the right balance between the ingredients. It might requires a lot of olive oil in order to become crispy on the outside and creamy on the inside, as it should be.
The farinata is traditionally only a few millimetres thin (see the pictures).

A few tips.
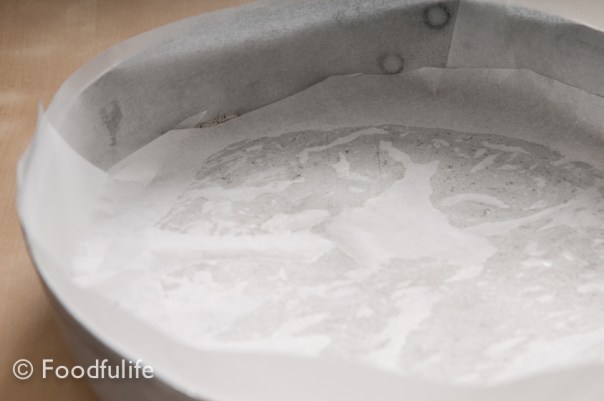
The ideal cooking method would also require a high temperature oven, like a wood stove, however, a good oven will do. Remember to use non-stick baking trays or baking paper.
The farinata has to be served quite hot, freshly made, otherwise it will become elastic and not very nice to eat. If you have leftovers, you can reheat the farinata in the oven the day after.

The farinata can also be enriched adding different ingredients; amongst the local most popular variations, you’ll find the onion and the artichoke farinata, also quite easy to make.

DSC_2051

Farinata could be a delicious starter or aperitif, but it is also a wonderful meal when served with a nice big salad on the side.

La farinata di ceci (Genoese socca)

Ingredients

for 3 rounded backing trays (28 cm in diameter)

1,5 litre of water

500 g chickpea flour

200 ml extra virgin olive oil

salt and pepper to taste

Method.

1. In a large bowl, vigorously whisk 1,5 litre of water with 500 g. of chickpea flour, 100 ml olive oil and some salt. Once all the ingredients are mixed well, let sit for at least 5 hours (but 10 hours would be better, so the flour can absorb the water well).

DSC_1994

2. After the resting time, remove the froth formed on the surface of the mixture with a spoon.

DSC_1997

3. Pour some extra virgin oil on a non-stick baking tray, then with a ladle add 1/3 of the mixture and season with salt and pepper.

DSC_2009

DSC_2007

4. Bake the farinata at 220°C / 428°F (or higher) until golden, then turn on the grill and cook for a little longer, in order to get a nice crispy crust on top. Remove from the oven and serve hot.

DSC_2013

DSC_2049

DSC_2056

Also see Chickpea flour bread recipe

La farinata di ceci.

Ingredients

Per 3 teglie rotonde di 28 cm di diametro

1,5 l d’ acqua

500 g di farina di ceci

sale e pepe q.b.

200 ml di olio extra vergine d’oliva

Preparazione.

1. In una ciotola grande, mescolate energicamente con una frusta 1, 5 l di acqua, 500 g. di farina di ceci, 100 ml di olio e un po’ di sale. Una volta amalgamati bene gli ingredienti, lasciate riposare per almeno 5 ore (sarebbe meglio 10 ore, per far assorbire bene l’acqua).

2. Passato il tempo necessario, togliete con un cucchiaio la schiuma formata in superficie.

3. Versate un po’ d’olio su una teglia antiaderente, poi con un mestolo aggiungete il composto liquido (non troppo perché deve restare sottile) e condite con sale e pepe.

4. Infornate a 220° C per una decina di minuti, poi accendete il grill e lasciate che si formi una crosta croccante. Sfornate e servite!

DSC_2047

DSC_2030

Vedi anche la ricetta del Pane con farina di ceci e semi di zucca

Traditional Recipe: Pesto Alla Genovese

DSC_0320

Pesto is a well known basil sauce originating in Genoa. This delicious sauce is traditionally served with various kinds of pasta such as trofie, lasagne and gnocchi or used to enrich dishes like vegetables soups and even pizzas! Countless variations already exist, but the best pesto is made with only basil and extra virgin olive oil from Liguria, because they are very aromatic and really make a difference when it comes to flavour. During the preparation method, we use a mortar because it is a slow and gentle process that doesn’t alter the quality and flavour of the ingredients.

Having said that, you can make a wonderful pesto using a blender and any of your local ingredients….so give it a go!!I promise, you won’t be disappointed!

Today we will see how to prepare a delicious pesto using either a mortar or a blender…You choose! 🙂

DSC_0412

Tips.

1. In the traditional recipe we only use well-aged Parmesan and Pecorino. Both these cheeses are quite salty, therefore it is better to use only a few crystals of salt in the recipe and taste the sauce when it’s ready; you can always add the salt later, if needed.

2. It is possible to dilute the pesto with water, in order to obtain a creamier sauce. I usually mix a couple of tablespoons of hot water with the sauce, just before mixing it with the pasta. Then stir vigorously with a spoon and add the pasta.

3. To preserve the pesto, put the sauce in a jar and cover with plenty of extra virgin olive oil, then seal well with a lid and put it in the fridge. The sauce will last up to 5 days, if properly preserved.

DSC_0346

Pesto alla Genovese.

for 2 serving

40 leaves of fresh basil, washed and dried

1 clove of garlic

3 tablespoons of well-aged Parmesan cheese, grated

1 tablespoon of aged Pecorino cheese, grated (you can add more Parmesan if you don’t find the Pecorino)

1 tbsp of pine nuts

6 tablespoons of extra virgin olive or more, if needed

sea salt crystals to taste

Method 1 (traditional method with a mortar)

1. Using a mortar, crush the garlic with only a couple of salt crystals.

DSC_0333

2. Remove the stems and gradually add all the basil leaves with a couple of salt crystals at a time. Move the pestle in circular motion and firmly crush all the leaves, adding more as you go along.

DSC_0359

3. Add the pine nuts and the grated cheeses, then continue mixing the ingredients with a gentile circular motion.

DSC_0365

4. Add the extra virgin olive oil and mix until you get a creamy pesto.

DSC_0408

DSC_0390

Method 2 ((with an immersion blender or food processor)

This is definitely a quicker method, however, you have to be a little bit careful in order to avoid burning the basil leaves using the blender. You can easily avoid this, by adding some cold water (it has to be really cold) to prevent the blade from heating up and spoiling the basil.

1. Put all the ingredients in a tall container and add only 3 tablespoons of extra virgin olive oil.  Start blending and add 2 tablespoons of really cold water.

DSC_0463

2. Blend everything for a few minutes, then add the rest of the extra virgin olive oil and continue blending until you get a nice creamy pesto.

DSC_0472

DSC_0478

DSC_0481

See also the arugula pesto recipe.

DSC_0427

DSC_0429

DSC_0432

Pesto alla genovese.

Per due persone

1 spicchio d’aglio

40 foglie di basilico, lavate e asciugate

1 cucchiaio di pinoli

3 cucchiai di parmigiano ben stagionato e grattugiato

1 cucchiaio di pecorino sardo stagionato e grattugiato

Olio extra vergine d’oliva q. b.

sale grosso q. b.

Metodo 1 (con il mortaio)

Nota. Una volta aggiunto il basilico, il pestello va mosso in senso rotatorio per non rovinare le foglie. Il basilico deve mantenere il suo colore verde vivo.

1. Usando un mortaio, pestate l’aglio con due cristalli di sale grosso (useremo poco sale perché i formaggi utilizzati nella ricetta sono già salati).

2. Togliete i gambi e aggiungete gradualmente le foglie di basilico con qualche cristallo di sale. Muovete il pestello in senso rotatorio e pestate tutte le foglie.

3. Aggiungete i pinoli con i formaggi grattugiati e continuate ad amalgamare gli ingredienti con il pestello.

4. Aggiungete l’olio a filo, fino ad ottenere un battuto cremoso.

Metodo 2 ((con il frullatore ad immersione)

Per fare il pesto in modo pratico e veloce, si può utilizzare il frullatore ad immersione con un contenitore alto e stretto. Prima di tritare tutti gli ingredienti è importante aggiungere un paio di cucchiai d’acqua ghiacciata, per evitare che la lama del frullatore si scaldi e quindi rovini il basilico.

1. Mettete il basilico, i pinoli e i formaggi nel contenitore con 3 cucchiai d’olio extra vergine d’oliva e 2 cucchiai d’acqua ghiacciata.

2. Tritate per qualche minuto, poi aggiungete altro olio e tritate fino ad ottenere un pesto cremoso.

Nota.

Per ottenere un pesto ancora più cremoso, si può aggiungere un po’ d’acqua di cottura della pasta al condimento.

Vedi anche la ricetta per il pesto di rucola.

Torta Della Nonna (Grandma’s Custard Pie) easy step by step

DSC_8217

Torta Della Nonna (Grandma’s Pie) is a delicious and delicate pie made with a soft shortcrust pastry and filled with plenty of thick Italian custard (Crema Pasticciera) and garnished with lots of pine nuts and icing sugar. It’s a Florentine recipe, but is also quite popular in Liguria; in fact many bakeries and coffee shops make this wonderful cake in Genoa. I thought it might be difficult for you to come and have a taste so here is the recipe for you to enjoy! 🙂

DSC_8227_01

Tips.

1. It can be quite a difficult to cover the pie with the thin layer of pastry, but you can simplify the recipe using only one layer of shortcrust for the pie case.

2. You might need less custard to fill the pie crust, I used a little less.

DSC_8231

Torta Della Nonna.

Preparation time: 50 minutes + resting time

Cooking time: 40 minutes

Medium difficulty

Ingredients

For the pastry (with the ingredients listed here, follow the method in this recipe)

350 g sifted flour

165 g butter

165 g of sugar

3 egg yolks

a pinch of salt

1/2 teaspoon of baking powder

2 drops of vanilla extract

For the custard or crema pasticciera (with the ingredients listed here, follow the method in this recipe)

1 litre of milk

8 egg yolks

140 g caster sugar

90 g sifted flour

the grated zest of 1 unwaxed lemon (possibly organic)

To garnish

icing sugar to taste

100 g pine nuts

Method.

1. Prepare the shortcrust pastry and place in the refrigerator to cool for 40 minutes.

2. Prepare the custard and let cool, stirring occasionally.

3. Place the pine nuts in water with ice for 30 minutes (so that they won’t burn when you cook them), then dry them with a kitchen towel.

DSC_8159

4. Cut the dough into two pieces, keeping in mind that one pieces should be a bit bigger than the other for the pie crust.

5. Using two pieces of baking paper, roll out the bigger piece of dough (5 mm thickness) to make a tart case with a slightly higher edge. Place the baking paper with the pastry onto the cake tin ( 22 cm wide).

DSC_8156

DSC_8162

6. Pierce the pastry with a fork, then fill with the custard.

DSC_8171

7. Roll out a disk of pastry (5 mm thick), then cover the pie and seal the two layers of pastry. Using a pastry cutter, cut and remove the excess pastry, then top with the pine nuts.

DSC_8175_01

DSC_8180

8. Bake at 180° C (356° F) for 40 minutes and let cool.

DSC_8186_01

9. Place in the fridge for at least an hour, then garnish with icing sugar.

DSC_8204

DSC_8215

DSC_8233_01

If you like this recipe please support the blog by following Foodfulife on Facebook….Thank you so much!!!!

Torta della nonna.

Tempo di preparazione: 50 minuti + il riposo

Tempo di cottura 40 minuti

Media difficoltà

Ingredienti

Per la frolla (con ingredienti scritti qui, seguite la preparazione di questa ricetta)

350 g farina setacciata

165 g burro

165 g di zucchero

3 tuorli d’uova

un pizzico di sale

1/2 bustina di lievito per dolci

2 gocce di estratto di vaniglia

Per la crema (con gli ingredienti scritti qui, seguite la preparazione di questa ricetta)

1 litro di latte intero

8 tuorli d’uova

140 g di zucchero semolato

90 g farina setacciata

la buccia di un limone grattugiato, non trattato e possibilmente bio

Per decorare

zucchero a velo vanigliato q. b.

100 g di pinoli

Preparazione

1. Preparate la pasta frolla e mettetela in frigo a raffreddare.

2. Preparate la crema pasticciera e lasciatela raffreddare, mescolando di tanto in tanto.

3. Mettete i pinoli in acqua con del ghiaccio per 30 minuti (per evitare di bruciarli durante la cottura), poi asciugateli bene con la carta da cucina.

4. Tagliate la pasta in due, tenendo presente che un pezzo dovrà essere un po’ più grande dell’altro per la base della torta.

5. Stendete il pezzo più grande tra due fogli di carta da forno (lo spessore deve essere di circa 5 mm) , come per fare una crostata con il bordo alto. Aiutandovi la carta da forno, trasferite la sfoglia di pasta su una teglia (larga 22 cm).

6. Bucherellate la frolla con una forchetta e riempite con la crema pasticciera.

7. Stendete un disco con la pasta rimasta (di spessore 5 mm), poi ricoprite la torta e sigillate i bordi. Tagliate la pasta in eccesso e ricoprite la torta con i pinoli.

8. Cuocete in forno a 180° per 40 minuti, poi fate raffreddare.

9. Mettete la torta a rassodare nel frigo per almeno un’oretta.  Prima di servire, decorate con abbondante zucchero a velo.

Segui Foodfulife su facebook per tante altre ricette golose!

Traditional Recipe: Torta Caprese

DSC_8662

As the name suggests, the Torta Caprese (Caprese cake) originally comes from Capri, a beautiful little island, near Naples.
Dark brown, a little bit crunchy on the outside but soft and moist in the centre, this delicious and decadent chocolate cake is widely appreciated all over Italy. It is also an amazing gluten-free cake, because it doesn’t contain any flour; although, in some recipes a little bit of flour might be used to dust the baking tin.

DSC_8668

Tips.

1. The Torta Caprese is usually cooked in a large round baking tin (this is 26 cm wide) and shouldn’t be too thick.

2. This is a dark chocolate cake which suits better an adult taste, because it’s not very sweet. It is possible to adjust the recipe for the kids using a sweeter dark chocolate, adding 20 g of sugar to the ingredients and dusting with plenty of icing sugar.

DSC_8661

Torta Caprese.

For 8 servings

easy

Cooking time: 1 hour

Preparation time: 20 minutes

Ingredients

300 g (10.58 oz) almonds (without the skin)

170 g (5.99 oz) butter, softened

100 g (3.5 oz) brown sugar

45 g (1.5 oz) honey

200 g (7.05 oz) dark chocolate (70% cocoa solids)

4 eggs

icing sugar for garnish

cocoa powder to taste

a pinch of salt

Method

1. Toast the almonds in the oven for a few minutes at 180 ° C (356°F). Let cool then grind finely.

DSC_8583

DSC_8588

2. Cut and melt the chocolate in bain-marie for a few minutes.

DSC_8598

3. In a large bowl, mix the butter with 4 egg yolks, honey, the brown sugar and a pinch of salt. Then add the ground almonds with the chocolate and mix well.

DSC_8605

4. Separately, whip all the egg whites until stiff, then gently mix with the rest of the ingredients.

DSC_8594

DSC_8611

5. Grease with butter and line the base and sides of a large cake tin (I am using a tin 26 cm wide) with baking paper (roughly cut down to size). Then fill with the mixture and bake at 150 ° C (302°F) for about 1 hour.

DSC_8613

DSC_8627

6. Take the cake out of the oven and let cool. Dust with some cocoa powder, decorate with icing sugar and serve.

DSC_8629

DSC_8638

DSC_8640

Torta Caprese.

Per 8 persone

Facile

Tempo di cottura: 1 ora

Tempo di preparazione: 20 minuti

Ingredienti

300 g di mandorle sbucciate

170 g di burro morbido (e del burro in più per imburrare la teglia)

100 g di zucchero di canna

45 g di miele

200 g di cioccolato fondente al 70 %

4 uova

zucchero e velo q. b. per guarnire

un pizzico di sale

cacao amaro in polvere q. b.

Preparazione.

1. Tostate le mandorle nel forno per qualche minuto a 180° C. Lasciatele raffreddare e poi tritatele molto finemente.

2. Fate fondere il cioccolato a bagnomaria.

3. In una terrina grande, amalgamate il burro con i tuorli d’uova, il miele, lo zucchero e un pizzico di sale, fino ad ottenere una crema. Aggiungete anche le mandorle con il cioccolato fuso e mescolate bene.

4. A parte, montate gli albumi a neve e uniteli al resto degli ingredienti, mescolando delicatamente dal basso verso l’alto.

5. Imburrate la teglia (uso una teglia larga 26 cm) e ricopritela con della carta da forno (tagliata di misura). Versate il composto nella teglia e infornate a 150°C per circa 1 ora.

6. Sfornate la torta e lasciatela raffreddare. Spolverate con un po’ di cacao amaro, decorate con dello zucchero a velo e servite.

DSC_8665

Traditional Recipe: Fried Sage Leaves

DSC_6398

This is another lovely traditional recipe from Genoa; an extremely easy and cheap dish to prepare, especially if you have a sage plant in the garden! Sage is usually a very tough plant, in this cooking process the leaves become very tender and the aroma of this wonderful aromatic herb gets very delicate and pleasant to taste. It is a wonderful starter, but also a great side dish.
You need the kind of sage with big leaves, not all varieties are suitable for this method of preparation.

DSC_6198

DSC_6202

Fried Sage Leaves.

For 4 people

Ingredients

200 g (7.05 oz) large leaves of sage, washed and dried

100 g (3.5 oz) of plain flour

1 egg white (as a vegan option, make the batter without egg white)

100 ml (3.38 us fl oz) light beer

1 tablespoon extra virgin olive oil

extra virgin olive oil (for frying)

salt

DSC_6190

Method.

1. In a bowl, add 1 tablespoon of olive oil and a pinch of salt to the flour. Then slowly pour in the beer, stirring the mixture with a whisk. Cover with a kitchen towel, then let the batter rest for about 30 minutes.

DSC_6146

2. Whip the egg whites until stiff, then stir them gently into the batter, just before frying.

DSC_6179

3. Heat the extra virgin olive oil, meanwhile, dip the sage into the batter. Fry a few leaves at a time, in plenty of oil.

DSC_6165

DSC_6182

4. Drain the leaves and place them on a plate with plenty of paper towels, to absorb the excess oil. Season with salt and serve.

DSC_6313

DSC_6376

DSC_6355

DSC_6409

Salvia fritta in pastella.

per 4 persone

Ingredienti

200 g di foglie grosse di salvia, lavate e asciugate

100 g di farina

1 albume (per una dieta vegana, si può fare la pastella senza uovo)

100 ml di birra chiara

1 cucchiaio di olio extra vergine d’oliva (per la pastella)

olio extra vergine d’oliva (per friggere)

sale

Preparazione.

1. In una terrina, unite 1 cucchiaio d’olio, un pizzico di sale alla farina. Versate poi a filo la birra, mescolando con una frusta l’impasto. Ricoprite con un canovaccio e lasciate riposare l’impasto per 30 minuti.

2. Montate l’albume a neve e incorporate delicatamente nella pastella, poco prima di friggere.

3. Fate scaldare l’olio e immergete la salvia nella pastella. Friggete alcune foglie per volta in olio abbondante.

4. Scolate le foglie e appoggiatele su un piatto con abbondante carta assorbente. Salate e servite.

 DSC_6195