Tag Archives: Step by step

Torta Della Nonna (Grandma’s Custard Pie) easy step by step

DSC_8217

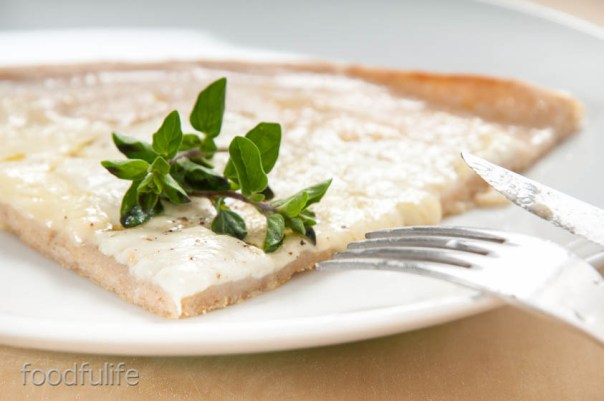
Torta Della Nonna (Grandma’s Pie) is a delicious and delicate pie made with a soft shortcrust pastry and filled with plenty of thick Italian custard (Crema Pasticciera) and garnished with lots of pine nuts and icing sugar. It’s a Florentine recipe, but is also quite popular in Liguria; in fact many bakeries and coffee shops make this wonderful cake in Genoa. I thought it might be difficult for you to come and have a taste so here is the recipe for you to enjoy! 🙂

DSC_8227_01

Tips.

1. It can be quite a difficult to cover the pie with the thin layer of pastry, but you can simplify the recipe using only one layer of shortcrust for the pie case.

2. You might need less custard to fill the pie crust, I used a little less.

DSC_8231

Torta Della Nonna.

Preparation time: 50 minutes + resting time

Cooking time: 40 minutes

Medium difficulty

Ingredients

For the pastry (with the ingredients listed here, follow the method in this recipe)
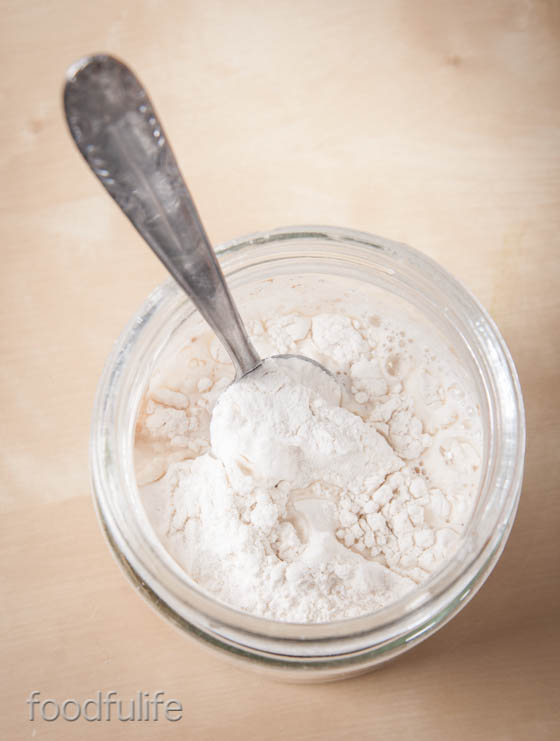
350 g sifted flour

165 g butter

165 g of sugar

3 egg yolks

a pinch of salt

1/2 teaspoon of baking powder

2 drops of vanilla extract

For the custard or crema pasticciera (with the ingredients listed here, follow the method in this recipe)

1 litre of milk

8 egg yolks

140 g caster sugar

90 g sifted flour

the grated zest of 1 unwaxed lemon (possibly organic)

To garnish

icing sugar to taste

100 g pine nuts

Method.

1. Prepare the shortcrust pastry and place in the refrigerator to cool for 40 minutes.

2. Prepare the custard and let cool, stirring occasionally.

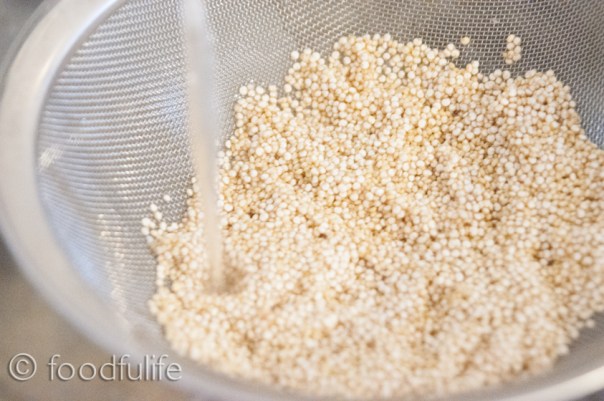
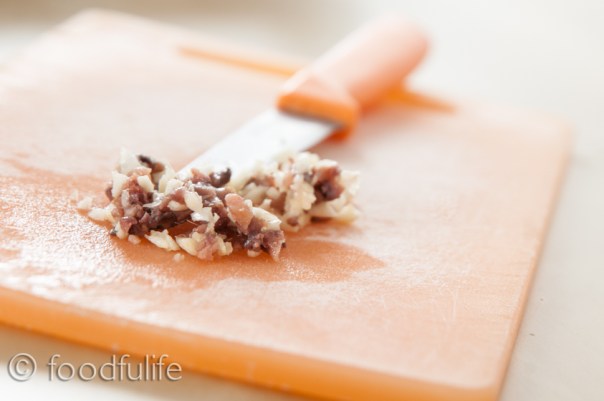
3. Place the pine nuts in water with ice for 30 minutes (so that they won’t burn when you cook them), then dry them with a kitchen towel.

DSC_8159

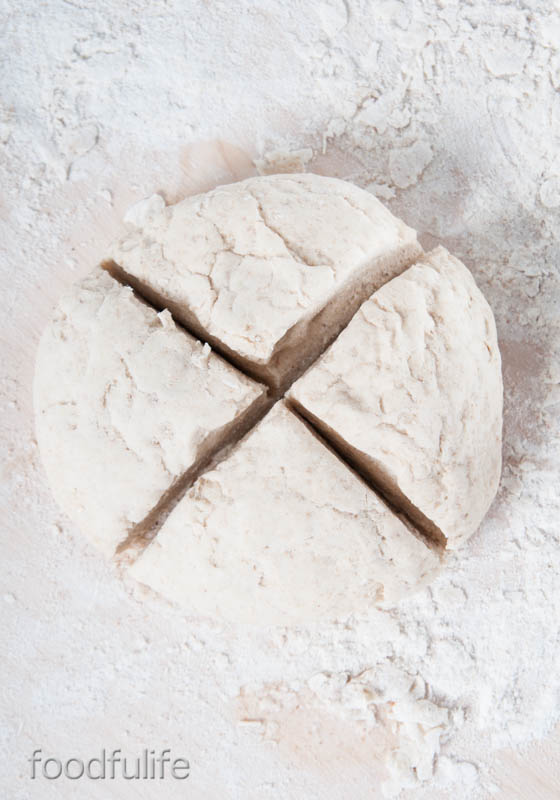
4. Cut the dough into two pieces, keeping in mind that one pieces should be a bit bigger than the other for the pie crust.

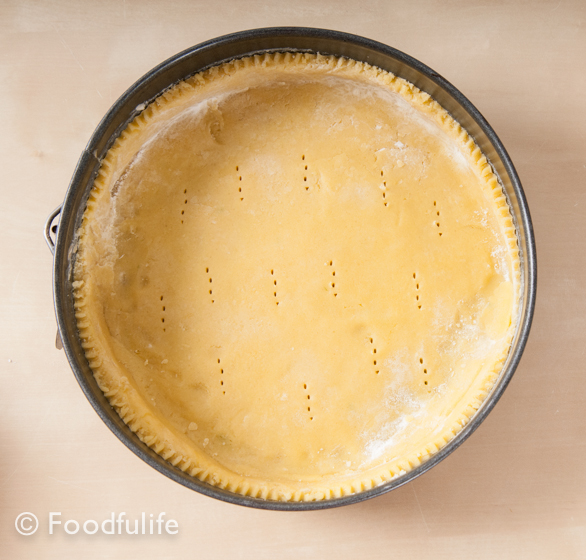
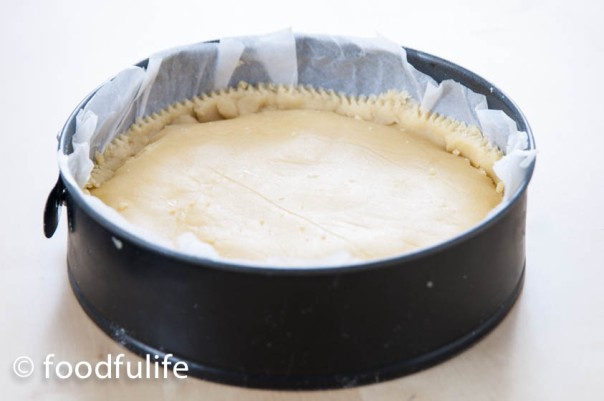
5. Using two pieces of baking paper, roll out the bigger piece of dough (5 mm thickness) to make a tart case with a slightly higher edge. Place the baking paper with the pastry onto the cake tin ( 22 cm wide).

DSC_8156

DSC_8162

6. Pierce the pastry with a fork, then fill with the custard.

DSC_8171

7. Roll out a disk of pastry (5 mm thick), then cover the pie and seal the two layers of pastry. Using a pastry cutter, cut and remove the excess pastry, then top with the pine nuts.

DSC_8175_01

DSC_8180

8. Bake at 180° C (356° F) for 40 minutes and let cool.

DSC_8186_01

9. Place in the fridge for at least an hour, then garnish with icing sugar.

DSC_8204

DSC_8215

DSC_8233_01

If you like this recipe please support the blog by following Foodfulife on Facebook….Thank you so much!!!!

Torta della nonna.

Tempo di preparazione: 50 minuti + il riposo

Tempo di cottura 40 minuti

Media difficoltà

Ingredienti

Per la frolla (con ingredienti scritti qui, seguite la preparazione di questa ricetta)

350 g farina setacciata

165 g burro

165 g di zucchero

3 tuorli d’uova

un pizzico di sale

1/2 bustina di lievito per dolci

2 gocce di estratto di vaniglia

Per la crema (con gli ingredienti scritti qui, seguite la preparazione di questa ricetta)

1 litro di latte intero

8 tuorli d’uova

140 g di zucchero semolato

90 g farina setacciata

la buccia di un limone grattugiato, non trattato e possibilmente bio

Per decorare

zucchero a velo vanigliato q. b.

100 g di pinoli

Preparazione

1. Preparate la pasta frolla e mettetela in frigo a raffreddare.

2. Preparate la crema pasticciera e lasciatela raffreddare, mescolando di tanto in tanto.

3. Mettete i pinoli in acqua con del ghiaccio per 30 minuti (per evitare di bruciarli durante la cottura), poi asciugateli bene con la carta da cucina.

4. Tagliate la pasta in due, tenendo presente che un pezzo dovrà essere un po’ più grande dell’altro per la base della torta.

5. Stendete il pezzo più grande tra due fogli di carta da forno (lo spessore deve essere di circa 5 mm) , come per fare una crostata con il bordo alto. Aiutandovi la carta da forno, trasferite la sfoglia di pasta su una teglia (larga 22 cm).

6. Bucherellate la frolla con una forchetta e riempite con la crema pasticciera.

7. Stendete un disco con la pasta rimasta (di spessore 5 mm), poi ricoprite la torta e sigillate i bordi. Tagliate la pasta in eccesso e ricoprite la torta con i pinoli.

8. Cuocete in forno a 180° per 40 minuti, poi fate raffreddare.

9. Mettete la torta a rassodare nel frigo per almeno un’oretta.  Prima di servire, decorate con abbondante zucchero a velo.

Segui Foodfulife su facebook per tante altre ricette golose!

Cooking Method: Shortcrust Pastry Tart Case

If you are making a tart, it’s possible to cook shortcrust pastry either with the filling or without. Today we will look at all the steps required in order to make a wonderful shortcrust tart case, without the filling and cooked to perfection.

DSC_3767

For the ingredients see this Shortcrust Basic Recipe.

Method. 

1. Take a cake tin (with the dimensions required by the recipe), grease with butter and dust with flour (the butter will help to cook the tart case more evenly).

DSC_3693

2. Roll out the dough (3-5 mm thickness), than wrap it loosely around the rolling pin and place it gently into the cake tin.

3. Using a pastry cutter, cut off the excess dough. With a fork, pierce the base of the dough a few times (this operation helps to avoid air bubbles while cooking).

DSC_3740

4. Place a sheet of aluminium foil on the dough and press it down lightly with your hands (this prevents the dough from collapsing during the cooking process).

5. Fill with dried beans (we use borlotti beans, you can also use rice) and bake at 180 ° C ( 356°F ) for 15-20 minutes (the cooking time will vary depending on the recipe and thickness of the pastry). When the pastry is perfectly cooked remove the foil with the beans and let cool.

DSC_3715

DSC_3757

DSC_3764

DSC_3775

Cottura in bianco della pasta frolla.

La pasta frolla si può cuocere in bianco (cioè senza ripieno) oppure con il ripieno (ad esempio per le ricette della crostata con la confettura di frutta). Oggi vedremo come si fa la cottura in bianco, per preparare crostate con il ripieno che non richiede cottura.

Per gli ingredienti vedere Ricetta base della pasta frolla.

Preparazione.

1. Prendete una teglia delle dimensioni consigliate dalla ricetta, ungetela bene con il burro e spolveratela con la farina (il burro conduce il calore e aiuta ad ottenere una cottura più uniforme).

2. Stendete l’impasto, arrotolatelo sul matterello e poi sistematelo sulla teglia con delicatezza.

3. Con una rotella tagliate la pasta in eccesso. Usando una forchetta, create alcuni fori sulla base della pasta (questa operazione serve per evitare che si formino delle bolle d’aria, quando la base si cuoce).

4. Prendete un foglio di alluminio e sistematelo sulla pasta in modo che aderisca alla forma (questo serve ad evitare che la pasta si abbassi durante la cottura, quando il burro si scioglie).

5. Riempite con dei fagioli secchi e infornate a 180° C per 15-20 minuti (il tempo di cottura dipenderà dalla ricetta e dallo spessore della pasta). A cottura terminata, togliete il foglio di alluminio con i fagioli e fate raffreddare.

How To Make Perfect Pastry (Basic Shortcrust Pastry Recipe).

A perfect shortcrust should have a light crumbly texture which melts in the mouth when you bite into it and tastes heavenly! This is why shortcrust pastry is the most popular when it comes to home-made desserts. Today we are going to look at the basics of the preparation method, including some possible variations.

This is a fairly simple method, but there are some important steps to follow in order to get it right. To obtain a crumbly and light pastry it is important to handle the butter and flour as little as possible, to avoid warming the pastry up with your hand. If the butter melts too much during the preparation method the pastry will change consistency and the result will be heavier than it should be.

DSC_3769

Tips.

1. If the dough is too dry you can add 1/2 egg white or a few tablespoons of water.

2. The ideal thickness for the base of a tart is about 3-5 mm, while 1/2 cm is the ideal thickness for a cookie dough.

3. It is possible to freeze the pastry and use it within a month.

Shortcrust Pastry Basic Recipe.

Medium difficulty

Ingredients

for a 24 cm in diameter cake tin (for 6 servings)

250 g plain flour, sifted

125 g butter, cut into small pieces

100 g sugar

3 egg yolks

aromas (lemon zest or orange zest, vanilla seeds, vanilla extract etc. ..)

a pinch of salt

DSC_3653

Method. 

1. On a board, using a spatula, mix the butter with the sugar.

DSC_3659

2. Add the egg yolks, one at a time.

DSC_3665

3. Add the sifted flour and the aromas. Knead well using a spatula and your hands (this operation should require as little time as possible).

DSC_3674

DSC_3680

4. Roll out the dough on a sheet of baking paper, cover with a second sheet, then fold it and place in refrigerator for at least 30 minutes.

DSC_3685

DSC_3690

5. After the required amount of time, remove the dough from the refrigerator. Beat the dough with a rolling pin to soften its consistency and proceed with your recipe.

DSC_3703

DSC_3739

DSC_3771

Basic variations.

For a more crumbly pastry:
Use hard-boiled yolks instead of raw and/ or add more butter to the recipe. If you add butter remember that you can add up to 80% of the total weight of the flour (e.i. if you use 500 g of flour, you can use up to 400 g of butter).

For a lighter pastry:
You can decrease the butter down to a minimum of 30% of the total weight of the flour used in the recipe.

For a crunchier pastry:
Increase the dose of sugar, bearing in mind that the dough will be sweeter.

For a finer pastry:
Use icing sugar instead of caster sugar. You can also use Italian flour 00, which is finer than plain flour.

For a drier pastry (e.g. to make cookies):
Use whole eggs (whites and yolks), adding 25 g of sugar and 25 g of butter.

For a taller pastry (for example to make cookies):
Add 1 teaspoon of baking powder to the dough.

Also see Cooking Method: Shortcrust Pastry Tart Case

Preparazione Base Della Pasta Frolla (Metodo A Mano).
Oggi vedremo insieme la preparazione base per fare la pasta frolla, la pasta più utilizzata per i dolci fatti in casa. E’ un metodo abbastanza semplice, che però comporta un minimo di attenzione nella preparazione e nella cottura, specialmente se si fanno delle crostate che richiedono una cottura in bianco, cioè senza il ripieno.
Per ottenere una buona pasta frolla, friabile e leggera al punto giusto, è importante che si proceda con gli ingredienti ancora freddi e si eviti di maneggiare troppo il burro e la farina durante la lavorazione, per non riscaldarli.

Note.

1. Nel caso l’impasto risultasse troppo asciutto si può aggiungere 1/2 albume oppure qualche cucchiaio d’acqua, per dare più elasticità.

2. E’ possibile surgelare la pasta frolla e utilizzarla entro un mese dal congelamento.

3. Se volete prepare la base di una crostata lo spessore ideale è di 3-5 mm e invece 1/2 cm è lo spessore ideale per i biscotti.

Ricetta base per la pasta frolla.

Media difficoltà

Ingredienti

per foderare uno stampo 24 cm di diametro (per 6 persone)

250 g di farina 00

125 g di burro a pezzetti

100 g di zucchero

3 tuorli d’uova

aromi (la buccia di limone o arancia grattugiata, i semi di vaniglia ecc..)

un pizzico di sale

Preparazione.

1. Su una spianatoia e utilizzando una spatola, per non riscaldare l’impasto, tagliate e amalgamate il burro con lo zucchero.

2. Aggiungete i tuorli, uno alla volta, al resto degli ingredienti.

3. Aggiungete gli aromi e la farina. Lavorate bene tutti gli ingredienti, sempre con la spatola e aiutandovi con le mani solo se necessario.

4. Stendete l’impasto su un foglio di carta da forno e ricopritelo con un secondo foglio. Piegate l’impasto a portafoglio e mettetelo nel frigo per almeno 30 minuti.

5. Passato il tempo necessario, togliete l’impasto dal frigorifero, battetelo con un matterello per ammorbidirlo e procedete con la vostra ricetta.

Possibili varianti nella consistenza.

1. Per una pasta frolla più friabile:
Utilizzate nell’impasto i tuorli delle uova sode, invece che crude e (oppure) aumentate la dose di burro. Se aggiungete il burro, non bisogna superare l’80% del peso della farina (cioè su 500 g di farina si possono utilizzare fino a 400 g di burro).

2. Per una pasta frolla più leggera:
Si può diminuire il burro fino al 30% dell’intero peso della farina utilizzata nella ricetta.

3. Per una pasta frolla più croccante:
Aumentate la dose di zucchero, tenendo presente che l’impasto sarà più dolce.

4. Per una pasta frolla più fine:
Utilizzate lo zucchero a velo al posto di quello semolato.

5. Per una pasta frolla più secca (ad esempio per fare i biscotti):
Utilizzate le uova intere (albumi e tuorli), aggiungendo 25 g di zucchero e 25 g di burro all’impasto.

6. Per una pasta frolla più gonfia (ad esempio per fare i biscotti):
Aggiungete 1 cucchiaino di lievito per dolci all’impasto.

Vedere anche Cottura in bianco della pasta frolla

Traditional Recipe: Saffron Risotto

Saffron Risotto (Risotto Allo Zafferano) is a Lombard recipe, much appreciated in the North of Italy for its wonderful delicate flavour and also because is one of the simplest risotto recipes to make. This amazing risotto is usually served on its own, without meat or fish and it has a lovely saffron flavour, well complemented with the Parmesan cheese, which is added at the final stage of the recipe, like in most Italian risotto dishes.

DSC_0627

Saffron Risotto is often confused with Milanese Risotto (Risotto alla Milanese), another renowned Lombard recipe; in both these risottos we use saffron as a main ingredient but there are some differences in the ingredients.

Tips.

1. It is very important to only use good quality products, in order to make a delicious risotto.

2. Also see How To Make A Perfect Risotto

DSC_0660

Saffron Risotto (Risotto allo Zafferano) 

Medium difficulty

Preparation time: 5 minutes (not considering the broth)

Cooking time: 25-30 minutes

Ingredients

For 4 servings

350 g (12.3 oz) Carnaroli rice or Arborio rice

a pinch of saffron (enough to colour the rice of a bright yellow)

1 large onion, very finely chopped

1 glass of good white wine (not acidic, this is very important!)

150 g (5.3 oz)  freshly grated Grana Padano cheese

125 g (4.4 oz) good quality fresh butter

1 litre (33, 8 fl oz us) hot vegetable broth (see below)

For vegetable broth

1 large carrot

1 large onion

1 celery stalk (also use the leaves, if you have them)

salt and pepper to taste

Method.

1. In a large pan, prepare the vegetable broth. Wash, clean and roughly chop the vegetables, then fill the pan with plenty of water and cook the vegetables until tender. Season with some fine sea salt (do not exceed), then sift the broth and remove the vegetables.

DSC_0600

2. Sauté the onion in 80 g of butter, over a low heat for about 10-15 minutes.

DSC_0605

3. Add the rice and fry for a few minutes over a medium heat, then pour in a glass of white wine and stir. Shimmer until all the wine evaporates.

DSC_0609

4. Lower the heat and add the hot broth (a little at a time), stirring constantly. Let the broth evaporate and continue adding the broth and stirring, until the rice is creamy and properly cooked. During the cooking time add the saffron (diluted in a little bit of warm vegetable broth).

DSC_0615

DSC_0620

5. Turn off the heat and add the finals ingredients to the risotto. Add the rest of the butter, 3-4 tablespoons of grated Grana Padano and season with salt and pepper ( taste it and season only if needed), then stir and cover with a lid. Let the risotto rest for a few minutes and serve.

DSC_0645

DSC_0639

DSC_0629


How To Make A Perfect Risotto

Risotto is one of the finest Italian dishes and is appreciated all over the world. There are endless variations. Each region has its own traditional risotto recipes made with seafood, meat or vegetables. Today we are going to explore the method to make a perfect risotto, the Italian way!

Four important steps.

To make a good risotto it is important to follow each recipe step by step. There are 4 basic steps in the preparation process of each risotto:

1. Sauté the onions

2. Fry the rice

3. Cook the risotto

4. Let the risotto rest

Today we are going to see each of these steps in depth.

DSC_0597

A few notes on the preparation process.

1. The preparation time and the ingredients will vary depending on the recipe.

2. During the whole process you have to constantly stir the risotto, therefore it’s important to prepare all the ingredients before you start cooking.

3. Don’t reheat the risotto because the rice will become chewy and dry. Prepare the risotto and serve it.

DSC_0594

Method.

1. Sauté the onions. Sauté the onions in butter over a very low heat, until they are very tender and almost transparent.

Notes. The onions have to dissolve in your mouth when you taste the risotto. You can replace the onions with shallots, spring onions or garlic, depending on the recipe.

DSC_0607

2. Fry the rice. When the onions are ready, add the rice and then fry it over a medium heat for a few minutes (stir constantly).

DSC_0608

3. Cook the risotto. After frying the rice, add the wine.  Once the wine flavour is absorbed and the alcohol evaporated, add the hot broth (usually a full ladle at a time) and cover the rice with it. Continue cooking and stirring. Once the liquid is almost completely absorbed, add more broth until you reach the ideal cooking consistency.

DSC_0602

Notes. Use hot broth, because a cold broth will lower the temperature and compromise the cooking process.

DSC_0613

4. Let the risotto rest. When the risotto is creamy and properly cooked, add the final ingredients (usually butter and cheese), stir well, cover with a lid and let the rice rest for a few minutes. Now the risotto is ready to be served.

Note. This will make the risotto very creamy and tasty.

Also see Traditional Recipe: Saffron Risotto

DSC_0639


Make The Best Pizza Dough ( Part 2)

I already published a basic pizza dough recipe with normal yeast a few weeks ago, this is basically the same recipe adapted for sourdough. Before getting started with the recipe, let me say a few things about sourdough.

Why sourdough?
Sourdough is a natural yeast created by fermenting flour with water. It is a long process, which is not particularly complicated, but it takes some time and care.
Basically, you create the natural yeast, then you feed it and keep it in good shape, that’s really all there is to it! In exchange, your sourdough will reward you with a lot of flavour, leavening strength and satisfaction!
Moreover, sourdough is healthier and much more digestible than commonly used yeast. Another good reason to use it is the difference in taste, as sourdough’s flavour is much more delicate and pleasant than all the other yeasts.
So, don’t give up if you haven’t tried yet, instead give it a go and you’ll see the difference, I promise you!
To get started with sourdough you can follow the step by step recipe here.

DSC_7541

Some things you have to know before you go on with the recipe:

1. The flour-sourdough ratio in recipes is usually 3 to 1 (3 parts of flour plus 1 part of sourdough). In order to prepare approximately 500 g of dough we will use 375 g of flour with 125 g of sourdough. You can use this recipe to make sourdough bread as well as pizza.

2. Semi-liquid sourdough contains a lot of water, therefore you have to add less water than in normal yeast pizza and bread recipes. My advice is to add a little bit of water gradually.

3. Sometimes it’s useful to make the dough in the evening and then keep it in the fridge with some extra water over night. The following day, take it out of the fridge two hours before you use it (knead the dough a little, then make the pizzas and let them rise for a couples of hours at room temperate). During this process the dough will rise much better and faster.

DSC_7548

Sourdough Pizza Crust.

Ingredients

For 2 large pizzas

Recipe No. 1

210 g flour 00 (or plain, unbleached all-purpuse flour)

135 g whole spelt flour

30 g durum wheat flour (semolina)

125 g sourdough (semi-liquid and made ​​with manitoba flour)

10 g salt

a pinch of barley malt (optional)

extra virgin olive oil to taste

water

Note.

If you use the sourdough starter made ​​from flour 00 (or plain, unbleached all-purpose flour) the ingredient ratio changes slightly:

Recipe No. 2

130 g flour 00 (or plain, unbleached all-purpuse flour)

135 g whole spelt flour

80 g Manitoba flour

30 g durum wheat flour (semolina)

125 g sourdough (semi-liquid and made with flour 00 of plain, unbleached all-purpuse flour)

10 g salt

a pinch of barley malt (optional)

extra virgin olive oil to taste

water

Method.

1. Sift and mix the flour on a wooden board or a large bowl (use a fine sieve). Mix the flour with the sourdough and a little bit of water. Add the salt and, if you want, you can also add 2 tablespoons of extra virgin olive oil with a pinch of malt.

DSC_7477-2

2. knead vigorously, until you get an elastic dough. Let the dough rise in a sheltered place for 3-6 hours (the rising time varies depending on different factors, the dough is ready when it has doubled in volume).

DSC_7487

DSC_7490

3. Take two large oven trays, cover them with baking paper and brush them with plenty of extra virgin olive oil. Roll out the dough with a rolling pin, make two pizza bases and then add the other ingredients (I am going to make a pizza with mozzarella cheese and crescenza, a nice sweet and creamy Italian cheese)

DSC_7509

DSC_7512

DSC_7519

4. Let the pizzas rise for about 1 hour, then bake in a preheated oven at 190° (374°F) for 20-30 minutes.

DSC_7533

DSC_7555

Impasto base per la pizza con lievito madre.

Ingredienti

2 pizze grandi

Ricetta n°1

210 g di farina 00

135 g di farina di farro integrale

30 g di semola rimacinata

125 g di lievito madre (semiliquido, a base di farina manitoba)

acqua q. b.

10 g di sale

pochissimo malto d’orzo (facoltativo)

olio extra vergine d’olio d’oliva q. b.

Nota.

Se usate il lievito madre a base di farina 00 gli ingredienti variano leggermente:

Ricetta n° 2

130 g di farina 00

135 g di farina di farro integrale

80 g di farina manitoba

125 g di lievito madre (semiliquido con base di farina 00)

30 g di semola rimacinata

10 g di sale

acqua q. b.

pochissimo malto d’orzo (facoltativo)

olio extra vergine d’olio d’oliva q. b.

Metodo.

1. Mescolate, setacciate le farine e sistematele a fontana su una spianatoia o mettetele in una ciotola grande. Unite il lievito madre alla farina con un po d’acqua. Mescolate leggermente, poi aggiungere il sale con cucchiai d’ olio extra vergine di oliva e un pizzico di malto, se desiderate aggiungerli.

2. Lavorate energicamente gli ingredienti, fino ad ottenere un impasto omogeneo ed elastico. Lasciate lievitare l’impasto in un luogo riparato per 3-6 ore (il tempo di lievitazione varia a seconda di diversi fattori, l’impasto è pronto quando sarà raddoppiato di volume).

3. Prendete due teglie grandi, ricopritele con carta da forno e spennellatele con abbondante olio extra vergine d’oliva. Stendete la pasta con un matterello e fate due basi per pizza, poi aggiungere gli altri ingredienti (in questo caso faremo una pizza bianca con crescenza e mozzarella).

4. Lasciate lievitare le pizze per circa 1 ora, poi fate cuocere a 190° C in forno preriscaldato per 20-30 minuti (dipende dallo spessore della pasta).

DSC_7558

How To Make Sourdough (re-edited).

DSC_7382

What is sourdough?

Sourdough is a natural yeast, obtained by fermenting flour and water. It can have a solid or a liquid consistency, depending on the amount of water used to feed it. Liquid sourdough usually rises better.

I personally recommend the preparation and use of this great ingredient because it’s completely natural, therefore much healthier and more digestible than other yeasts. Sourdough can be used to make a variety of breads, pizzas, pies and cakes with surprising results. Moreover, it makes everything taste better!

Preparing the sourdough starter.

1. First you have to make a starter. Mix 1 cup of organic wholemeal flour (the wholemeal flour is necessary for the first feed) with 1/2 cup of cool water (use non-chlorinated water, you can mix tap water with still drinking water from a bottle).
Put the ingredients in a glass, stainless steel or a plastic container for food.

DSC_7335

2. Stir all the ingredients together, until creamy and smooth, then cover the container with a damp cloth and let it sit for 24 hours.

DSC_7367

DSC_7348

3. After 24 hours remove the top half of the mixture, then feed the starter again with 1 cup of plain flour (you can use manitoba, whole spelt or wholemeal flour, if you prefer) and half a cup of water. Stir well, cover with a damp cloth and let it sit for another 24 hours.

DSC_7355

DSC_7363

DSC_7367

4. Now you can start feeding the starter every two days. Repeat this process for about 10 days.

DSC_7376

5. After 10 days, you can start feeding your sourdough every 4-5 days and you can use it for your recipes.

Store the sourdough.

1. Store the sourdough in a glass jar and keep it in the fridge (with the lid on).

2. Each time you feed the sourdough let it sit for 1-2 hours at room temperature in a glass jar covered with a damp cloth (with no lid on). Then remove the cloth, close the container and put it back in the refrigerator.

DSC_7385

Doses.

1. Feed the sourdough the day before you use it (12 hours before). To feed the sourdough, weight the natural yeast, then add the same amount of  flour and half the amount of water.

2. In the quickest recipes, the ratio of flour and sourdough used must be 3 to 1. (e.g. for 900 g of flour use 300 g of sourdough).

3. The rising time of the dough will depend on the age and strength of the yeast, at first it may take 3 to 6 hours (however, when it doubles in size it is ready for use).

DSC_7378

DSC_6085

DSC_6203

La pasta madre.
La pasta madre è un lievito naturale che si ottiene facendo fermentare farina e acqua. Questo lievito può avere una consistenza più solida o liquida, a seconda della quantità d’acqua utilizzata, normalmente la versione più liquida ha una lievitazione migliore.

Consiglio vivamente la preparazione e l’utilizzo di questo ingrediente, essendo un lievito completamente naturale e quindi molto più digeribile e salutare rispetto ad altri lieviti comunemente utilizzati. Inoltre può essere usato facilmente nella preparazione di svariati tipi di pane, pizze torte salate e dolci con risultati sorprendenti.

Preparazione della pasta madre.

1. Per prima cosa, preparate un piccolo impasto unendo 1 tazza di farina integrale biologica (la farina integrale è necessaria per il primo impasto) a 1/2 tazza d’acqua fredda (utilizzate acqua con poco cloro, potete miscelare l’acqua del rubinetto con acqua minerale naturale).

2. Mettere gli ingredienti in un contenitore (è consigliabile utilizzare un contenitore di vetro oppure acciaio inossidabile, ma anche la plastica per alimenti va bene) e mescolare fino ad ottenere un composto cremoso. Coprire il contenitore con un panno umido e lasciate riposare per 24 ore.

3. Passate 24 ore, levate la parte dura in superficie e rinfrescare quello che resta del lievito, cioè aggiungete al composto 1 tazza di farina (potete utilizzare la 00, manitoba oppure farina integrale, come preferite) e mezzo bicchiere d’ acqua. Mescolare bene, coprire con un panno umido e lasciate riposare per altre 24 ore.

4. Ora potete rinfrescare il lievito ogni 2 giorni, utilizzando sempre una tazza di farina e 1/2 tazza d’acqua. Continuate con questa procedura per circa 10 giorni.

5. Dopo 10 giorni, potete incominciare a rinfrescare la pasta madre ogni 4-5 giorni. Arrivati a questo punto, la vostra pasta madre è pronta per essere utilizzata nelle vostre ricette.

La conservazione.

1. Conservate la pasta madre in un vasetto di vetro, chiuso con il coperchio e tenuto in frigorifero.

2. Dopo ogni rinfresco, lasciate riposare il lievito madre per una o due ore in un vasetto coperto da un panno umido a temperatura ambiente, poi chiudete il contenitore e rimettetelo nel frigorifero.

Le dosi consigliate.

1. Nutrite la pasta madre il giorno prima di utilizzarla (almeno 12 ore prima). Per nutrire la pasta madre, prima pesate il lievito naturale, poi aggiungere la stesso peso di farina e metà del peso di acqua.

2. Nelle ricette più rapide, il rapporto tra farina e pasta madre deve essere di 3 a 1, cioè su 900 g di farina utilizzeremo 300 g di lievito naturale.

3. Il tempo di lievitazione dipenderà dall’età e dalla forza della pasta madre. I tempi possono variare dalle 3 alle 6 ore, consiglio però di non guardare l’orologio ma di osservare il volume dell’impasto, quando raddoppia è pronto per l’uso.

Make the Best Pizza Dough (Part 1)

Making your own pizza dough, for the first time, is probably one of the most satisfying things you can ever experience in your kitchen. There is something magical about the whole process, from the moment you first see the dough rising, up to the moment you actually see your beautiful creation coming out of the oven. I personally enjoy everything about this process and this is why I don’t buy it anymore. Moreover, once you start experimenting with different flours and ingredients, especially if you use natural yeast (but we will see this in part 2), home-made pizza can become a truly special dish to make.

DSC_6063

 A few words on the preparation.

To prepare (approximately) 500 g of dough for pizza or bread you must use 500 g of flour, 15 g of yeast, 10 g salt and some water.

For this recipe I used different kinds of organic flour which have very different qualities from one another and help to create a certain harmony of flavours and textures. The amount of water in the dough and the leavening time may vary, depending on the ingredients used. This type of dough can be used, not only to make pizza but it’s also great to make focaccia and other breads.

Notes. You can decide to add extra virgin olive oil and barley malt (or honey) to the recipe or not, depending on your personal taste. The extra virgin olive oil gives a crunchier crust and the malt (or honey) will help the leavening process, but both these ingredients will add some extra calories to your recipe, so if you are on a diet,  don’t use them.

DSC_5964

I am giving you two options here, choose the dough with the ingredients that you prefer.

Basic pizza dough (with normal yeast)

 Ingredients 

For two large pizzas

to prepare (approximately) 500 g of bread dough or pizza base

 for a wholemeal dough 

250 g plain flour (unbleached all-purpose flour)

100 g whole spelt flour (or farro flour)

100 g Manitoba flour

50 g durum wheat semolina flour

15 g yeast

200-250 ml warm water (but add more if necessary)

10 g salt

extra virgin olive oil to taste

a big pinch of barley malt or honey (optional)

 for a plain flour dough 

If you prefer a dough made mostly with plain flour, then use:

250 g plain flour

250 g manitoba flour (or durum wheat semolina flour)

15 g yeast

200-250 ml warm water (add more if you need to)

10 g salt

extra virgin olive oil to taste

a big pinch of barley malt or honey (optional)

DSC_5972

 Method (for both doughs). 

1. Break up the yeast into small pieces and mix it with a bit ‘of warm water and a few tablespoons of flour. Create a small dough and let it double in volume.

DSC_5991

DSC_5998

DSC_6019

2. Sift the remaining flour with a fine sieve and make a well on a wooden board, then pour 200-250 ml warm water (gradually) and salt in the centre (also add 1 tablespoon of extra virgin olive oil and a pinch of malt, if you wish). Mix the ingredients.

DSC_6022

3. Add the yeast dough (from step 1) to the mixture and knead vigorously.

DSC_6027

4. Let it rise in a sheltered place until the dough has doubled volume (it might take between one or two hours).

DSC_6030

5. Take two large oven trays, cover them with baking paper and brush the paper with plenty of extra virgin olive oil. Roll out the dough with a rolling pin and then add the other ingredients (mozzarella, tomatoes, olives etc.).

DSC_6089

DSC_6090

DSC_6100

6. Let it rise again for 30 minutes, then bake in preheated oven at 190 ° C (374° F) for 20-30 minutes.

DSC_6134-2

This pizza is called “Marinara” and is made with anchovies, tomatoes and crushed garlic. A very cheap and simple dish, but full of flavour!

DSC_6170

See also Make the best pizza dough part 2 (with sourdough)

Impasto per la pizza (con lievito di birra).

Per preparare 500 g di pasta per la pizza o da pane generalmente si utilizzano 500 g di farina, 15 g di lievito di birra, 10 g di sale e acqua.

In questo caso utilizzerò farine biologiche di vario tipo, che presentano qualità molto diverse tra loro e che aiutano a creare una certa armonia di fragranza e croccantezza. La quantità d’ acqua necessaria da utilizzare potrebbe variare leggermente, a seconda delle farine e degli altri ingredienti utilizzati, così come il tempo di lievitazione. Questo tipo di impasto può esse utilizzato anche per preparare focacce e pane.

Nota. Ho aggiunto l’ olio extravergine d’oliva e il malto d’orzo nella lista degli ingredienti, perché servono a creare una crosta più croccante e a far lievitare meglio l’impasto (nel caso del malto).

Vi darò due ricette, così potete scegliere l’impasto con gli ingredienti che preferite.

Impasto base per la pizza (con lievito di birra)

Ingredienti 

Per due pizze grandi

per preparare 500 g di pasta da pane o per pizza

Impasto con farina integrale

250 g farina 00

100 g farina di farro integrale

100 g Manitoba

50 g semola di grano duro rimacinata

15 g di lievito di birra

200-250 ml di acqua tiepida

10 g di sale

olio extra vergine d’oliva q. b.

una punta di cucchiaio di malto d’orzo (facoltativo)

Impasto con farina 00

Se preferite un’impasto semplice con farina bianca allora utilizzate i seguenti ingredienti:

250 g di farina 00

250 g di farina Manitoba

15 g di lievito di birra

200-250 ml di acqua tiepida

10 g di sale

olio extra vergine d’oliva q. b.

una punta di cucchiaio di malto d’orzo (facoltativo)

 Metodo (per entrambi gli impasti). 

1. Spezzate il lievito in piccoli pezzi e mischiatelo con un po’ d’ acqua tiepida e qualche cucchiaio di farina, fino a creare un panetto. Lasciate raddoppiare il panetto di volume.

2. Setacciate il resto della farina e disponetela a fontana su una spianatoia con 200-250 ml d’ acqua tiepida e il sale (aggiungete anche l’olio e il malto, se volgete utilizzarli). Mescolate leggermente.

3. Aggiungete il panetto di lievito e impastate tutto energicamente.

4. Lasciate lievitare in un luogo riparato, finché il volume dell’impasto sarà raddoppiato (una o due ore).

5. Utilizzate due teglie grandi, ricopritele con della carta da forno e spennellate con abbondante olio extra vergine d’oliva. Stendete l’impasto con un matterello, aggiungete gli   altri ingredienti (mozzarella, pomodori, origano ecc.) e infornate a forno preriscaldato a 190° C per 20-30 minuti.

Special Stuffed Calamari (Quinoa Recipe)

DSC_4810

Stuffed calamari (calamari ripieni) is a very popular dish in Italy. Normally, the recipe is made with bread stuffing and some variation on the other ingredients. This time, we are going to prepare a quinoa stuffing with peas, anchovies and garlic. It is a wonderful starter and a great main meal served with vegetables. It might seem a little complex to prepare, but it’s such a delicious full-flavoured dish that it’s worth a try!

Tip. Calamari ( squid) should be fresh and properly cleaned before you start the preparation. It’s very important not to over cook the seafood, because calamari can become very chewy and unpleasant to eat. If that happens continue to cook them until they become tender again (in this case, remember to add more wine and some vegetable or fish stock).

DSC_4813

 Stuffed Calamari (quinoa recipe)

Ingredients 

for 3 servings

Preparation: 40 minutes

400g (14.1 oz) cleaned calamari (squid)

1 clove of garlic

2 tablespoons extra virgin olive oil

1 splash of white wine (non-acidic)

salt and pepper to taste

For the filling

50 g (1.76 oz) quinoa (uncooked)

3 tablespoons extra virgin olive oil

2 cloves of garlic

2 anchovies

3 tablespoons finely chopped fresh parsley

20 g (0.7 oz) of frozen peas

1 egg

30 g (1.05 oz) grated Parmesan cheese

White wine (good quality)

Salt and pepper to taste

 Method

1. Wash the quinoa, using a strainer under running water, for a few minutes (to remove the natural bitter taste).

DSC_4725

2 . Cook for 15 minutes in 200 ml (6.76 us oz fl, 0.35 uk pt) of water, then cover with a lid and set aside.

3.  Separate the tentacles from the top of the body of the calamari. Finely chop the tentacles.

DSC_4746

DSC_4747

4. Chop two cloves of garlic and two anchovies and gently fry them over a low heat with three tablespoons of extra virgin olive oil.

DSC_4756

5. Add the chopped tentacles with the peas and (after a couple of minutes) drizzle with a little bit of white wine.

DSC_4760

DSC_4766

6. Add the quinoa with two tablespoons of parsley, then stir and after a few minutes turn off the heat.

DSC_4770

7. Combine the ingredients with an egg, the Parmesan cheese, some salt and pepper and mix well. Stuff the calamari using a teaspoon (and your fingers) or a piping bag ( fill only 2/3 to avoid braking the calamari during the cooking time) . Seal the calamari with toothpicks.

DSC_4772

DSC_4774

DSC_4783

DSC_4795

8. Put the calamari in a frying pan with two tablespoons of extra virgin olive oil, a chopped clove of garlic, a splash of white wine and season with salt and pepper. Cook for 10 minutes at a medium heat,  after 5 minutes add a tablespoon of parsley and stir. Serve warm.

DSC_4803

DSC_4811

Calamari ripieni con quinoa.

 Ingredienti

per 3 persone

400 g di calamari puliti (senza dente)

1 spicchio d’aglio

2 cucchiai di olio extra vergine d’oliva

1 spruzzata di vino bianco (non acido)

sale e pepe q b

 Per il ripieno

50 g quinoa (cruda)

3 cucchiai di olio extra vergine d’oliva

2 spicchi d’aglio

3 cucchiai di prezzemolo (tritato finemente)

20 g di piselli surgelati

Sale e pepe q b

1 uova

30 g Parmigiano Reggiano grattugiato

vino bianco (non acido) q b

2 acciughe sott’ olio (alici)

 Preparazione

1. Lavate la quinoa, utilizzando un colino sotto l’acqua del rubinetto, per qualche minuto (questa operazione serve a togliere il sapore amaro della quinoa).

2. Fate bollire per 15 minuti in 200 ml d’acqua, poi spegnete il fuoco, coprite con un coperchio e mettete da parte.

3. Usando un coltello, separate i tentacoli dalle tasche dei calamari. Tritate finemente i tentacoli.

4. Tritate e fate soffriggere a fuoco basso due spicchi d’aglio e due acciughe con tre cucchiai di olio extra vergine d’oliva.

5. Aggiungete i tentacoli tritati con i piselli e annaffiate con un po’ di buon vino. Fate ritirare a fuoco lento.

6. Aggiungete la quinoa con due cucchiai di prezzemolo, mescolando per qualche minuto e poi spegnete il fuoco.

7. Unite agli ingredienti un uovo, del parmigiano, sale, pepe e mescolate bene. Riempite i calamari usando un cucchiaino o la saccapoche (riempite solo 2/3, per evitare che si rompano durante la cottura). Chiudete con degli stuzzicadenti.

8. Mettete i calamari in una padella con due cucchiai d’olio, uno spicchio d’aglio tritato, uno spruzzo di vino bianco e un po’ di sale e pepe. Fate cuocere per 10 minuti a fuoco medio, aggiungendo un cucchiaio di prezzemolo dopo 5 minuti. Spegnete e servite.