Tag Archives: Italian cooking

Almond And Raisin Genoese Pandolce (Sweet Bread)

Each Christmas, as you probably know by now,  I make my own Pandolce recipe using different ingredients, depending on the flavour and texture I wish to achieve. This year, however, I’ve decided to stick to a more traditional version of this wonderful cake.

Preparation time: 15 minutes + the resting time (15 minutes)

Cooking time: 50 minutes

Ingredients

For 8-10 servings

220 g Manitoba flour (or spelt flour)

100 g unbleached all purpose flour (or Italian flour 00 )

100 g softened butter

1 egg

1 and a half tablespoons of honey

90 g sugar

1 teaspoon baking powder

1 teaspoon baking soda

a few drops of vanilla essence

150 g shelled almonds (you could replace some almond with pine nuts, to make it even more traditional)

200 g of raisin

80 g of candied fruit cut into small pieces

milk to taste (a few tablespoons, just enough to make a soft dough)

Method.

1. Mix the butter with the sugar and the egg, then add the honey. Add two drops of vanilla essence, then stir until the mixture is soft and creamy.

2. Separately, mix the two flours with the baking soda and the baking powder; then add the almonds, the raisins and the candied fruit. Combine the ingredients with the creamy mixture, add a few tablespoons of milk and work the dough for a few minutes. If the dough is too sticky add some flour. Then place in the refrigerator for 15 minutes.

3. Remove the dough from the refrigerator and bake at 170 ºC /388º ,with the fan of the oven running, for 40-50 minutes. Keep the door open with a metal object until the cake is cooked, in order to let the steam out (I use a small padlock).

I Wish You A Merry Christmas!!! <3<3<3

Pandolce con uvetta e mandorle.

Tempo di preparazione: 15 minuti + tempo di riposo (15 minuti)

Tempo di cottura: 50 minuti

Ingredienti

Per 8-10 porzioni

220 g di farina di manitoba (o farina di farro)

100 g di farina 00

100 g di burro ammorbidito

1 uovo

1 cucchiaio e mezzo di miele

90 g di zucchero

1 cucchiaino di lievito per dolci

1 cucchiaino di bicarbonato di sodio

alcune gocce di essenza di vaniglia

150 g di mandorle sgusciate (potete sostituire un po’ di mandorle con i pinoli, per renderlo ancora più tradizionale)

200 g di uva passa

80 g di frutta candita tagliata a pezzettini

latte q. b.  (pochi cucchiai, quel tanto che basta per fare un impasto morbido)

Metodo.

1. Mescolate il burro con lo zucchero e l’uovo, quindi aggiungete il miele. Aggiungete due gocce di essenza di vaniglia, poi mescolate fino ad ottenere un composto morbido e cremoso.

2. Separatamente, unite le due farine con il bicarbonato e il lievito; quindi aggiungete le mandorle, l’uvetta e i canditi. Unite gli ingredienti al composto cremoso, aggiungete qualche cucchiaio di latte e lavorate l’impasto per alcuni minuti. Se l’impasto risultasse troppo appiccicoso potete aggiungere un po’ di farina. Mettete l’impasto in frigorifero a riposare per 15 minuti.

3. Togliete l’impasto dal frigorifero e infornate a 170 ºC per 40-50 minuti, con la ventola in funzione. Tenete la porta aperta con un oggetto metallico (uso un lucchetto di un paio di centimetri di spessore) per tutta la durata della cottura, in modo da far uscire il vapore.

Caprese Flatbread Wraps (piadine alla caprese)

Today we are going to prepare a delicious Caprese salad in “pockets”, a fresh and light meal for a healthy lunch on the go, that can also be served as a tasty appetiser. These Caprese Piadinas are perfect for this season and they are so quick and easy to make!

Italian flatbread with Caprese salad on a wooden board. Piadina con mozzarella e pomodorini.

See also the Whole spelt Piadina (Italian flatbread) recipe

Caprese flatbread wraps

Ingredients

Serves 4

4 spelt Piadinas ( Whole grain Italian flatbreads)

2 fresh mozzarella cheeses

12 ripe Piccadilly or cherry tomatoes

a handful of fresh basil leaves

extra virgin olive oil to taste

salt and pepper to taste

Mozzarella cheese, cherry tomatoes and basil leaves on wooden board.

Method.

1. Drain and squeeze the mozzarellas well.

2. Wash and dry the tomatoes and the basil leaves, then cut the tomatoes into halves.

basil leaves, mozzarella and cherry tomatoes on a wooden board.

3. Fold and then fill each Piadina with 6 pieces of tomatoes, some slices of the mozzarella and some basil leaves.

Italian flatbread with Caprese salad on a wooden board. Piadina con mozzarella e pomodorini.

4. Season with plenty of extra virgin olive oil, salt, pepper and serve.

Italian flatbread with Caprese salad on a wooden board. Piadina con mozzarella e pomodorini.

Italian flatbread with Caprese salad on a wooden board. Piadina con mozzarella e pomodorini.

Tip. You can add some crushed garlic, a few drops of balsamic vinegar and/ or a pinch of dried oregano for more flavour.

Piadina alla caprese.

Ingredienti

Per 4 persone

4 piadine sfogliate grandi (andate alla ricetta della piadine di farro)

2 mozzarelle freschissime

12 pomodori maturi (piccadilly o ciliegino)

una manciata di foglie di basilico fresco

olio extra vergine di oliva q.b.

sale e pepe q.b.

Preparazione.

1. Scolate e strizzate bene le mozzarelle.

2. Lavate e asciugate i pomodori, poi tagliarli a metà. Mondate e lavate anche le foglie di basilico.

3. Piegate e riempire ogni Piadina con 6 pezzi di pomodori, qualche fetta di mozzarella e qualche foglia di basilico.

4. Condire con abbondante olio extra vergine di oliva, sale, pepe e servite.

Nota.

Potete aggiungere agli ingredienti anche un po’ d’ aglio crudo (tritato molto finemente), qualche goccia di aceto balsamico e / o un pizzico di origano per dare sapore.

Pear And Gorgonzola Risotto (no oil, no butter)

DSC_4422

This pear and gorgonzola risotto is definitely another highly addictive dish!….One of those dishes that you just can’t stop eating, even when you have picked up the last grain of rice and swept up the all the traces of what was left on the plate with a spoon!

A truly delicious risotto, where the flavours blends perfectly together and the consistency is perfectly creamy and yet quite “light”. In fact, there is no need to add any oil or butter, because the cheese already does the job!

DSC_4405

Cooking tips.

1. For the preparation of this dish you’ll need quite a good quantity of pepper and salt to balance out the flavours and sweetness of the pears.

2. It is important to keep the vegetable broth quite warm during the whole cooking process, in this way the rice won’t stop cooking when you add the broth to the risotto.

3. Always get the best quality ingredients when making a risotto! For this dish I used the best quality of fresh Gorgonzola, sweet, tangy and so creamy that it literally melts in the mouth.

Pear and gorgonzola risotto.

Preparation and cooking time: 25 minutes

Easy

Ingredients

Serves 4

320 g risotto rice (Carnaroli or Arborio)

3 kaiser pears (or any pear suitable for cooking)

200 g good quality Gorgonzola cheese, cut into small pieces

80 g of Grana Padano cheese

salt to taste

plenty of ground black pepper

2 tablespoons of fresh parsley, finely chopped (optional)

1 litre of hot vegetable stock (I used an organic cube stock, without glutamate)

Method

1. Peel and clean the pears, then cut the fruit into little pieces.

2. Toast the rice grains in a pan (without any oil or butter) for a few minutes.

DSC_4393

3. Add the pieces of fruit with two ladles of broth and let shimmer over a low heat.

DSC_4394

4. Once the liquid has almost completely evaporated, add more broth and let evaporate again, then continue this process until the rice is cooked (the rice will take about 18-20 minutes to cook).

DSC_4396

5. When the rice is properly cooked, add 200 g of Gorgonzola cheese, 80 g of Grana Padano, salt and pepper. Mix well.

DSC_4398

6. Mix well, then cover the pan with a lid and let sit for a few minutes. Sprinkle with fresh parsley and serve.

DSC_4406

DSC_4423

Note.

At the end of the cooking process the risotto should be very creamy, however it might thicken a little when you add the cheeses (see step 5). It’s ok, you can solve this problem by adding one or two ladles of warm vegetable broth to the risotto, which will make it creamier.

Risotto alle pere e gorgonzola

Tempo di preparazione e cottura: 25 minuti

Facile

Ingredienti

Per 4 persone

320 g di riso da risotto (Carnaroli o Arborio)

3 pere kaiser (o altre pere adatte alla cottura)

200 g di gorgonzola di buona qualità, tagliato a cubetti piccoli

1 litro di brodo vegetale caldo (uso del dado biologico senza glutammato)

80 g di Grana Padano

prezzemolo fresco tritato molto finemente (facoltativo)

sale q. b.

pepe a volontà

Preparazione.

1. Pelate e pulite le pere, poi tagliate la polpa a pezzi piccoli.

2. Fate tostare i chicchi di riso in una pentola (senza olio o burro) per qualche minuto.

3. Unite la polpa delle pere con due mestoli di brodo al riso. Mescolate e lasciate evaporare il liquido a fuoco molto basso.

4. Aggiungete gradualmente altro brodo e fate evaporare, continuando così per tutto il tempo di cottura (il risotto cuoce in 18-20 minuti).

5. A cottura terminata, aggiungete 200 g di Gorgonzola, 80 g di Grana grattugiato, sale e tanto pepe.

6. Mescolate bene, coprite la pentola con un coperchio e lasciate mantecare per qualche minuto. Aggiungete del prezzemolo tritato finemente e servite.

Nota.

Se a fine cottura il risotto dovesse risultare poco cremoso, aggiungete un po’ di brodo caldo, quindi mescolate e fate mantecare.

DSC_4427

DSC_4435

Cooking Method: Pizza Margherita

DSC_3061-2

Plain but full of flavour, Pizza Margherita is one of the most appreciated pizzas in Italy! We use only fresh and the best quality ingredients, in order to get the right combination of flavours. It’s so simple but really delicious!

I often prepare this pizza with a sourdough starter and make a dough using mainly spelt flour, because I love it’s nutty flavour and crunchy texture. Here is my favourite sourdough recipe for the pizza base and the normal yeast version.

Pizza Margherita

Preparation time: 5 minutes + the time to make the dough

Cooking time: 30-40 minutes

Ingredients

For two large pizzas

2 pizza bases (use the dough you prefer)

Two good quality mozzarellas (if you want more flavour you can use buffalo mozzarella)

200 g good quality tomato sauce (sweet and not acidic)

2 tablespoons of chopped marjoram (fresh or dried)

Extra virgin olive oil and salt to taste ( I mix them with the tomato sauce and herbs)

Method.

1. Preheat the oven at the highest temperature and with the fan running (to dry out the excess water from the cheese). Place the pizza stone in the oven (the pizza stone has to heat up gradually, because otherwise it will break).

2. Once the pizza stone is hot, remove it from the oven and dust with some dried (quick cooking) polenta (the polenta will make the pizza crust crunchier).

3. Roll out the pizza dough on the stone, top with the ingredients and place to cook in the oven, with the fan running, for 30-40 minutes (depending on the temperature you are using).

Notes.

1. Use the best quality tomato sauce you can get ; if the tomato sauce is too acidic, you can add some sugar and make it sweeter.

2. Mozzarella is usually preserved in water, so you have to rinse it really well and squeeze it with your hands when you use it.

3. You can use different herbs to personalise your pizza; we often use oregano, basil or marjoram.

Stuffed Vegetables (Gluten-Free and Vegetarian)

Stuffed vegetables (gluten-free and vegetarian)_ Verdure ripiene vegetariane, senza glutine.

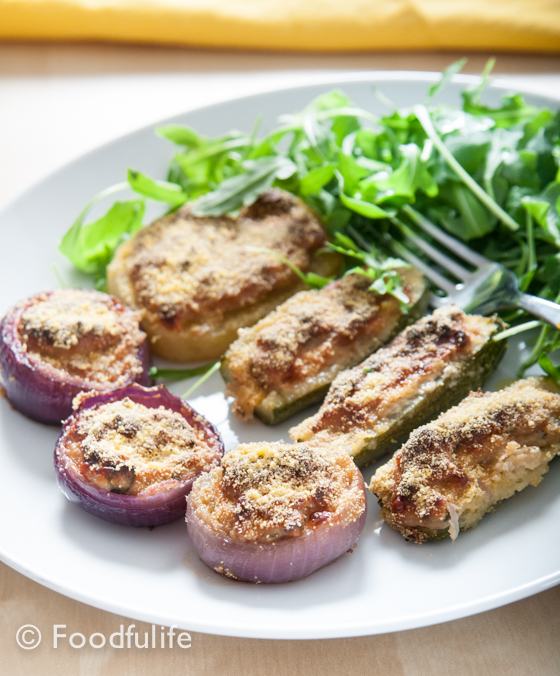
Stuffed vegetables are a typical genoese dish, which requires quite a long preparation and cooking time, but it’s worth it! In this case, I adapted my mom’s recipe to create a gluten-free, vegetarian dish, using ricotta, plenty of fresh marjoram (which is also in the traditional recipe) and some gluten-free breadcrumbs. These stuffed vegetables are incredibly tasty, soft in the middle and crunchy on the outside; a wonderful Sunday meal to share with family and friends!

My advice is to make plenty, keep them in the fridge and eat them the next day, they taste even better!

DSC_7725

Stuffed vegetables without meat and gluten-free.

Cooking time: 1 hour 15 minutes

Preparation time: 30 minutes

difficulty: medium

Ingredients

for 1 medium-large tray of stuffed vegetables

2 medium potatoes

4 medium-large zucchini (to be divided into 8 pieces)

2 onions, plus 1 small onion to sauté

1 clove of garlic

1 egg

50 g grated Parmesan cheese

125 g ricotta

3 full tablespoons of fresh marjoram, chopped

5 tablespoons of extra virgin olive oil

some gluten-free bread crumbs to sprinkle on top and 2 tablespoons to add to the stuffing (or you can use pre-cooked polenta)

salt and pepper to taste

Method.

1. Steam all vegetables, until they are cooked but still crunchy.

2. Slice the potatoes, then place the smallest slices in a bowl and set aside for the stuffing.

3. Using a spoon and a knife, scoop out the central part of the zucchini and cut the onions in half (from the centre, not from the roots). Remove the central and the outer layers of onions, then put them in the bowl with the rest of the vegetables for the stuffing.

DSC_7641

DSC_7627

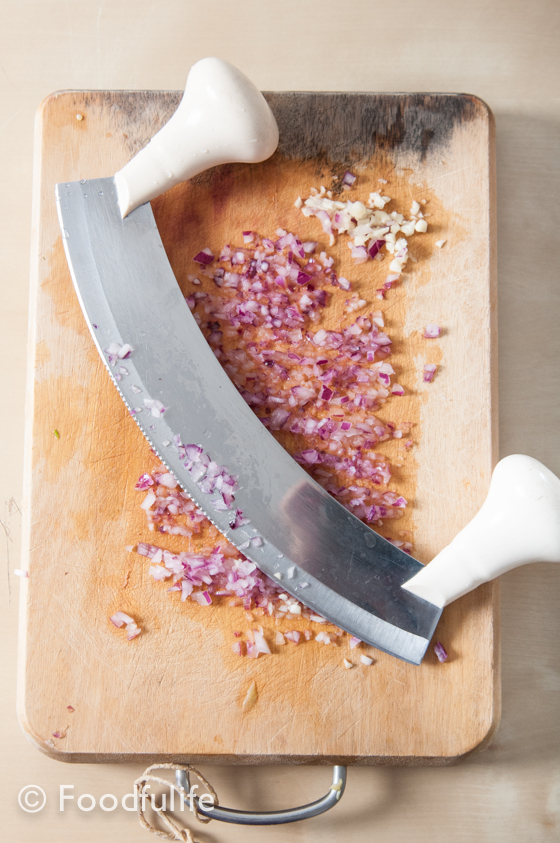
4. In a frying pan, sauté the onion with a clove of garlic, both finely chopped (add the garlic after a few minutes, to prevent burning).

DSC_7651

5. Remove the excess water, then using a food processor, puree all the vegetables for the stuffing. Fry over a medium heat, stirring well, until the mixture gets a little bit drier.

DSC_7654

6. In a food processor, mix the ricotta with the Parmesan cheese, 2 tablespoons of gluten-free bread crumbs, the marjoram and an egg. In a large bowl, add the vegetables puree to the ricotta mixture, then mix and season with salt and pepper.

DSC_7659

DSC_7660

7. Grease a baking tray with 2 tablespoons of extra virgin olive oil, then place the vegetables onto the tray and fill them with the stuffing.

DSC_7630

DSC_7673

8. Sprinkle some gluten-free bread crumbs on top, season with a little more extra virgin olive oil and bake at 200 ° C (392° F), until the vegetables are well coloured (about 30-40 minutes).

DSC_7735

DSC_7728

Verdure ripiene senza carne e senza glutine.

Cottura: 1 ora e 15 minuti

Preparazione: 30 minuti

Difficoltà media

Ingredienti

per 1 teglia medio-grande

2 patate di media grandezza

4 zucchini medio-grossi (da dividere in 8 pezzi)

2 cipolle , più 1 cipolla per il soffritto da mettere da perte

1 spicchio d’aglio

1 uova

50 g di parmigiano grattugiato

125 g di ricotta

3 cucchiai abbondanti di maggiorana fresca e tritata

5 cucchiai d’olio extravergine d’oliva

pangrattato senza glutine q. b. (oppure potete usare della polenta istantanea)

sale e pepe q. b.

Preparazione.

1. Fate cuocere a vapore tutte le verdure e toglietele dal fuoco ancora sode.

2. Tagliate le patate a fette, poi mettete le fette piccole e rotte in un contenitore per il ripieno.

3. Tagliate gli zucchini e scavate la polpa usando un cucchiaino e un coltello. Tagliate le cipolle a metà (non dalle radici ma dal centro), poi prendete la parte centrale e lo strato esterno delle cipolle e metteteli, con la polpa degli zucchini, nel contenitore per il ripieno.

4. In una padella, fate soffriggere 1 cipolla e uno spicchio d’aglio, entrambi tritati finemente (aggiungete l’aglio qualche minuto dopo, per evitare che si bruci).

5. Strizzate bene le verdure del ripieno per togliere l’acqua in eccesso, poi frullate e aggiungete al soffritto. Fate asciugare a fuoco medio e mescolando bene.

6. A parte, frullate la ricotta con il parmigiano, la maggiorana, due cucchiai di pangrattato senza glutine e un uovo. In una terrina grande, unite il purea di verdure passata in padella al composto di ricotta, poi mescolate e insaporite con sale e pepe.

7. Ungete una teglia con 2 cucchiai di olio extravergine d’oliva, disponetevi le verdure tagliate a metà, poi riempitele con il ripieno e spolverate con abbondante pangrattato senza glutine.

8. Condite con un filo d’olio e infornate a 200°C, finché le verdure saranno ben colorate (30-40 minuti).

DSC_7714

Traditional Recipe: Crema Pasticciera (Italian Custard Cream)

La Crema Pasticciera is a thick and rich custard cream used in Italian patisserie as a filling or ingredient for pastries, cakes and various desserts. Often aromatised with lemon or vanilla, this custard is so popular because it is extremely pleasing to the eye and palate, with its wonderful flavour and velvety creamy texture.

It is possible to aromatise la Crema Pasticciera in various ways, for example using chocolate or coffee, but also liqueurs and the zest of different citrus fruits. In uncooked desserts, it is often mixed with whipped cream to obtain a lighter and more delicate custard.

Crema Pasticciera.

1 litre whole milk

8 egg yolks

160 g caster sugar

80 g sifted flour

1 vanilla pod, or the grated zest of 1 organic lemon

Method.

1. In a pan, bring the milk with the vanilla pod (opened and emptied into the milk) to a boil, or add the lemon zest (the aromas you use will depend on your personal taste). Then sieve the milk.

DSC_5301

2. In a large bowl, whisk the egg yolks with the sugar until creamy.

DSC_5333

3.. Add the flour to the egg mixture and gently stir from the bottom upwards.

DSC_5337

DSC_5346

4. Gently pour the hot milk into the mixture and stir. Put the custard onto a low heat to thicken for about 5 minutes (stirring constantly, but gently).

DSC_5355

5. After 5 minutes, turn off the heat and put the cream in a bowl (stirring occasionally) to cool.

DSC_5401

6. Cover with a sheet of cling film, to prevent the skin from forming on the top and put in the refrigerator. Stir the custard vigorously before using.

DSC_5412

Notes.

1 It’s important to mix the egg yolks with the sugar straight away, to prevent crystals from forming.

2. Cook over a medium-low heat and use a thick bottom sauce pan to avoid burning the custard cream.

3. kept in a refrigerator, the cream should be used within 3 days.

DSC_5395

If you like this recipe please support the blog by following foodfulife on facebook! Thank you so much!!! 🙂

Crema Pasticciera (ricetta base)

1 litro di latte intero

8 tuorli d’uova

160 g di zucchero

80 g di farina 00, setacciata

1 baccello di vaniglia, oppure la scorza grattugiata di un limone non trattato

Preparazione.

1. In un tegame, portate ad ebollizione il latte con il baccello di vaniglia (aperto e svuotato nel latte), oppure aggiungete la scorza di limone. Filtrate il latte usando un colino fine.

2. In una terrina grande, montate i tuorli con lo zucchero, fino ad ottenere una crema spumosa.

3. Unite la farina alle uova e mescolate delicatamente dal basso verso l’alto.

4. Versate il latte caldo a filo nel composto e mescolate delicatamente con una frusta. Mettete la crema sul fuoco ad addensare per almeno 5 minuti, continuando a mescolare delicatamente.

5. Spegnete il fuoco, mettete la crema a raffreddare in una ciotola e mescolate ogni tanto.

6. Ricoprite con la pellicola per alimenti, per evitare che si formi la pellicina in superficie e mettete in frigorifero. Mescolate la crema energicamente prima di utilizzarla.

Note.

1. E’ importante mescolare subito i tuorli con lo zucchero per evitare che si formino dei cristalli.

2. Cuocete a fiamma medio-bassa per evitare che la crema si attacchi al fondo della pentola. E’ consigliabile usare una pentola con il fondo spesso.

3. Conservata in frigorifero, la crema va utilizzata entro 3 giorni.

DSC_5365

Home-Made Pizza With Tomatoes, Rocket and Parmesan Cheese

A crunchy pizza base, topped with fresh Piccadilly tomatoes, some rocket leaves and Parmesan cheese…

An easy recipe, perfect for this season!

Enjoy!

DSC_0986

Pizza with tomatoes, rocket and Parmesan cheese.

Ingredients

for 2 large pizzas

Buy 2 ready made pizza bases or follow this recipe

For the pizza toppings

2 fresh mozzarellas (or you can use stracchino)

300 g Piccadilly tomatoes or cherry tomatoes

60 g rocket leaves (arugula)

50 g Parmesan cheese (thin slices)

Extra virgin olive oil

salt and pepper to taste

Method.

1. Wash and dry the rocket leaves and the tomatoes. Cut the tomatoes in half.

2. Using a rolling pin, roll out the pizza dough and make two large pizza bases.

DSC_0911

DSC_0926

3. Bake the pizza bases at 200 ° C (392°F) until they are crunchy (I am using a use a pizza stone, but you can use a baking tray greased with olive oil).

4. Add the mozzarella cheese and put the bases back in oven for a few minutes, to melt the cheese.

DSC_0938

DSC_0941

5. Turn off the oven and garnish your pizzas. Place the tomatoes, the rocket leaves and Parmesan cheese onto the pizza bases, then season with extra virgin olive oil, salt and pepper.

DSC_0958

DSC_0972

DSC_0965

DSC_1026

Pizza con pomodorini freschi, rucola e parmigiano.

Ingredienti

Per 2 pizze grandi

Per fare due basi per la pizza seguite questa ricetta

Per guarnire le pizze

2 mozzarelle (oppure stracchino)

300 g di pomodorini Piccadilly

60 g di rucola

50 g di scaglie di Parmigiano Reggiano

olio extra vergine d’oliva

sale e pepe q. b.

Preparazione.

1. Lavate e asciugate la rucola e i pomodorini, poi tagliate i pomodorini a metà.

2. Stendete la pasta con un matterello.

3. Infornate le basi della pizza a 200° C (uso una pietra per la cottura della pizza, ma potete usare una teglia unta). Fate cuocere fino ad ottenere una pasta croccante.

4. Aggiungete la mozzarella e infornate ancora per qualche minuto, per far sciogliere il formaggio.

5. Sfornate le pizze e spegnete il forno. Disponete i pomodorini, la rucola e il parmigiano sulle pizze, poi condite con abbondante olio extra vergine d’oliva, sale e pepe.