Tag Archives: Desserts

Tangerine Custard Pots

SER_1584

SER_1597

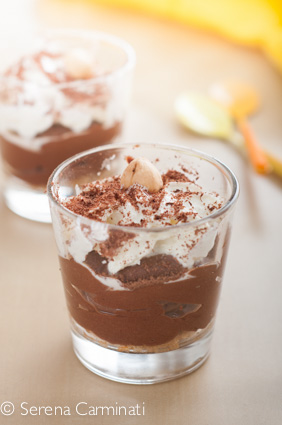
A delicately flavoured tangerine custard cream, baked in small pots. This dessert is super easy to make and is a great alternative to plain custard. I added some cardamom seeds in the recipe, however it ‘s totally up to you if you want to add them or not. Cardamom seeds can give a nice spicy kick to the dessert, however you have to add just a hint of really finely ground seeds (not like in the pictures) or you might get a strong bitter flavour.

You can use this tangerine custard as a cake filling if you cook it in a pan on a moderate heat instead of baking it. Have fun with this recipe and be creative with it! 🙂

SER_1505

Tangerine custard pots.

Ingredients

For 2 small terracotta pots

300 ml of milk

4-5 seedless tangerines (organic)

a piece of lemon zest

2 egg yolks

1 spoonful of cornstarch

3 finely ground cardamom seed (just the seeds, not the pods)

2 tablespoons of sugar for the custard and 2 more tablespoons for the syrup

Method.

1. Wash the tangerine really well, then peel the skin off and place the slices on the side.

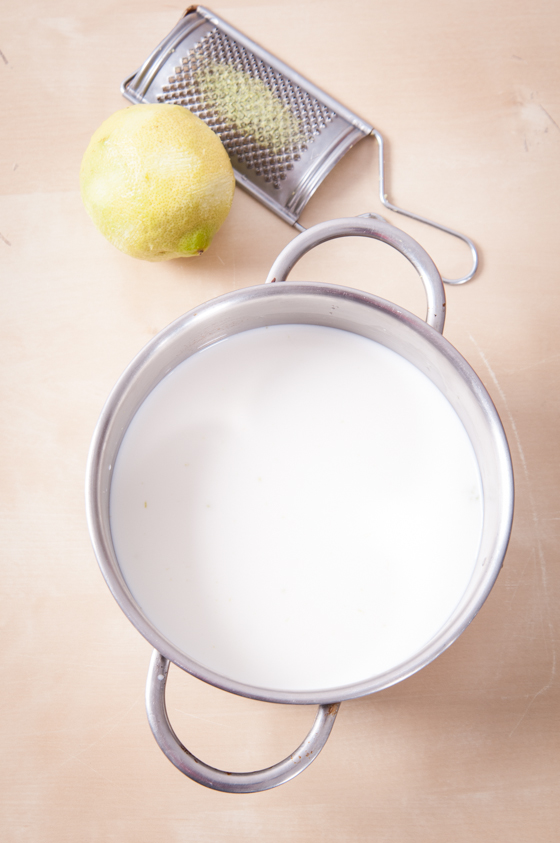
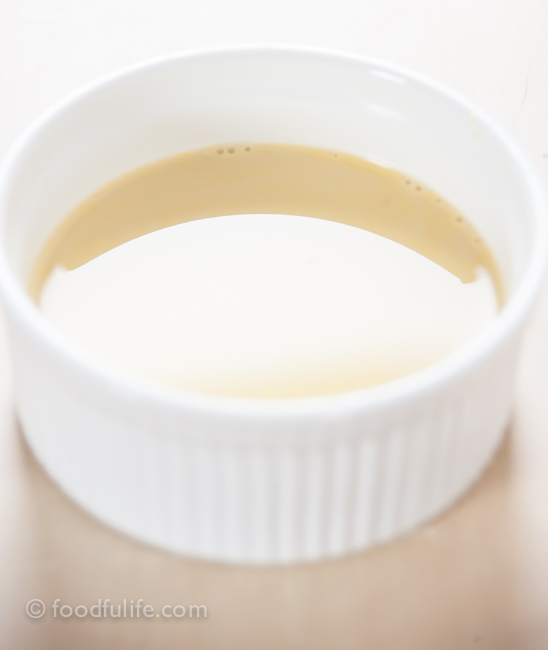
2. Place the tangerine and the lemon skin in a small pan, add 300 ml of milk, then bring to the boil. Boil for a few minutes, until the tangerine skins release their flavour.

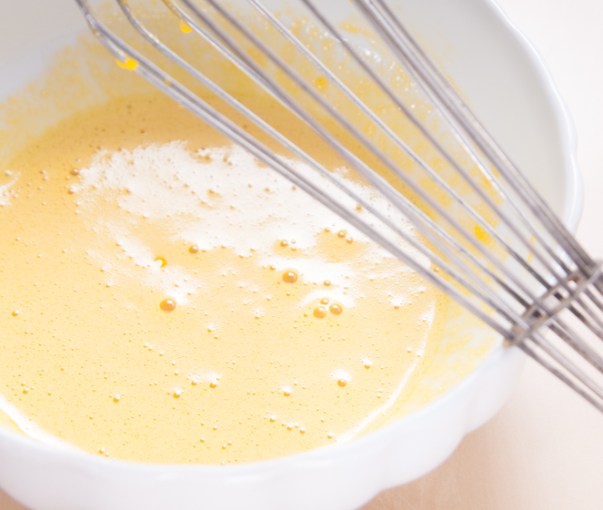
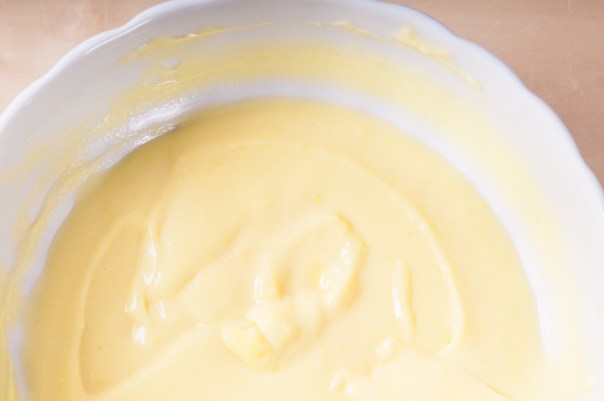
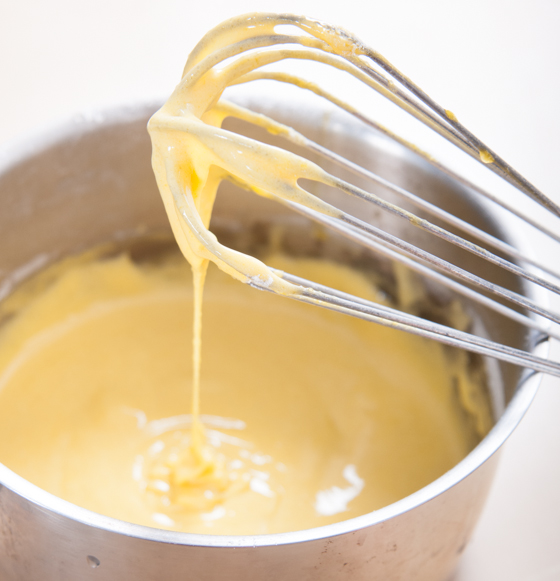
3. In a small bowl, whisk 1 spoonful of cornstarch with two tablespoons of sugar and two egg yolks, until you get a creamy mixture. Gradually pour the boiling milk into the egg mixture (but remove the skins with a strainer) and whisk well.

SER_1520

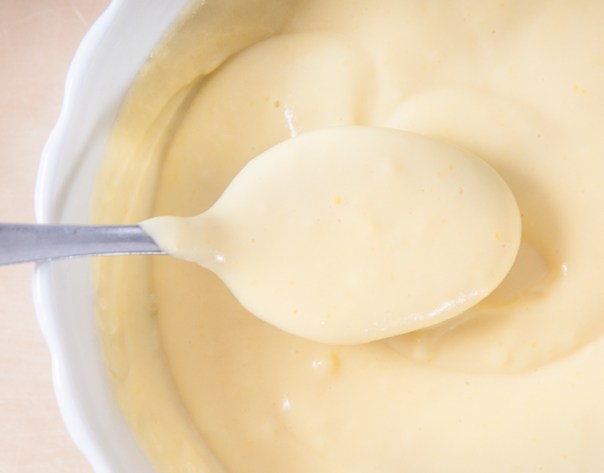
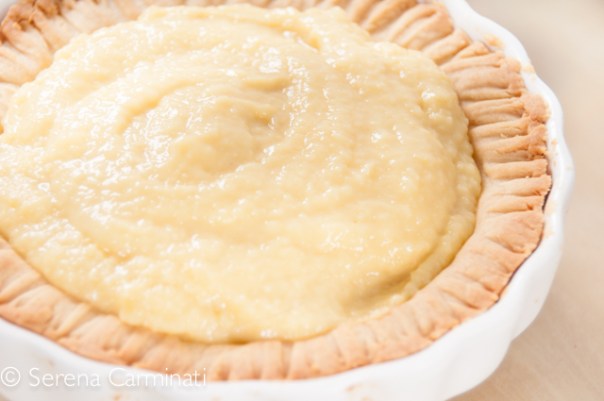
4. Pour the mixture into two pots and place on a thick oven tray filled with water. Bake at 160° C (320 ° F) until the custard has thickened.
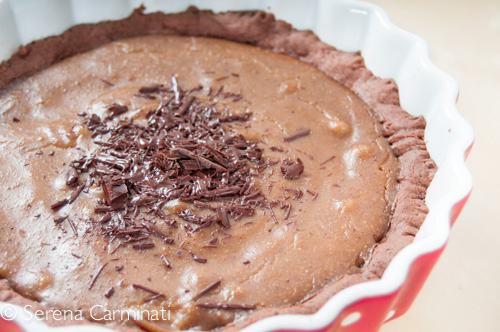
SER_1529

SER_1571

SER_1583

For the decoration.

In a small pan put 2 tablespoons of sugar and then cover with water, then add the tangerine slices and bring to the boil. Continue to cook at a moderate heat until you have a syrup. Decorate the custard pots with the tangerine slices, a hint of finely ground cardamom seeds and then pour some syrup on top.

Terrine di crema cotta al mandarino.

Ingredienti

2 stampini piccoli di terracotta

300 ml di latte

4-5 mandarini non trattati (senza semi e a buccia sottile)

un pezzo di scorza di limone

2 tuorli d’uovo

1 cucchiaio di amido di mais

3 semi di cardamomo, finemente macinati (non il baccello, ma i semi)

2 cucchiai di zucchero, per fare la crema pasticciera

2 cucchiai di zucchero, per fare lo sciroppo.

Preparazione.

1. Lavate bene i mandarini, quindi levate le bucce e mettete gli spicchi da parte.

2. Mettete le scorze dei mandarini e del limone con 300 ml di latte in un pentolino e portate ad ebollizione. Fate bollire per alcuni minuti.

3. Mescolate 1 cucchiaio abbondante di amido di mais con due cucchiai di zucchero e due tuorli d’uovo, fino ad ottenere un composto cremoso. Versate gradualmente il latte bollente nel composto e, contemporaneamente, levate le bucce dei mandarini filtrando con un colino. Mescolate bene.

4. Riempite due stampini piccoli di terracotta con il composto e metteteli in una teglia riempita d’acqua (x cuocere nel forno la crema a bagnomaria). Infornate a 160 ° C e fate cuocere fino a quando la crema si sarà rassodata. Lasciare raffreddare.

Per la decorazione.

Mettete 2 cucchiai di zucchero e ricoprire con un po’ d’acqua, poi aggiungete le fette di mandarino e portate ad ebollizione. Continuate la cottura a fuoco moderato fino a quando si dispone di uno sciroppo. Decorate le crema pasticciera con le fette di mandarino, un pizzico di semi di cardamomo finemente macinate e lo sciroppo.

SER_1596

Best Christmas treats!

Here are some ideas for your Christmas Party! I hope you like my choices! 🙂

Click on the links or the pictures for the recipes.

Pandolce al cioccolato con le nocciole ( a wonderful traditional Christmas cake made with lots of hazelnuts and chocolate)

Pandolce alla genovese con nocciole e cioccolato (hazelnuts and chocolate pandolce)

Baci di dama (Absolutely gorgeous! Hazelnuts and chocolate joined together for pure pleasure!)

DSC_2285

Bavarian cream with chocolate -caramel sauce (an incredibly soft vanilla dessert, served with a delicious sauce)

DSC_5894

 Shortbread biscuits with black pepper and fennel seeds (So sweet and spicy, these cookies melt in the mouth and can be very addictive!!! )

DSC_0280

Dark chocolate and marrons glacés Tart (Decadent and delicious!)

Slice Of Dark Chocolate And Marrons Glacés Tart

Torta Paradiso with Crema Pasticciera (This is a gorgeous sponge cake that can be served with any filling you wish… I would serve it with this delicious Italian custard cream)

DSC_2842

Step 6. Stir the custard before using.

Torta della Nonna (An amazing cake, made with a shortbread crust and top layer, filled with a thick custard and topped with lots of pine nuts! Truly special!)

Torta della nonna (grandma's cake)

French meringues (I know this is a recent post, but I think meringues are a perfect Christmas treat!)

DSC_2997-4

Torta Della Nonna (Grandma’s Custard Pie) easy step by step

DSC_8217

Torta Della Nonna (Grandma’s Pie) is a delicious and delicate pie made with a soft shortcrust pastry and filled with plenty of thick Italian custard (Crema Pasticciera) and garnished with lots of pine nuts and icing sugar. It’s a Florentine recipe, but is also quite popular in Liguria; in fact many bakeries and coffee shops make this wonderful cake in Genoa. I thought it might be difficult for you to come and have a taste so here is the recipe for you to enjoy! 🙂

DSC_8227_01

Tips.

1. It can be quite a difficult to cover the pie with the thin layer of pastry, but you can simplify the recipe using only one layer of shortcrust for the pie case.

2. You might need less custard to fill the pie crust, I used a little less.

DSC_8231

Torta Della Nonna.

Preparation time: 50 minutes + resting time

Cooking time: 40 minutes

Medium difficulty

Ingredients

For the pastry (with the ingredients listed here, follow the method in this recipe)

350 g sifted flour

165 g butter

165 g of sugar

3 egg yolks

a pinch of salt

1/2 teaspoon of baking powder

2 drops of vanilla extract

For the custard or crema pasticciera (with the ingredients listed here, follow the method in this recipe)

1 litre of milk

8 egg yolks

140 g caster sugar

90 g sifted flour

the grated zest of 1 unwaxed lemon (possibly organic)

To garnish

icing sugar to taste

100 g pine nuts

Method.

1. Prepare the shortcrust pastry and place in the refrigerator to cool for 40 minutes.

2. Prepare the custard and let cool, stirring occasionally.

3. Place the pine nuts in water with ice for 30 minutes (so that they won’t burn when you cook them), then dry them with a kitchen towel.

DSC_8159

4. Cut the dough into two pieces, keeping in mind that one pieces should be a bit bigger than the other for the pie crust.

5. Using two pieces of baking paper, roll out the bigger piece of dough (5 mm thickness) to make a tart case with a slightly higher edge. Place the baking paper with the pastry onto the cake tin ( 22 cm wide).

DSC_8156

DSC_8162

6. Pierce the pastry with a fork, then fill with the custard.

DSC_8171

7. Roll out a disk of pastry (5 mm thick), then cover the pie and seal the two layers of pastry. Using a pastry cutter, cut and remove the excess pastry, then top with the pine nuts.

DSC_8175_01

DSC_8180

8. Bake at 180° C (356° F) for 40 minutes and let cool.

DSC_8186_01

9. Place in the fridge for at least an hour, then garnish with icing sugar.

DSC_8204

DSC_8215

DSC_8233_01

If you like this recipe please support the blog by following Foodfulife on Facebook….Thank you so much!!!!

Torta della nonna.

Tempo di preparazione: 50 minuti + il riposo

Tempo di cottura 40 minuti

Media difficoltà

Ingredienti

Per la frolla (con ingredienti scritti qui, seguite la preparazione di questa ricetta)

350 g farina setacciata

165 g burro

165 g di zucchero

3 tuorli d’uova

un pizzico di sale

1/2 bustina di lievito per dolci

2 gocce di estratto di vaniglia

Per la crema (con gli ingredienti scritti qui, seguite la preparazione di questa ricetta)

1 litro di latte intero

8 tuorli d’uova

140 g di zucchero semolato

90 g farina setacciata

la buccia di un limone grattugiato, non trattato e possibilmente bio

Per decorare

zucchero a velo vanigliato q. b.

100 g di pinoli

Preparazione

1. Preparate la pasta frolla e mettetela in frigo a raffreddare.

2. Preparate la crema pasticciera e lasciatela raffreddare, mescolando di tanto in tanto.

3. Mettete i pinoli in acqua con del ghiaccio per 30 minuti (per evitare di bruciarli durante la cottura), poi asciugateli bene con la carta da cucina.

4. Tagliate la pasta in due, tenendo presente che un pezzo dovrà essere un po’ più grande dell’altro per la base della torta.

5. Stendete il pezzo più grande tra due fogli di carta da forno (lo spessore deve essere di circa 5 mm) , come per fare una crostata con il bordo alto. Aiutandovi la carta da forno, trasferite la sfoglia di pasta su una teglia (larga 22 cm).

6. Bucherellate la frolla con una forchetta e riempite con la crema pasticciera.

7. Stendete un disco con la pasta rimasta (di spessore 5 mm), poi ricoprite la torta e sigillate i bordi. Tagliate la pasta in eccesso e ricoprite la torta con i pinoli.

8. Cuocete in forno a 180° per 40 minuti, poi fate raffreddare.

9. Mettete la torta a rassodare nel frigo per almeno un’oretta.  Prima di servire, decorate con abbondante zucchero a velo.

Segui Foodfulife su facebook per tante altre ricette golose!

Rice Flour Chocolate Cookies With Pomegranate (Gluten-Free, Low-Sugar)

Rice flour chocolate cookies with pomegranate (gluten-free, low-sugar)

To continue the series of recipes with pomegranate, this week I am publishing an easy cookie recipe, gluten-free and perfect for dark chocolate lovers! These cookies are garnished with a lot of pomegranate seeds, they are not very sweet and have a strong chocolate flavour ; I served them warm with plenty of honey on top! In this way, all the flavours and different textures really come together nicely!

Tips.

1. For the kids dip them in milk, because they have a strong dark chocolate flavour.

2. For a low-sugar recipe don’t add the honey on top of the cookies, just follow the recipe.

Rice flour chocolate cookies with pomegranate (gluten-free, low-sugar)

I hope you enjoy this autumn treat!

Rice flour chocolate cookies with pomegranate (gluten-free, low-sugar)

Rice flour dark chocolate cookies with pomegranate.

For two trays (16 cookies)

Preparation time: 20 minutes + the resting time

Cooking time: 20-30 minutes

Ingredients

100 g soft butter

100 g rice flour

150 g almonds, peeled

15 g cocoa powder (I use organic and fair trade)

60 g dark chocolate 70% cocoa (I use organic and fair trade )

50 g cornstarch

the seeds of a pomegranate

1 tablespoon honey

3 tablespoons maple syrup

a pinch of salt

a pinch of cinnamon

Method.

1. Bake the almonds at 160 ° C (320° F) for 5-10 minutes. Let cool then grind with a food processor.

Step 1. Bake the almonds, let cool and grind them.

2. Melt the chocolate using a bain-marie.

3. In a bowl, work the butter with the maple syrup, the honey and the ground almonds.

DSC_7968

4. Add the melted chocolate to the almond mixture and stir well. In another bowl, combine the rice flour, the cornstarch, the cocoa, a pinch of cinnamon, a pinch of salt, then mix everything together with the almonds. Knead for a few minutes then put in the refrigerator to cool for about 30 minutes.

DSC_7954

DSC_7971

DSC_7982

5. Line the base of two baking trays with some baking paper, then shape the cookies and garnish with the pomegranate seeds.

DSC_7985

6. Bake at 180 ° C (356°F ) for 20-30 minutes.

DSC_8006

7. Serve the cookies hot with a lot of honey on top!

DSC_8047

DSC_8059

DSC_8065

DSC_8027

Also see Light Sabayon With Pomegranate And Pistachios and Prawn Salad With Rocket And Pomegranate.

Biscotti di farina riso al cioccolato con melagrana.

Per due teglie (16 biscotti)

tempo di preparazione: 20 minuti + il riposo

tempo di cottura: 20-30 minuti

Ingredienti

100 g di burro morbido

100 g di farina di riso

150 g di mandorle, senza buccia

15 g di cacao amaro (uso il fair trade e bio)

60 g di cioccolato fondente al 70 % (uso il fair trade e bio)

50 g di amido di mais

i chicchi di una melagrana

1 cucchiaio di miele

3 cucchiai di sciroppo d’acero

un pizzico di sale

un pizzico di cannella

Preparazione.

1.Tostate le mandorle a 160 °C per 5-10 minuti. Lasciate raffreddare e tritate finemente con il tritatutto.

2. Fate sciogliere il cioccolato a bagnomaria.

3. Lavorate il burro con lo sciroppo d’acero, un cucchiaio di miele e la farina di mandorle.

4. Unite il cioccolato sciolto al composto di burro e farina di mandorle. A parte, mescolate la farina di riso con il cacao, l’amido di mais, la cannella e un pizzico di sale. Unite tutto e impastate bene per qualche minuto, poi mettete nel frigorifero a raffreddare per 30 minuti.

5. Distribuite i biscotti su due teglie rettangolari (ricoperte da carta da forno) e guarnite con dei chicchi di melagrana.

6. Infornate a 180°C  per 20-30 minuti.

7. Servite i biscotti caldi con tanto miele sopra.

DSC_8049

Traditional Recipe: Crema Pasticciera (Italian Custard Cream)

La Crema Pasticciera is a thick and rich custard cream used in Italian patisserie as a filling or ingredient for pastries, cakes and various desserts. Often aromatised with lemon or vanilla, this custard is so popular because it is extremely pleasing to the eye and palate, with its wonderful flavour and velvety creamy texture.

It is possible to aromatise la Crema Pasticciera in various ways, for example using chocolate or coffee, but also liqueurs and the zest of different citrus fruits. In uncooked desserts, it is often mixed with whipped cream to obtain a lighter and more delicate custard.

Crema Pasticciera.

1 litre whole milk

8 egg yolks

160 g caster sugar

80 g sifted flour

1 vanilla pod, or the grated zest of 1 organic lemon

Method.

1. In a pan, bring the milk with the vanilla pod (opened and emptied into the milk) to a boil, or add the lemon zest (the aromas you use will depend on your personal taste). Then sieve the milk.

DSC_5301

2. In a large bowl, whisk the egg yolks with the sugar until creamy.

DSC_5333

3.. Add the flour to the egg mixture and gently stir from the bottom upwards.

DSC_5337

DSC_5346

4. Gently pour the hot milk into the mixture and stir. Put the custard onto a low heat to thicken for about 5 minutes (stirring constantly, but gently).

DSC_5355

5. After 5 minutes, turn off the heat and put the cream in a bowl (stirring occasionally) to cool.

DSC_5401

6. Cover with a sheet of cling film, to prevent the skin from forming on the top and put in the refrigerator. Stir the custard vigorously before using.

DSC_5412

Notes.

1 It’s important to mix the egg yolks with the sugar straight away, to prevent crystals from forming.

2. Cook over a medium-low heat and use a thick bottom sauce pan to avoid burning the custard cream.

3. kept in a refrigerator, the cream should be used within 3 days.

DSC_5395

If you like this recipe please support the blog by following foodfulife on facebook! Thank you so much!!! 🙂

Crema Pasticciera (ricetta base)

1 litro di latte intero

8 tuorli d’uova

160 g di zucchero

80 g di farina 00, setacciata

1 baccello di vaniglia, oppure la scorza grattugiata di un limone non trattato

Preparazione.

1. In un tegame, portate ad ebollizione il latte con il baccello di vaniglia (aperto e svuotato nel latte), oppure aggiungete la scorza di limone. Filtrate il latte usando un colino fine.

2. In una terrina grande, montate i tuorli con lo zucchero, fino ad ottenere una crema spumosa.

3. Unite la farina alle uova e mescolate delicatamente dal basso verso l’alto.

4. Versate il latte caldo a filo nel composto e mescolate delicatamente con una frusta. Mettete la crema sul fuoco ad addensare per almeno 5 minuti, continuando a mescolare delicatamente.

5. Spegnete il fuoco, mettete la crema a raffreddare in una ciotola e mescolate ogni tanto.

6. Ricoprite con la pellicola per alimenti, per evitare che si formi la pellicina in superficie e mettete in frigorifero. Mescolate la crema energicamente prima di utilizzarla.

Note.

1. E’ importante mescolare subito i tuorli con lo zucchero per evitare che si formino dei cristalli.

2. Cuocete a fiamma medio-bassa per evitare che la crema si attacchi al fondo della pentola. E’ consigliabile usare una pentola con il fondo spesso.

3. Conservata in frigorifero, la crema va utilizzata entro 3 giorni.

DSC_5365

Cooking Method: Shortcrust Pastry Tart Case

If you are making a tart, it’s possible to cook shortcrust pastry either with the filling or without. Today we will look at all the steps required in order to make a wonderful shortcrust tart case, without the filling and cooked to perfection.

DSC_3767

For the ingredients see this Shortcrust Basic Recipe.

Method. 

1. Take a cake tin (with the dimensions required by the recipe), grease with butter and dust with flour (the butter will help to cook the tart case more evenly).

DSC_3693

2. Roll out the dough (3-5 mm thickness), than wrap it loosely around the rolling pin and place it gently into the cake tin.

3. Using a pastry cutter, cut off the excess dough. With a fork, pierce the base of the dough a few times (this operation helps to avoid air bubbles while cooking).

DSC_3740

4. Place a sheet of aluminium foil on the dough and press it down lightly with your hands (this prevents the dough from collapsing during the cooking process).

5. Fill with dried beans (we use borlotti beans, you can also use rice) and bake at 180 ° C ( 356°F ) for 15-20 minutes (the cooking time will vary depending on the recipe and thickness of the pastry). When the pastry is perfectly cooked remove the foil with the beans and let cool.

DSC_3715

DSC_3757

DSC_3764

DSC_3775

Cottura in bianco della pasta frolla.

La pasta frolla si può cuocere in bianco (cioè senza ripieno) oppure con il ripieno (ad esempio per le ricette della crostata con la confettura di frutta). Oggi vedremo come si fa la cottura in bianco, per preparare crostate con il ripieno che non richiede cottura.

Per gli ingredienti vedere Ricetta base della pasta frolla.

Preparazione.

1. Prendete una teglia delle dimensioni consigliate dalla ricetta, ungetela bene con il burro e spolveratela con la farina (il burro conduce il calore e aiuta ad ottenere una cottura più uniforme).

2. Stendete l’impasto, arrotolatelo sul matterello e poi sistematelo sulla teglia con delicatezza.

3. Con una rotella tagliate la pasta in eccesso. Usando una forchetta, create alcuni fori sulla base della pasta (questa operazione serve per evitare che si formino delle bolle d’aria, quando la base si cuoce).

4. Prendete un foglio di alluminio e sistematelo sulla pasta in modo che aderisca alla forma (questo serve ad evitare che la pasta si abbassi durante la cottura, quando il burro si scioglie).

5. Riempite con dei fagioli secchi e infornate a 180° C per 15-20 minuti (il tempo di cottura dipenderà dalla ricetta e dallo spessore della pasta). A cottura terminata, togliete il foglio di alluminio con i fagioli e fate raffreddare.

Delicious Chocolate and Pistachio Flan.

This week I’m publishing another recipe from my friend, Anahita Tcheraghali.
With the Christmas holidays just around the corner, we decided to prepare a light and tasty dessert for you to enjoy with the whole family during this festive season!
This delightful flan is made with a nice chocolate shortcrust pastry and an exquisite pistachio filling, with an intense caramel-like flavour. It is light and perfect for vegan diets because it doesn’t contain eggs and it’s dairy-free.
You will love it!
DSC_3399
Ingredients
for the filling
300 ml (10 fl oz)  rice milk
25 g (0.88 oz) muscovado brown sugar
40 g (1.4 oz) of shelled pistachios 
2 tablespoons cornstarch
a vanilla bean (or a few drops of vanilla extract)
For the pastry
200 g (7 oz) flour 00
60 g (2 oz) of sunflower oil
60 g (2 oz) dark chocolate (with 70% cocoa solids)
80 g (3 oz) muscovado brown sugar
a pinch of baking soda
some grated lemon zest
a pinch of salt
a pinch of cinnamon (optional)
Preparation of the filling.
1. Finely grind the pistachios.
DSC_3332
2. Mix the ground pistachios with 2 tablespoons of cornstarch and 25 g (0.88 oz)  of sugar.
DSC_3341
3. Add the rice milk with a few seeds of the vanilla bean.
4. Thicken the filling on a low heat, stirring continuously for about 10 minutes.
DSC_3355
Preparation of the pastry.
1. Separately, combine the flour with the baking soda, then melt the chocolate in a bain-marie.
DSC_3371
2. Mix the flour with the melted chocolate, 300 ml (10 fl oz) of oil, a little bit of lemon zest, cinnamon, salt and 80 g of sugar.
DSC_3379
3. Once you have a smooth dough, put it in the fridge for 30 minutes.
DSC_3383
4. Roll out the pastry on a greased baking tray and pierce the surface with a fork.
DSC_3390
5. Bake the base of the tart at 170 ° C (338 °F)  for 10 minutes.
6. Spoon the filling into the the pastry base and bake for another 15 minutes.
DSC_3395
DSC_3417
DSC_3443
Crostata di cioccolato con crema di pistacchi.
Ingredienti
Per la pasta brisé al cioccolato
200 g di farina 00
60 g di olio di semi di girasole
60 g di cioccolato fondente al 70 % (possibilmente bio)
80 g di zucchero di canna muscovado
un pizzico di bicarbonato
1 po’ di scorza di limone non trattato
un pizzico di cannella (facoltativo)
un pizzico di sale
Per la crema
2 cucchiai di amido di mais
300 ml di latte di riso
40 g di pistacchi sgusciati
una stecca di vaniglia (o qualche goccia di estratto di vaniglia)
25 g di zucchero di canna muscovado
Preparazione della crema.
1. Tritate i pistacchi finemente.
2. Unite i pistacchi tritati all’amido di mais e allo zucchero. Aggiungete il latte di riso e qualche seme del baccello di vaniglia.
3. Fate addensare la crema sul fornello a fuoco basso, mescolando continuativamente.
Preparazione della pasta.
1. A parte, unite la farina al bicarbonato e poi fate sciogliere il cioccolato a bagnomaria.
2. Impastate la farina con l’olio, la scorza di limone, la cannella, il cioccolato fuso, il sale e lo zucchero.
3. Una volta ottenuto un impasto omogeneo, mettetelo a riposare nel frigo per 30 minuti.
4. Stendete la pasta su una teglia leggermente unta e bucherellate la superficie con una forchetta.
5. Infornate la base della crostata a 170 °C per 10 minuti.
6. Riempite la base della torta con la crema e poi fate cuocere per altri 15 minuti.

Seriously Decadent Mini Chocolate Trifle

A very special mini trifle, made with a dark chocolate mascarpone mousse, enriched with rum and hazelnuts.
This recipe was inspired by the layered Italian dessert “Tiramisù”, which has very different ingredients but a similar structure. All the layers in this trifle give a nice variety of textures and flavours which blend nicely in the mouth.
It’s pure pleasure in a glass, made to satisfy the needy taste buds of chocolate lovers.
Mini chocolate trifle with hazelnuts.
Ingredients
for 4 glasses
100 g ( 3.52 oz) dark chocolate (70% cocoa solids)
2 tablespoons honey
3 tablespoons dark rum
100 g ( 3.5 oz) toasted and skinned hazelnuts
250 g ( 8.8 oz) mascarpone cheese
2 teaspoons unsweetened cocoa powder
sweetened whipped cream
 Method
1. Melt the chocolate in a bain-marie (double boiler).
2. Mix the mascarpone with honey.
DSC_3186
3. Mix the melted chocolate with the mascarpone cheese, then add 3 tablespoons of rum mixed with 2 teaspoons of cocoa powder.
DSC_3192
4. Finely chop the hazelnuts in a food processor.
DSC_3194
5. Fill the base of 4 glasses (small-medium size) with the hazelnut crumbs.
DSC_3196
6. Add the chocolate mascarpone, then a layer of whipped cream and top each glass with ground chocolate and a hazelnut.
DSC_3207
DSC_3236
 Bicchierini golosi con crema di mascarpone al cioccolato.

Ingredienti 

per 4 coppette

100 g di cioccolato fondente al 70%

2 cucchiai di miele

3 cucchiai di rum scuro

100 g di nocciole tostate e spellate

250 g di mascarpone

2 cucchiaini di cacao amaro

panna montata già zuccherata q b

Preparazione.

1. Fate sciogliere il cioccolato fondente a bagnomaria.

2. Mescolate il mascarpone con il miele.

3. Unite il cioccolato sciolto al mascarpone e aggiungete 3 cucchiai di rum, precedentemente mescolato al cacao.

4. Tritate finemente le nocciole.

5. Riempite la base di 4 bicchierini (di piccola-media grandezza) con la granella di nocciole.

6. Aggiungete la crema di cioccolato, poi uno strato di panna montata e guarnite ogni coppetta con della granella di cioccolato ( o cioccolato grattugiato) e una nocciola.

Apple custard tart with pine nuts and cinnamon (no refined sugar).

Today I’m going to prepare a very special apple tart. For this recipe I made a cute small version enriched with an apple custard and garnished with roasted pine nuts and cinnamon. I decided to make a mini and revisited version of the apple tart using only good quality ingredients such as organic apples and honey, to naturally sweeten the cake and keep the cost of this recipe relatively low.

Apple custard tart with pine nuts 

Ingredients

Serves 2-3 

 for the sweet shortcrust pastry 

100 g (3.52 oz) plain flour

30 g (1 oz) softened butter

1/2 tablespoon honey

a pinch of salt

For the apple custard

2 small apples (I had royal gala, but you can use the apples you prefer)

2 tablespoons honey (and some more to garnish the cake)

1 egg yolk

1 tablespoon plain flour

2 drops of lemon essential oil (or the zest of an organic lemon)

1 cup of milk

the juice of half a lemon

cinnamon powder to taste

a few roasted pine nuts (roast on a frying pan for 10 minutes at moderate heat)

Method.

1. In a thick saucepan mix an egg yolk with 2 tablespoons of honey, 2 drops of lemon essential oil and 1 tablespoon of flour.

DSC_2630

2. Peel, cut, then puree the apples with the lemon juice using a blender.

DSC_2601

3. Add the apple puree with a cup of milk to the ingredients in the saucepan, then stir gently over low heat, until you have a thick and creamy apple custard.

DSC_2676

4. In a large bowl, mix 30 g of butter with 100 g of flour, a pinch of salt and 1/2 a tablespoon of honey. Work well until you have a smooth shortcrust pastry dough.

DSC_2587

DSC_2589

5. In a small greased oven pan (15-16 cm), or a ceramic baking tray, roll out the dough with your hands, pierce with a fork and bake for 15 minutes at 160 ° C ( 320° F).

DSC_2685

6. Remove from the oven, cover with the custard, a few slices of apple and some cinnamon powder, then bake for another 5 minutes.

DSC_2708

DSC_2715

DSC_2726

7. Garnish the cake with some honey and a few roasted pine nuts.

DSC_2748

Crostata di crema pasticciera alle mele e pinoli.

Ingredienti

per 2-3 persone

per la pasta brisé dolce.

100 g di farina

30 g di burro

1/2 cucchiaio di miele

un pizzico di sale

Per la crema pasticciera alla mela

2 mele medio-piccole (uso le gala, ma potete usare la qualità che preferite)

2 cucchiai di miele (e un po’ per guarnire la torta a fine cottura)

1 tuorlo d’ uovo

1 cucchiaio di farina

2 goccia di olio essenziale di limone (o un po’ di buccia grattugiata di un limone non trattato)

il succo di mezzo limone

1/2 bicchiere di latte

Cannella in polvere q b

alcuni pinoli (precedentemente tostati per 10 minuti in una padella a fuoco moderato)

Preparazione.

1. In una casseruola col fondo spesso, unite il tuorlo d’uovo a due cucchiai di miele, uno di farina e due gocce di olio essenziale di limone, mescolando bene.

2. Pelate, tagliate le mele e tritate molto finemente la polpa con il succo di mezzo limone in un frullatore.

3. Aggiungete la polpa di mela con mezzo bicchiere di latte agli ingredienti nella casseruola e fate cuocere a fuoco lento, mescolando costantemente fino ad ottenere una crema corposa.

4. A parte, lavorate 100 g di farina con un pizzico di sale, burro e mezzo cucchiaio di miele.

5. In una tortiera o terrina da forno (15-16 cm) già imburrata, stendete la pasta, bucatela con una forchetta e fate cuocere per 15 minuti a 160° C.

6. Sfornate, coprite con la crema pasticciera, decorate con la cannella e qualche fetta di mela. Infornate per altri 5 minuti.

7. Guarnite la torta con un po’ di miele e alcuni pinoli tostati.

Delicious Plum Ice Cream With A Hint Of Cinnamon

In my parents’ garden there is a beautiful wild plum tree that every year gives us lots of fruit. These plums, however, are small, mushy and not very sweet. They not very good to eat but great for preparing jams, sauces and desserts. This week I’m going to prepare a really nice and delicate plum ice cream, enriched with a hint of cinnamon, a real treat!

DSC_9196

Yellow plum ice cream with a hint of cinnamon.

Ingredients

Serves 4

500 g yellow plums, halved, pitted

1 tablespoon of cornstarch

the juice of 1/2 a lemon

150 g brown sugar

200 ml water

1 greek yogurt (170 g)

1 tablespoon honey

cinnamon to taste (optional)

Method.

1. Peel the plums carefully (the plums I’m using have a very thin skin, therefore I’m not going to peel them for this recipe).

DSC_9176

2. Meanwhile, boil the water with sugar and let cool.

DSC_9179

3. Puree the fruit in a food processor until smooth, then add the lemon juice, honey, corn starch, and finally the yogurt with cinnamon to the mixture.

DSC_9181

4. Add the sugar syrup to the rest of the ingredients and mix well.

DSC_9192

5. Place the mixture in the ice cream maker and follow the manufacturer’s instructions.

DSC_9195

6. Store in freezer. Top with some fresh mint and serve.

DSC_9214
Gelato di prugne gialle alla cannella.
Ingredienti
Per 4 persone
500 g di prugne gialle
1 cucchiaio abbondante di amido di mais
il succo di 1/2 limone
150 g di zucchero di canna
200 ml di acqua
1 yogurt greco (175 g)
1 cucchiaio di miele
cannella q b (facoltativo)
Preparazione.

1. Lavate e asciugate le prugne, quindi togliete la buccia e il nocciolo (qui io uso delle prugne con la buccia sottilissima e non la tolgo).

2. A parte, fate bollire l’acqua con lo zucchero e lasciate raffreddare.

3. Frullate la frutta fino ad ottenere una crema, poi aggiungete il limone, il miele, l’amido di mais e lo yogurt con le cannella.

4. Aggiungete anche lo sciroppo e mescolate bene.

5. Mettete il composto nella gelatiera e seguite le istruzioni.

6. Una volta fatto, potete conservare il gelato nel congelatore o servirlo direttamente nelle coppette con due foglie di menta.