Today’s menu is a delicious dinner for two, with 3 elegant and delicate courses,
quite easy to prepare.
Risotto with fresh peas and corn salad

Salmon with lime and balsamic vinaigrette


Serve with chilled white wine.
Today’s menu is a delicious dinner for two, with 3 elegant and delicate courses,
quite easy to prepare.
Risotto with fresh peas and corn salad
Salmon with lime and balsamic vinaigrette
Serve with chilled white wine.


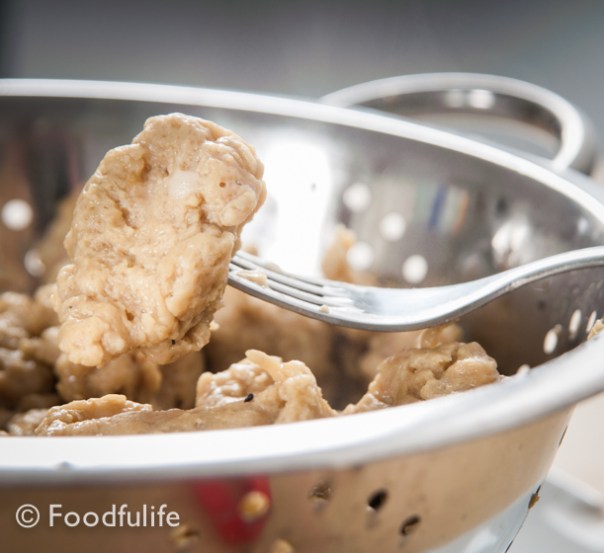
What is seitan?
Seitan is a high-protein product made of wheat flour, used as a meat substitute. Tofu and Seitan are both very versatile when it comes to making meat-like dishes. While tofu has an egg-like texture, seitan’s consistency is chewy and more similar to meat. It is widely used because it absorbs the condiments well, however it has high gluten content, which can cause allergies, therefore, is not suitable for everyone.
I often think that meat-like products are not really what a vegetarian would want to eat, because (and I speak from a personal point of view) I believe, if you don’t want to eat meat you don’t really want to be reminded what meat is like. However, I think you can be really creative with either tofu or seitan in the kitchen, therefore, it’s worth giving it a try!
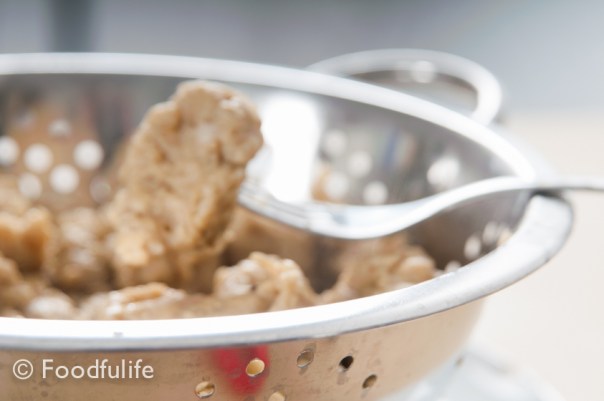
Making seitan.
Many things can be used to flavour seitan; you can add herbs to the dough or flavour it with different ingredients such as: soy sauce, kombu, herbs, vegetables, spices and seeds. All these ingredients are added to the vegetable broth in which the dough is cooked or simply added as flavourings before kneading. Seitain can be also made using spelt flour or gluten flour.
Making seitan requires a lot of time. Basically, you mix the ingredients, make a dough and then rinse it under running water for about 15-20 minutes, to remove the starch. As a result, you will end up with a considerably smaller amount of product, in the end, but it’s worth it! The main reason to prepare home-made seitan is that you can be really creative with it and you can add all the flavours that you like to it!
What you need
1 large bowl
1 large pan with a lid
1 wooden spoon
1 measuring cup
Ingredients
For the dough
2 tablespoons of nutritional yeast (optional)
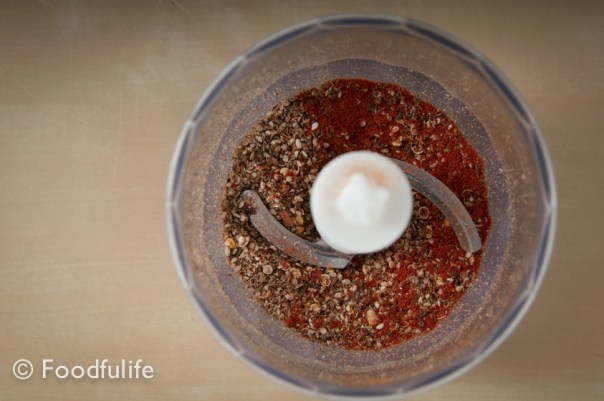
4-5 tablespoons of ground spices and seeds (black pepper, paprika, sesame seeds, fennel seeds, coriander seeds, a few cloves, a few chillies)
1 kg (35.2 oz) flour (I use Manitoba, you can use plain or spelt flour)
900 ml (30.4 us fl oz) of water (the amount of water vary depending on the flour)
200 ml (6.76 us fl oz) of soy sauce
For the broth
3 tablespoons extra virgin olive oil
1 clove of garlic
1 large onion
2 stalk of celery
2 carrot
2 bay leaves
a bunch of rosemary
vegetable stock
200 ml (6.76 us fl oz) soy sauce (optional)
Method.
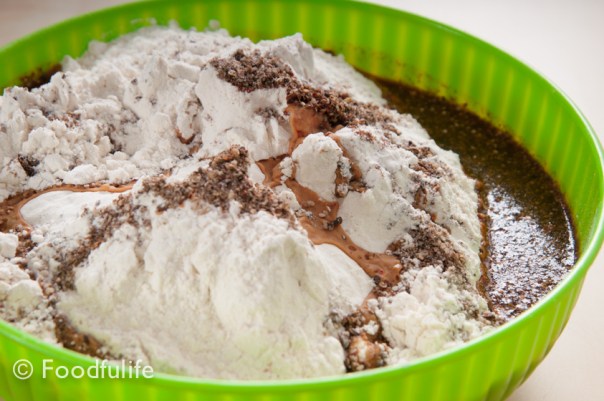
1. In a large bowl, mix the flour, the nutritional yeast, the seeds and the spices.

2. Then add 200 ml of soy sauce with the 900 ml of water. Mix with the spoon, then knead with your hands, until you get a smooth dough.
3. Let it rest for a few minutes.

4. Meanwhile, prepare the stock. Fry the vegetables in 3 tablespoons of extra virgin olive oil, for a few minutes. Then, fill the pan with vegetable stock (enough to cook the dough in), add the herbs, 200 ml of soy sauce and bring to a boil. Cook for 10 minutes, then turn off the heat, sift the broth and let cool.


5. Now knead the dough, in a large bowl, under running water for 20-30 minutes (basically, until the running water in the bowl and in which you are washing the dough, becomes clear). With this operation you are removing the starch and therefore keeping only the protein of the wheat.

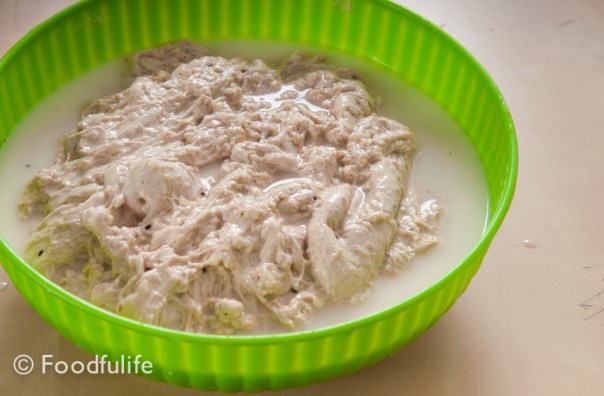


6. After about 20-30 minutes, drain nicely and let the dough sit for a few minutes.
7. Put the seitan in the cold stock ( the broth has to be cold otherwise the seitan will lose its shape) and turn on the heat. Bring to a boil, then turn down the heat and simmer for 45 minutes. Once is ready, turn off the heat and let it cool. Let it drain completely and then store it in an airtight container (in the fridge) for 5 days or freeze it for up to 1-2 months.


Tip.
1. Basically, this is the traditional method, with a personal touch for the flavouring. However, you can shorten the process using gluten wheat flour and avoid the rinsing operation. In this way, you can knead the dough, cook directly in the broth and save a lot of time and water! I strongly recommend this method as it’s quicker and much more ecological.
2. You can replace meat with seitan in many recipes. It’s perfect in stir-fry and slow cooker dishes.
Seitan fatto in casa (metodo tradizionale).
Utensili
1 ciotola grande
1 pentola grande, con il coperchio
1 cucchiaio di legno
1 caraffa graduata
Ingredienti
Per l’impasto
2 cucchiai di nutritional yeast (facoltativo, per il sapore)
4-5 cucchiai di spezie e semi misti macinati (pepe nero, paprika, semi di sesamo, semi di finocchio, semi di coriandolo, qualche seme di garofano, peperoncino)
1 kg di farina (ho usato Manitoba, ma è possibile utilizzare la farina normale, integrale o di farro)
900 ml di acqua (la quantità di acqua può variare a seconda della farina utilizzata)
200 ml di salsa di soia
Per il brodo
3 cucchiai di olio extra vergine di oliva
1 spicchio di aglio
1 cipolla grande
2 gambo di sedano
2 carota
2 foglie di alloro
2 rametti di rosmarino
brodo vegetale
200 ml di salsa di soia (facoltativo)
Preparazione.
1. In una ciotola grande, mescolate la farina, il nutritional yeast, i semi e le spezie.
2. Poi aggiungete 200 ml di salsa di soia con 900 ml di acqua. Mescolate con il cucchiaio, poi impastate con le mani, fino ad ottenere un impasto liscio.
3. Lasciate riposare per qualche minuto.
4. Preparate il brodo. Fate soffriggere le verdure in 3 cucchiai di olio extra vergine d’oliva (per qualche minuto). Riempite la pentola con abbondante brodo vegetale (sufficiente per cuocere tutto il seitan), aggiungete le erbe, 200 ml di salsa di soia e portate ad ebollizione. Fate bollire per 10 minuti. Spegnete il fuoco, togliete la verdura e lasciate raffreddare il brodo.
5. In una ciotola molto grande, impastate il composto di farina e spezie sotto l’acqua corrente per 20-30 minuti (fino a quando l’acqua sarà limpida). Questa operazione serve a rimuovere l’amido dalle proteine del grano.
6. Scolate e lasciate riposare l’impasto per qualche minuto.
7. Tagliate e mettete il seitan nel brodo freddo (il brodo deve essere freddo o il seitan perderà la sua forma) e accendete il fuoco. Portate ad ebollizione, poi abbassate il fuoco al minimo e fate cuocere per 50 minuti. Una volta pronto, spegnete il fuoco, scolate bene e lasciate raffreddare. Il seitan si può conservare in un contenitore ermetico (in frigorifero) per 5 giorni o congelare per 1 o 2 mesi.
Note.
1. Questo è il metodo tradizionale, con un tocco personale per aromatizzare il seitan. E’ possibile abbreviare il metodo di preparazione utilizzando la farina di glutine ed evitare il risciacquo. In questo modo, è possibile impastare il seitan, cuocerlo direttamente nel brodo e risparmiare un sacco di tempo ed acqua. Consiglio vivamente questo metodo perché è molto più veloce ed ecologico.
2. Si può sostituire la carne con il seitan in moltissime ricette. Il seitan è ottimo saltato in padella con le verdure, oppure utilizzato al posto della carne negli stufati.
Since the hot weather has finally arrived, it’s time to dust off the barbecue and eat plenty of fresh vegetables and delicious summer fruits! This time of the year we can be really creative with the dishes! Today we are going to prepare some fresh and light summer veggie kebabs and then, we are going to a party! It’s time to participate in Fiesta Friday, a lovely blog event hosted by my friend and talented blogger Angie, from the Novice Gardener, and co-hosted by other wonderful bloggers. This week, Fiesta Friday #21 is co-hosted by Elaine@Foodbod and Julianna@Foodie On Board.

This is a lovely light recipe, fresh and full of mediterranean flavours! It could be served as an aperitif, a side dish or a delicious light meal…You choose!
Enjoy!
Tip. You can remove the the bell pepper skin after grilling the vegetables, if you wish.
I left it because it’s quicker.

Summer Veggie Kebabs.
Ingredients
4 servings
1 red bell pepper
1 yellow bell pepper
1 small aubergine
2 courgettes
green picked olives
1 small fresh goat’s cheese (150 g)
anchovies
cherries tomatoes
8 wooden skewers
For the dressing
6 tablespoons of extra virgin olive oil
2 crushed clove of garlic
some dried or fresh origano
2 small fresh chillies, cut into slices
salt and bleck pepper to taste


Method.
1. Wash the vegetables, cut them into thin slices and grill them on an electric grill or on a grill pan, previously greased with a little extra virgin olive oil.


2. Roll the zucchini with the goat’s cheese in the center. Roll the yellow pepper with the anchovies and the red pepper with the olives in the center.


3. In a small bowl, mix the extra virgin olive oil and some dried origano with crushed garlic and chillies, salt and pepper.
4. Pierce the stuffed vegetables with the wooden skewers and make 8 kebabs. Serve cold with some garlic-olive oil sauce on the side.


Spiedini saporiti di verdure.
Ingredienti
Per 4 persone
1 peperone rosso
1 peperone giallo
1 melanzana
2 zucchine
olive verdi snocciolate
1 formaggio fresco di capra (150 g)
acciughe sott’olio
pomodorini ciliegia
8 stecchi di legno per gli spiedini
Per il condimento
6 cucchiai di olio extra vergine d’oliva
2 spicchi d’aglio (schiacciati e tagliati finemente)
un mazzetto di origano fresco o un cucchiaio di origano secco
2 peperoncini tagliati a fettine
sale e pepe q. b.
Preparazione.
1. Lavate e tagliate le verdure a fette. Fate grigliare tutte le verdure su una bistecchiera (o una piastra elettrica), spennellata con abbondante olio extra vergine d’oliva.
2. Arrotolate gli zucchini con un pezzetto di formaggio di capra e le melanzane con mezzo pomodorino al centro. Arrotolate anche il peperone rosso con le olive e il peperone giallo con le acciughe.
3. A parte, mescolate 6 cucchiai di olio extra vergine d’oliva con l’origano, l’aglio schiacciato, il peperoncino a fettine, il sale e il pepe.
4. Infilzate le verdure con gli stecchi e create gli spiedini alternando i sapori. Servite gli spiedini freddi con l’olio aromatizzato.

This week we have been hit by a heat wave and the thermometer has risen dramatically! With this hot, sticky weather, I really feel like having a lot of raw fruits and veg, but I don’t want to compromise on creativity or flavours….So there isn’t anything like a tasty gorgonzola salad when it comes to freshness and flavour!
This salad is a light, complete meal, but also as a dish that stands somewhere between healthy and comfort food…You will love it! I kept it simple, but you can add toasted walnuts for extra flavour. Walnuts and gorgonzola work perfectly together! So many things can be prepared with these two wonderful ingredients.
But, of course, if you don’t like smelly cheeses, then this dish is definitely not for you! So, look away now!!! 🙂

Gorgonzola Salad with Rustic Bread.
Ingredients
Preparation: 15 minutes
Easy
Serves 2
crispy lettuce leaves, washed and dried
2 hard-boiled eggs
2 stalks of celery, washed and cut into small cubes
2 large ripe tomatoes, washed and sliced
a few sliced of rustic bread
100 g (3.5 oz) gorgonzola cheese
5 tablespoons extra virgin olive oil
salt and pepper to taste


Method.
1. Bake the slices of bread in the oven (at 200 ° C , 392 °F), until very crispy.
2. Place the lettuce leaves, the sliced tomatoes, the celery and the gorgonzola on the plate (alternate all the ingredients). Slice the eggs in half and place them in the center.


3. Add the bread (cut into small pieces) and season with extra virgin olive oil, salt and pepper.


Insalata al gorgonzola.
Preparazione: 15 minuti
Facile
Per 2 persone
alcune foglie di insalata croccante (lavate e asciugate)
2 uova sode
2 gambi di sedano (lavati e tagliati a cubetti)
2 pomodori maturi (lavati e tagliati a fette)
alcune fette di pane rustico
100 g di gorgonzola
5 cucchiai di olio extra vergine d’oliva
sale e pepe q. b.
Preparazione.
1. Fate dorare le fette di pane in forno (a 200°C).
2. Appoggiate le foglie di insalata, le fette di pomodoro, il sedano e il gorgonzola sul piatto, alternando tutti gli ingredienti. Tagliate le uova a metà e sistematele al centro.
3. Aggiungete il pane croccante (tagliato a cubetti piccoli) e condite tutto con abbondante olio extra vergine d’oliva, sale e pepe.
Nota. Aggiungete delle noci tostate per arricchire ulteriormente l’insalata.

A touch of exotic flavour in this light stir-fry recipe. By now you all know, I like to prepare different things and vary my diet. Well, this week I thought that a stir-fry would be really lovely to celebrate the warm weather. I could just imagine enjoying this dish with a nice glass of chilled white wine during a lovely sunset, sitting by the sea…Just perfect!!

Prawns with pineapple in sweet and sour sauce.
Ingredients
For 3 servings
Easy
Preparation: 20 minutes
250 g (8.8 oz) of cleaned and peeled prawns
2 spring onions, sliced
1 big red bell pepper
350 g (12.3 oz) pineapple (cleaned)
4 radishes (without leaves)
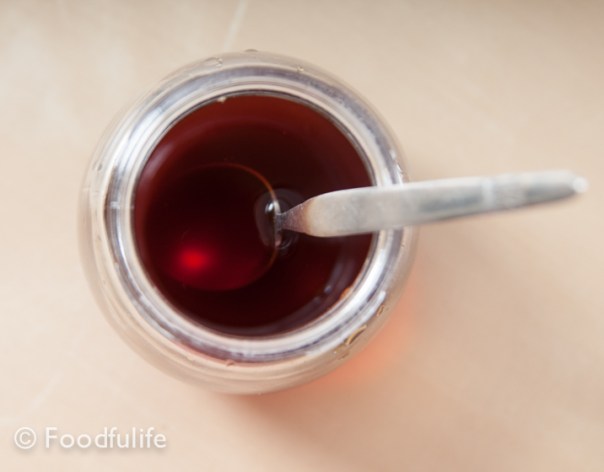
3 tablespoons soy sauce (use a naturally fermented soy sauce, which meets gluten free standards)
2 tablespoons lime juice
3 tablespoons extra virgin olive oil
ground black pepper to taste
fresh chillies to taste (optional)

Method.
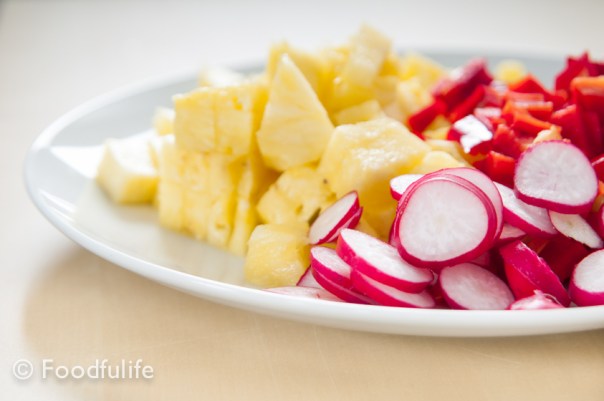
1. Cut and clean the pineapple, removing all the hard parts (including the centre).

2. Wash and cut the bell pepper, then wash and slice the radishes.
3. In a frying pan (or a wok), sauté the garlic and the spring onions for a few minutes with 3 tablespoons of extra virgin olive oil.
4. Add the pineapple and bell pepper, cut into small cubes. Fry for 5 minutes, then add the prawns and stir.

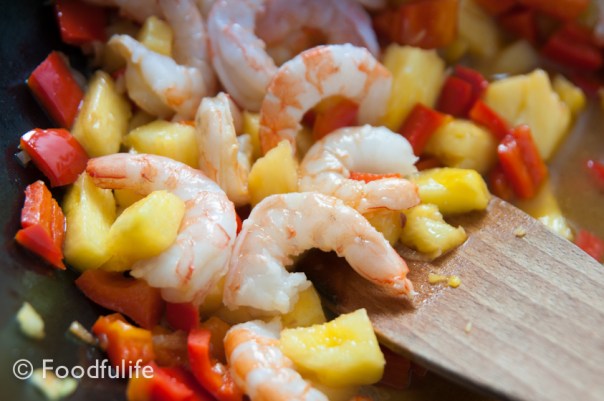
5. Separately, mix the lime juice with the soy sauce, previously diluted with a little bit of water. Pour into the pan and stir well.
6. Stir fry over a medium heat for a few minutes, then turn off the heat. Add the crunchy radishes, season with black pepper and serve with a cup of steamed basmati rice. You can add some fresh chillies if you wish.


Gamberi in salsa agrodolce.
Ingredienti
Per 3 persone
Facile
Preparazione: 20 minuti
250 g di gamberi puliti
2 spicchi d’aglio, tagliati a pezzi
2 cipollotti, tagliati a fettine
1 peperone rosso (abbastanza grosso)
350 g di ananas (già pulito)
4 ravanelli (senza foglie)
3 cucchiai di salsa di soia (usate una salsa di soia fermentata naturalmente)
2 cucchiai di succo di lime
3 cucchiai di olio extra vergine d’oliva
pepe q. b.
peperoncino q. b. (facoltativo)
Preparazione.
1. Tagliate e pulite l’ananas, togliendo tutte le parti dure (compresa la parte dura al centro).
2. Lavate, tagliate a pezzi il peperone e affettate i ravanelli. Mettete i ravanelli da parte.
3. In una padella (o un wok), fate soffriggere i cipollotti e l’aglio per qualche minuto, in abbondante olio extra vergine d’oliva.
4. Aggiungete l’ananas e il peperone (tagliati a cubetti abbastanza piccoli). Fate soffriggere per 5 minuti, poi aggiungete i gamberi.
5. A parte, unite il succo di lime alla salsa di soia, precedentemente allungata con un po’ d’acqua. Amalgamate il tutto e versate il condimento in padella. Mescolate bene.
6. Fate friggere a fuoco medio per qualche minuto, poi spegnete il fuoco e aggiungete le fette di ravanelli. Servite con del riso basmati e aggiungete del pepe e/o peperoncino, se lo desiderate.

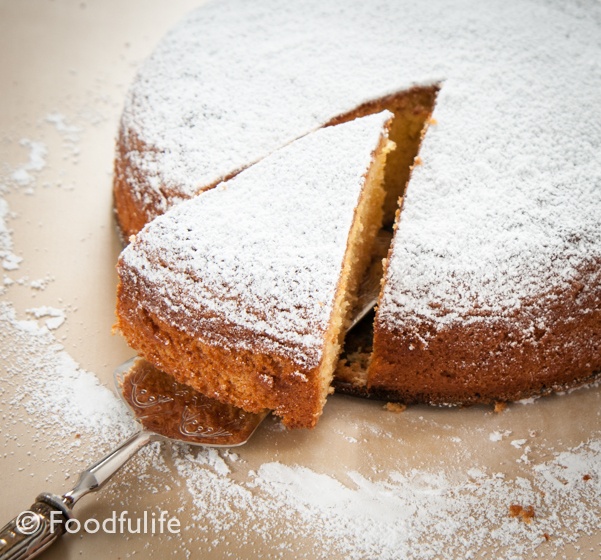
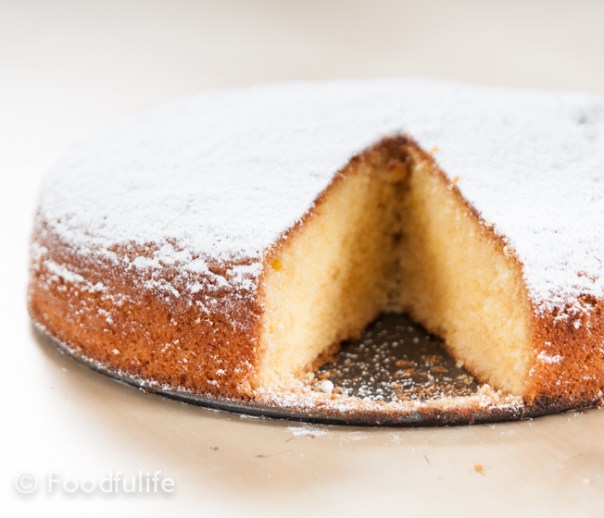
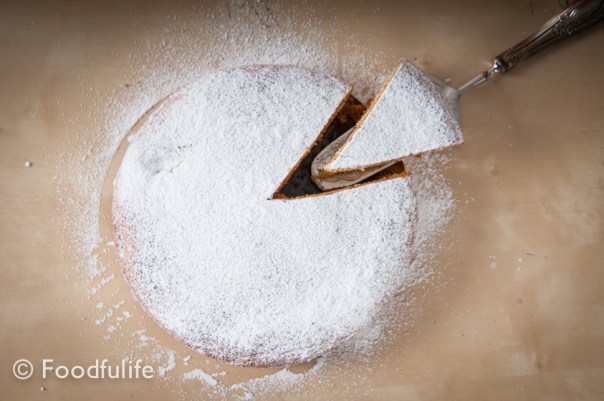
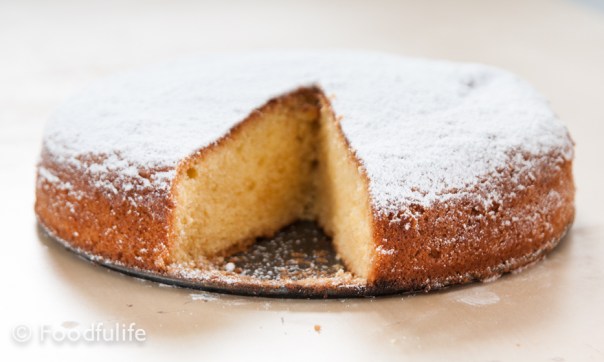
This is a traditional dessert from Genoa, a very delicate, light and soft sponge cake that everybody loves! It reminds me of my childhood: at the time, my mother used to buy this cake from Panarello, one of the best and most famous posh bakeries in town. Panarello’s Torta Paradiso is truly amazing! If you ever come to visit Genoa, I strongly recommend that you try this cake in one of their shops.

This recipe was inspired by Panarello’s Torta Paradiso (and I assure you, it also gets very close to the real thing), which is slightly more elaborated and delicious than the old Genoese recipe. In the traditional recipe (and by traditional I mean the really old one), you would only use potato starch, the juice of a lemon, eggs, baking powder, sugar and finally, butter, but, only to grease the tin.
Torta Paradiso.
Ingredients
for a 28 cm in diameter cake
Preparation: 20 minutes
Cooking: 50 minutes
Medium/ Difficult
200 g (7.05 oz) butter, softened
200 g (7.05 oz) icing sugar (and a little more icing sugar to garnish the cake)
100 g (3.5 oz) manitoba flour
100 g (3.5 oz) potato starch
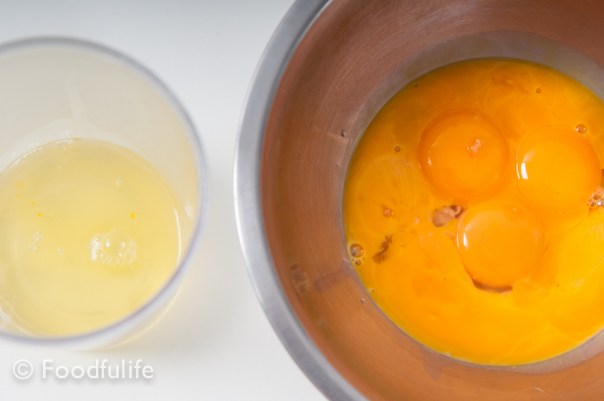
4 egg yolks
3 whole eggs
2 drops of vanilla extract
1 teaspoon of baking powder
1 tablespoon of lemon juice
a pinch of salt
a few drops of almond flavouring
Method.
1. Separate the egg whites from the yolks and put everything aside.
2. Sift together the flour, the potato starch and the baking powder.
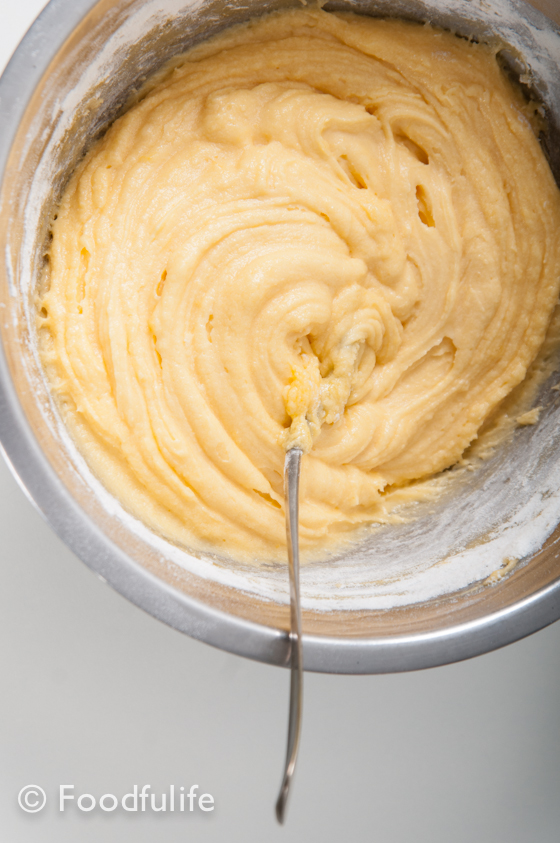
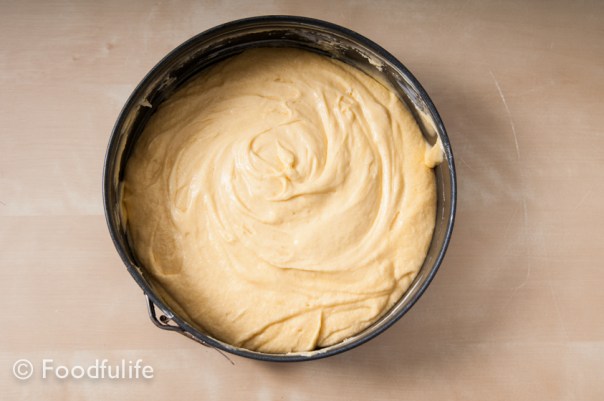
3. Stir the softened butter with the sugar, the almond flavouring and the vanilla extract, until you get a creamy mixture. Then gradually add all the egg yolks into the mixture.

4. Also add the flour and the starch (but still very gradually). Mix everything well.
5. Beat all the egg whites with a pinch of salt and a tablespoon of lemon juice, until stiff. Combine the egg whites into the mixture, stirring gently.


6. Bake in a preheated oven at 180 ° C (356 °F) for at least 50 minutes, using a greased baking dish (with 28 cm in diameter).
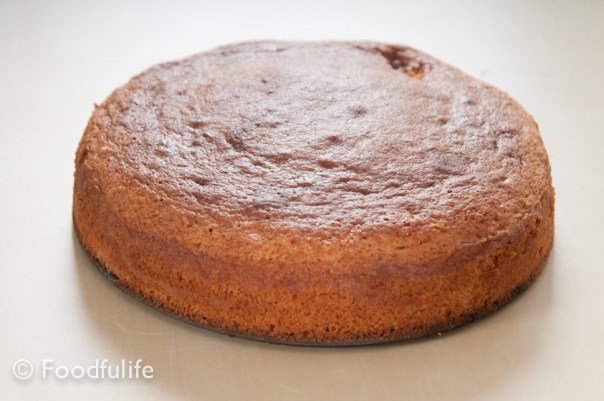
7. When the cake is completely cooled, garnish with plenty of icing sugar.


Torta Paradiso.
Media difficoltà
Preparazione: 20 minuti
Cottura: 50 minuti
Ingredienti
200 g di burro
200 g di zucchero a velo (e dello zucchero a velo in più per decorare)
100 g di farina manitoba
100 g di fecola di patate
4 tuorli d’uovo
3 uova intere
2 gocce di estratto di vaniglia
un cucchiaio di succo di limone
1 busta di lievito per dolci
un pizzico di sale
qualche goccia di aroma di mandorla
Metodo.
1. Separate gli albumi dai tuorli e mettete tutto da parte.
2. Setacciate e unite la farina alla fecola di patate con il lievito.
3. Amalgamate il burro con lo zucchero, l’aroma di mandorla e l’estratto di vaniglia, fino ad ottenere una crema omogenea. Poi, incorporate gradualmente tutti i tuorli d’uova all’impasto.
4. Aggiungete anche la farina e la fecola (sempre gradualmente). Amalgamate bene tutto.
5. A parte, montate tutti gli albumi a neve con un pizzico di sale e un cucchiaio di succo di limone. Unite gli albumi montati al composto, mescolando delicatamente dal basso verso l’alto.
6. Infornate a forno preriscaldato a 180° C per almeno 50 minuti, utilizzando una teglia imburrata (di 28 cm di diametro).
7. Quando la torta sarà completamente raffreddata, guarnite con abbondante zucchero a velo.


This focaccia al formaggio di Recco (Cheese Focaccia from Recco), is one of the most appreciated dishes we have in Liguria. Many bakeries and pizza places make this amazing focaccia, but only a few really excel in this recipe.
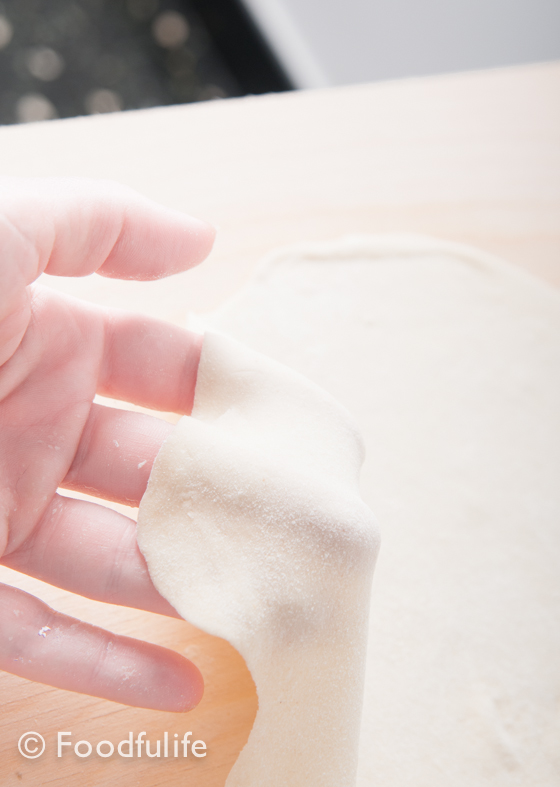
This focaccia is basically made with two almost transparent sheets of pastry, made with flour, olive oil, salt and no yeast. The cheese is then arranged and sealed between the pastry layers. The result should’t be either too oily or dry, the pastry should be crunchy on top and the cheese should be very fresh and creamy in the middle. Sometimes I add milk to the cheese to make it a little extra creamy. But you really have to use only fresh crescenza or stracchino, because no other cheese will taste as good as these cheeses in this recipe!

The preparation method will requires some care, especially when you roll out the dough to make it thin. Yes, to make a thin layer might be tricky the first few times, however after some practice it will get easier and the pastry thinner.
Focaccia al formaggio di Recco.
Ingredients
For 6 servings
250 g (8.8 oz) plain flour
500 g (17.6 oz) of Italian soft cheese crescenza or stracchino (but you can double this amount, if you want more cheese inside the focaccia)
extra virgin olive oil
freshly ground sea salt
flour for dusting
water
Method.
1. On a work surface or a table, place the flour, then add the salt, 2 tablespoons of extra virgin olive oil and enough water to make a soft and smooth dough. Knead well.


2. Dust the work surface with some flour and roll out the pastry using a rolling pin. Stretch the pastry further with your hands, until you get two almost see-through sheets (careful not to break them).


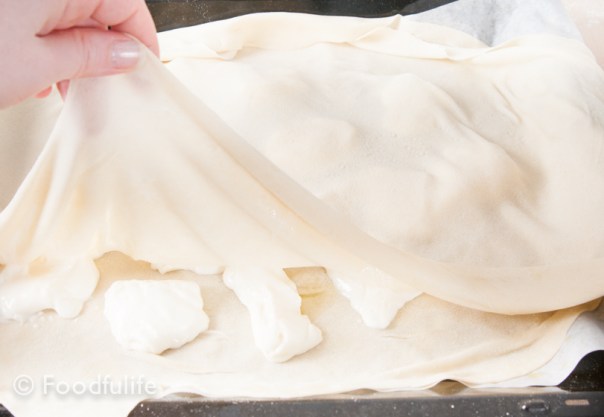
3. Place a sheet of pastry on a large baking tray, greased with extra virgin olive oil. Arrange the cheese (cut into pieces) on top of the pastry, then cover everything with the other sheet of pastry.

4. Seal the edges of the pastry together, so that the cheese will stay inside when it melts.

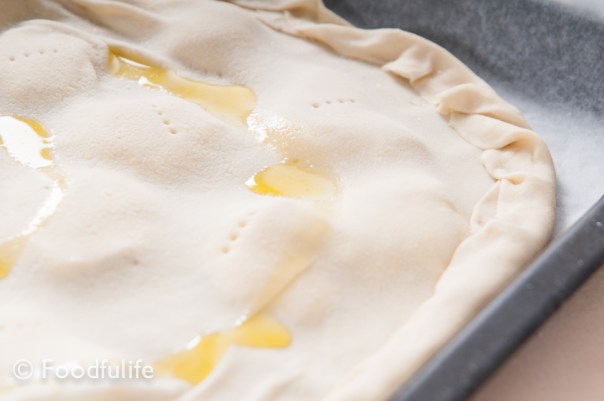
5. Slightly pierce the pastry (only pierce the top layer, not the base). Bake at 200 ° C (392° F) until the pastry is golden and crispy. Salt and serve straight away.


Focaccia al formaggio di Recco.
Ingredienti
Per 6 persone
250 g di farina 00
500 g di crescenza o stracchino (potete raddoppiare la dose di formaggio, se volete più formaggio dentro la vostra focaccia)
olio extra vergine d’oliva
sale
farina per infarinare la spianatoia
acqua q. b.
Preparazione.
1. Su una spianatoia, disponete la farina a fontana e aggiungete il sale, 2 cucchiai d’olio e l’acqua necessaria per ottenere un impasto omogeneo. Impastate bene tutto.
2. Infarinate la spianatoia e stendete l’impasto con il matterello. Tendete ulteriormente l’impasto con le mani, per ottenere due sfoglie il più sottile possibile (senza romperle).
3. Stendete una sfoglia su una teglia grande, precedentemente unta con 2 cucchiai d’olio. Disponete il formaggio fresco (tagliato a pezzi) sulla sfoglia e ricoprite tutto con la seconda sfoglia.
4. Pressate insieme i bordi delle sfoglie, in modo da sigillare la pasta e non far uscire il formaggio.
5. Bucate leggermente la superficie della pasta, facendo attenzione a non bucare la base della focaccia. Infornate a 200°C, fino ad ottenere una focaccia croccante. Salate e servite subito.


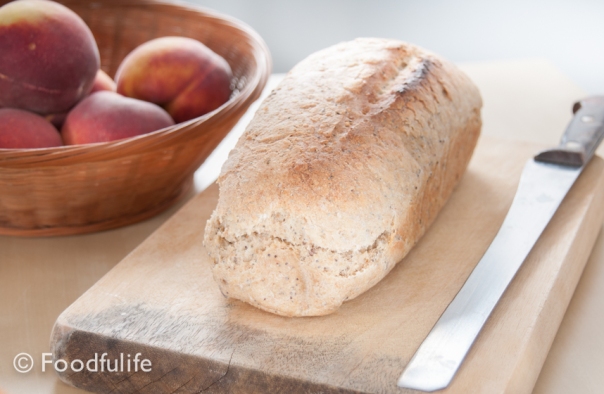
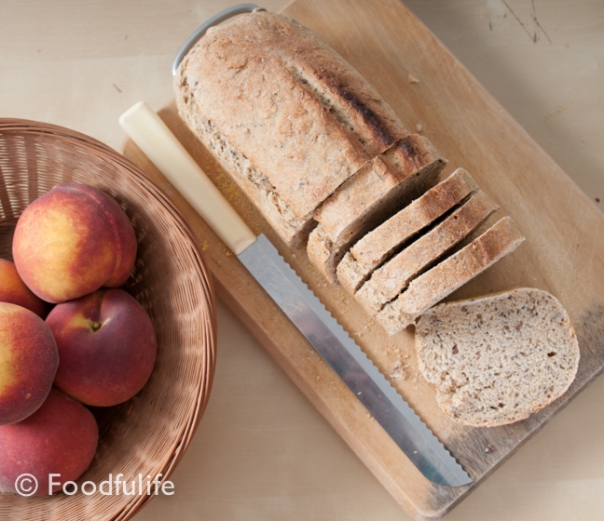
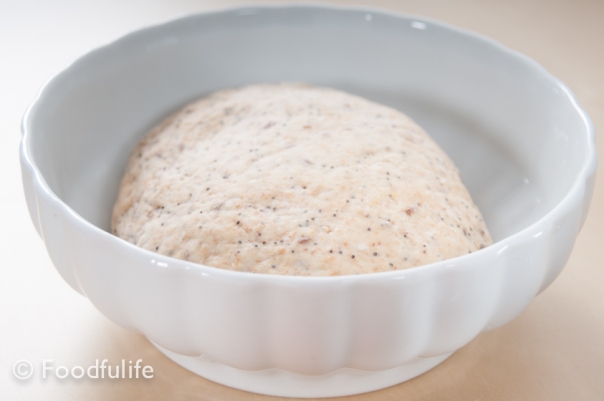
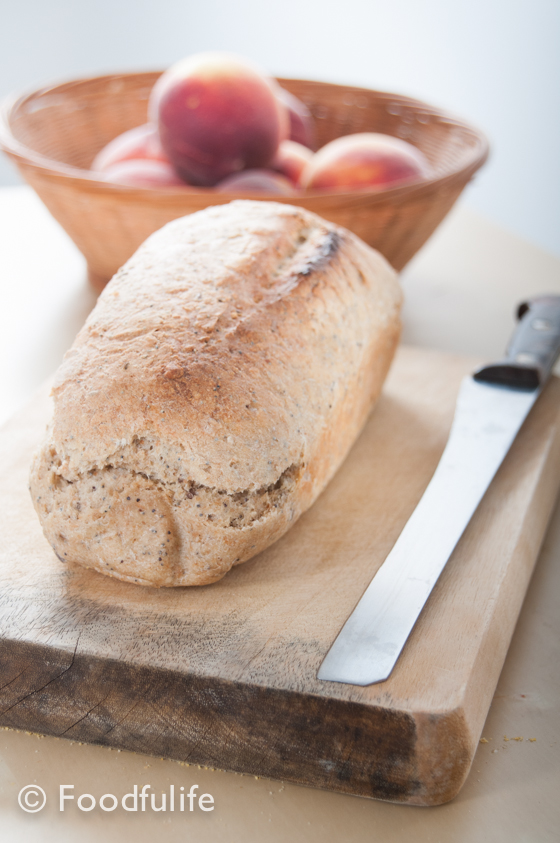
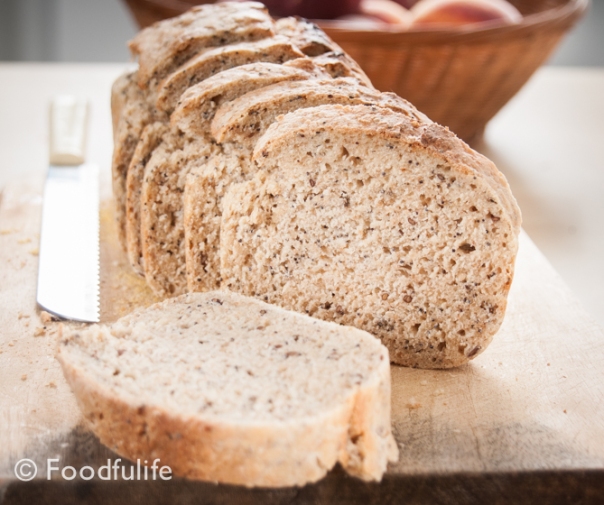
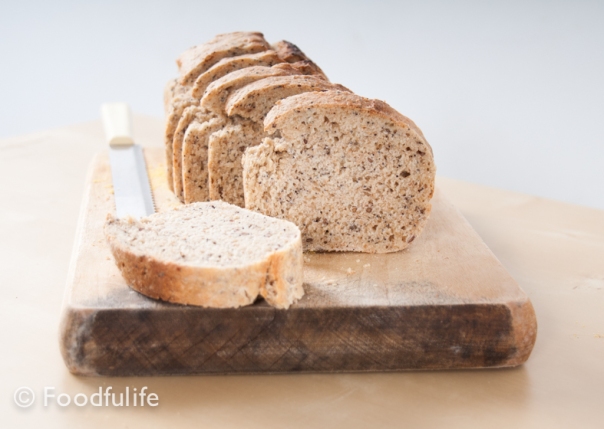
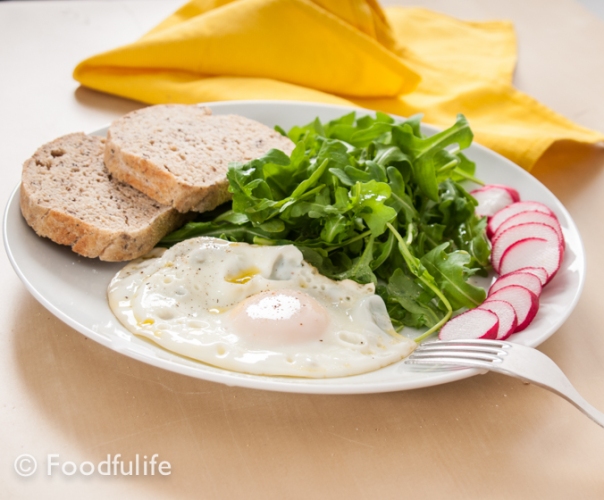
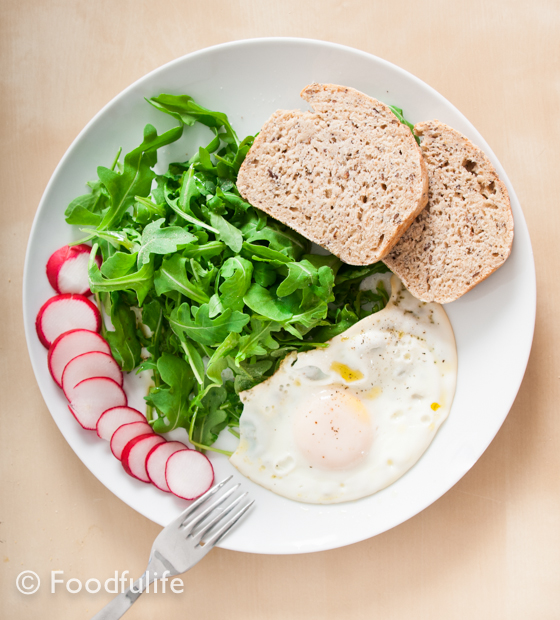
A delicious loaf of bread with a lot of tasty seeds inside! This is a great breakfast or sandwich bread,very tasty, crunchy on the outside and soft in the middle. I actually served it with a nice salad and I really enjoyed it!
You can prepare the dough in the evening and keep it in the fridge with a few tablespoons of water, it will rise slowly through the night. The day after you have to take it out of the fridge a couple of hours before you bake it.
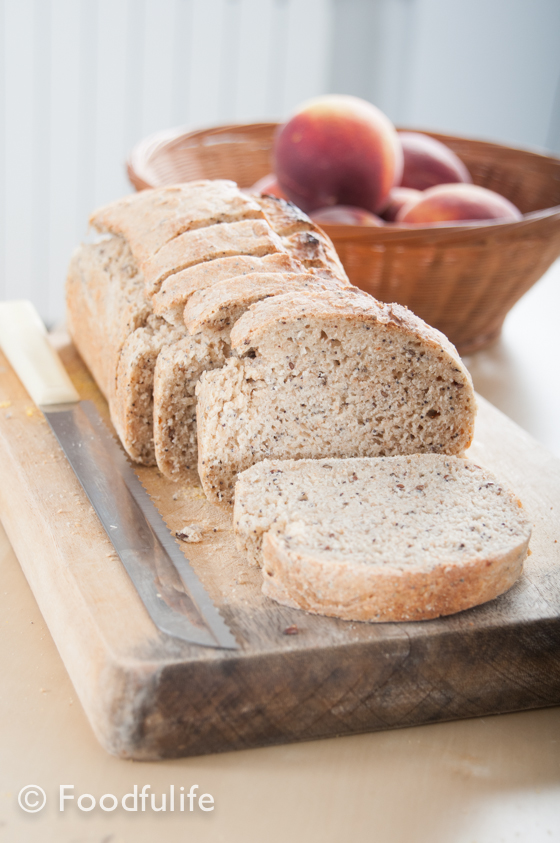
Mixed Seed Wholemeal Bread.
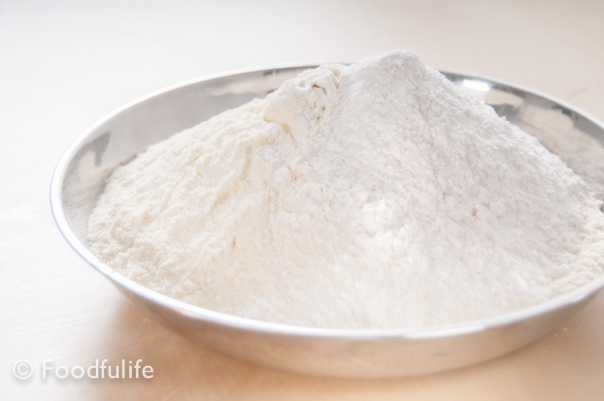
150 g (5.2 oz) plain flour / unbleached all-purpose flour
100 g (3.5 oz) of durum wheat semolina flour
100 g (3.5 oz) whole spelt flour
100 g (3.5 oz) of wholemeal flour
135 g (4.76 oz) of sourdough (semi-liquid, made with plain or Manitoba flour) or 15 g of yeast
1/2 tsp of barley malt
1 tablespoon of extra virgin olive oil and some more to grease the tin
8 g (0.28 oz) of ground sea salt
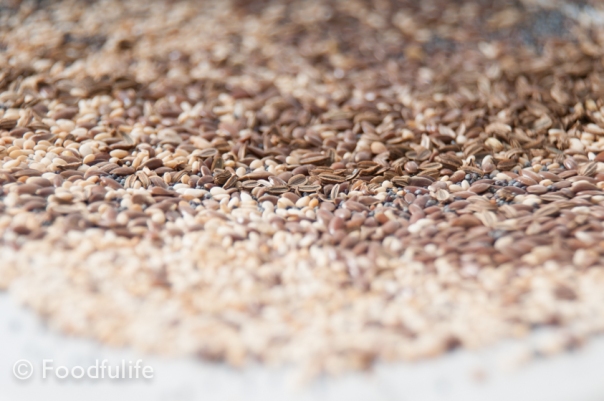
1 tablespoon of flax seeds
1 tablespoon sesame seeds
1 tablespoon poppy seeds
1/2 tablespoon of fennel seeds
Method.
1. Toast the seeds in a very hot oven for about 5 minutes (at 200°C/392 °F).
2. Sift and mix the flours. Add the seeds, the sourdough (or yeast), 1 tablespoon of extra virgin olive oil, the barley malt and the salt. Mix everything well until you have a smooth dough.
3. Let the dough rise until it doubles in volume (1-2 hours for the yeast, 3-6 hours for the sourdough).
4. Bake in a loaf tin ( 3.9 inches x 10.2 inches), lightly greased with extra virgin olive oil, at 200 ° C (392°F) for 25-30 minutes. Let cool and then serve with a nice salad.

Pane integrale ai semi.
150 g di farina 00
100 g di semola di grano duro
100 g di farina integrale di farro
100 g di farina integrale
135 g di lievito madre (semi liquido, con base di farina 00 o manitoba)
oppure 15 g di lievito di birra
1/2 cucchiaio di malto d’orzo
1 cucchiaio d’olio extra vergine d’oliva per l’impasto e un po’ di più per ungere la teglia
1 cucchiaio di semi di lino
1 cucchiaio di semi di sesamo
1 cucchiaio di semi di papavero
1/2 cucchiaio di semi di finocchio
Preparazione.
1. Fate tostare i semi per qualche minuto nel forno a 200°C, oppure in una padella.
2. Setacciate e unite le farine. Aggiungete i semi, il lievito, 1 cucchiaio d’olio extra vergine d’oliva, il malto d’orzo e il sale.
3. Fate lievitare fino a far raddoppiare l’impasto di volume (1-2 ore per il lievito di birra, 3-6 ore per il lievito madre).
4. Infornate a 200 °C per 25-30 minuti (ho usato una teglia profonda 10 cm x 26 cm). Fate raffreddare e servite con una buona insalata.

We love our pizzas! We love them with all sort of ingredients on top, as long as the ingredients are of the best quality! We have so many different types of pizza in Italy that is easy to get confused! I don’t even know all of them, I just know there are several recipes. Some of the most amazing pizzas are made with seafood and fresh herbs.
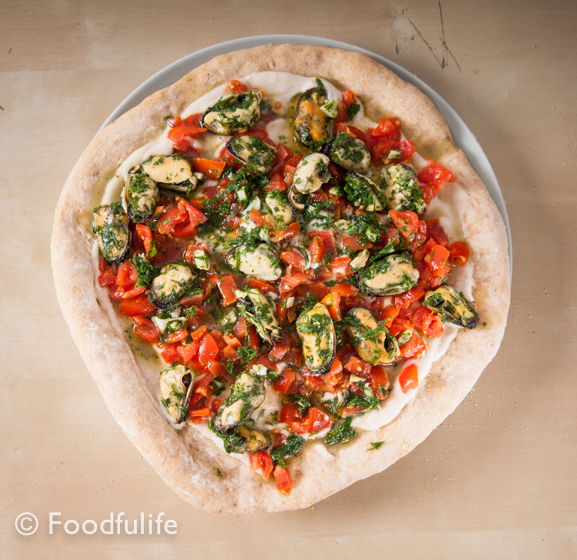
This is one of my recipes, a lovely pizza made with a creamy cannellini bean hummus and topped with mussels, full of flavours and really crunchy! You can call it pizza or you can call it focaccia, either way, it is delicious!!!
Cannellini beans are perfect with mussels, so I have adapted my hummus recipe with slightly different ingredients to suit this recipe best. It is a great summer dish, fresh crunchy and very tasty!
Pizza with cannellini bean hummus and mussels.
Ingredients
For 2 large pizzas (4 people)
500 g pizza dough (you can follow this recipe)

For the cannellini bean hummus
1 can of cannellini beans
1/2 clove of garlic
1 small shallot
the juice of 1/2 a lemon
1 teaspoon sesame seeds
a few crystals of sea salt
2 tablespoons of extra virgin olive
2 tablespoons of water (if needed)

For the mussels
2 cloves of garlic, finally chopped
250g (8.8 oz) of mussels ( I used already cleaned and frozen mussels without shell, but you can use fresh ones if you like)
1 tablespoon of chopped parsley
1 tablespoon of chopped tarragon
salt and pepper to taste
3 tablespoons of extra virgin olive oil
To garnish
20 cherry tomatoes, washed, chopped and drained

Method.
For the Hummus.
1. Using a small mortar and a pestle, crush 1 teaspoon of sesame seeds with a few sea salt crystals.

2. Rinse the beans well, then boil them for a few minutes in salted water and drain.
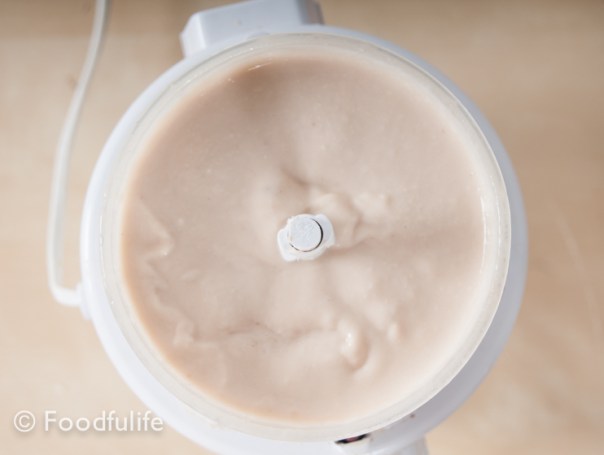
3. In a food processor, finely chop the beans with the crushed sesame seeds, the salt crystals, 1/2 a clove of garlic and a small shallot. After a few minutes, add the juice of half a lemon, 2 tablespoons of water (only if needed) and 2 tablespoons of extra virgin olive oil. Process everything until you have a smooth and creamy mixture.

For the pizza.
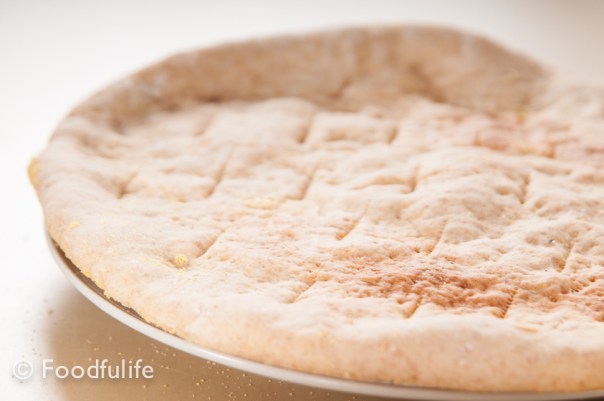
1. Make 500g of pizza dough (follow this recipe).
2. Roll out the dough on two baking trays, greased with plenty of extra virgin olive oil and shape 2 large pizzas.

3. Pierce the dough using a knife and bake in a preheated oven at 200 ° C (392° F) for 15-20 minutes.

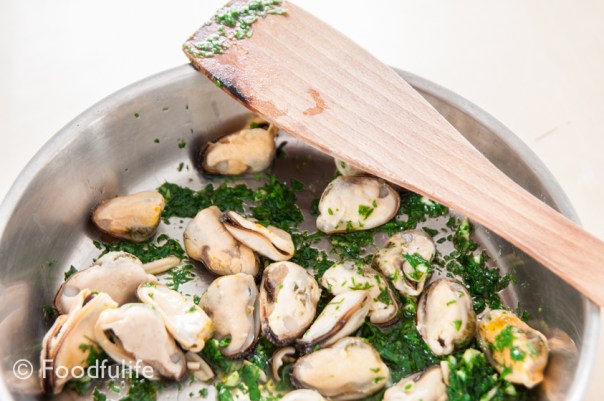
For the mussels.
1. In a frying pan, fry two cloves of garlic with the parsley and the tarragon (all finely chopped), over very low heat with 3 tablespoons of extra virgin olive oil.

2. After a few minutes add the mussels and cook over a medium heat for about 10 minutes, then turn off the heat.
To garnish.
Garnish the pizzas with the cannellini hummus, then top with the tomatoes and the mussels.


Pizza saporita con hummus di cannellini e muscoli.
Ingredienti
Per 2 pizze grosse (4 persone)
500 g di pasta per la pizza
Per l’hummus di cannellini
1 scatola di cannellini
1/2 spicchio d’aglio
1 scalogno piccolo
il succo di 1/2 limone
1 cucchiaio di semi di sesamo
qualche cristallo di sale marino
acqua q. b.
2 cucchiai di olio extra vergine d’oliva
Per i muscoli
2 spicchi d’aglio
250g di muscoli ( ho usato muscoli già puliti, senza guscio e surgelati, ma potete anche usare quelli freschi)
1 cucchiaio di prezzemolo, lavato e tritato
1 cucchiaio di dragoncello, lavato e tritato
sale e pepe q.b.
3 cucchiai d’olio extra vergine d’oliva
Per la guarnizione.
20 pomodorini ciliegina, lavati, tagliati a pezzetti e scolati
Per la preparazione dell”hummus.
1. Con un pestello e un piccolo mortaio, schiacciate i semi di sesamo con qualche cristallo di sale.
2. Sciacquate bene i fagioli e scottateli per qualche minuto (in acqua leggermente salata). Quando saranno pronti, scolate i fagioli.
3. In un tritatutto, tritate finemente i fagioli con i semi di sesamo, il sale, mezzo spicchio d’aglio e lo scalogno. Dopo qualche minuto, aggiungete il succo di mezzo limone, un po’ d’acqua (solo se necessario) e 2 cucchiai d’olio extra vergine d’oliva. Tritate tutto fino ad ottenere una crema uniforme.
Preparazione della base.
1. Preparate 500g di pasta per la pizza seguendo questa ricetta.
2. Stendete la pasta su due teglie unte abbondantemente con olio extra vergine d’oliva e formate due pizze grandi.
3. Fate dei piccoli tagli sulla superficie della pasta e infornate a 200°C per 15-20 minuti.
Per la preparazione dei muscoli.
1. In una padella, fate soffriggere due spicchi d’aglio con il prezzemolo e il dragoncello (a fuoco molto basso).
2. Dopo qualche minuto aggiungete i muscoli e fate cuocere per circa una decina di minuti, poi spegnete il fuoco.
Preparate la pizza.
Con un cucchiaio spalmate l’hummus di cannellini uniformemente sulla base della pizza, poi aggiungete i pomodorini e i muscoli.


Panna cotta is one of the most appreciated Italian desserts and is well known all over the world. This amazing dessert is probably widely appreciated, not only for its wonderful velvety texture and delicate flavour but also for the simplicity of the preparation method. The traditional recipe is usually prepared with cream, sugar and vanilla pods and served with fruit, chocolate or caramel sauce. In addition to the traditional recipe, there are many variations which include different ingredients, in order to get more creative and complex flavour combinations (we have already prepared a double chocolate panna cotta, in a previous post).
In this recipe, I added the mango pulp with a hint of lemon flavour, to celebrate the warm season. The result is an extremely velvety, exotic and charming dessert!
You’ll love it!!!

Tips.
1. To make a slightly lighter dessert you can replace 50 ml of whipping cream with 50 ml of whole milk.
2. It’s important to strain the mango puree well, because the mango pulp contains little hairy bits which can compromise the smoothness and texture of the dessert.
3. In this recipe, I added 1 tablespoon of honey, but half a tablespoon was actually enough for my taste. With half a tablespoon of honey you get a less sweet but more delicate panna cotta, which in my opinion, suits an adult taste best. You can taste the mixture with 1/2 tablespoon of honey and then decide whether you want to add more or not. For children, the preparation with a tablespoon of honey is perfect!

Mango Panna Cotta.
Preparation: 20 minute + 3 hours in the fridge
Easy
Ingredients
for 2 servings
150g (5.2 oz) mango (+ a few pieces of fresh mango)
1 tablespoon of honey
the zest of half a lemon (or 1 drop of lemon essential oil)
2 gelatine leaves
200 ml ( 6.76 us fl oz) whipping or double cream
a few mint leaves

Method
1. Leave the gelatine leaves to soak for about 10 minutes.

2. Pour the cream into a small saucepan with the honey and the lemon zest (or lemon essential oil). Cook over a moderate heat for a few minutes, until the cream is quite hot (but do not boil). Then add the gelatine leaves, stir very well and turn off the heat.

3. Peel the mango and cut it into pieces. Puree the fruit in a blender with the warm cream.
4. Using a strainer, pour the mixture into small one-portion pots and let cool. Then put the pots in the refrigerator to set for about 3 hours.

5. Serve the panna cotta with some fresh mango and a few mint leaves on top.


Panna Cotta al Mango.
Difficoltà: facile
Preparazione: 20 minuti + 3 ore nel frigorifero
Ingredienti
per 2 panne cotte
150 g di mango (+ qualche pezzo di mango da aggiungere alla fine, come guarnizione)
Scorza di mezzo limone (oppure 1 o 2 goccia di olio essenziale di limone)
1 cucchiaio di miele
2 fogli di colla di pesce
200 ml di panna
qualche foglia di menta
Metodo
1. Mettete a bagno, in acqua tiepida, i fogli di gelatina per 10 minuti.
2. Riscaldate la panna in un pentolino (a fuoco basso) con il miele e la scorza di limone (oppure l’olio essenziale di limone). Aggiungete la gelatina, mescolate per qualche minuto e spegnete il fuoco.
3. Togliete la buccia al mango, tagliatelo a pezzi e frullatelo bene insieme alla panna (ancora calda).
4. Usando un colino, filtrate la panna e versatela negli stampini. Lasciate raffreddare e poi mettete in frigorifero per 3 ore a rassodare.
5. Servite con dei pezzi di mango fresco e qualche foglia di menta.

