Tag Archives: Home-made

Make the Best Home-made Yogurt!

DSC_0946

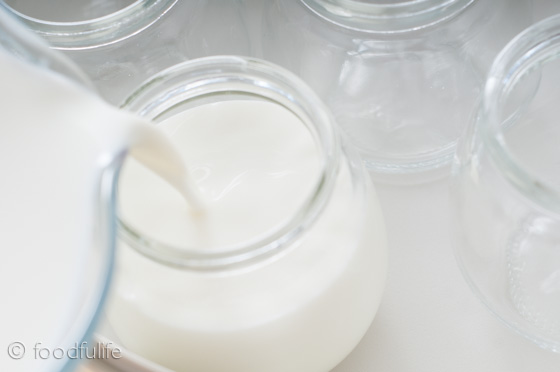
Home-made yogurt is cheap, healthy and delicious! There are several ways to make yogurt at home, today I am going to show you the easiest method, using a yogurt maker, some milk and live culture yogurt bacteria.

First, there are a few things that you have to keep in mind when choosing the ingredients…

DSC_4196-2

You’ll need :

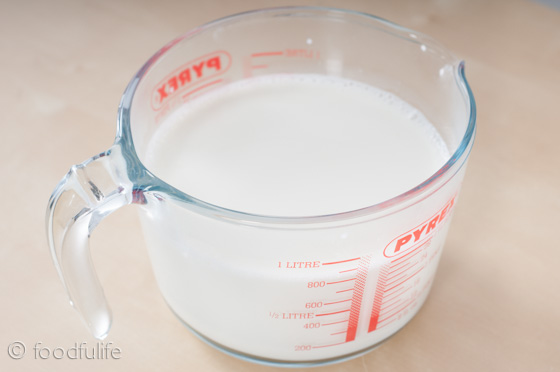
1. One litre (33.8 fl oz, 1.75 pt uk ) of good quality milk, possibly organic, to avoid that the antibiotics contained in the milk might compromise the development of the good bacteria in the process. Unless you are on a low-fat diet, choose full-fat milk to make a creamier and smoother yogurt.

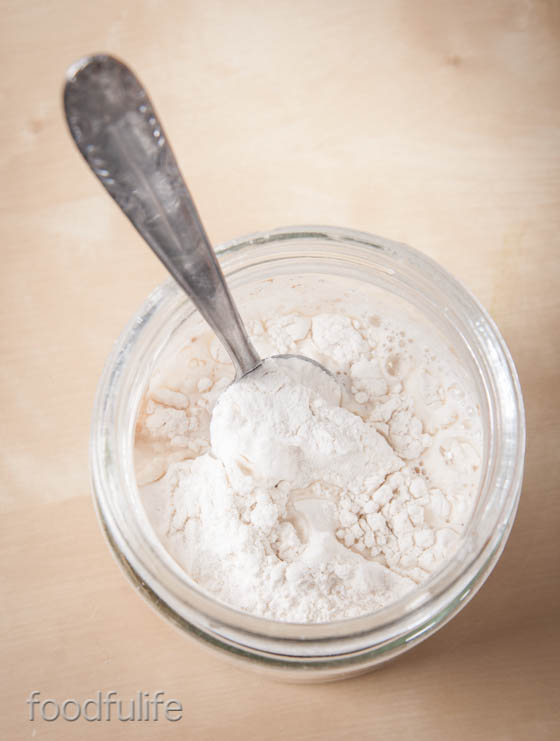
2. A live culture yogurt or a yogurt culture packet (here I am going to use a yogurt culture packet).

3. Sterilised glass jars. You can sterilise the jars by putting them (of course, without the lids) in a pre-heated oven at 100° C (212 F°) for about 8-10 minutes. Let cool before using.

DSC_4267

Home-made yogurt (basic recipe)

Ingredients

1 litre (33.8 fl oz, 1.75 pt uk ) of good quality milk

1 live culture yogurt (1 cup) or a yogurt culture packet

Tools

a food thermometer

a yogurt maker (possibly with glass jars)

a stainer, or a cheese cloth

a spoon

a pan

a cup, or a small bowl to strain the yogurt

a measuring cup

DSC_4205-4

The Method.

1. Pasteurise your milk. Heat the milk up to 85°C (185°F ), checking the temperature using a food thermometer (avoid boiling the milk, this way you can preserve the nutrients contained in it). This process will take a few minutes.

Variation. If you prefer thick yogurt, you have to boil the milk for at least 5-10 minutes and then remove the skin on the surface.

DSC_4236

DSC_4246

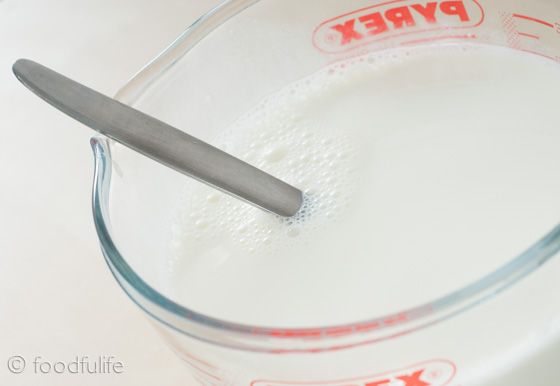
2. Let the milk cool (you have to use the milk at room temperature to make the yogurt).

DSC_4256

3. Add the healthy bacteria. You can use a live culture yogurt (unflavoured, unsweetened and to be added at room temperature) or you can buy a yogurt culture packet. If you use a yogurt culture packet, you have to mix the culture with 2 tablespoons of milk first.

DSC_4276

4. Mix the live culture with 1 litre of milk (or less, if you have boiled the milk to make thick yogurt). Mix everything well.

DSC_4299

5. Set the timer (or an alarm) and keep the mixture at 38-40 °C (100-104°F) for 8-12 h. Use a yogurt maker, in this way your temperature will be constant at all times.

DSC_4313

DSC_4318

6. Strain your yogurt (this is optional). If you desire a thicker yogurt, you can strain the liquid using a cheese cloth (or a tea towel or a strainer). This process might take from a few up to several hours, depending on the device you use and on the thickness of the yogurt you wish to achieve. Leave the yogurt in the fridge while you do this.

DSC_3857

 Notes.

1. Store your yogurt in sterilised jars. Seal the jars with a lid and keep them in the fridge for 5-7 days (your yogurt might last even longer, if properly stored). You can freeze it and it will last up to a month.

2. If you are going to use your home-made yogurt as a starter to make a new batch, you have to do this within 5 days from the day you’ve made it, to make sure that the bacteria is fully active.
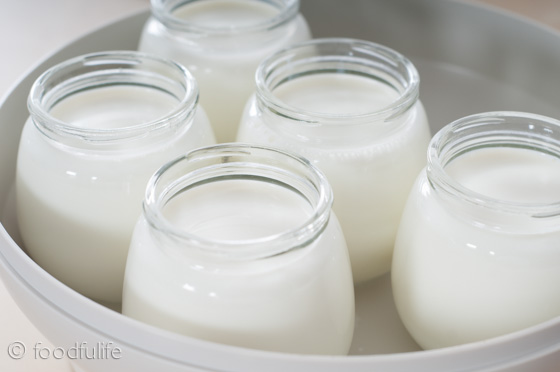
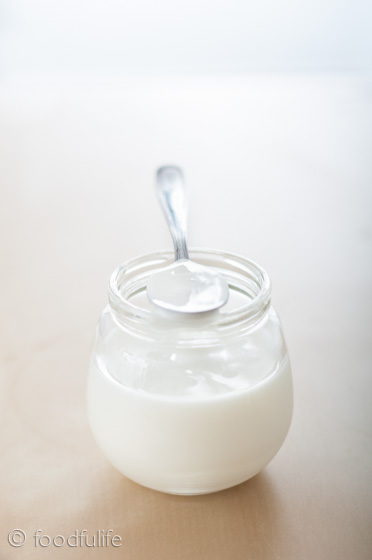
Comparing yogurts.

DSC_4331

In the picture above the yogurt was made without boiling the milk.

DSC_4214-2

In this picture the yogurt was made boiling the milk during the process.

I hope this post was helpful. Please let me know if you having troubles with the process.

Thank you!

Come fare lo yogurt in casa. 

Lo yogurt fatto in casa è economico, sano e delizioso! Ci sono diversi modi per fare lo yogurt, oggi vi mostrerò il metodo più semplice utilizzando la yogurtiera, del latte bio e dei fermenti lattici.

Prima di tutto, ci sono alcuni accorgimenti da seguire quando scegliete gli ingredienti…

Per avere un ottimo yogurt fatto in casa è necessario: 

1. Acquistare latte di buona qualità (possibilmente biologico), per evitare che gli antibiotici contenuti in esso possano compromettere lo sviluppo dei batteri buoni durante il processo. A meno che non stiate seguendo una dieta povera di grassi, è consigliabile scegliere del latte intero di buona qualità per ottenere yogurt denso e cremoso.

2. Utilizzare uno yogurt con i fermenti lattici vivi, oppure acquistare un pacchetto di fermenti lattici liofilizzati, che potete trovare in farmacia (in questa dimostrazione utilizzerò i fermenti in pacchetto).

3. Sterilizzare i vasetti di vetro. Se volete uno yogurt perfettamente conservato è necessario sterilizzare i contenitori che si utilizzeranno per conservare il prodotto. È possibile farlo mettendo i vasetti (senza il coperchio) in forno preriscaldato a 100 ° C per circa 8-10 minuti, oppure si possono far bollire (eseguite questo passaggio solo se utilizzate dei contenitori di vetro, non fatelo con la plastica!). Lasciate raffreddare prima dell’uso.

Ingredienti

1 litro di latte di buona qualità

1 yogurt con fermenti lattici vivi o un pacchetto di fermenti liofilizzati per fare lo yogurt

Utensili

un termometro per alimenti

una yogurtiera (possibilmente con vasetti di vetro)

un colino molto fitto, o un panno e un colino normale

un cucchiaio

una pentola

una tazza, o una piccola ciotola per scolare lo yogurt

una caraffa graduata per misurare i liquidi

Il Metodo. 

1. Pastorizzate il latte. Scaldare il latte fino a 85 ° C (185 ° F), controllando la temperatura con un termometro per alimenti. E’ bene non portare a bollore il latte per conservarne al meglio le sostanze nutritive. Questo processo richiederà alcuni minuti. Per ottenere invece uno yogurt più denso, fate bollire il latte per 5-10 minuti, poi rimuovete la pellicola che si forma in superficie e proseguite con il procedimento.

2. Lasciate raffreddare il latte. Utilizzare il latte a temperatura ambiente per fare lo yogurt.

3. Aggiungete i fermenti lattici. È possibile utilizzare uno yogurt con i fermenti lattici vivi come base per farne altro, oppure si può acquistare un pacchetto di fermenti lattici liofilizzati. Nel secondo caso, è necessario miscelare i fermenti con 2 cucchiai di latte prima di procedere.

4. Mescolate il latte con i fermenti. Utilizzate 1 litro di latte, o quello che rimane se ne avete già mischiata una parte o avete fatto bollire il latte. Mescolare bene tutto.

5. Impostate il timer (o un allarme) e mantenete la miscela a 38-40 ° C (100-108 ° F) per 8-12 h. Vi consiglio di utilizzare una yogurtiera, in questo modo la temperatura sarà mantenuta costante in ogni momento ed eviterete sorprese.

6. Filtrate il vostro yogurt. Se volete lo yogurt più denso, potete filtrarlo per eliminare il siero con un panno, un canovaccio oppure un colino molto fitto. Lasciate lo yogurt in frigo durante questa operazione. Questo passaggio può richiedere da poche a svariate ore, dipende da ciò che utilizzate e dal risultato che volete ottenere (il filtraggio è facoltativo).

Note. 

Conservate lo yogurt in vasetti sterilizzati. Sigillate i vasetti con un coperchio e riponeteli in frigo per 5-7 giorni (ma il vostro yogurt potrebbe durare anche più a lungo, se correttamente conservato). Potete anche congelarlo e durerà fino a un mese. Se avete intenzione di utilizzare lo yogurt fatto in casa come base per farne di nuovo, dovete farlo entro 5 giorni dalla produzione, per essere sicuri che i batteri siano pienamente attivi.

Nelle ultime due immagini del post, potete vedere chiaramente la differente consistenza di uno yogurt fatto con il latte pastorizzato (non bollito o scaldato) e uno yogurt fatto facendo bollire il latte durante il procedimento (ultima immagine).

Posh and perfect! Wholemeal pizza with goat’s cheese, olives and rocket (arugula).

This is a great veggy pizza! The dough, once cooked, is perfectly crunchy on the outside and soft on the inside. I used a mixture of manitoba, semolina and wholemeal flour to give elasticity, crispness and flavour to the pizza. Instead of using sourdough you can use 6 g of yeast to significantly reduce the rising time of the dough. At this link https://foodfulife.wordpress.com/2013/01/02/how-to-make-natural-yeast-sourdough/  you will find a short article that explains how to make sourdough at home.

Wholemeal pizza with goat’s cheese, olives and rocket (arugula).

Ingredients

For 1 thick pizza

50 g (1.76 oz) manitoba flour

50 g (1.76 oz) wholemeal (whole wheat) flour

40 g (1.41 oz)  fine semolina flour

50 g (1.76 oz) sourdough

70 g (2.46 oz) fresh and creamy goat’s cheese

70 g (2.46 oz) sweet and creamy soft cheese (crescienza or stracchino)

3 tablespoons extra virgin olive oil

1 teaspoon salt

A handful of rocket (arugula)

A handful of pitted olives

6-7 ripe cherry tomatoes

salt and pepper as needed (for seasoning the pizza)

100 ml (3.38 fl. oz) water (or more)

1/2 teaspoon honey

Create a starter dough with 50 g (1.76 oz ) wholemeal flour, 50 g manitoda flour and 50 g sourdough. Knead the starter dough with 100 ml (3.38 fl. oz) water and half a teaspoon of honey.

DSC_6289

Cover and set for a couple of hours. After 2 hours, take the starter dough and mix with the semolina flour ( adding some water or flour if needed). Add a teaspoon of salt and a tablespoon of oil and work until smooth.

DSC_6357

Let rise for a few hours, and then the dough will ready when it doubles in volume. Roll out the dough and place in a baking tray, previously evenly greased with a tablespoon of olive oil.

DSC_6371-3

Cut the tomatoes and the olives into thin slices. In a small bowl, mix the goat’s cheese with crescenza until smooth.

DSC_6361-3

Alternating, place the tomatoes and cheese on top of the dough, then garnish with some slices of olives. Season your pizza with a tablespoon of olive oil, some salt and pepper.

DSC_6378-3

Bake at 200 ° C (392° F) for 25-30 minutes.

DSC_6395-3

Top the pizza with fresh rocket and serve.

DSC_6408-3

DSC_6425-3

Pizza integrale con formaggio di capra, olive e rucola.

Ingredienti

per 1 pizza

50g di farina manitoba

50g di farina integrale

40g di semola (rimacinata)

50g di lievito madre  (oppure 6 g di lievito di birra con aggiunta di acqua)

70 g di formaggio fresco (cremoso) di capra

70 g di crescenza o stracchino

3 cucchiai di olio extravergine d’oliva

Una manciata di olive verdi snocciolate

Una manciata di rucola

1 cucchiaino scarso di sale

6-7 pomodorini ciliegia ben maturi

sale e pepe qb (sulla pizza finita)

100 ml di acqua (o più)

1/2 cucchiaino di miele

Create un lievitino con 50g di farina integrale, 50g di farina manitoda e 50 g di lievito madre. Impastate il lievitino con 100 ml di acqua e mezzo cucchiaino di miele. Coprite e lasciate lievitare per un paio d’ore. Dopo la prima lievitazione, prendete il lievitino e impastate con la semola (aggiungendo un po’ d’acqua o di farina se necessario). Aggiungete un cucchiaino di sale e un cucchiaio d’olio all’impasto. Lasciate lievitare per qualche ora ( tenete presente che l’impasto è pronto quando raddoppia di volume).

Stendete l’impasto su una teglia, uniformemente unta con un cucchiaio di olio extravergine d’oliva. Tagliate i pomodorini e le olive a fettine. In una terrina piccola, unite e mescolate bene la crescenza con il formaggio di capra, fino ad ottenere una crema abbastanza omogenea. Cospargete i pomodorini alternandoli al formaggio sulla base della pizza e finite di decorare con delle fettine di olive. Condite la pizza con un cucchiaio di olio, un po’ di sale e pepe.

Fate cuocere a 200° di per 25-30 minuti. Sfornate la pizza, aggiungete la rucola e servite.

How to Make Sourdough (Natural Yeast).

DSC_7382 

What is sourdough?

Sourdough is a natural yeast, obtained by fermenting flour and water. It can have a solid or a liquid consistency, depending on the amount of water used to feed it. Liquid sourdough usually rises better.

I personally recommend the preparation and use of this great ingredient because it’s completely natural, therefore much healthier and more digestible than other yeasts. Sourdough can be used to make a variety of breads, pizzas, pies and cakes with surprising results. Moreover, it makes everything taste better!

Preparing the sourdough starter.

1. First you have to make a starter. Mix 1 cup of organic wholemeal flour (the wholemeal flour is necessary for the first feed) with 1/2 cup of cool water (use non-chlorinated water, you can mix tap water with still drinking water from a bottle).
Put the ingredients in a glass, stainless steel or a plastic container for food.

DSC_7335

2. Stir all the ingredients together, until creamy and smooth, then cover the container with a damp cloth and let it sit for 24 hours.

DSC_7346

DSC_7348

3. After 24 hours remove the top half of the mixture, then feed the starter again with 1 cup of plain flour (you can use manitoba, whole spelt or wholemeal flour, if you prefer) and half a cup of water. Stir well, cover with a damp cloth and let it sit for another 24 hours.

DSC_7355

DSC_7363

DSC_7367

4. Now you can start feeding the starter every two days. Repeat this process for about 10 days, until it doubles in volume.

DSC_7376

5. After 10 days, you can start feeding your sourdough every 4-5 days and you can use it for your recipes.

Store the sourdough. 

1. Store the sourdough in a glass jar and keep it in the fridge (with the lid on).

2. Each time you feed the sourdough let it sit for 1-2 hours at room temperature in a glass jar covered with a damp cloth (with no lid on). Then remove the cloth, close the container and put it back in the refrigerator.

DSC_7385

Doses. 

1. Feed the sourdough the day before you use it (12 hours before).

2. In the recipes, the ratio of flour and sourdough used must be 3 to 1. (e.g. for 900 g of flour use 300 g of sourdough).

3. The rising time of the dough will depend on the age and strength of the yeast, at first it may take 3 to 6 hours  (however, when it doubles in size it is ready for use).

DSC_7378

DSC_6085
DSC_6203
La pasta madre.

La pasta madre è un lievito naturale che si ottiene facendo fermentare farina e acqua. Questo lievito può avere una consistenza più solida o liquida, a seconda della quantità d’acqua utilizzata, normalmente la versione più liquida ha una lievitazione migliore.

Consiglio vivamente la preparazione e l’utilizzo di questo ingrediente, essendo un lievito completamente naturale e quindi molto più digeribile e salutare rispetto ad altri lieviti comunemente utilizzati. Inoltre può essere usato facilmente nella preparazione di svariati tipi di pane, pizze torte salate e dolci con risultati sorprendenti.

Preparazione della pasta madre.

1. Per prima cosa, preparate un piccolo impasto unendo 1 tazza di farina integrale biologica (la farina integrale è necessaria per il primo impasto) a 1/2 tazza d’acqua fredda (utilizzate acqua con poco cloro, potete miscelare l’acqua del rubinetto con acqua minerale naturale).

2. Mettere gli ingredienti in un contenitore (è consigliabile utilizzare un contenitore di vetro oppure acciaio inossidabile, ma anche la plastica per alimenti va bene) e mescolare fino ad ottenere un composto cremoso. Coprire il contenitore con un panno umido e lasciate riposare per 24 ore.

3. Passate 24 ore, levate la parte dura in superficie e rinfrescare quello che resta del lievito, cioè aggiungete al composto 1 tazza di farina (potete utilizzare la 00, manitoba oppure farina integrale, come preferite) e mezzo bicchiere d’ acqua. Mescolare bene, coprire con un panno umido e lasciate riposare per altre 24 ore.

4. Ora potete rinfrescare il lievito ogni 2 giorni, utilizzando sempre una tazza di farina e 1/2 tazza d’acqua. Continuate con questa procedura per circa 10 giorni.

5. Dopo 10 giorni, potete incominciare a rinfrescare la pasta madre ogni 4-5 giorni. Arrivati a questo punto, la vostra pasta madre è pronta per essere utilizzata nelle vostre ricette.

La conservazione.

1. Conservate la pasta madre in un vasetto di vetro, chiuso con il coperchio e tenuto in frigorifero.

2. Dopo ogni rinfresco, lasciate riposare il lievito madre per una o due ore in un vasetto coperto da un panno umido a temperatura ambiente, poi chiudete il contenitore e rimettetelo nel frigorifero.

Le dosi consigliate. 

1. Nutrite la pasta madre il giorno prima di utilizzarla (almeno 12 ore prima).

2. Nelle ricette, il rapporto tra farina e pasta madre deve essere di 3 a 1, cioè su 900 g di farina utilizzeremo 300 g di lievito naturale.

3. Il tempo di lievitazione dipenderà dall’età e dalla forza della pasta madre. I tempi possono variare dalle 3 alle 6 ore, consiglio però di non guardare l’orologio ma di osservare il volume dell’impasto, quando raddoppia è pronto per l’uso.