Category Archives: SAVOURY RECIPES

Quick And Easy: Chestnut Salad With Apples And Escarole

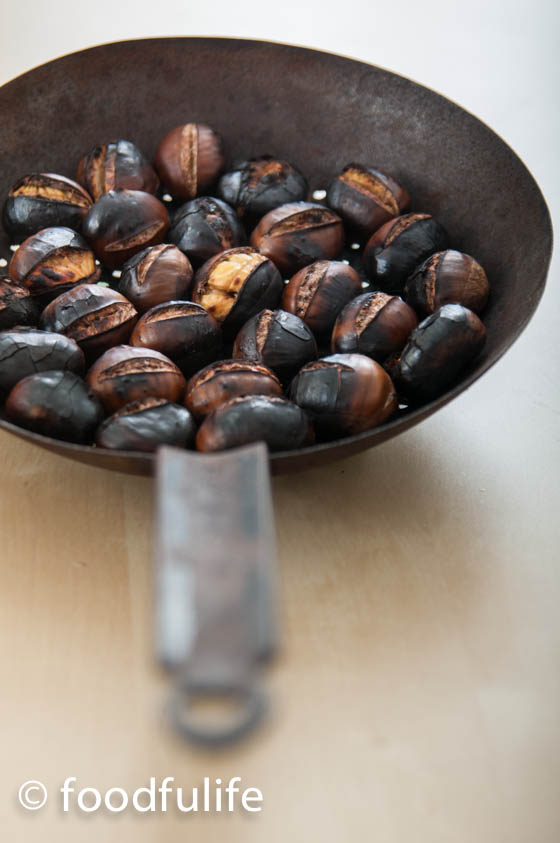
This week, as promised, I start a series of recipes dedicated to chestnuts. Chestnuts are a wonderful and versatile ingredient, full of fibre, nutrients and vitamins. Basically, they are carbohydrates, but they also contains some good proteins and are gluten-free. These fruits are usually roasted or boiled, sometimes used to enrich salads, stews or soups. Chestnuts flour is also quite popular, often used to make tasty breads and various desserts. Candied chestnuts are also an amazing ingredient when it comes to making desserts, but they are usually quite expensive.

DSC_9980

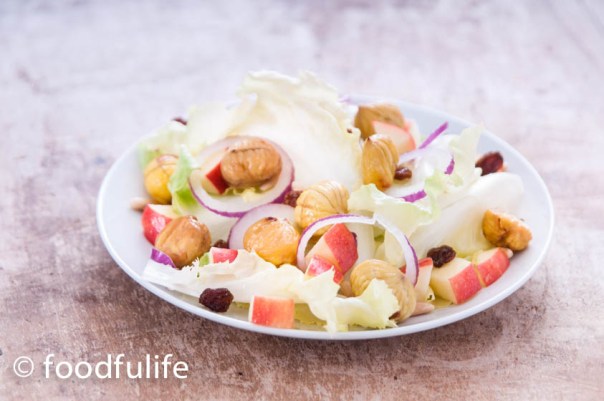
Today I am publishing a salad with crunchy roasted chestnuts, escarole, pine nuts and apples, packed with vitamins (B1, B2, C etc…) and minerals, to boost the immune system with plenty of flavour and texture!

DSC_0092

Salad with roasted chestnuts, escarole and apples.

Ingredients 

For 4 people

400 g of roasted chestnuts (or boiled, if you prefer) see How to make amazing roasted chestnuts

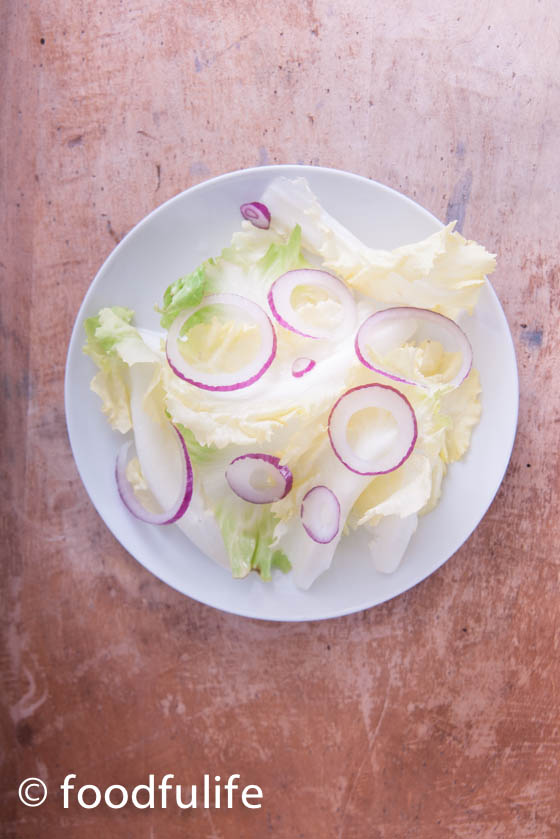
160 g of escarole or curly-leaved endive, washed and dried

1/2 red onion (optional)

30 g of raisins

40 g pine nuts

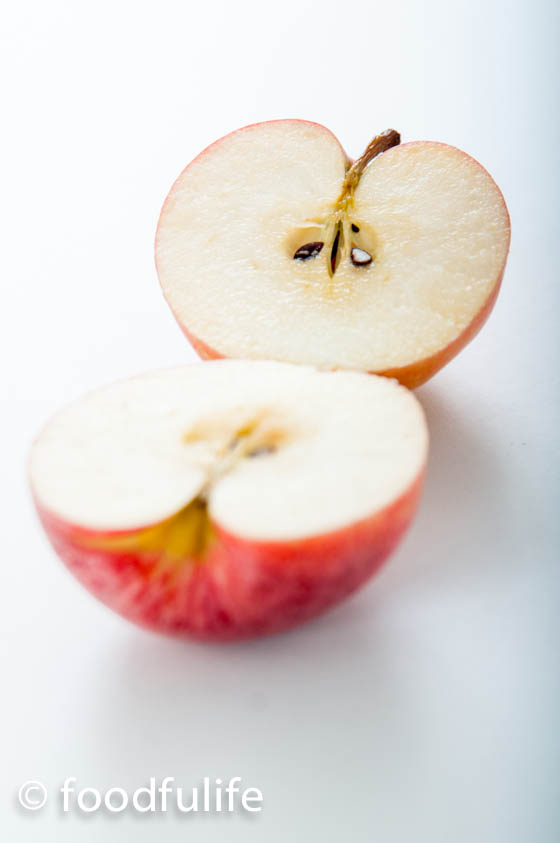
2 gala apples, washed and dried

3 tablespoons extra virgin olive oil

the juice of half a lemon

salt and pepper to taste

DSC_0015

DSC_0023

Method.

1. Cut the apples and the escarole leaves. Peel and slice the onion then put it in a cup and fill the cup with water. Leave the onion in the water for 30 minutes and then drain (this operation will make the onion sweeter).

DSC_0149

2. Arrange the escarole leaves on the plates, then add the chopped apples with the raisins, the onion and the pine nuts (divide into 4 servings).

DSC_0163

DSC_0165

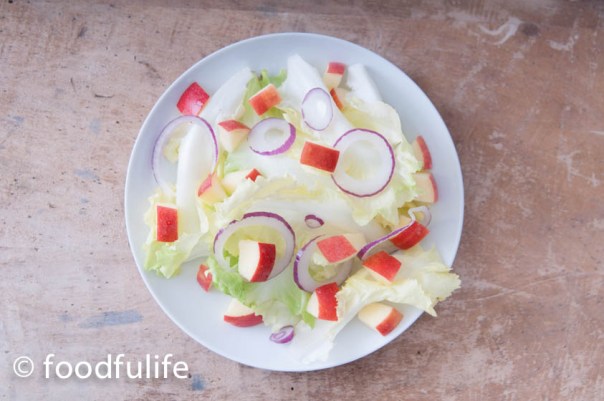
3. Peal the roasted chestnuts then  add them to the salad.

DSC_0218

4. Season with 3 tablespoons of extra virgin olive oil, a few drops of lemon juice, salt and pepper.

DSC_0223

DSC_0190

DSC_0174

Insalata di caldarroste, scarola e mele.

Ingredienti

Per 4 persone

400 g di caldarroste (oppure castagne bollite),

per fare le caldarroste seguite questo link:  Come preparare ottime caldarroste a casa

160 g di indivia scarola (oppure indivia riccia) , lavata e asciugata

1/2 cipolla rossa (facoltativo)

30 g di uvetta

40 g di pinoli

2 mele gala, lavate e asciugate

3 cucchiai di olio extravergine d’oliva

il succo di mezzo limone

sale e pepe q. b.

Preparazione.

1. Tagliate le mele e le foglie di scarola. Sbucciate e affettate le cipolle.  Mettete le cipolle a mollo in acqua per 30 minuti (per renderle più dolci), poi scolate.

2. Dividendo in quattro porzioni, sistemate prima le foglie di scarola e poi aggiungete i pezzetti di mele, l’uvetta, la cipolla e i pinoli.

3. Sbucciate le caldarroste e aggiungetele all’insalata.

4. Condite con olio extra vergine d’oliva, qualche goccia di succo di limone, sale e pepe.

DSC_0215

Quick And Easy: Prawn Salad With Rocket And Pomegranate

Last but not least, today I am publishing a wonderful prawn salad with rocket leaves and lots of pomegranate seeds. Extremely easy to make and perfectly balanced, this dish is real treat!!!

It will definitely become a classic at my dinner parties!

DSC_8122

DSC_8107

Prawn salad with rocket and pomegranate.

350 g prawns tails

125 g rocket (arugula)

2 spring onions, washed and finely sliced (only the tender part)

half bulb of fennel, washed and finely sliced

2 stalks of celery, washed and finely sliced (only the tender part)

the seeds of a pomegranate

for the lime citronette

the juice of 1/2 a lime

4 tablespoons of extra virgin olive oil

salt and pepper to taste

DSC_8117

Method.

1. Peel and devein the prawns, then poach in water for a few minutes.

2. Drain the prawns and let cool.

3. Place the arugula, the fennel, the spring onions and the celery in the plates, then add the prawns and garnish with plenty of pomegranate seeds.

4. Make the lime citronette. Mix 4 tablespoons of extra virgin olive oil with the juice of half a lime, then season with salt and pepper.

5. Pour the lime dressing over the salad and serve.

Also see Rice Flour Chocolate Cookies With Pomegranate and Light Sabayon With Pomegranate And Pistachios

DSC_8068

DSC_8072

DSC_8101

Insalata di gamberi con rucola e melagrana.

350 g di code di gambero

125 g di rucola

2 cipollotti, lavati e tagliati finemente (solo la parte tenera)

2 gambi di sedano, lavati e tagliati finemente (solo la parte tenera)

1/2 finocchio, lavato e tagliato finemente

i chicchi di una melagrana

Per la citronette di lime

il succo di mezzo lime

4 cucchiai di olio extra vergine d’oliva

sale pepe q. b.

Preparazione.

1. Sgusciate i gamberi e togliete il budellino. Fate bollire i gamberi per qualche minuto.

2. Scolate i crostacei e fateli raffreddare.

3. Mettete i gamberi con la rucola, i chicchi di melagrana, il finocchio e i cipollotti nei piatti.

4. A parte, preparate la citronette di lime. Mescolate 4 cucchiai di olio extra vergine d’oliva con il succo di mezzo lime, sale e pepe.

5. Condite l’insalata di gamberi con la citronette di lime e servite.

DSC_8148

Stuffed Vegetables (Gluten-Free and Vegetarian)

Stuffed vegetables (gluten-free and vegetarian)_ 
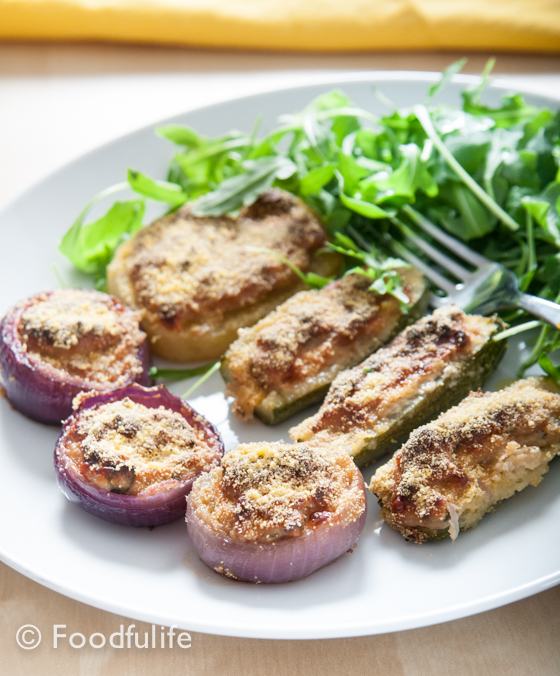
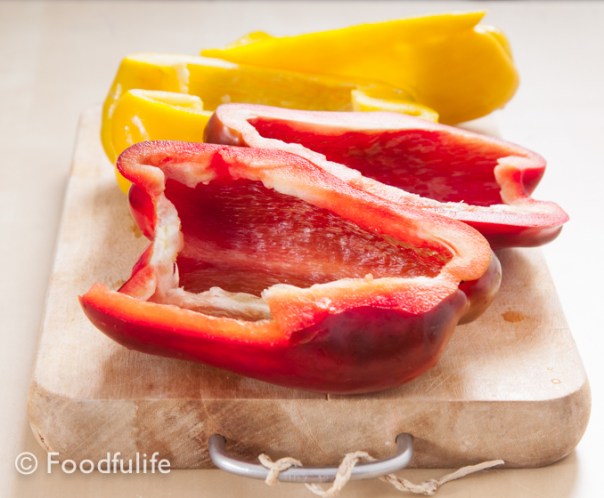
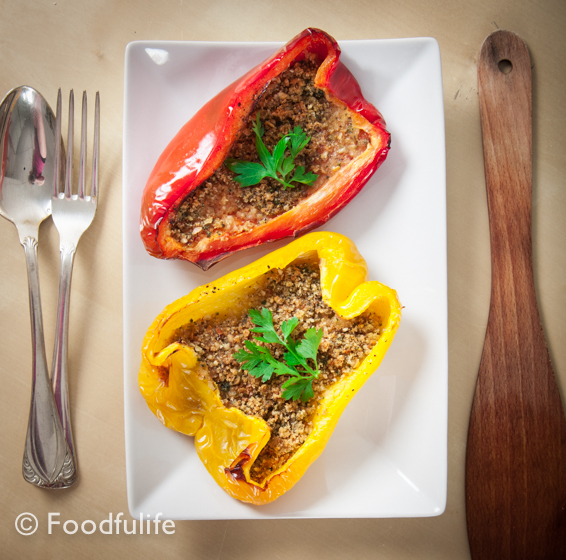
Verdure ripiene vegetariane, senza glutine.

Stuffed vegetables are a typical genoese dish, which requires quite a long preparation and cooking time, but it’s worth it! In this case, I adapted my mom’s recipe to create a gluten-free, vegetarian dish, using ricotta, plenty of fresh marjoram (which is also in the traditional recipe) and some gluten-free breadcrumbs. These stuffed vegetables are incredibly tasty, soft in the middle and crunchy on the outside; a wonderful Sunday meal to share with family and friends!

My advice is to make plenty, keep them in the fridge and eat them the next day, they taste even better!

DSC_7725

Stuffed vegetables without meat and gluten-free.

Cooking time: 1 hour 15 minutes

Preparation time: 30 minutes

difficulty: medium

Ingredients

for 1 medium-large tray of stuffed vegetables

2 medium potatoes

4 medium-large zucchini (to be divided into 8 pieces)

2 onions, plus 1 small onion to sauté

1 clove of garlic

1 egg

50 g grated Parmesan cheese

125 g ricotta

3 full tablespoons of fresh marjoram, chopped

5 tablespoons of extra virgin olive oil

some gluten-free bread crumbs to sprinkle on top and 2 tablespoons to add to the stuffing (or you can use pre-cooked polenta)

salt and pepper to taste

Method.

1. Steam all vegetables, until they are cooked but still crunchy.

2. Slice the potatoes, then place the smallest slices in a bowl and set aside for the stuffing.

3. Using a spoon and a knife, scoop out the central part of the zucchini and cut the onions in half (from the centre, not from the roots). Remove the central and the outer layers of onions, then put them in the bowl with the rest of the vegetables for the stuffing.

DSC_7641

DSC_7627

4. In a frying pan, sauté the onion with a clove of garlic, both finely chopped (add the garlic after a few minutes, to prevent burning).

DSC_7651

5. Remove the excess water, then using a food processor, puree all the vegetables for the stuffing. Fry over a medium heat, stirring well, until the mixture gets a little bit drier.

DSC_7654

6. In a food processor, mix the ricotta with the Parmesan cheese, 2 tablespoons of gluten-free bread crumbs, the marjoram and an egg. In a large bowl, add the vegetables puree to the ricotta mixture, then mix and season with salt and pepper.

DSC_7659

DSC_7660

7. Grease a baking tray with 2 tablespoons of extra virgin olive oil, then place the vegetables onto the tray and fill them with the stuffing.

DSC_7630

DSC_7673

8. Sprinkle some gluten-free bread crumbs on top, season with a little more extra virgin olive oil and bake at 200 ° C (392° F), until the vegetables are well coloured (about 30-40 minutes).

DSC_7735

DSC_7728

Verdure ripiene senza carne e senza glutine.

Cottura: 1 ora e 15 minuti

Preparazione: 30 minuti

Difficoltà media

Ingredienti

per 1 teglia medio-grande

2 patate di media grandezza

4 zucchini medio-grossi (da dividere in 8 pezzi)

2 cipolle , più 1 cipolla per il soffritto da mettere da perte

1 spicchio d’aglio

1 uova

50 g di parmigiano grattugiato

125 g di ricotta

3 cucchiai abbondanti di maggiorana fresca e tritata

5 cucchiai d’olio extravergine d’oliva

pangrattato senza glutine q. b. (oppure potete usare della polenta istantanea)

sale e pepe q. b.

Preparazione.

1. Fate cuocere a vapore tutte le verdure e toglietele dal fuoco ancora sode.

2. Tagliate le patate a fette, poi mettete le fette piccole e rotte in un contenitore per il ripieno.

3. Tagliate gli zucchini e scavate la polpa usando un cucchiaino e un coltello. Tagliate le cipolle a metà (non dalle radici ma dal centro), poi prendete la parte centrale e lo strato esterno delle cipolle e metteteli, con la polpa degli zucchini, nel contenitore per il ripieno.

4. In una padella, fate soffriggere 1 cipolla e uno spicchio d’aglio, entrambi tritati finemente (aggiungete l’aglio qualche minuto dopo, per evitare che si bruci).

5. Strizzate bene le verdure del ripieno per togliere l’acqua in eccesso, poi frullate e aggiungete al soffritto. Fate asciugare a fuoco medio e mescolando bene.

6. A parte, frullate la ricotta con il parmigiano, la maggiorana, due cucchiai di pangrattato senza glutine e un uovo. In una terrina grande, unite il purea di verdure passata in padella al composto di ricotta, poi mescolate e insaporite con sale e pepe.

7. Ungete una teglia con 2 cucchiai di olio extravergine d’oliva, disponetevi le verdure tagliate a metà, poi riempitele con il ripieno e spolverate con abbondante pangrattato senza glutine.

8. Condite con un filo d’olio e infornate a 200°C, finché le verdure saranno ben colorate (30-40 minuti).

DSC_7714

Traditional Recipe: Baked Peppers Au Gratin

A great dish to serve if you have a large number of guests to feed, because it is so easy to prepare and cook. Baked Peppers Au Gratin are a wonderful appetiser and side, served with meat or seafood, but you can have them as a vegetarian meal, with a nice salad. You can prepare a gluten-free version of this Italian traditional dish using instant polenta, instead of bread crumbs. You can also make a vegan version without the cheese.

DSC_1181

Serve Peppers Au Gratin hot or cold, they are delicious either way! But in the summer I prefer this dish cold, straight from the fridge, because the peppers need some time to absorb all the different flavours.

This is the right season to eat fresh bell peppers and there are plenty of choices when it comes to great traditional recipes with this wonderful ingredient.
Here are some other recipes using bell peppers that I have published recently on Foodfulife:

La peperonata

Roasted Bell Peppers with Garlic Vinaigrette

DSC_1210

Baked Peppers Au Gratin.

Preparation time: 10 minutes

Cooking time: 40 minutes

6 servings

Easy

Ingredients

3 large bell peppers (red and yellow)

6 tablespoons breadcrumbs

80 g freshly grated Parmesan cheese

1 tablespoon of fresh parsley, finally chopped

1/2 a tablespoon of dried oregano

2-3 cloves of garlic, crushed and finally chopped

salt and pepper to taste

extra virgin olive oil

DSC_1087

Method.

1. In a small bowl, mix the herbs with the breadcrumbs, the grated cheese, the garlic and season with some salt and pepper.

DSC_1099

2. Wash and dry the bell peppers.

DSC_1041

DSC_1053

3. Using a knife, cut the peppers in half and remove the stem, the seeds and the white parts.

DSC_1071

4. Place the peppers onto an oven tray, previously greased with a couple of tablespoons of extra virgin olive oil. With a spoon, spread the breadcrumb mixture evenly onto the peppers.

DSC_1104

5. Bake in the oven at 200°C (392° F) , until the peppers are tender and the breadcrumb mixture becomes very crunchy.

DSC_1209

DSC_1194

DSC_1193

Peperoni Gratinati Al Forno.

Tempo di preparazione: 10 minuti

Tempo di cottura: 40 minuti

6 persone

Facile

Ingredienti

3 peperoni grandi (rosso e giallo)

6 cucchiai di pangrattato

80 g di Parmigiano Reggiano, grattugiato fresco

1 cucchiaio di prezzemolo fresco, tritato finemente

1/2 cucchiaio di origano secco

2-3 spicchi d’aglio, schiacciato e tritato finemente

sale e pepe

olio extra vergine di oliva

Preparazione.

1. In una terrina, mescolate il pan grattato con l’aglio, l’origano, il prezzemolo, il parmigiano e un pò di sale e pepe.

2. Lavate e asciugate bene i peperoni.

3. Con un coltello, tagliate e rimuovete la calotta superiore del peperone. Tagliate a metà gli ortaggi e rimuovete la parte interna, con i filamenti e i semi.

4. Disponete i peperoni sopra una teglia, unta con un filo d’olio. Riempite i peperoni con il composto di pangrattato e sapori, ma senza esagerare.

5. Condite con un po’ d’olio e infornate a 200° C. Quando i peperoni saranno morbidi e il ripieno croccante spegnete il fuoco.

Home-Made Pizza With Tomatoes, Rocket and Parmesan Cheese

A crunchy pizza base, topped with fresh Piccadilly tomatoes, some rocket leaves and Parmesan cheese…

An easy recipe, perfect for this season!

Enjoy!

DSC_0986

Pizza with tomatoes, rocket and Parmesan cheese.

Ingredients

for 2 large pizzas

Buy 2 ready made pizza bases or follow this recipe

For the pizza toppings

2 fresh mozzarellas (or you can use stracchino)

300 g Piccadilly tomatoes or cherry tomatoes

60 g rocket leaves (arugula)

50 g Parmesan cheese (thin slices)

Extra virgin olive oil

salt and pepper to taste

Method.

1. Wash and dry the rocket leaves and the tomatoes. Cut the tomatoes in half.

2. Using a rolling pin, roll out the pizza dough and make two large pizza bases.

DSC_0911

DSC_0926

3. Bake the pizza bases at 200 ° C (392°F) until they are crunchy (I am using a use a pizza stone, but you can use a baking tray greased with olive oil).

4. Add the mozzarella cheese and put the bases back in oven for a few minutes, to melt the cheese.

DSC_0938

DSC_0941

5. Turn off the oven and garnish your pizzas. Place the tomatoes, the rocket leaves and Parmesan cheese onto the pizza bases, then season with extra virgin olive oil, salt and pepper.

DSC_0958

DSC_0972

DSC_0965

DSC_1026

Pizza con pomodorini freschi, rucola e parmigiano.

Ingredienti

Per 2 pizze grandi

Per fare due basi per la pizza seguite questa ricetta

Per guarnire le pizze

2 mozzarelle (oppure stracchino)

300 g di pomodorini Piccadilly

60 g di rucola

50 g di scaglie di Parmigiano Reggiano

olio extra vergine d’oliva

sale e pepe q. b.

Preparazione.

1. Lavate e asciugate la rucola e i pomodorini, poi tagliate i pomodorini a metà.

2. Stendete la pasta con un matterello.

3. Infornate le basi della pizza a 200° C (uso una pietra per la cottura della pizza, ma potete usare una teglia unta). Fate cuocere fino ad ottenere una pasta croccante.

4. Aggiungete la mozzarella e infornate ancora per qualche minuto, per far sciogliere il formaggio.

5. Sfornate le pizze e spegnete il forno. Disponete i pomodorini, la rucola e il parmigiano sulle pizze, poi condite con abbondante olio extra vergine d’oliva, sale e pepe.

Barley And Shrimp Salad In Red Cabbage Leaves

Barley is a cereal that has been used in dishes for thousands of years. It’s a wonderful and versatile ingredient: it can be used in salads and soups or cooked like a risotto. Today we are going to make a light barley salad with lots of fresh vegetables and shrimps! This colourful salad could be a great side dish for a barbecue or a buffet, but could also be served on its own as a light meal.

DSC_0799

DSC_0727

Tips.

1. Pearl barley does not need soaking before cooking, it is simply boiled like rice.

2. Wash the barley under running water for a few minutes before cooking it, to remove its natural bitter taste.

3. For this recipe I am using a red Tropea’s onion, a delicious onion variety, available in Italy. If you don’t find it, you can use shallots instead. Shallots and Tropea’s onions are perfect for this recipe because they are naturally sweet and have a pleasant delicate flavour.

DSC_0720

Barley and shrimp salad in red cabbage leaves.

5 – 6 red cabbage leaves (medium size)

90 g pearl barley

250 g frozen shrimps

1/2 sweet red Tropea’s onion (or shallots)

1/2 celery stalk, finely chopped

7-8 cherry tomatoes

1 large avocado

the juice of half a lemon

2 tablespoons of fresh parsley, finely chopped

salt and pepper to taste

vegetable broth

DSC_0666

Method.

1. Cook the pearl barley in vegetable broth (I used an organic stock), for 40 minutes (the cooking time will vary depending on the variety of barley).

DSC_0704

2. Boil some water in a sauce pan, then turn off the heat and poach the shrimps for 3-4 minutes. Drain and set aside.

DSC_0711

3. Wash and dry the cabbage leaves. Peel and slice the onion and avocado, then set aside. Wash, dry and cut the celery and tomatoes.

DSC_0697

DSC_0756

4. Mix all the vegetables (including the chopped parsley) with the cooked barley and shrimps. Serve the salad in cabbage leaves and season with salt, pepper and lemon juice.

DSC_0765

DSC_0787

DSC_0810

Cestini di insalata d’orzo e gamberetti.

5-6 foglie di cavolo rosso

250 g gamberetti surgelati

1/2 cipolla rossa di Tropea (oppure lo scalogno)

1/2 gambo di sedano

7-8 pomodorini ciliegia

1 avocado grande

il succo di mezzo limone

2 cucchiai di prezzemolo fresco, tritato finemente

sale e pepe q. b.

brodo vegetale (uso del brodo fatto con del dado biologico)

Preparazione.

1. Fate cuocere l’orzo perlato nel brodo per 40 minuti (il tempo di cottura può variare a seconda della qualità di orzo).

2. Fate bollire una pentola piena d’acqua, poi spegnete il fuoco e immergetevi i gamberetti per 3-4 minuti. Scolate e mettete da parte.

3. Lavate e asciugate le foglie di cavolo. Pelate e tagliate le cipolle e l’avocado. Lavate, asciugate e tagliate a cubetti il sedano e i pomodorini.

4. Mescolate tutte le verdure (compreso il prezzemolo) con l’orzo e i gamberetti. Servite l’insalata nelle foglie di cavolo e condite con sale, pepe e il succo di limone.

DSC_0806

Traditional Recipe: Saffron Risotto

Saffron Risotto (Risotto Allo Zafferano) is a Lombard recipe, much appreciated in the North of Italy for its wonderful delicate flavour and also because is one of the simplest risotto recipes to make. This amazing risotto is usually served on its own, without meat or fish and it has a lovely saffron flavour, well complemented with the Parmesan cheese, which is added at the final stage of the recipe, like in most Italian risotto dishes.

DSC_0627

Saffron Risotto is often confused with Milanese Risotto (Risotto alla Milanese), another renowned Lombard recipe; in both these risottos we use saffron as a main ingredient but there are some differences in the ingredients.

Tips.

1. It is very important to only use good quality products, in order to make a delicious risotto.

2. Also see How To Make A Perfect Risotto

DSC_0660

Saffron Risotto (Risotto allo Zafferano) 

Medium difficulty

Preparation time: 5 minutes (not considering the broth)

Cooking time: 25-30 minutes

Ingredients

For 4 servings

350 g (12.3 oz) Carnaroli rice or Arborio rice

a pinch of saffron (enough to colour the rice of a bright yellow)

1 large onion, very finely chopped

1 glass of good white wine (not acidic, this is very important!)

150 g (5.3 oz)  freshly grated Grana Padano cheese

125 g (4.4 oz) good quality fresh butter

1 litre (33, 8 fl oz us) hot vegetable broth (see below)

For vegetable broth

1 large carrot

1 large onion

1 celery stalk (also use the leaves, if you have them)

salt and pepper to taste

Method.

1. In a large pan, prepare the vegetable broth. Wash, clean and roughly chop the vegetables, then fill the pan with plenty of water and cook the vegetables until tender. Season with some fine sea salt (do not exceed), then sift the broth and remove the vegetables.

DSC_0600

2. Sauté the onion in 80 g of butter, over a low heat for about 10-15 minutes.

DSC_0605

3. Add the rice and fry for a few minutes over a medium heat, then pour in a glass of white wine and stir. Shimmer until all the wine evaporates.

DSC_0609

4. Lower the heat and add the hot broth (a little at a time), stirring constantly. Let the broth evaporate and continue adding the broth and stirring, until the rice is creamy and properly cooked. During the cooking time add the saffron (diluted in a little bit of warm vegetable broth).

DSC_0615

DSC_0620

5. Turn off the heat and add the finals ingredients to the risotto. Add the rest of the butter, 3-4 tablespoons of grated Grana Padano and season with salt and pepper ( taste it and season only if needed), then stir and cover with a lid. Let the risotto rest for a few minutes and serve.

DSC_0645

DSC_0639

DSC_0629


How To Make A Perfect Risotto

Risotto is one of the finest Italian dishes and is appreciated all over the world. There are endless variations. Each region has its own traditional risotto recipes made with seafood, meat or vegetables. Today we are going to explore the method to make a perfect risotto, the Italian way!

Four important steps.

To make a good risotto it is important to follow each recipe step by step. There are 4 basic steps in the preparation process of each risotto:

1. Sauté the onions

2. Fry the rice

3. Cook the risotto

4. Let the risotto rest

Today we are going to see each of these steps in depth.

DSC_0597

A few notes on the preparation process.

1. The preparation time and the ingredients will vary depending on the recipe.

2. During the whole process you have to constantly stir the risotto, therefore it’s important to prepare all the ingredients before you start cooking.

3. Don’t reheat the risotto because the rice will become chewy and dry. Prepare the risotto and serve it.

DSC_0594

Method.

1. Sauté the onions. Sauté the onions in butter over a very low heat, until they are very tender and almost transparent.

Notes. The onions have to dissolve in your mouth when you taste the risotto. You can replace the onions with shallots, spring onions or garlic, depending on the recipe.

DSC_0607

2. Fry the rice. When the onions are ready, add the rice and then fry it over a medium heat for a few minutes (stir constantly).

DSC_0608

3. Cook the risotto. After frying the rice, add the wine.  Once the wine flavour is absorbed and the alcohol evaporated, add the hot broth (usually a full ladle at a time) and cover the rice with it. Continue cooking and stirring. Once the liquid is almost completely absorbed, add more broth until you reach the ideal cooking consistency.

DSC_0602

Notes. Use hot broth, because a cold broth will lower the temperature and compromise the cooking process.

DSC_0613

4. Let the risotto rest. When the risotto is creamy and properly cooked, add the final ingredients (usually butter and cheese), stir well, cover with a lid and let the rice rest for a few minutes. Now the risotto is ready to be served.

Note. This will make the risotto very creamy and tasty.

Also see Traditional Recipe: Saffron Risotto

DSC_0639


Traditional Recipe: Roasted Bell Peppers With Garlic Vinaigrette

Bell peppers are delicious, rich in vitamin C and antioxidants and come in a variety of colours. In Italy we usually cook red and yellow peppers and we don’t use green peppers as much, because they are more acidic and bitter in taste. Bell peppers are usually roasted, fried, grilled or stewed with different ingredients. Today we are going to roast the peppers and season them with a light vinaigrette made with extra virgin olive oil, a splash of balsamic vinegar and enriched with fresh herbs and garlic.

Roasted peppers are a very simple but effective appetiser or side dish, I personally really like them and I could eat lots! If you prefer a more complex dish you can use them to make a sauce to complement or season pasta and meat dishes, or simply used them as a tasty ingredient in salads.

DSC_0574

Roasted bell peppers with garlic vinaigrette.

medium difficulty

Ingredients

for 4 people

3 large bell peppers.

DSC_0545

For the garlic vinaigrette.

4 tablespoons of extra virgin olive oil

1 clove of garlic, crushed

1/2 tablespoon of dried oregano

1/2 tablespoon of finely chopped fresh parsley

1 tablespoon of good balsamic vinegar

salt and pepper to taste

Method.

1. Wash and dry the bell peppers.

DSC_0523

2. Roast the whole peppers in the oven at 200°C (392° F ) on a baking sheet (The cooking time will vary depending on the size and thickness of the peppers. When the skin starts darkening slightly and detaching from the flesh, the peppers are ready).

DSC_0531

3. Once the peppers are slightly soft, turn off the oven. Put the hot peppers in plastic bags (or an airtight container) and seal well (In this way, the steam will make removing the skin from the flesh mush easier).

4. Let cool, then remove the pepper from the bag and throw away the water created from the steam. Remove the skin on each pepper, using a small sharp knife.

DSC_0538

5. Slice the peppers vertically into two, then remove and discard the stem and the seeds. Slice each pepper vertically into 8 pieces and serve cold with the garlic and herb vinaigrette.

DSC_0546

DSC_0579

For the vinaigrette.

Mix 4 tablespoons of extra virgin olive oil with the herbs, the garlic and some salt and pepper. Season and serve.

Tip. For extra flavour you can add half a tablespoon of anchovy paste to the sauce.

DSC_0543

DSC_0571

Peperoni arrosto con vinaigrette all’ aglio.

media difficoltà

Ingredienti

Per 4 persone

3 peperoni abbastanza grossi (rossi e gialli)

Per la vinaigrette all’ aglio

4 cucchiai di olio extra vergine di oliva

1 spicchio d’aglio, sbucciato e ben schiacciato

1/2 cucchiaio di origano essiccato

1/2 cucchiaio di prezzemolo fresco tritato

1 cucchiaio di aceto balsamico

sale e pepe q.b.

Preparazione.

1. Lavate bene i peperoni e asciugateli.

2. Mettete i peperoni interi a cuocere in forno a 200° C ( uso una teglia grande ricoperta da un foglio di carta da forno). Il tempo di cottura varierà a seconda della grandeza e dello spessore dei peperoni; quando la buccia si colorirà e si staccherà dalla polpa, i peperoni sono pronti.

3. Mettete i peperoni ancora caldi in un contenitore con il coperchio, poi chiudete bene e lasciate raffreddare (con questo metodo il vapore farà staccare con più facilità la buccia dalla polpa).

4. Aprite e buttate via l’acqua che si è formata per il vapore. Con un coltello, levate la buccia ai peperoni.

5. Tagliate a metà i peperoni e rimuovete la parte interna con i semi. Tagliate ancora i peperoni in verticale fino ad ottenere 6-8 fette lunghe per peperone.

Per la vinaigrette.

Mescolate l’olio extra vergine di oliva con le erbe, l’aglio, il sale e pepe. Condite i peperoni e servire.

Tip. Per insaporire ulteriormente si può aggiungere mezzo cucchiaio di pasta d’acciughe al condimento.

DSC_0588

Light Wholemeal Spelt Brioches

Brioche and cappuccino are, without a doubt, Italians’ favourite breakfast! Yes, our ideal breakfast would be a brioche filled with plenty of custard and a nice warm cappuccino, topped with a lot of cocoa powder! It’s not something we would have every day (even though some people might do) but it’s something we’d treat ourself with during weekends and special occasions. Sometimes waking up to a warm brioche and a cappuccino is a really nice way to start the day in full swing!

DSC_8493

Since I started this blog, I have always wanted to try and make my own brioches, but for one reason or another I kept on postponing it…Last week I finally gave it a go and here is my brioche recipe! I have to say, I thought it was going to be much more complicated! The method is not too difficult if you follow all the steps of the recipe, it just takes some time and care. You can prepare your brioches in your spare time and store them in the freezer, where they will last up to a month. They are very nice when you warm them up in the morning!

Italian brioches have a similar shape to croissants but the dough is sweeter and softer. This recipe is quite light, it has some fibres and it’s not too sweet, so you can fill the brioches with whatever you like, if you wish.

Wholemeal Spelt Brioches (sourdough recipe).

Medium difficulty

Ingredients

For 2 trays (approximately 12-14 brioches)

For the starter

100 g (3.5 oz)  manitoba flour

50 g (1.7 oz) semisolid sourdough (made with manitoba flour, or plain flour)

water

For the dough

150 g (5.29 oz) manitoba flour

100 g (3.5 oz) plain flour

100 g (3.5 oz) wholemeal spelt flour

100 ml (3.38 us fl oz) milk (at room temperature)

2 egg (1 egg for the dough and 1egg to brush on top of the brioches)

1 egg yolk

60 g (2.1 oz) butter, softened

a pinch of salt

50 g (1.7 oz) brown sugar

1 teaspoon of honey

2 drops of vanilla extract

a little bit of grated lemon zest (use an organic lemon)

icing sugar

DSC_8377

Method.

1. Prepare the sourdough starter the night before and let it rise overnight at room temperature. Mix 100 g manitoba flour with 50 g of sourdough and enough water to get a smooth and moist dough. Cover it with cling film and let it rise for 12 hours.

DSC_8372

2. The next morning, mix the rest of the flour with the starter, then add 1 egg, the egg yolk, the brown sugar, a few drops of vanilla extract, a little bit of grated lemon zest and honey. Mix well. Add the butter and a pinch of salt. Knead well, adding a little ‘flour if necessary.

DSC_8379

3. Allow the dough to rise until it doubles in volume (it will take a few hours).

DSC_8400

4. When risen, gently roll out the dough using a rolling pin. Then divide the sheet of dough into 2 and cut a few triangles (see the picture).

DSC_8403

DSC_8410

5. Roll each triangle and shape the brioches like small croissants. Then place them on 2 baking sheets greased with butter and dusted with flour. Brush your brioches with a beaten egg (or milk).

DSC_8416

DSC_8417

DSC_8418

DSC_8425

DSC_8434

6. Bake at 200 ° C (392° F) for about 20 minutes with steam (you can do that by putting a small pan filled with boiling water in the oven; while the brioches are cooking the water will release steam and the brioches will remain soft inside). Let cool and dust with icing sugar.

DSC_8457

DSC_8469

DSC_8508

DSC_8505

Brioches semi-integrali di farro (con lievito madre).

media difficoltà

Ingredienti

Per 2 teglie (circa 12-14 brioches)

Panetto di lievito o biga

100 g di farina manitoba

50 g di lievito madre semisolido (con base di farina manitoba o farina 00)

acqua q. b.

Per l’impasto

150 g di farina manitoba

100 g di farina 00

100 g di farina integrale di farro

100 ml di latte a temperatura ambiente

2 uova (1 uovo servirà per lucidare le brioches)

1 tuorlo

60 g di burro ammorbidito

un pizzico di sale

50 g di zucchero integrale di canna

1 cucchiaino di miele

2 gocce di estratto di vaniglia

un po’ di buccia grattugiata di un limone biologico

zucchero a velo q. b.

Preparazione.

1. Preparate il panetto di lievito la sera prima e lasciate lievitare tutta la notte a temperatura ambiente. Mescolate 100 g di farina manitoba e 50 g di lievito madre con un po’ d’acqua. Coprite con la pellicola e lasciate lievitare per 12 ore (a temperatura ambiente).

2. La mattina dopo mischiate le farine e aggiungete il panetto lievitato, un uovo intero, un tuorlo, 50 g di zucchero di canna, l’estratto di vaniglia, la buccia di limone e il miele. Amalgamate bene, poi aggiungete il burro e un pizzico di sale. Lavorate bene l’impasto, aggiungendo un po’ di farina se necessario.

3. Lasciate lievitare l’impasto fino a quando sarà raddoppiato di volume.

4. Dopo la lievitazione stendete l’impasto delicatamente con un matterello, poi dividetelo in due e tagliate dei triangoli.

5. Arrotolate le brioches e mettetele su due teglie imburrate e infarinate. Spennellate le brioches con dell’uovo sbattuto per lucidarle (potete anche usare del latte al posto dell’uovo).

6. Cuocete a 200 °C per circa 20 minuti con del vapore (cioè mettete nel forno anche un pentolino di metallo colmo d’acqua bollente; con questo metodo le brioches resteranno morbide dentro e non si asciugheranno). Lasciate raffreddare e spolverate con zucchero a velo.