Tag Archives: Low-fat recipes

Whole Spelt Piadina (Italian flatbread)

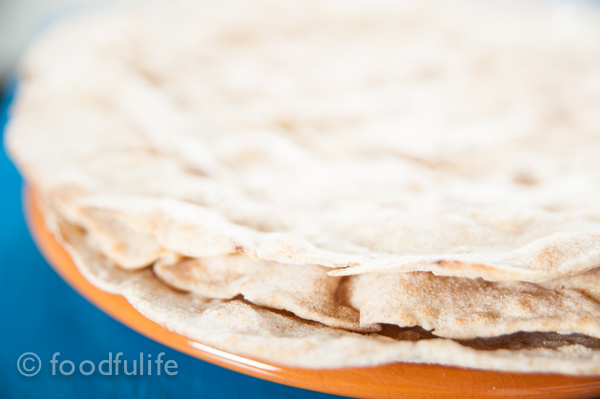
The Piadina Romagnola is a flatbread traditionally made in Emilia-Romagna, an Italian region well known for its delicious food and wonderful recipes. Usually, this bread is made with simple ingredients like: white 00 flour (Italian plain flour), lard, water, milk and fine sea salt… However there are some variations in ingredients, thickness and consistency. This week we are going to prepare a whole grain piadina made with yogurt and extra virgin olive oil, instead of using lard and plain flour, for a lighter high-in-fibre version of the Piadina.

SER_1359

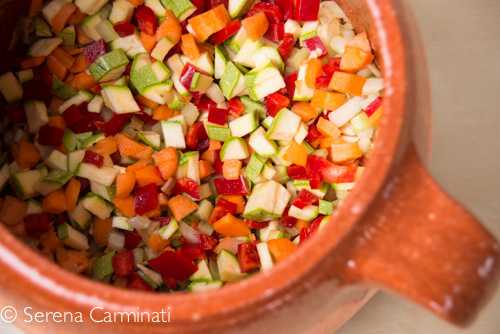
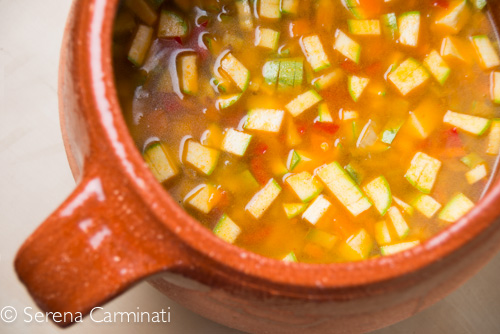
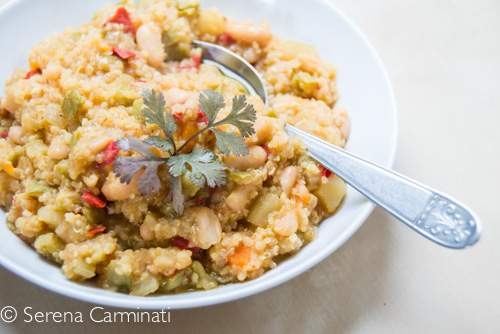
You can be very creative and fill this bread with lots of fresh seasonal ingredients.

SER_1384

Tips.

1. For the cooking method I suggest you use a heavy-based large and flat pan; a cast iron or a stone-derived pan is possibly the best thing you can use for this preparation.

2. Dust the pastry with some flour before placing it on the hot pan to cook. Then, when the piadina is cooked, wipe the surface of the pan with some paper. Repeat this operation before cooking each bread, otherwise the flour left on the pan will burn and change the flavour of the piadina.

3. I added a little bit of yogurt to replace the milk and lard, however you can replace the yogurt with more oil and water, if you want a dairy-free recipe.

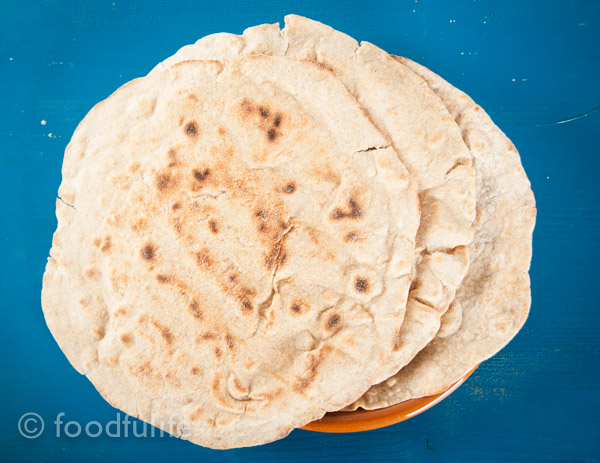
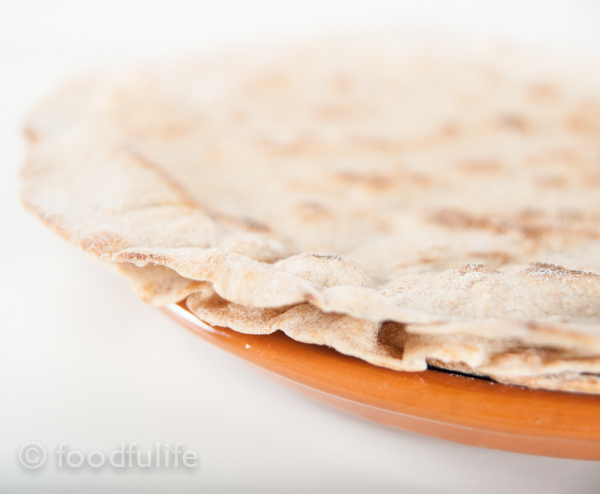
Whole spelt Piadina (Italian flatbread)

for 5 large flatbreads

Ingredients

400 g wholemeal spelled flour

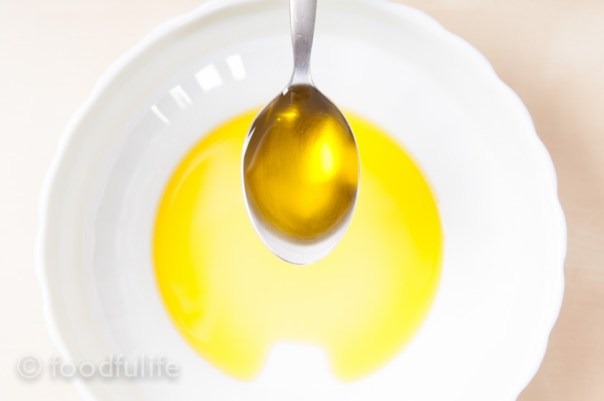
50 ml extra virgin olive oil

1/2 teaspoon fine sea salt

1/2 teaspoon baking soda

3 tablespoons of yogurt (I used full-fat, but you can use low-fat yogurt if you prefer)
200 ml of water

Method.

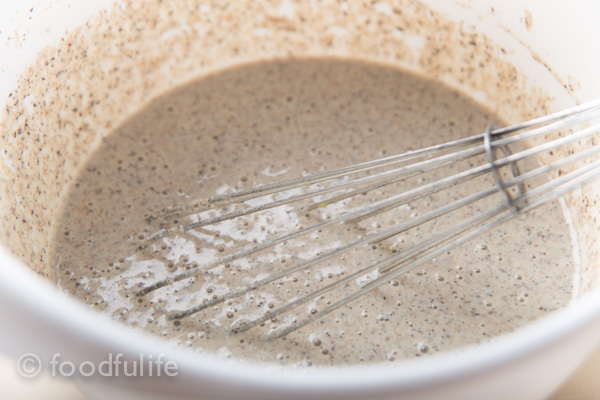
1. Mix all the ingredients in a bowl, then cover with cling film and let sit for 30 minutes.

2. Heat a large non-stick frying pan (use a pan with 24 cm in diameter).

3. Cut the dough into five pieces. Using a rolling pin, roll out the dough until you get a round thin sheet of pastry, with a diameter a little ‘smaller than the diameter of the pan.

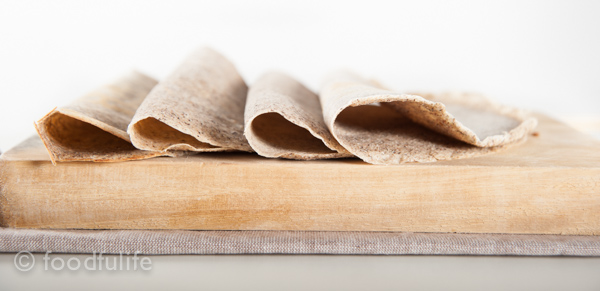
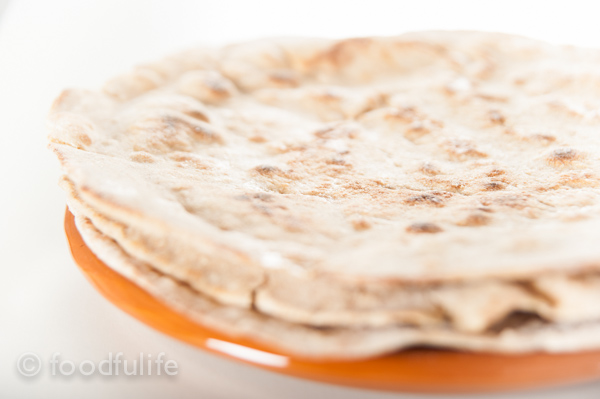
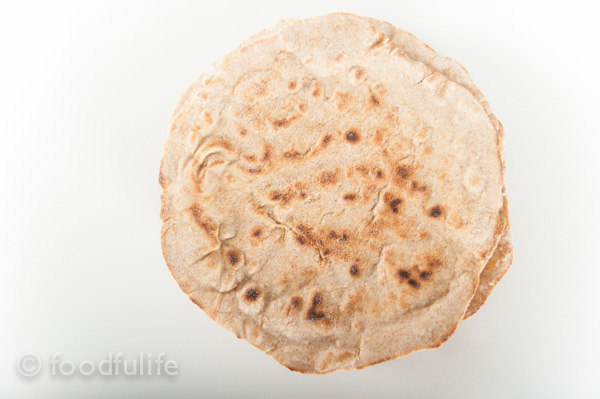
4. Dust the Piadina and place it on the hot pan, over a medium-high heat. Cook the flatbread on each side for a few minutes until crispy and golden.

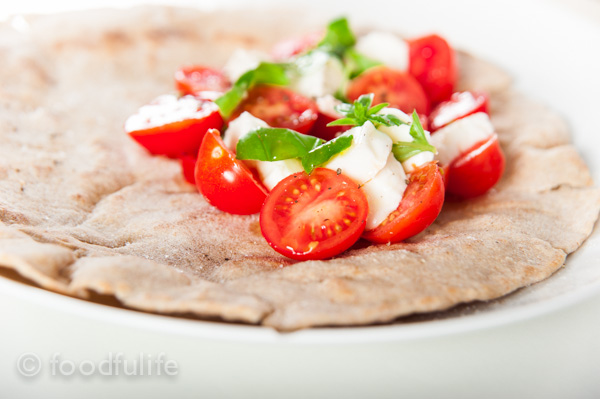
5. Cook all the Piadinas, then fill them with all the fresh ingredients that you like.

See also Caprese flatbread wraps (piadine alla caprese)

SER_1368

SER_1373

SER_1450

The preparation of this recipe is so quick and easy that you won’t be buying flat bread anymore!!

Piadine di farro (senza strutto)

Per 5 piadine 

Ingredienti

400 g di farina integrale di farro

50 ml di olio extra vergine d’oliva

1/2 cucchiaino di sale

1/2 cucchiaino di bicarbonato

3 cucchiai di yogurt intero

200 ml d’acqua

Preparazione.

1. Impastate tutti gli ingredienti in una terrina, poi ricoprite con la pellicola e lasciate riposare per 30 minuti.

2. Scaldate una padella antiaderente abbastanza grande (uso una padella con 24 cm di diametro).

3. Tagliate la pasta in cinque pezzi. Stendete la pasta con un matterello fino ad ottenere una sfoglia rotonda e sottile (del diametro un po’ più piccolo della padella).

4. Infarinate la sfoglia e mettetela sulla padella. Fate cuocere per qualche minuto e poi girate la piadina per cuocerla uniformemente. Quando la piadina è dorata su entrambi i lati è pronta.

5. Preparate tutte le piadine, poi farcitele con con il ripieno che desiderate.

Guardate anche la ricetta per la piadina alla caprese

SER_1347

Buckwheat Crepes (Gluten-free, High in fibre)

Rich in flavour and fibre, buckwheat crepes are incredibly delicious, healthy and can make a simple meal look quite impressive! You can be a little intimidated when you first make crepes….Well, I was when I made crepes for the first time! It is not so difficult to make nice crepes, as long as you remember to occasionally grease the frying pan during the preparation method, you move quickly when you shape the crepes and you cook the crepes over a low heat.

Crepe on round wooden cutting board on a table mat

Tips.
It might take a little bit of practice at first, however the best way to shape the crepes is to quickly move the pan around, in order to spread and flatten the batter evenly. During this process the frying pan shouldn’t be too hot, otherwise the batter will cook too quickly, leaving you with thick and uneven crepes.
During the cooking time, the crepes will start curling around the edges and lifting up from the pan; at this point the crepes are ready to be flipped around, to cook both sides.

You can be very creative with this dish and serve your crepes with lots of savoury or sweet fillings, experimenting with a great variety of ingredients, textures and flavour combinations.
Enjoy the recipe and have fun with it!

crepes on rectangular cutting board on a beige cutting mat, with white background

Buckwheat crepes

Ingredients

For 10 crepes

2 eggs

300 g of buckwheat flour

400 ml of milk

100 ml of water

extra virgin olive oil

salt or sugar (depending if you are making a sweet or savoury recipe)

extra virgin olive oil

Method.

1. In a bowl, gradually mix the flour with milk, water and salt (or sugar). Separately, beat the eggs and then make the batter incorporating the eggs and 1 tablespoon of extra virgin olive oil into the flour mixture. Place the batter to cool for two hours in the refrigerator.

crepes batter with whisk in white plastic bowl

2. Heat a large frying pan over a low heat, then grease the base with a tablespoon of extra virgin olive oil.

3. Using a ladle, pour the batter in centre of the pan, then spread evenly and let cook for a few minutes.

raw crepe in a stone pan with olive oil on blue painted table

4. When the crepe starts curling around the edges, turn it around and cook the other side.

Repeat the process until you have made all the crepes, occasionally greasing the pan with a little extra virgin olive oil.

pile of crepes on round wooden cutting table on beige table mat

Also see the Gluten-free Béchamel sauce recipe and the Crepes with swiss chard and borage filling recipe.

SER_0750

SER_0753

SER_0780

Crepes di grano saraceno

Ingredienti

Per 10 crepes

2 uova

300 g di farina di grano saraceno

400 ml di latte

100 ml di acqua

olio extra vergine d’oliva

zucchero o sale (dipende se la ricetta è dolce o salata)

Preparazione.

1. Amalgamate la farina e il sale (o zucchero) con il latte mischiato all’acqua. A parte, sbattete le uova e incorporatele al composto con un cucchiaio d’olio extra vergine d’oliva. Lasciate riposare la pastella nel frigorifero per almeno due ore.

2. Fate scaldare, a fuoco moderato, una padella con un cucchiaio d’olio extra vergine d’oliva.

3. Usando un mestolo, versate il composto al centro della padella, poi muovete energicamente la pentola per stendere uniformemente la pastella.

4. Lasciate cuocere per qualche minuto. Quando la crepe incomincia ad arricciarsi sui bordi potete girarla per cuocerla su entrambi i lati.

Preparate tutte le crepes, ricordandovi di ungere ogni tanto la padella con un filo d’olio.

Guardate anche la ricetta della Besciamella con amido di mais e la ricetta delle Crepes con ripieno di bietole e borragine.

Light Béchamel Sauce (Gluten-free White Sauce)

Béchamel sauce is a delicious white sauce, traditionally used to enrich various recipes like lasagna, cannelloni, crepes and other oven-baked pasta dishes.  Usually made with butter and flour, today we are going to make a lighter gluten-free and Parmesan-flavoured version of this wonderful sauce.
It is a fairly easy and quick recipe to make, just mix the cornstarch with the milk and cook the sauce really gradually and slowly….Take your time with it, heat it gently and stir it constantly during the entire preparation method and you’ll be all right!

Tip. The béchamel sauce might thicken a little too much when it cools down. You can solve this problem by heating the sauce up with some hot milk over a low heat and then blending everything using a mixer. With this method you should get a smooth sauce with the desired consistency.

DSC_4484

Gluten-free Béchamel sauce (white sauce with cornstarch)

Ingredients

600 ml of milk

80 g of cornstarch

4 tablespoons of Parmesan cheese

a pinch of grated nutmeg (optional)

salt and pepper to taste

Method.

1. In a pan, mix the milk with 80 g of cornstarch (add the milk very gradually).

2. Warm the milk up over a low heat, then bring slowly to a boil, stirring constantly and vigorously. When the sauce has thickened, add the grated Parmesan cheese and stir for a few more minutes. Remove from the heat.

DSC_4468

3. Season with one tablespoon of extra virgin olive oil, a pinch of grated nutmeg (optional), salt, pepper and serve.

DSC_4486

DSC_4510

Also see the Crepes with swiss chard and borage filling recipe and the Buckwheat Crepes recipe

Besciamella con amido di mais (senza glutine)

Ingredienti

600 ml di latte

80 g di amido di mais

4 cucchiai di Parmigiano Reggiano

sale e pepe q. b.

un pizzico di noce moscata

un cucchiaio d’olio extra vergine d’oliva

Preparazione.

1. Mescolate il latte freddo con 80 g di amido di mais (aggiungete il latte molto gradualmente).

2. Mettete il latte sul fuoco e portate ad ebollizione, mescolando energicamente. Quando la crema si sarà addensata, aggiungete il parmigiano grattugiato e mescolate per qualche minuto.

3. Spegnete il fuoco, condite con un cucchiaio di olio extra vergine d’oliva, un pizzico di noce moscata, sale, pepe e servite.

DSC_4515

Guardate anche la ricetta delle Crepes di grano saraceno e la ricetta delle Crepes con ripieno di bietole e borragine.

Skinny “Fries”, My Way!

Low-fat and healthier than the real thing, oven-baked skinny “fries” can be even tastier than deep fried potatoes, if you add fresh herbs and garlic.
These skinny “fries” are super tasty and very crunchy!…None will know they are baked and not fried!!

Skinny fries with garlic and rosemary

Rosemary and garlic skinny “fries”.

Preparation time: 10 minutes

Cooking time: 30-35 minutes

4 Servings

Ingredients

a bunch of fresh rosemary

8 garlic cloves, peeled and cut in halves

4 medium-large potatoes

4 tablespoons extra virgin olive oil

salt and pepper to taste

Skinny fries with garlic and rosemary

what you need

2 large rectangular baking trays

a big bowl

some baking paper

a knife

a kitchen cutting board

Skinny fries with garlic and rosemary

Method.

1. Wash, peel and cut the potatoes into sticks.

Skinny fries with garlic and rosemary

2. Put the potatoes in a large bowl and mix with 4 tablespoons of extra virgin olive oil, salt and pepper.

Skinny fries with garlic and rosemary

3. Take 2 large baking trays, line them with baking paper and place the potatoes on the trays (not too many, otherwise they’ll stick together).

4. Top the potatoes with the rosemary and the garlic cloves, then bake for 30-35 minutes at 190°C (374° F).

Skinny fries with garlic and rosemary

5. Take the potatoes out of the oven, remove the garlic and rosemary and serve.

Skinny fries with garlic and rosemary

Skinny fries with garlic and rosemary

Skinny fries with garlic and rosemary

Skinny fries with garlic and rosemary

Patatine al forno con aglio e rosmarino.

Tempo di preparazione: 10 minuti

Tempo di cottura: 30-35 minuti

Per 4 persone

Ingredienti

un po’ di rosmarino fresco

8 spicchi d’aglio, puliti e tagliati a metà

4 patate medio-grandi

4 cucchiai di olio extra vergine d’oliva

sale e pepe q. b.

occorrono:

2 teglie grandi rettangolari

una ciotola grande

2 fogli di carta da forno

un coltello

un tagliere

Preparazione.

1. Lavate, sbucciate e tagliate le patate a bastoncini sottili.

2. Mettete le patate in una ciotola e mescolate con 4 cucchiai di olio extra vergine d’oliva, sale e pepe.

3. Prendete una teglia grande, ricoprite con carta da forno e posizionateci sopra le patate, lasciando un po’ di spazio tra un pezzo e l’altro (altrimenti si attaccano).

4. Aggiungete il rosmarino e gli spicchi d’aglio sopra le patate, poi infornate a 190 ° C per 30-35 minuti.

5. Levate le patate dal forno, poi togliete l’aglio e il rosmarino. Servite subito.

Skinny fries with garlic and rosemary

Skinny fries with garlic and rosemary

Light And Tasty Onion Soup With Chickpea Bread

DSC_2827

This week we are going to prepare a delicious and easy to make onion soup, served with a wonderful chickpea bread, especially made for this recipe. A meal so light and tasty that it could easily be considered comforting as well as healthy!

This soup is really well complemented by the chickpea bread (see the recipe), which is a good source of proteins and keeps the meal light and nicely balanced! The perfect winter dish to enjoy by the fire!

Enjoy!

DSC_2796

DSC_2724

Light onion soup (zuppa di cipolle)

Preparation time: 10 minutes

Cooking time: 40 minutes

Ingredients

For 4 servings

1 kg of onions of your choice

extra virgin olive oil

salt and pepper (use plenty, because onions are naturally quite sweet)

DSC_2719

Method.

1. Slice the onion and fry them in extra virgin olive oil.

DSC_2738

2. Using a large pan, cover the onions with water and cook until tender.

DSC_2766

3. With an immersion blender, puree the onions until you get a smooth and creamy mixture.

DSC_2768

4. Drizzle with extra virgin olive oil, season with salt and pepper, then serve with the chickpea bread!

DSC_2793

DSC_2802

DSC_2806

See also the pasta e fagioli recipe (another delicious winter dish!).

Zuppa di leggera cipolle

Tempo di preparazione: 10 minuti

Tempo di cottura: 40 minuti

Ingredienti

Per 4 persone

1 kg di cipolle di vostra scelta

olio extra vergine d’oliva q. b.

sale e pepe (abbondate perché le cipolle sono naturalmente dolci)

Preparazione.

1. Sbucciate e affettate le cipolle, poi fatele soffriggere in olio extra vergine d’oliva.

2. Riempite la pentola d’acqua, fino a ricoprire tutte cipolle; quindi fate cuocere, a fuoco moderato e con il coperchio, per 30-35 minuti.

3. Usando un frullatore ad immersione, frullate le cipolle fino ad ottenere un composto cremoso.

4. Condire con olio extra vergine d’oliva e abbondante sale e pepe. Servite la zuppa calda con del pane di farina di ceci.

DSC_2729

How To Make Amazing Roasted Chestnuts In Your Own Home!

This is the right season to enjoy some crunchy roasted chestnuts! Golden and crunchy, roasted chestnuts are simply delicious!! When my brother and I were kids, my father used to make some roasted chestnuts before bed time….We loved it!

DSC_0128

In this post I’ll share the method to prepare amazing roasted chestnuts directly on the stove, just like my father used to do, but make sure you follow the instructions and you protect yourself with the proper equipment, in order to avoid disasters! :-). If you carefully follow all the steps this method is fairly easy and safe.

DSC_0132

Tip. During the cooking time keep away from the fire as much as possible and wear oven gloves for extra safety.

How to make roasted chestnuts 

Preparation time: 5 minutes

Cooking time:15-20 minutes

Ingredients

500 g of fresh chestnuts

just a small splash good quality white wine (avoid putting the bottle close to the fire when you cook and use it)

What you need.

a gas stove

a frying pan with holes to cook chestnuts (you can buy it or you can make your own, by piercing an old frying pan with a large nail, using a hammer)

a long stainless steel kitchen utensil (don’t use anything with plastic or wood)

Good oven gloves

Preparation.

1. Check, wash and dry the chestnuts.

DSC_0096

2. Using a sharp knife, cut the chestnuts one by one, making a 2cm long incision on the round side (make an X or 1 long cut horizontally, either way it should be fine!).

DSC_0098

DSC_0106

This operation is necessary to release the steam from the nuts while they are cooking and it will also make them easier to peel (If you skip this step the chestnuts will explode during the cooking process, so make sure you cut them properly).

Cooking Method (on the stove).

1. Put the pierced pan with the chestnuts directly on the gas stove over a moderate-high heat. Stir constantly with a long stainless steel kitchen utensil.

2. Roast the chestnuts for about 10 minutes, then add a small splash of white wine (try to keep yourself and the bottle of wine away from the heat, while you do that) and continue to roast and stir for at least 5 more minutes.

DSC_0136

3. Turn off the eat and put the chestnuts in a brown paper bag for a few minutes (this will keep them hot and moist). Peel the chestnuts while they are still hot, because once they are cool they become much more difficult to peel.

DSC_0139

Tip. You can bake the chestnuts at 220° C (428° F) for about 20 minutes, instead of cooking them on the stove top; it’s probably a safer cooking method…However, I prefer the method above, because the chestnuts are much tastier and crunchier, when cooked directly over the flame!

DSC_0108

Roasted chestnuts with roasting pan.

Come preparare ottime caldarroste a casa.

In questo articolo vedremo insieme come preparare delle ottime caldarroste, cotte direttamente sul fornello, proprio come mio padre era solito fare, quando io e mio fratello eravamo bambini.

Seguite attentamente le istruzioni indicate e vedrete che questo è un metodo abbastanza semplice e sicuro.

Nota. Durante la cottura delle caldarroste, per quanto possibile, cercate di stare lontano dal fuoco e indossate dei guanti da forno per protezione.

Preparazione delle caldarroste.

Tempo di preparazione: 5 minuti

Tempo di cottura: 15-20 minuti

Ingredienti

500 g di castagne fresche

un dito di vino bianco di buona qualità (fate attenzione a non avvicinare troppo la bottiglia di vino al fuoco)

L’attrezzatura

un fornello a gas

una padella forata per caldarroste (potete farne una voi forando più volte una vecchia padella, con un chiodo grosso e un martello).

un cucchiaio grande di acciaio con manico lungo (non utilizzate plastica o legno)

guanti da forno

Preparazione.

1. Controllate, lavate e asciugate le castagne.

2. Utilizzando un coltello molto affilato, tagliate le castagne, una ad una, facendo un’ incisione di circa 2 cm sulla parte bombata. Questa operazione è necessaria per fare evaporare l’acqua dai frutti durante la cottura, se no le castagne col calore possono esplodere.

Metodo di cottura (sul fornello)

1. Mettete la padella forata, con le castagne, direttamente sul fornello a fuoco medio. Mescolate spesso, utilizzando un grosso cucchiaio di acciaio con il manico lungo.

2. Fate arrostire le castagne per circa 10 minuti, quindi insaporite con una piccola spruzzata di vino bianco (cercate di tenere la bottiglia di vino lontana dal fuoco). Continuate a cuocere le castagne per almeno altri 5 minuti.

3. Spegnete il fuoco e mettere le castagne in un sacchetto di carta per alcuni minuti (serve a mantenerle calde e umide). Sbucciate le castagne mentre sono ancora calde perché, una volta raffreddate, sbucciarle diventa molto più difficile.

Nota. È possibile cuocere le castagne nel forno a 220 °  C per circa 20 minuti, invece di utilizzare il fornello. Io preferisco cuocerle direttamente sulla fiamma perché, in questo modo, le castagne risultano molto più croccanti e saporite

Amazing Artichoke and Pea Quinoa.

DSC_3748

Quinoa has become a very popular ingredient in recent years. Besides being very versatile, it’s considered by nutritionists to be one of the most important super foods for its numerous nutritional properties and it’s often used as a substitute for couscous in gluten-free recipes. Quinoa is also an excellent source of protein and amino acids, therefore is perfect for vegetarian and vegan diets.

I must thank my mother for this awesome recipe! She usually prepares meat dishes using artichokes, peas and potatoes. Being a vegetarian, I thought of using this amazing combination of flavours in a quinoa recipe, in order to create a delicious and perfectly balanced meal.

Cooking tip. After cutting the artichokes dip them in cold water and some lemon juice for a few minutes, to preserve the colour.

DSC_3741

Artichoke and Pea Quinoa.

 Ingredients 

for 4 servings

4 artichokes

200 g ( 7 oz) of peas

1 large potato

1 organic vegetable stock cube

1 large onion

1 clove of garlic

a bunch of parsley

a sprig of fresh marjoram

5 tablespoons extra virgin olive oil

salt and pepper to taste

400 ml (14 fl. oz) of vegetable stock (made with 400 ml of hot water and 1 organic vegetable stock cube)

For the quinoa.

1 cup quinoa

2 cups water

a pinch of salt

Quinoa preparation.

1. Wash the quinoa, using a strainer, under running water for a few minutes.

2. Put 1 cup of quinoa, 2 cups of water and a pinch of salt in a small pan, then cook for 15 minutes.

3. Turn off the heat and cover with the lid.

How to prepare the Vegetables. 

1. Peel, wash and finely cut the onion. Fry over a low heat for a few minutes. Cut the garlic clove, remove the green core, then chop and fry with the onion.

DSC_0908

DSC_3642

2. Wash and trim the artichokes, removing all the sharp,  hard and hairy bits.  Cut each artichoke into 8 parts (also peel and cut the stems into small pieces) then add to the ingredients.

DSC_3638

DSC_3656

DSC_3675

3. Wash, peel and cut the potato into very small cubes.  Add the potato, pour 400 ml of vegetable stock into the pan and mix well.

DSC_3686

4. Then add the peas and cook for about 30 minutes over a low heat (cover with the lid and stir from time to time).

DSC_3691

5. Five minutes before the end of the cooking time, add the herbs ( finely chopped) and season with salt and pepper.

DSC_3711

6. Turn off the heat and serve the vegetables with the quinoa in the middle.

DSC_3783

DSC_3751

Quinoa con Carciofi e Piselli.

Ingredienti

per 4 persone

4 carciofi

200 g di piselli

1 patata grande

1 cipolla grande

1 spicchio d’aglio

1 dado vegetale biologico

un mazzetto di prezzemolo

un mazzetto di maggiorana fresca

5 cucchiai di olio extra vergine d’ oliva

400 ml di brodo vegetale (fatto con 400 ml d’acqua bollente e un dado vegetale)

sale e pepe q b

per la quinoa

80 g di quinoa

200 ml d’acqua (ancora meglio se usate del brodo vegetale)

un pizzico di sale

 Preparazione della quinoa.

1. Lavate la quinoa, usando un colino, sotto il getto d’acqua del rubinetto per qualche minuto.

2. Fate cuocere in acqua leggermente salata (o brodo)  la quinoa per circa 15 minuti.

3. Spegnete il fuoco, coprite con il coperchio e lasciate riposare.

Preparazione delle verdure.

1. Pulite, tagliate finemente la cipolla e fate soffriggere a fuoco basso. Tagliate in due lo spicchio d’aglio, togliete l’anima, tritate e aggiungete al soffritto.

2. Lavate e pulite i carciofi, togliendo tutte le spine, le parti dure e fastidiose. Tagliate ciascun carciofo in 8 parti, tagliate anche il gambo a pezzetti e aggiungete al soffritto.

3. Pelate, lavate e tagliate la patata a cubetti molto piccoli. Mettete a cuocere la patata e aggiungete del brodo vegetale. Mescolate bene.

4. Aggiungete i piselli e fate cuocere a fuoco lento per 30 minuti con il coperchio semi chiuso, mescolando occasionalmente.

5. Quasi a fine cottura, aggiungete le erbe tritate finemente e condite con il sale e pepe.

6. A cottura terminata, spegnete il fuoco e servite le verdure con la quinoa nel centro.

Steamed Prawn and Bell Pepper Kebabs.

Today I am publishing my first recipe of the year, after taking a little break.
Bearing in mind that many of you will be on a diet, just like me, after a full-on Christmas feast, I decided to go for a light and delicate starter made with seafood and vegetables . Experimenting in my kitchen, not long ago, I discovered that the delicate flavours of yellow bell peppers and prawns complement each other very well, especially if steamed. This recipe is very healthy and the preparation is quick and easy, however it’s important to get the cooking time right, because if you overcook the ingredients the final result won’t be any good, as the bell peppers will become too soft and the prawns will turn out hard, dry and chewy. In order to avoid this follow carefully the instructions and you’ll have the most amazing prawn kebabs!
Tip. As a light meal, serve the prawn kebabs with steamed basmati rice.
DSC_3587
Prawn and bell pepper kebabs.
Ingredients
for 4 people ( for 8 kebabs)
2 big yellow peppers (or 3 small peppers)
450 g prawn tails, to clean
a few leaves of fresh parsley
6 tablespoons of extra virgin olive oil
3 tablespoons of lime juice
salt and pepper to taste
1. Wash the peppers, remove the core, pith and seeds, then cut them into 2 halves.
DSC_3488
2. Wash and peel the prawns. Using a knife, remove the hard parts and the dark vein on the back.
DSC_3463
3. Steam the peppers for about 10-15 minutes (external side facing down).
DSC_3492
4. Remove the peppers from the heat, peel the skin off using a knife and cut them into small pieces (about 4 cm).
DSC_3521
5. Steam the prawns for about 3 minutes.
6. Insert the skewers, alternating pieces of pepper with prawns.
DSC_3570
For the seasoning (lime citronette sauce).
DSC_3533
1. In a small bowl, mix 6 spoons of extra virgin olive oil with the lime juice.
DSC_3523
2. Chop a few parsley leaves finely.
DSC_3506
3. Mix all the ingredients together with some salt and pepper.
DSC_3538
4. Season the prawn kebabs and serve them warm with the sauce.
DSC_3585
Spiedini di Gamberi e Peperoni (cottura a vapore).

Ingredienti

per 4 persone (8 spiedini)

2 grandi peperoni gialli (o 3 piccoli)

450 g di code di gambero (da pulire)

alcune foglie di prezzemolo

6 cucchiai di olio extra vergine di oliva

3 cucchiai di succo di lime

sale e pepe q b

1. Lavate, pulite e tagliate i peperoni in due.

2. Pulite e sgusciate i gamberi, eliminando completamente la buccia e il budellino nero.

3. Fate cuocere i peperoni a vapore per 10-15 minuti (con la parte esterna verso il basso).

4. Togliete i peperoni dal fuoco, sbucciateli delicatamente e tagliateli a pezzetti rettangolari.

5. Fate cuocere a vapore i gamberi per 3 minuti.

6. Infilzate gli ingredienti con degli spiedini di legno, alternando dei pezzi di peperone ai gamberi.

Per la citronette di lime.

1. In una piccola ciotola, mischiate 6 cucchiai di olio extra vergine di oliva con 3 cucchiai di succo di lime.

2. Tritate qualche foglia di prezzemolo molto finemente.

3. Unite tutti gli ingredienti, aggiungendo anche un po’ di sale e pepe.

4. Condite bene gli spiedini di gamberi e serviteli tiepidi, accompagnandoli con il condimento.

Delicious Chocolate and Pistachio Flan.

This week I’m publishing another recipe from my friend, Anahita Tcheraghali.
With the Christmas holidays just around the corner, we decided to prepare a light and tasty dessert for you to enjoy with the whole family during this festive season!
This delightful flan is made with a nice chocolate shortcrust pastry and an exquisite pistachio filling, with an intense caramel-like flavour. It is light and perfect for vegan diets because it doesn’t contain eggs and it’s dairy-free.
You will love it!
DSC_3399
Ingredients
for the filling
300 ml (10 fl oz)  rice milk
25 g (0.88 oz) muscovado brown sugar
40 g (1.4 oz) of shelled pistachios 
2 tablespoons cornstarch
a vanilla bean (or a few drops of vanilla extract)
For the pastry
200 g (7 oz) flour 00
60 g (2 oz) of sunflower oil
60 g (2 oz) dark chocolate (with 70% cocoa solids)
80 g (3 oz) muscovado brown sugar
a pinch of baking soda
some grated lemon zest
a pinch of salt
a pinch of cinnamon (optional)
Preparation of the filling.
1. Finely grind the pistachios.
DSC_3332
2. Mix the ground pistachios with 2 tablespoons of cornstarch and 25 g (0.88 oz)  of sugar.
DSC_3341
3. Add the rice milk with a few seeds of the vanilla bean.
4. Thicken the filling on a low heat, stirring continuously for about 10 minutes.
DSC_3355
Preparation of the pastry.
1. Separately, combine the flour with the baking soda, then melt the chocolate in a bain-marie.
DSC_3371
2. Mix the flour with the melted chocolate, 300 ml (10 fl oz) of oil, a little bit of lemon zest, cinnamon, salt and 80 g of sugar.
DSC_3379
3. Once you have a smooth dough, put it in the fridge for 30 minutes.
DSC_3383
4. Roll out the pastry on a greased baking tray and pierce the surface with a fork.
DSC_3390
5. Bake the base of the tart at 170 ° C (338 °F)  for 10 minutes.
6. Spoon the filling into the the pastry base and bake for another 15 minutes.
DSC_3395
DSC_3417
DSC_3443
Crostata di cioccolato con crema di pistacchi.
Ingredienti
Per la pasta brisé al cioccolato
200 g di farina 00
60 g di olio di semi di girasole
60 g di cioccolato fondente al 70 % (possibilmente bio)
80 g di zucchero di canna muscovado
un pizzico di bicarbonato
1 po’ di scorza di limone non trattato
un pizzico di cannella (facoltativo)
un pizzico di sale
Per la crema
2 cucchiai di amido di mais
300 ml di latte di riso
40 g di pistacchi sgusciati
una stecca di vaniglia (o qualche goccia di estratto di vaniglia)
25 g di zucchero di canna muscovado
Preparazione della crema.
1. Tritate i pistacchi finemente.
2. Unite i pistacchi tritati all’amido di mais e allo zucchero. Aggiungete il latte di riso e qualche seme del baccello di vaniglia.
3. Fate addensare la crema sul fornello a fuoco basso, mescolando continuativamente.
Preparazione della pasta.
1. A parte, unite la farina al bicarbonato e poi fate sciogliere il cioccolato a bagnomaria.
2. Impastate la farina con l’olio, la scorza di limone, la cannella, il cioccolato fuso, il sale e lo zucchero.
3. Una volta ottenuto un impasto omogeneo, mettetelo a riposare nel frigo per 30 minuti.
4. Stendete la pasta su una teglia leggermente unta e bucherellate la superficie con una forchetta.
5. Infornate la base della crostata a 170 °C per 10 minuti.
6. Riempite la base della torta con la crema e poi fate cuocere per altri 15 minuti.

Crock Pot Quinoa and Veggie Stew.

 This dish is very healthy and nourishing, perfect for the winter.
Quinoa is a plant that can be used as a grain, in fact it is quite similar to couscous. It takes 15 minutes to cook, usually it’s boiled and added to the dish, however here I cook it together with the vegetables at end of the preparation of the recipe.
Quinoa is considered a superfood because it contains important amino acids and it’s gluten-free. As a matter of fact it’s not a cereal, but it can be used like one in many recipes.
Cooking tips.
To cook this stew I used an eco-friendly crock pot.  Some crock pots can release harmful chemicals contained in their paint, when they are used at high temperatures for slow cooking recipes. There are specialised shops that sell these eco-friendly crock pots, painted with harmless natural paint, they are a little bit expensive, but you’ll only need one….Although, a crock pot is nice, but it is not strictly necessary, you can also use a normal stainless steel pan or a slow cooker to prepare this recipe.
DSC_0540
Ingredients
Serves 4
1 large onion
2 cloves of garlic
2 medium carrots
2 stalks of celery
2 large potatoes
3 zucchini / courgettes
1 red bell pepper
300 g (10.6 oz) sweet tomatoes, like cherry tomatoes
1 can of cannellini beans (or baked beans)
150 g (5.3 oz) quinoa
3 bay leaves
700 ml (23.6 oz fl) water
extra virgin olive oil, salt and pepper to taste
1. Peel and cut all the vegetables into small pieces.
DSC_0508
2. Fry the onion with plenty of olive oil, then add the garlic after a few minutes.
DSC_0504
3. When the onions are golden, add all the vegetables with the bay leaves and 700 ml of water.
DSC_0516
DSC_0518-2
4. Stir and continue to cook over a low heat for 1 hour and 20 minutes (but add the beans after 40 minutes of cooking time).
DSC_0522
5. Wash the quinoa, using a strainer, under running water for a few minutes.
6. When the vegetables are cooked add the quinoa, then stir and cook for another 10 minutes.
DSC_0527
7.  Turn off the heat and cover with a lid. Season with a little olive oil, salt, pepper and serve after 5 minutes.
DSC_0545
Zuppa di quinoa con verdure.

Ingredienti

4 persone 

1 cipolla grossa

3 zucchini

2 spicchi d’aglio

2 carote medie

2 gambi di sedano

2 patate grosse

1 peperone rosso

300 g di pomodorini piccoli e dolci

1 scatola di fagioli cannellini

150 g di quinoa

3 foglie di alloro

700 ml d’acqua

olio extra vergine d’oliva, sale e pepe q b

1. Mondate e tagliate tutte le verdure a dadini.

2. Mettete a soffriggere la cipolla, aggiungendo l’aglio dopo qualche minuto per non farlo bruciare.

3. Quando il soffritto sarà dorato, aggiungete tutte le verdure con le foglie di alloro. Innaffiate con 700 ml d’acqua, poi coprite con il coperchio e fate cuocere lentamente.

4. Mescolate e continuate a cuocere a fuoco molto lento per 1 ora e 20 minuti (aggiungete i fagioli dopo 40 minuti di cottura).

5. Lavate la quinoa, usando un colino, sotto il getto d’acqua del rubinetto per qualche minuto.

6. Poco prima di spegnere il fuoco aggiungente la quinoa (circa 10 minuti prima), spegnete e coprite con il coperchio.

7. Lasciate riposare per 5 minuti. Condite con un po’ d’olio, sale e pepe e servite.