Category Archives: Desserts

Torta Della Nonna (Grandma’s Custard Pie) easy step by step

DSC_8217

Torta Della Nonna (Grandma’s Pie) is a delicious and delicate pie made with a soft shortcrust pastry and filled with plenty of thick Italian custard (Crema Pasticciera) and garnished with lots of pine nuts and icing sugar. It’s a Florentine recipe, but is also quite popular in Liguria; in fact many bakeries and coffee shops make this wonderful cake in Genoa. I thought it might be difficult for you to come and have a taste so here is the recipe for you to enjoy! 🙂

DSC_8227_01

Tips.

1. It can be quite a difficult to cover the pie with the thin layer of pastry, but you can simplify the recipe using only one layer of shortcrust for the pie case.

2. You might need less custard to fill the pie crust, I used a little less.

DSC_8231

Torta Della Nonna.

Preparation time: 50 minutes + resting time

Cooking time: 40 minutes

Medium difficulty

Ingredients

For the pastry (with the ingredients listed here, follow the method in this recipe)

350 g sifted flour

165 g butter

165 g of sugar

3 egg yolks

a pinch of salt

1/2 teaspoon of baking powder

2 drops of vanilla extract

For the custard or crema pasticciera (with the ingredients listed here, follow the method in this recipe)

1 litre of milk

8 egg yolks

140 g caster sugar

90 g sifted flour

the grated zest of 1 unwaxed lemon (possibly organic)

To garnish

icing sugar to taste

100 g pine nuts

Method.

1. Prepare the shortcrust pastry and place in the refrigerator to cool for 40 minutes.

2. Prepare the custard and let cool, stirring occasionally.

3. Place the pine nuts in water with ice for 30 minutes (so that they won’t burn when you cook them), then dry them with a kitchen towel.

DSC_8159

4. Cut the dough into two pieces, keeping in mind that one pieces should be a bit bigger than the other for the pie crust.

5. Using two pieces of baking paper, roll out the bigger piece of dough (5 mm thickness) to make a tart case with a slightly higher edge. Place the baking paper with the pastry onto the cake tin ( 22 cm wide).

DSC_8156

DSC_8162

6. Pierce the pastry with a fork, then fill with the custard.

DSC_8171

7. Roll out a disk of pastry (5 mm thick), then cover the pie and seal the two layers of pastry. Using a pastry cutter, cut and remove the excess pastry, then top with the pine nuts.

DSC_8175_01

DSC_8180

8. Bake at 180° C (356° F) for 40 minutes and let cool.

DSC_8186_01

9. Place in the fridge for at least an hour, then garnish with icing sugar.

DSC_8204

DSC_8215

DSC_8233_01

If you like this recipe please support the blog by following Foodfulife on Facebook….Thank you so much!!!!

Torta della nonna.

Tempo di preparazione: 50 minuti + il riposo

Tempo di cottura 40 minuti

Media difficoltà

Ingredienti

Per la frolla (con ingredienti scritti qui, seguite la preparazione di questa ricetta)

350 g farina setacciata

165 g burro

165 g di zucchero

3 tuorli d’uova

un pizzico di sale

1/2 bustina di lievito per dolci

2 gocce di estratto di vaniglia

Per la crema (con gli ingredienti scritti qui, seguite la preparazione di questa ricetta)

1 litro di latte intero

8 tuorli d’uova

140 g di zucchero semolato

90 g farina setacciata

la buccia di un limone grattugiato, non trattato e possibilmente bio

Per decorare

zucchero a velo vanigliato q. b.

100 g di pinoli

Preparazione

1. Preparate la pasta frolla e mettetela in frigo a raffreddare.

2. Preparate la crema pasticciera e lasciatela raffreddare, mescolando di tanto in tanto.

3. Mettete i pinoli in acqua con del ghiaccio per 30 minuti (per evitare di bruciarli durante la cottura), poi asciugateli bene con la carta da cucina.

4. Tagliate la pasta in due, tenendo presente che un pezzo dovrà essere un po’ più grande dell’altro per la base della torta.

5. Stendete il pezzo più grande tra due fogli di carta da forno (lo spessore deve essere di circa 5 mm) , come per fare una crostata con il bordo alto. Aiutandovi la carta da forno, trasferite la sfoglia di pasta su una teglia (larga 22 cm).

6. Bucherellate la frolla con una forchetta e riempite con la crema pasticciera.

7. Stendete un disco con la pasta rimasta (di spessore 5 mm), poi ricoprite la torta e sigillate i bordi. Tagliate la pasta in eccesso e ricoprite la torta con i pinoli.

8. Cuocete in forno a 180° per 40 minuti, poi fate raffreddare.

9. Mettete la torta a rassodare nel frigo per almeno un’oretta.  Prima di servire, decorate con abbondante zucchero a velo.

Segui Foodfulife su facebook per tante altre ricette golose!

Rice Flour Chocolate Cookies With Pomegranate (Gluten-Free, Low-Sugar)

Rice flour chocolate cookies with pomegranate (gluten-free, low-sugar)

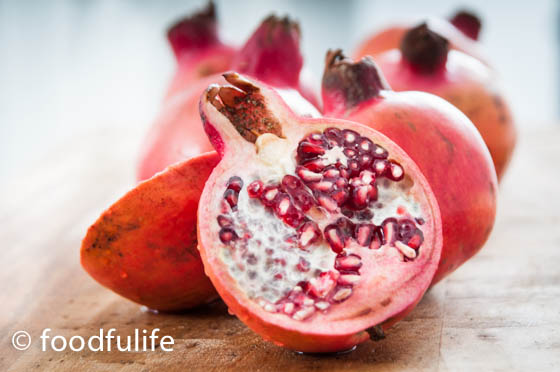
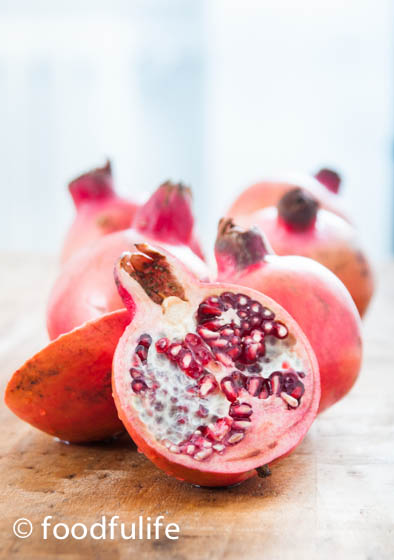
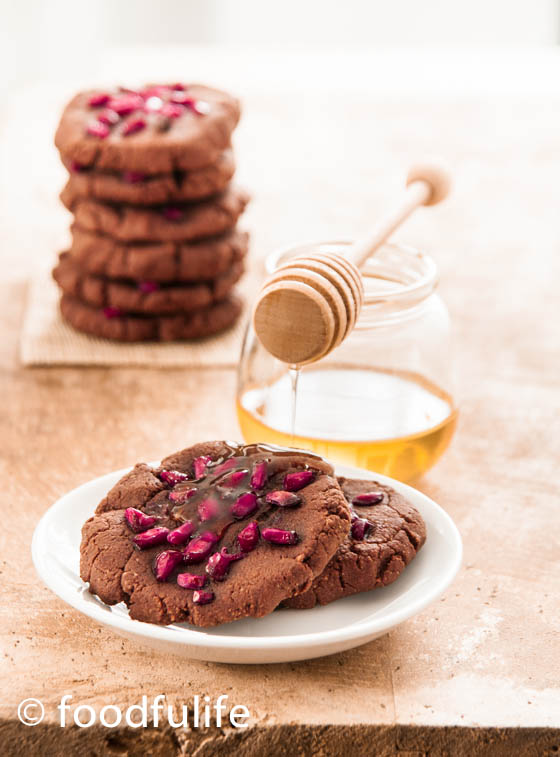
To continue the series of recipes with pomegranate, this week I am publishing an easy cookie recipe, gluten-free and perfect for dark chocolate lovers! These cookies are garnished with a lot of pomegranate seeds, they are not very sweet and have a strong chocolate flavour ; I served them warm with plenty of honey on top! In this way, all the flavours and different textures really come together nicely!

Tips.

1. For the kids dip them in milk, because they have a strong dark chocolate flavour.

2. For a low-sugar recipe don’t add the honey on top of the cookies, just follow the recipe.

Rice flour chocolate cookies with pomegranate (gluten-free, low-sugar)

I hope you enjoy this autumn treat!

Rice flour chocolate cookies with pomegranate (gluten-free, low-sugar)

Rice flour dark chocolate cookies with pomegranate.

For two trays (16 cookies)

Preparation time: 20 minutes + the resting time

Cooking time: 20-30 minutes

Ingredients

100 g soft butter

100 g rice flour

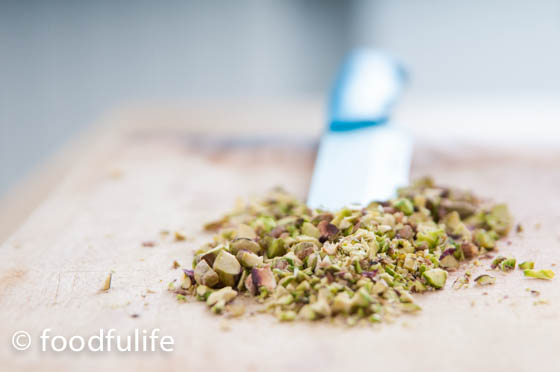
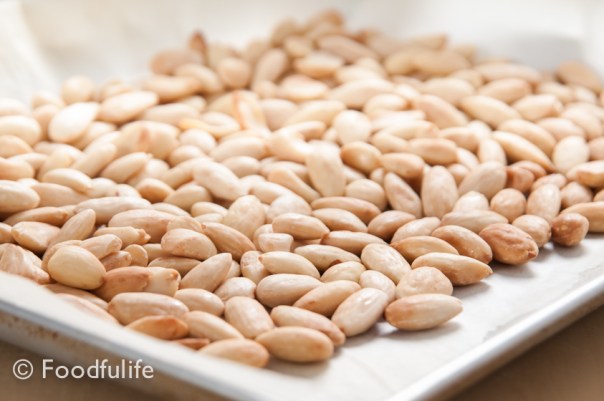
150 g almonds, peeled

15 g cocoa powder (I use organic and fair trade)

60 g dark chocolate 70% cocoa (I use organic and fair trade )

50 g cornstarch

the seeds of a pomegranate

1 tablespoon honey

3 tablespoons maple syrup

a pinch of salt

a pinch of cinnamon

Method.

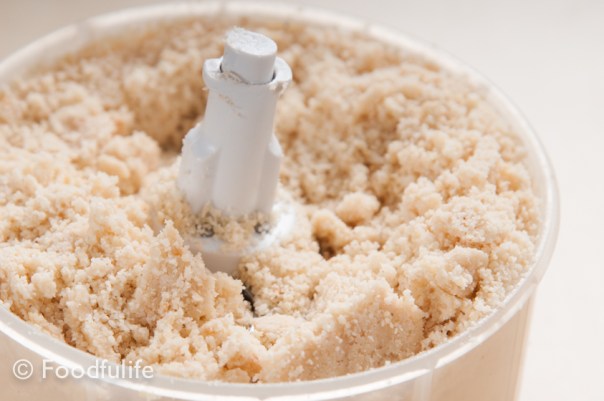
1. Bake the almonds at 160 ° C (320° F) for 5-10 minutes. Let cool then grind with a food processor.

Step 1. Bake the almonds, let cool and grind them.

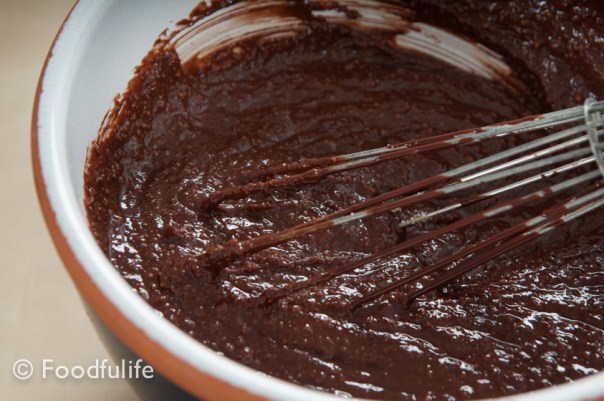
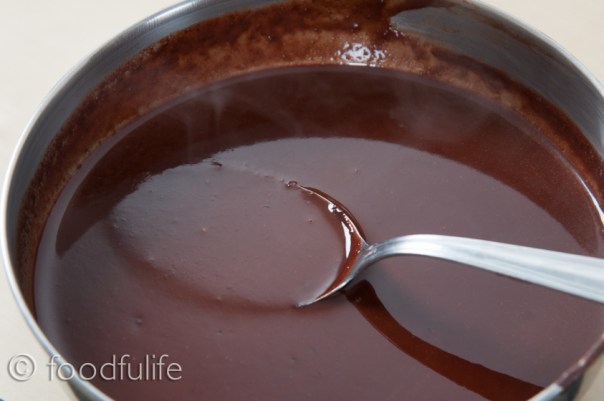
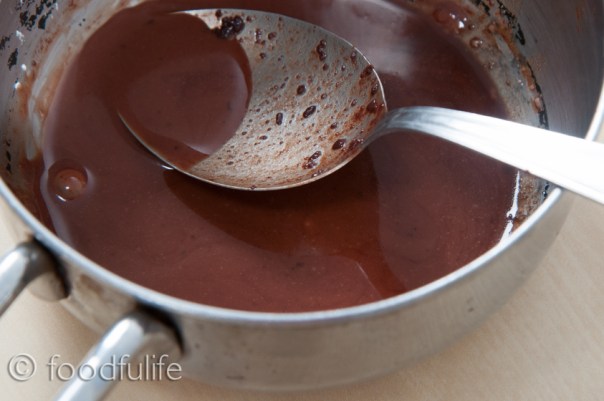
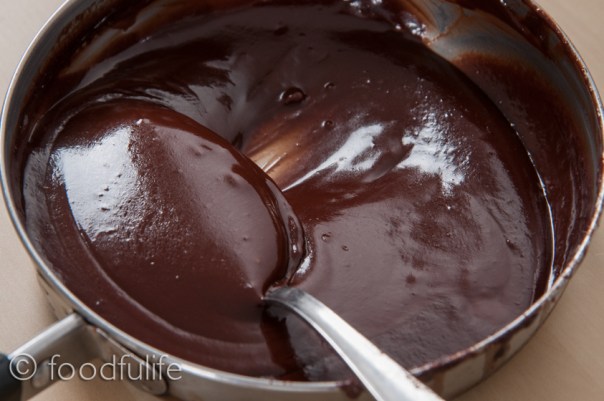
2. Melt the chocolate using a bain-marie.

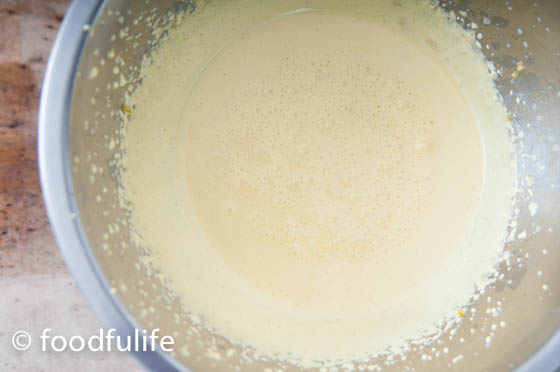
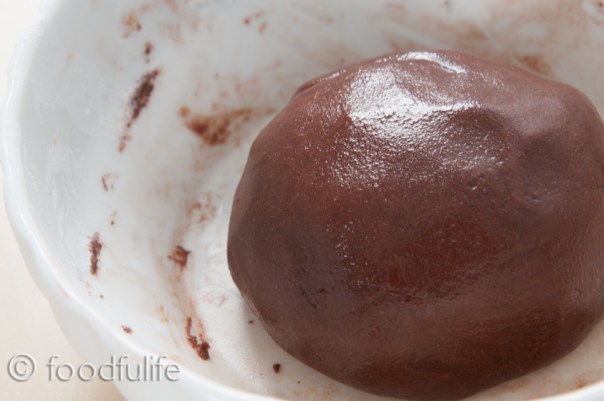
3. In a bowl, work the butter with the maple syrup, the honey and the ground almonds.

DSC_7968

4. Add the melted chocolate to the almond mixture and stir well. In another bowl, combine the rice flour, the cornstarch, the cocoa, a pinch of cinnamon, a pinch of salt, then mix everything together with the almonds. Knead for a few minutes then put in the refrigerator to cool for about 30 minutes.

DSC_7954

DSC_7971

DSC_7982

5. Line the base of two baking trays with some baking paper, then shape the cookies and garnish with the pomegranate seeds.

DSC_7985

6. Bake at 180 ° C (356°F ) for 20-30 minutes.

DSC_8006

7. Serve the cookies hot with a lot of honey on top!

DSC_8047

DSC_8059

DSC_8065

DSC_8027

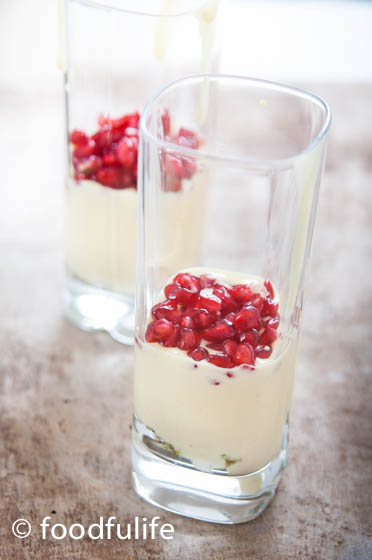
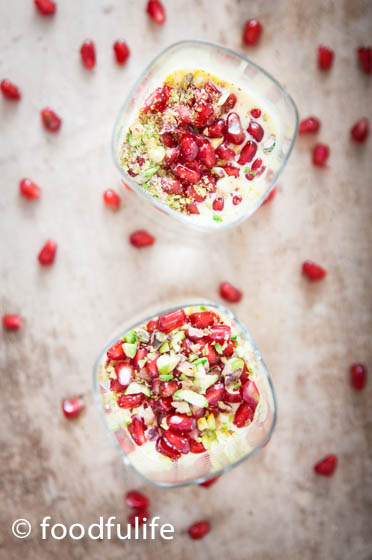
Also see Light Sabayon With Pomegranate And Pistachios and Prawn Salad With Rocket And Pomegranate.

Biscotti di farina riso al cioccolato con melagrana.

Per due teglie (16 biscotti)

tempo di preparazione: 20 minuti + il riposo

tempo di cottura: 20-30 minuti

Ingredienti

100 g di burro morbido

100 g di farina di riso

150 g di mandorle, senza buccia

15 g di cacao amaro (uso il fair trade e bio)

60 g di cioccolato fondente al 70 % (uso il fair trade e bio)

50 g di amido di mais

i chicchi di una melagrana

1 cucchiaio di miele

3 cucchiai di sciroppo d’acero

un pizzico di sale

un pizzico di cannella

Preparazione.

1.Tostate le mandorle a 160 °C per 5-10 minuti. Lasciate raffreddare e tritate finemente con il tritatutto.

2. Fate sciogliere il cioccolato a bagnomaria.

3. Lavorate il burro con lo sciroppo d’acero, un cucchiaio di miele e la farina di mandorle.

4. Unite il cioccolato sciolto al composto di burro e farina di mandorle. A parte, mescolate la farina di riso con il cacao, l’amido di mais, la cannella e un pizzico di sale. Unite tutto e impastate bene per qualche minuto, poi mettete nel frigorifero a raffreddare per 30 minuti.

5. Distribuite i biscotti su due teglie rettangolari (ricoperte da carta da forno) e guarnite con dei chicchi di melagrana.

6. Infornate a 180°C  per 20-30 minuti.

7. Servite i biscotti caldi con tanto miele sopra.

DSC_8049

Light Sabayon With Pomegranate And Pistachios

Autumn has finally arrived and soon Foodfulife will turn two years old! Yep, two years ago I decided to start this incredible journey and Foodfulife is still going strong! To celebrate I will dedicate three recipes to the pomegranate, a wonderful fruit that contains important nutriments that can help us to boost our immune system during this season.

DSC_7944

Pomegranate is rich in vitamins A, B, C; it contains minerals including potassium and phosphorus, sodium, magnesium, iron and important antioxidants such as flavonoids and phytoestrogens. It has anti-aging, anti-oxidising and anti-cancerous proprieties and it may be effective in reducing the risk of heart related diseases.
Pomegranate is also a very versatile fruit to use in recipes; its delicate flavour is sweet and slightly sour and it can be used in sweet as well as savoury dishes.

DSC_7853

Today I am sharing an easy recipe with a light orange sabayon, crunchy pistachios and lots of pomegranates seeds. This is a deliciously creamy dessert with an interesting texture and lots of flavour!

DSC_7828

Light sabayon with pomegranates and pistachios.

For 4 glasses

the seeds from 2 pomegranates

40 g toasted pistachio nuts (toasted in the oven for about 10 minutes )

340 g greek yogurt

for the sabayon

6 egg yolks

130 g of brown sugar

1 tablespoon orange liqueur

DSC_7875

Method.

1. In a stainless steel bowl, combine the eggs with the sugar.

2. Place the bowl over a bain-marie (with very hot water, but not boiling) over a very low heat, then whisk the mixture.

3. Add a tablespoon of orange liqueur, whisk for a few more minutes, then turn off the heat and set aside to cool.

DSC_7886

4. Once the sabayon has cooled, mix gently with the yogurt.

5. Separately, chop the pistachios.

DSC_7865

6. Take 4 tall glasses and fill with a layer of pistachios, then alternate a layer of pomegranate seeds with one of sabayon and another of the pomegranate seeds. Finish with a layer of sabayon and garnish with pomegranate and pistachios.

DSC_7878

DSC_7907

DSC_7938

7. Place in the fridge to cool and serve.

DSC_7940

also see Rice Flour Chocolate Cookies With Pomegranate and Prawn Salad With Rocket And Pomegranate.

Zabaione allo yogurt con melagrana e pistacchi.

Per 4 bicchieri

2 melegrane

40 g di pistacchi (tostati al forno per 10 minuti)

340 g di yogurt greco

per lo zabaione

6 tuorli d’uova

130 g di zucchero di canna

1 cucchiaio di liquore all’arancia

DSC_7855

Preparazione.

1. In una ciotola di metallo, unite lo zucchero alle uova.

2. Mettete la ciotola a bagnomaria (a fuoco basso, con acqua molto calda che non deve bollire) e montate le uova fino ad ottenere una crema soffice.

3. Aggiungete un cucchiaio di liquore all’arancia, poi montate per qualche minuto e spegnete il fuoco. Lasciate raffreddare, mescolando di tanto in tanto.

4. Una volta raffreddato, unite lo zabaione allo yogurt.

5. A parte, tritate grossolanamente i pistacchi.

6. Prendete 4 bicchieri alti e ricoprite la base con uno strato di pistacchi, poi alternate uno strato di chicchi di melagrana con uno di crema, poi aggiungete altro melagrana e terminate con la crema. Guarnite con chicchi di melagrana e pistacchi.

7. Mettete nel frigo a raffreddare e poi servite.

Vedi anche Biscotti Di Farina Di Riso Al Cioccolato Con Melagrana e Insalata Con Gamberi E Rucola

DSC_7951

Traditional Recipe: Crema Pasticciera (Italian Custard Cream)

La Crema Pasticciera is a thick and rich custard cream used in Italian patisserie as a filling or ingredient for pastries, cakes and various desserts. Often aromatised with lemon or vanilla, this custard is so popular because it is extremely pleasing to the eye and palate, with its wonderful flavour and velvety creamy texture.

It is possible to aromatise la Crema Pasticciera in various ways, for example using chocolate or coffee, but also liqueurs and the zest of different citrus fruits. In uncooked desserts, it is often mixed with whipped cream to obtain a lighter and more delicate custard.

Crema Pasticciera.

1 litre whole milk

8 egg yolks

160 g caster sugar

80 g sifted flour

1 vanilla pod, or the grated zest of 1 organic lemon

Method.

1. In a pan, bring the milk with the vanilla pod (opened and emptied into the milk) to a boil, or add the lemon zest (the aromas you use will depend on your personal taste). Then sieve the milk.

DSC_5301

2. In a large bowl, whisk the egg yolks with the sugar until creamy.

DSC_5333

3.. Add the flour to the egg mixture and gently stir from the bottom upwards.

DSC_5337

DSC_5346

4. Gently pour the hot milk into the mixture and stir. Put the custard onto a low heat to thicken for about 5 minutes (stirring constantly, but gently).

DSC_5355

5. After 5 minutes, turn off the heat and put the cream in a bowl (stirring occasionally) to cool.

DSC_5401

6. Cover with a sheet of cling film, to prevent the skin from forming on the top and put in the refrigerator. Stir the custard vigorously before using.

DSC_5412

Notes.

1 It’s important to mix the egg yolks with the sugar straight away, to prevent crystals from forming.

2. Cook over a medium-low heat and use a thick bottom sauce pan to avoid burning the custard cream.

3. kept in a refrigerator, the cream should be used within 3 days.

DSC_5395

If you like this recipe please support the blog by following foodfulife on facebook! Thank you so much!!! 🙂

Crema Pasticciera (ricetta base)

1 litro di latte intero

8 tuorli d’uova

160 g di zucchero

80 g di farina 00, setacciata

1 baccello di vaniglia, oppure la scorza grattugiata di un limone non trattato

Preparazione.

1. In un tegame, portate ad ebollizione il latte con il baccello di vaniglia (aperto e svuotato nel latte), oppure aggiungete la scorza di limone. Filtrate il latte usando un colino fine.

2. In una terrina grande, montate i tuorli con lo zucchero, fino ad ottenere una crema spumosa.

3. Unite la farina alle uova e mescolate delicatamente dal basso verso l’alto.

4. Versate il latte caldo a filo nel composto e mescolate delicatamente con una frusta. Mettete la crema sul fuoco ad addensare per almeno 5 minuti, continuando a mescolare delicatamente.

5. Spegnete il fuoco, mettete la crema a raffreddare in una ciotola e mescolate ogni tanto.

6. Ricoprite con la pellicola per alimenti, per evitare che si formi la pellicina in superficie e mettete in frigorifero. Mescolate la crema energicamente prima di utilizzarla.

Note.

1. E’ importante mescolare subito i tuorli con lo zucchero per evitare che si formino dei cristalli.

2. Cuocete a fiamma medio-bassa per evitare che la crema si attacchi al fondo della pentola. E’ consigliabile usare una pentola con il fondo spesso.

3. Conservata in frigorifero, la crema va utilizzata entro 3 giorni.

DSC_5365

Cooking Method: Shortcrust Pastry Tart Case

If you are making a tart, it’s possible to cook shortcrust pastry either with the filling or without. Today we will look at all the steps required in order to make a wonderful shortcrust tart case, without the filling and cooked to perfection.

DSC_3767

For the ingredients see this Shortcrust Basic Recipe.

Method. 

1. Take a cake tin (with the dimensions required by the recipe), grease with butter and dust with flour (the butter will help to cook the tart case more evenly).

DSC_3693

2. Roll out the dough (3-5 mm thickness), than wrap it loosely around the rolling pin and place it gently into the cake tin.

3. Using a pastry cutter, cut off the excess dough. With a fork, pierce the base of the dough a few times (this operation helps to avoid air bubbles while cooking).

DSC_3740

4. Place a sheet of aluminium foil on the dough and press it down lightly with your hands (this prevents the dough from collapsing during the cooking process).

5. Fill with dried beans (we use borlotti beans, you can also use rice) and bake at 180 ° C ( 356°F ) for 15-20 minutes (the cooking time will vary depending on the recipe and thickness of the pastry). When the pastry is perfectly cooked remove the foil with the beans and let cool.

DSC_3715

DSC_3757

DSC_3764

DSC_3775

Cottura in bianco della pasta frolla.

La pasta frolla si può cuocere in bianco (cioè senza ripieno) oppure con il ripieno (ad esempio per le ricette della crostata con la confettura di frutta). Oggi vedremo come si fa la cottura in bianco, per preparare crostate con il ripieno che non richiede cottura.

Per gli ingredienti vedere Ricetta base della pasta frolla.

Preparazione.

1. Prendete una teglia delle dimensioni consigliate dalla ricetta, ungetela bene con il burro e spolveratela con la farina (il burro conduce il calore e aiuta ad ottenere una cottura più uniforme).

2. Stendete l’impasto, arrotolatelo sul matterello e poi sistematelo sulla teglia con delicatezza.

3. Con una rotella tagliate la pasta in eccesso. Usando una forchetta, create alcuni fori sulla base della pasta (questa operazione serve per evitare che si formino delle bolle d’aria, quando la base si cuoce).

4. Prendete un foglio di alluminio e sistematelo sulla pasta in modo che aderisca alla forma (questo serve ad evitare che la pasta si abbassi durante la cottura, quando il burro si scioglie).

5. Riempite con dei fagioli secchi e infornate a 180° C per 15-20 minuti (il tempo di cottura dipenderà dalla ricetta e dallo spessore della pasta). A cottura terminata, togliete il foglio di alluminio con i fagioli e fate raffreddare.

How To Make Perfect Pastry (Basic Shortcrust Pastry Recipe).

A perfect shortcrust should have a light crumbly texture which melts in the mouth when you bite into it and tastes heavenly! This is why shortcrust pastry is the most popular when it comes to home-made desserts. Today we are going to look at the basics of the preparation method, including some possible variations.

This is a fairly simple method, but there are some important steps to follow in order to get it right. To obtain a crumbly and light pastry it is important to handle the butter and flour as little as possible, to avoid warming the pastry up with your hand. If the butter melts too much during the preparation method the pastry will change consistency and the result will be heavier than it should be.

DSC_3769

Tips.

1. If the dough is too dry you can add 1/2 egg white or a few tablespoons of water.

2. The ideal thickness for the base of a tart is about 3-5 mm, while 1/2 cm is the ideal thickness for a cookie dough.

3. It is possible to freeze the pastry and use it within a month.

Shortcrust Pastry Basic Recipe.

Medium difficulty

Ingredients

for a 24 cm in diameter cake tin (for 6 servings)

250 g plain flour, sifted

125 g butter, cut into small pieces

100 g sugar

3 egg yolks

aromas (lemon zest or orange zest, vanilla seeds, vanilla extract etc. ..)

a pinch of salt

DSC_3653

Method. 

1. On a board, using a spatula, mix the butter with the sugar.

DSC_3659

2. Add the egg yolks, one at a time.

DSC_3665

3. Add the sifted flour and the aromas. Knead well using a spatula and your hands (this operation should require as little time as possible).

DSC_3674

DSC_3680

4. Roll out the dough on a sheet of baking paper, cover with a second sheet, then fold it and place in refrigerator for at least 30 minutes.

DSC_3685

DSC_3690

5. After the required amount of time, remove the dough from the refrigerator. Beat the dough with a rolling pin to soften its consistency and proceed with your recipe.

DSC_3703

DSC_3739

DSC_3771

Basic variations.

For a more crumbly pastry:
Use hard-boiled yolks instead of raw and/ or add more butter to the recipe. If you add butter remember that you can add up to 80% of the total weight of the flour (e.i. if you use 500 g of flour, you can use up to 400 g of butter).

For a lighter pastry:
You can decrease the butter down to a minimum of 30% of the total weight of the flour used in the recipe.

For a crunchier pastry:
Increase the dose of sugar, bearing in mind that the dough will be sweeter.

For a finer pastry:
Use icing sugar instead of caster sugar. You can also use Italian flour 00, which is finer than plain flour.

For a drier pastry (e.g. to make cookies):
Use whole eggs (whites and yolks), adding 25 g of sugar and 25 g of butter.

For a taller pastry (for example to make cookies):
Add 1 teaspoon of baking powder to the dough.

Also see Cooking Method: Shortcrust Pastry Tart Case

Preparazione Base Della Pasta Frolla (Metodo A Mano).
Oggi vedremo insieme la preparazione base per fare la pasta frolla, la pasta più utilizzata per i dolci fatti in casa. E’ un metodo abbastanza semplice, che però comporta un minimo di attenzione nella preparazione e nella cottura, specialmente se si fanno delle crostate che richiedono una cottura in bianco, cioè senza il ripieno.
Per ottenere una buona pasta frolla, friabile e leggera al punto giusto, è importante che si proceda con gli ingredienti ancora freddi e si eviti di maneggiare troppo il burro e la farina durante la lavorazione, per non riscaldarli.

Note.

1. Nel caso l’impasto risultasse troppo asciutto si può aggiungere 1/2 albume oppure qualche cucchiaio d’acqua, per dare più elasticità.

2. E’ possibile surgelare la pasta frolla e utilizzarla entro un mese dal congelamento.

3. Se volete prepare la base di una crostata lo spessore ideale è di 3-5 mm e invece 1/2 cm è lo spessore ideale per i biscotti.

Ricetta base per la pasta frolla.

Media difficoltà

Ingredienti

per foderare uno stampo 24 cm di diametro (per 6 persone)

250 g di farina 00

125 g di burro a pezzetti

100 g di zucchero

3 tuorli d’uova

aromi (la buccia di limone o arancia grattugiata, i semi di vaniglia ecc..)

un pizzico di sale

Preparazione.

1. Su una spianatoia e utilizzando una spatola, per non riscaldare l’impasto, tagliate e amalgamate il burro con lo zucchero.

2. Aggiungete i tuorli, uno alla volta, al resto degli ingredienti.

3. Aggiungete gli aromi e la farina. Lavorate bene tutti gli ingredienti, sempre con la spatola e aiutandovi con le mani solo se necessario.

4. Stendete l’impasto su un foglio di carta da forno e ricopritelo con un secondo foglio. Piegate l’impasto a portafoglio e mettetelo nel frigo per almeno 30 minuti.

5. Passato il tempo necessario, togliete l’impasto dal frigorifero, battetelo con un matterello per ammorbidirlo e procedete con la vostra ricetta.

Possibili varianti nella consistenza.

1. Per una pasta frolla più friabile:
Utilizzate nell’impasto i tuorli delle uova sode, invece che crude e (oppure) aumentate la dose di burro. Se aggiungete il burro, non bisogna superare l’80% del peso della farina (cioè su 500 g di farina si possono utilizzare fino a 400 g di burro).

2. Per una pasta frolla più leggera:
Si può diminuire il burro fino al 30% dell’intero peso della farina utilizzata nella ricetta.

3. Per una pasta frolla più croccante:
Aumentate la dose di zucchero, tenendo presente che l’impasto sarà più dolce.

4. Per una pasta frolla più fine:
Utilizzate lo zucchero a velo al posto di quello semolato.

5. Per una pasta frolla più secca (ad esempio per fare i biscotti):
Utilizzate le uova intere (albumi e tuorli), aggiungendo 25 g di zucchero e 25 g di burro all’impasto.

6. Per una pasta frolla più gonfia (ad esempio per fare i biscotti):
Aggiungete 1 cucchiaino di lievito per dolci all’impasto.

Vedere anche Cottura in bianco della pasta frolla

Traditional Recipe: Torta Caprese

DSC_8662

As the name suggests, the Torta Caprese (Caprese cake) originally comes from Capri, a beautiful little island, near Naples.
Dark brown, a little bit crunchy on the outside but soft and moist in the centre, this delicious and decadent chocolate cake is widely appreciated all over Italy. It is also an amazing gluten-free cake, because it doesn’t contain any flour; although, in some recipes a little bit of flour might be used to dust the baking tin.

DSC_8668

Tips.

1. The Torta Caprese is usually cooked in a large round baking tin (this is 26 cm wide) and shouldn’t be too thick.

2. This is a dark chocolate cake which suits better an adult taste, because it’s not very sweet. It is possible to adjust the recipe for the kids using a sweeter dark chocolate, adding 20 g of sugar to the ingredients and dusting with plenty of icing sugar.

DSC_8661

Torta Caprese.

For 8 servings

easy

Cooking time: 1 hour

Preparation time: 20 minutes

Ingredients

300 g (10.58 oz) almonds (without the skin)

170 g (5.99 oz) butter, softened

100 g (3.5 oz) brown sugar

45 g (1.5 oz) honey

200 g (7.05 oz) dark chocolate (70% cocoa solids)

4 eggs

icing sugar for garnish

cocoa powder to taste

a pinch of salt

Method

1. Toast the almonds in the oven for a few minutes at 180 ° C (356°F). Let cool then grind finely.

DSC_8583

DSC_8588

2. Cut and melt the chocolate in bain-marie for a few minutes.

DSC_8598

3. In a large bowl, mix the butter with 4 egg yolks, honey, the brown sugar and a pinch of salt. Then add the ground almonds with the chocolate and mix well.

DSC_8605

4. Separately, whip all the egg whites until stiff, then gently mix with the rest of the ingredients.

DSC_8594

DSC_8611

5. Grease with butter and line the base and sides of a large cake tin (I am using a tin 26 cm wide) with baking paper (roughly cut down to size). Then fill with the mixture and bake at 150 ° C (302°F) for about 1 hour.

DSC_8613

DSC_8627

6. Take the cake out of the oven and let cool. Dust with some cocoa powder, decorate with icing sugar and serve.

DSC_8629

DSC_8638

DSC_8640

Torta Caprese.

Per 8 persone

Facile

Tempo di cottura: 1 ora

Tempo di preparazione: 20 minuti

Ingredienti

300 g di mandorle sbucciate

170 g di burro morbido (e del burro in più per imburrare la teglia)

100 g di zucchero di canna

45 g di miele

200 g di cioccolato fondente al 70 %

4 uova

zucchero e velo q. b. per guarnire

un pizzico di sale

cacao amaro in polvere q. b.

Preparazione.

1. Tostate le mandorle nel forno per qualche minuto a 180° C. Lasciatele raffreddare e poi tritatele molto finemente.

2. Fate fondere il cioccolato a bagnomaria.

3. In una terrina grande, amalgamate il burro con i tuorli d’uova, il miele, lo zucchero e un pizzico di sale, fino ad ottenere una crema. Aggiungete anche le mandorle con il cioccolato fuso e mescolate bene.

4. A parte, montate gli albumi a neve e uniteli al resto degli ingredienti, mescolando delicatamente dal basso verso l’alto.

5. Imburrate la teglia (uso una teglia larga 26 cm) e ricopritela con della carta da forno (tagliata di misura). Versate il composto nella teglia e infornate a 150°C per circa 1 ora.

6. Sfornate la torta e lasciatela raffreddare. Spolverate con un po’ di cacao amaro, decorate con dello zucchero a velo e servite.

DSC_8665

Traditional Recipe: Torta Paradiso (Heaven Cake)

DSC_2842

This is a traditional dessert from Genoa, a very delicate, light and soft sponge cake that everybody loves! It reminds me of my childhood: at the time, my mother used to buy this cake from Panarello, one of the best and most famous posh bakeries in town. Panarello’s Torta Paradiso is truly amazing! If you ever come to visit Genoa, I strongly recommend that you try this cake in one of their shops.

DSC_2886

This recipe was inspired by Panarello’s Torta Paradiso (and I assure you, it also gets very close to the real thing), which is slightly more elaborated and delicious than the old Genoese recipe. In the traditional recipe (and by traditional I mean the really old one), you would only use potato starch, the juice of a lemon, eggs, baking powder, sugar and finally, butter, but, only to grease the tin.

DSC_2917

Torta Paradiso.

Ingredients

for a 28 cm in diameter cake

Preparation: 20 minutes

Cooking: 50 minutes

Medium/ Difficult

200 g (7.05 oz) butter, softened

200 g (7.05 oz) icing sugar (and a little more icing sugar to garnish the cake)

100 g (3.5 oz) manitoba flour

100 g (3.5 oz) potato starch

4 egg yolks

3 whole eggs

2 drops of vanilla extract

1 teaspoon of baking powder

1 tablespoon of lemon juice

a pinch of salt

a few drops of almond flavouring

Method.

1. Separate the egg whites from the yolks and put everything aside.

DSC_2777

2. Sift together the flour, the potato starch and the baking powder.

3. Stir the softened butter with the sugar, the almond flavouring and the vanilla extract, until you get a creamy mixture. Then gradually add all the egg yolks into the mixture.

DSC_2790

4. Also add the flour and the starch (but still very gradually). Mix everything well.

DSC_2795

5. Beat all the egg whites with a pinch of salt and a tablespoon of lemon juice, until stiff. Combine the egg whites into the mixture, stirring gently.

DSC_2804

DSC_2809

6. Bake in a preheated oven at 180 ° C (356 °F) for at least 50 minutes, using a greased baking dish (with 28 cm in diameter).

DSC_2810

DSC_2817

7. When the cake is completely cooled, garnish with plenty of icing sugar.

DSC_2824

DSC_2835

DSC_2886

DSC_2910

DSC_2871

DSC_2861

DSC_2893

Torta Paradiso.

Media difficoltà

Preparazione: 20 minuti

Cottura: 50 minuti

Ingredienti

200 g di burro

200 g di zucchero a velo (e dello zucchero a velo in più per decorare)

100 g di farina manitoba

100 g di fecola di patate

4 tuorli d’uovo

3 uova intere

2 gocce di estratto di vaniglia

un cucchiaio di succo di limone

1 busta di lievito per dolci

un pizzico di sale

qualche goccia di aroma di mandorla

Metodo.

1. Separate gli albumi dai tuorli e mettete tutto da parte.

2. Setacciate e unite la farina alla fecola di patate con il lievito.

3. Amalgamate il burro con lo zucchero, l’aroma di mandorla e l’estratto di vaniglia, fino ad ottenere una crema omogenea. Poi, incorporate gradualmente tutti i tuorli d’uova all’impasto.

4. Aggiungete anche la farina e la fecola (sempre gradualmente). Amalgamate bene tutto.

5. A parte, montate tutti gli albumi a neve con un pizzico di sale e un cucchiaio di succo di limone. Unite gli albumi montati al composto, mescolando delicatamente dal basso verso l’alto.

6. Infornate a forno preriscaldato a 180° C per almeno 50 minuti, utilizzando una teglia imburrata (di 28 cm di diametro).

7. Quando la torta sarà completamente raffreddata, guarnite con abbondante zucchero a velo.

DSC_2904

Mango Panna Cotta

Panna cotta is one of the most appreciated Italian desserts and is well known all over the world. This amazing dessert is probably widely appreciated, not only for its wonderful velvety texture and delicate flavour but also for the simplicity of the preparation method. The traditional recipe is usually prepared with cream, sugar and vanilla pods and served with fruit, chocolate or caramel sauce. In addition to the traditional recipe, there are many variations which include different ingredients, in order to get more creative and complex flavour combinations (we have already prepared a double chocolate panna cotta, in a previous post).

In this recipe, I added the mango pulp with a hint of lemon flavour, to celebrate the warm season. The result is an extremely velvety, exotic and charming dessert!

You’ll love it!!!

DSC_8005

 Tips.

1. To make a slightly lighter dessert you can replace 50 ml of whipping cream with 50 ml of whole milk.

2. It’s important to strain the mango puree well, because the mango pulp contains little hairy bits which can compromise the smoothness and texture of the dessert.

3. In this recipe, I added 1 tablespoon of honey, but half a tablespoon was actually enough for my taste. With half a tablespoon of honey you get a less sweet but more delicate panna cotta, which in my opinion, suits an adult taste best. You can taste the mixture with 1/2 tablespoon of honey and then decide whether you want to add more or not. For children, the preparation with a tablespoon of honey is perfect!

DSC_7961

Mango Panna Cotta.

Preparation: 20 minute + 3 hours in the fridge

Easy

Ingredients

for 2 servings

150g (5.2 oz) mango (+ a few pieces of fresh mango)

1 tablespoon of honey

the zest of half a lemon (or 1 drop of lemon essential oil)

2 gelatine leaves

200 ml ( 6.76 us fl oz) whipping or double cream

a few mint leaves

DSC_7943

Method

1. Leave the gelatine leaves to soak for about 10 minutes.

DSC_7932

2. Pour the cream into a small saucepan with the honey and the lemon zest (or lemon essential oil). Cook over a moderate heat for a few minutes, until the cream is quite hot (but do not boil). Then add the gelatine leaves, stir very well and turn off the heat.

DSC_7934

3. Peel the mango and cut it into pieces. Puree the fruit in a blender with the warm cream.

4. Using a strainer, pour the mixture into small one-portion pots and let cool. Then put the pots in the refrigerator to set for about 3 hours.

DSC_7947

5.  Serve the panna cotta with some fresh mango and a few mint leaves on top.

DSC_7984

DSC_7980

DSC_7988

DSC_7958

Panna Cotta al Mango.

Difficoltà: facile

Preparazione: 20 minuti + 3 ore nel frigorifero

Ingredienti

per 2 panne cotte

150 g di mango (+ qualche pezzo di mango da aggiungere alla fine, come guarnizione)

Scorza di mezzo limone (oppure 1 o 2 goccia di olio essenziale di limone)

1 cucchiaio di miele

2 fogli di colla di pesce

200 ml di panna

qualche foglia di menta

Metodo

1. Mettete a bagno, in acqua tiepida, i fogli di gelatina per 10 minuti.

2. Riscaldate la panna in un pentolino (a fuoco basso) con il miele e la scorza di limone (oppure l’olio essenziale di limone). Aggiungete la gelatina, mescolate per qualche minuto e spegnete il fuoco.

3. Togliete la buccia al mango, tagliatelo a pezzi e frullatelo bene insieme alla panna (ancora calda).

4. Usando un colino, filtrate la panna e versatela negli stampini. Lasciate raffreddare e poi mettete in frigorifero per 3 ore a rassodare.

5. Servite con dei pezzi di mango fresco e qualche foglia di menta.

DSC_8008

Rich Chocolate Tart with Fresh Raspberries…Yes, but it’s different!

Vegan, dairy-free, gluten-free, egg-free, with only a little refined sugar and absolutely delicious!!!!

I must admit I was a little bit sceptical about vegan desserts, I thought that without dairy products, desserts would just taste dull! So I decided to give it a try and make this vegan chocolate tart, because I usually like to try things before I make a judgement, especially when I am talking about recipes. I am glad to say that I was wrong! I might even dedicate an entire post to the lovely vegan chocolate ganache that I’ve made for this recipe, because I think it deserves a little place on its own in this blog and a few more words given over to it.

So, today we are going to prepare a delicious mini chocolate tart with a lot of fresh raspberries on top! As a filling, I made a rich dark chocolate ganache. Usually, the chocolate ganache is prepared with heavy whipping cream or butter, I used rice milk instead and I thickened the sauce with a little cornstarch. The result is a velvety smooth chocolate filling that contains little refined sugar and is dairy-free.

This is an amazing vegan dessert that everyone can enjoy!

DSC_5795

DSC_5793

Rich Chocolate Tart with Fresh Raspberries

 Ingredients

For the pastry

2-3 servings. 

50 g (1.7 oz) skinless almonds (or hazelnuts, if you prefer)

60 g (2 oz) dark chocolate (organic, with 70% cocoa solids)

60 g (2 oz) rice flour

30 g (1 oz) of potato starch

1/2 teaspoon of baking powder

2 tablespoons of sunflower oil

1 tablespoon of agave syrup (or 1 tablespoon of honey, if you are not on a vegan diet)

a pinch of salt

For the dark chocolate ganache 

60 g (2 oz) of dark chocolate (organic, 70 % cocoa)

100 ml (3.38 fl oz US, 0.175 pt UK) rice milk (replace with soya or almond milk, if you prefer)

1 tablespoon of agave syrup (or 2 tablespoon of honey, if you are not on a vegan diet)

1/2 a tablespoon of cornstarch

To garnish

100 g (3.5 oz) raspberries, fresh and washed

a few chocolate chips

DSC_5601

Method. 

For the pastry. 

Preparation: 20 minutes

Cooking: 15 minutes

1. In a double boiler (bain-marie), melt 60 g (2 oz) of dark chocolate.

DSC_5626

2. Finely grind the almonds using a food processor, until you get a fine paste.

DSC_5619

3. In a small bowl, sift the flour and the potato starch using a fine strainer. Then, mix in the melted chocolate, the almond paste, 1/2 a teaspoon of baking powder, a pinch of salt, 2 tablespoons of sunflower oil and 1 tablespoon of agave syrup (or 1 tablespoon of honey).

DSC_5630

4. Place the dough in the refrigerator for 15 minutes.

DSC_5632

5. Lightly grease the base of a small cake pan (15-17 cm or 6 – 7 inches of diameter) and bake at 170 ° C (338° F) for about 15 minutes.

DSC_5643

For the chocolate ganache.

Preparation: 20 minutes

1. In a double boiler (or bain-marie), melt 60 g (2 oz) of dark chocolate.

2. In a small pan, heat 100 ml (3.38 fl oz US) of rice milk and add it (gradually and stirring) to the melted chocolate (both must be warm).

DSC_5639

3. In another pan, mix 1/2 a tablespoon of cornstarch with 1 tablespoon of the chocolate mixture and stir well. Gradually add the rest of the chocolate mixture, then cook over a low heat and stir until the chocolate ganache has thickened (it will take only a few minutes).

DSC_5646

4. Turn off the heat, add 1 tablespoon of agave syrup (or 2 tablespoon of honey) and mix well. Let cool.

DSC_5650

To garnish.

Refrigeration: 30 minutes

1. Pour the chocolate ganache into the base of the tart, then put the cake in the refrigerator for about 30 minutes.

DSC_5689

2. Garnish with plenty of raspberries and some chocolate chips.

DSC_5698

DSC_5794

DSC_5800

DSC_5808

 Crostata di lamponi con ganache di cioccolato fondente.

Ingredienti

Per la base.

2-3 porzioni.

50 g di mandorle, senza pelle (oppure nocciole, se preferite)

60 g di farina di riso

30 g di fecola di patate

60 g di cioccolato fondente bio ( con 70% di cacao)

1/2 cucchiaino di lievito per torte

2 cucchiai di olio di semi di girasole

1 cucchiaio di sciroppo d’agave (oppure 1 cucchiaio di miele bio, se non seguite una dieta vegana)

un pizzico di sale

Per la ganache al cioccolato fondente

100 ml di latte di riso (oppure latte di mandorle, soia o latte normale)

1 cucchiaio di sciroppo d’agave (oppure 2 cucchiai di miele bio, se non seguite una dieta vegana)

60 g di cioccolato fondente bio (con 70% di cacao)

1/2 cucchiaio di amido di mais

Per guarnire

100 g di lamponi (freschi e ben lavati)

un po’ di scaglie di cioccolato per decorare

Preparazione.

Per la base.

1. Fate sciogliere 60 g di cioccolato fondente a bagnomaria.

2. Tritate molto finemente le mandorle usando un tritatutto.

3. In una terrina, setacciate la farina e la fecola di patate usando un colino molto fine. Aggiungete il cioccolato sciolto, la pasta di mandorle, il lievito per dolci, un pizzico di sale, due cucchiai d’olio di semi di girasole e 1 cucchiaio di sciroppo d’agave (oppure 1 cucchiaio di miele).

4. Impastate bene e mettete in frigo per 15 minuti.

5. Ungete leggermente la base di una piccola teglia (15-16 cm di diametro) e infornate a 170° per 15 minuti.

Per la ganache al cioccolato.

1. Fate sciogliere 60 g di cioccolato fondente a bagnomaria.

2. Scaldate 100 ml di latte di riso in un pentolino e unitelo al cioccolato ancora caldo, mescolando bene.

3. In un altro pentolino, unite una piccola quantità di latte di riso al cioccolato con mezzo cucchiaio di amido di mais (mescolando energicamente). In modo molto graduale, aggiungete tutto il latte al cioccolato, poi fate rassodare la ganache sul fuoco a fiamma bassa, per qualche minuto (continuando a mescolare).

4. Spegnete il fuoco e aggiungete 1 cucchiaio di sciroppo d’agave (oppure 2 cucchiai di miele). Mescolate ancora, poi lasciate raffreddare.

 Per guarnire.

1. Versate la crema sulla base della crostata e mettete in frigorifero per 30 minuti.

2. Guarnite con un doppio strato di lamponi e scaglie di cioccolato.