Today we were in Genova Nervi, enjoying an amazing Affogato al Cioccolato.


Today we were in Genova Nervi, enjoying an amazing Affogato al Cioccolato.

Vegan, dairy-free, gluten-free, egg-free, with only a little refined sugar and absolutely delicious!!!!
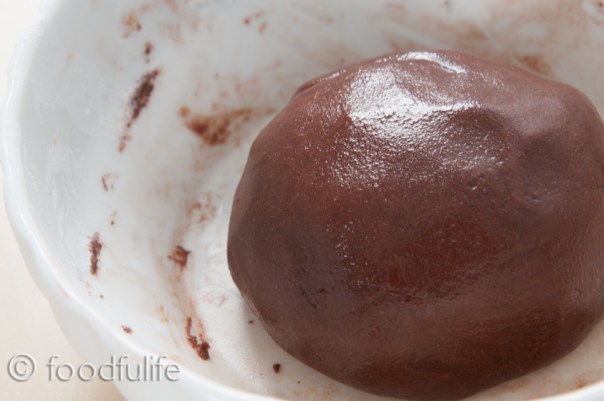
I must admit I was a little bit sceptical about vegan desserts, I thought that without dairy products, desserts would just taste dull! So I decided to give it a try and make this vegan chocolate tart, because I usually like to try things before I make a judgement, especially when I am talking about recipes. I am glad to say that I was wrong! I might even dedicate an entire post to the lovely vegan chocolate ganache that I’ve made for this recipe, because I think it deserves a little place on its own in this blog and a few more words given over to it.
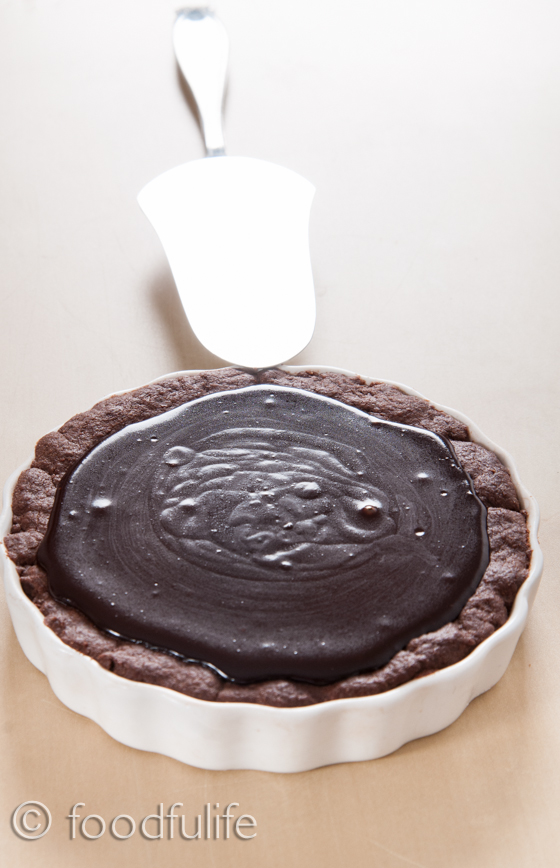
So, today we are going to prepare a delicious mini chocolate tart with a lot of fresh raspberries on top! As a filling, I made a rich dark chocolate ganache. Usually, the chocolate ganache is prepared with heavy whipping cream or butter, I used rice milk instead and I thickened the sauce with a little cornstarch. The result is a velvety smooth chocolate filling that contains little refined sugar and is dairy-free.
This is an amazing vegan dessert that everyone can enjoy!


Rich Chocolate Tart with Fresh Raspberries
Ingredients
For the pastry
2-3 servings.
50 g (1.7 oz) skinless almonds (or hazelnuts, if you prefer)
60 g (2 oz) dark chocolate (organic, with 70% cocoa solids)
60 g (2 oz) rice flour
30 g (1 oz) of potato starch
1/2 teaspoon of baking powder
2 tablespoons of sunflower oil
1 tablespoon of agave syrup (or 1 tablespoon of honey, if you are not on a vegan diet)
a pinch of salt
For the dark chocolate ganache
60 g (2 oz) of dark chocolate (organic, 70 % cocoa)
100 ml (3.38 fl oz US, 0.175 pt UK) rice milk (replace with soya or almond milk, if you prefer)
1 tablespoon of agave syrup (or 2 tablespoon of honey, if you are not on a vegan diet)
1/2 a tablespoon of cornstarch
To garnish
100 g (3.5 oz) raspberries, fresh and washed
a few chocolate chips

Method.
For the pastry.
Preparation: 20 minutes
Cooking: 15 minutes
1. In a double boiler (bain-marie), melt 60 g (2 oz) of dark chocolate.

2. Finely grind the almonds using a food processor, until you get a fine paste.

3. In a small bowl, sift the flour and the potato starch using a fine strainer. Then, mix in the melted chocolate, the almond paste, 1/2 a teaspoon of baking powder, a pinch of salt, 2 tablespoons of sunflower oil and 1 tablespoon of agave syrup (or 1 tablespoon of honey).

4. Place the dough in the refrigerator for 15 minutes.
5. Lightly grease the base of a small cake pan (15-17 cm or 6 – 7 inches of diameter) and bake at 170 ° C (338° F) for about 15 minutes.

For the chocolate ganache.
Preparation: 20 minutes
1. In a double boiler (or bain-marie), melt 60 g (2 oz) of dark chocolate.
2. In a small pan, heat 100 ml (3.38 fl oz US) of rice milk and add it (gradually and stirring) to the melted chocolate (both must be warm).
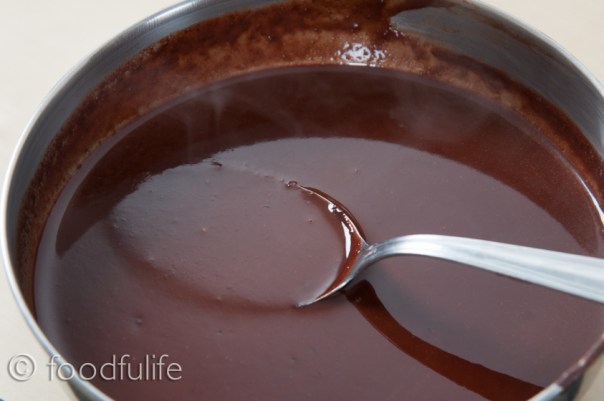
3. In another pan, mix 1/2 a tablespoon of cornstarch with 1 tablespoon of the chocolate mixture and stir well. Gradually add the rest of the chocolate mixture, then cook over a low heat and stir until the chocolate ganache has thickened (it will take only a few minutes).
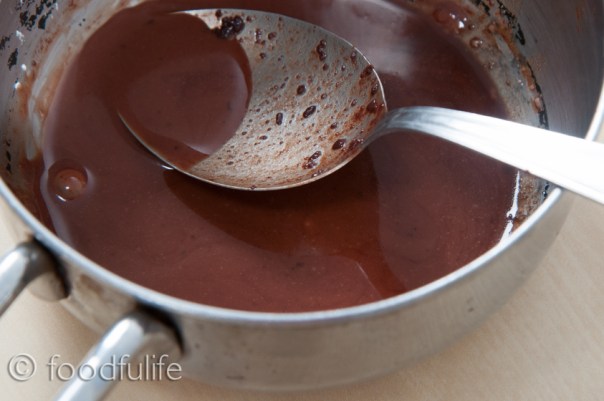
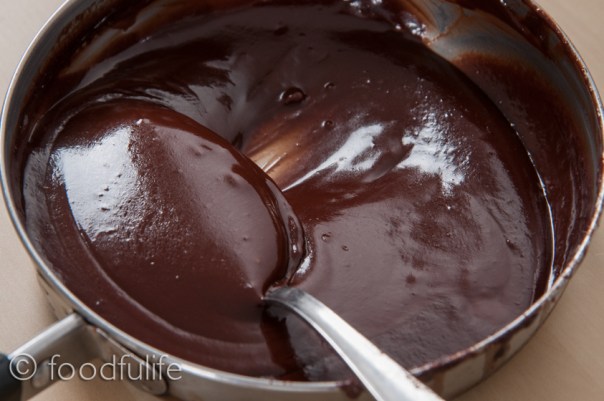
4. Turn off the heat, add 1 tablespoon of agave syrup (or 2 tablespoon of honey) and mix well. Let cool.
To garnish.
Refrigeration: 30 minutes
1. Pour the chocolate ganache into the base of the tart, then put the cake in the refrigerator for about 30 minutes.
2. Garnish with plenty of raspberries and some chocolate chips.


Crostata di lamponi con ganache di cioccolato fondente.
Ingredienti
Per la base.
2-3 porzioni.
50 g di mandorle, senza pelle (oppure nocciole, se preferite)
60 g di farina di riso
30 g di fecola di patate
60 g di cioccolato fondente bio ( con 70% di cacao)
1/2 cucchiaino di lievito per torte
2 cucchiai di olio di semi di girasole
1 cucchiaio di sciroppo d’agave (oppure 1 cucchiaio di miele bio, se non seguite una dieta vegana)
un pizzico di sale
Per la ganache al cioccolato fondente
100 ml di latte di riso (oppure latte di mandorle, soia o latte normale)
1 cucchiaio di sciroppo d’agave (oppure 2 cucchiai di miele bio, se non seguite una dieta vegana)
60 g di cioccolato fondente bio (con 70% di cacao)
1/2 cucchiaio di amido di mais
Per guarnire
100 g di lamponi (freschi e ben lavati)
un po’ di scaglie di cioccolato per decorare
Preparazione.
Per la base.
1. Fate sciogliere 60 g di cioccolato fondente a bagnomaria.
2. Tritate molto finemente le mandorle usando un tritatutto.
3. In una terrina, setacciate la farina e la fecola di patate usando un colino molto fine. Aggiungete il cioccolato sciolto, la pasta di mandorle, il lievito per dolci, un pizzico di sale, due cucchiai d’olio di semi di girasole e 1 cucchiaio di sciroppo d’agave (oppure 1 cucchiaio di miele).
4. Impastate bene e mettete in frigo per 15 minuti.
5. Ungete leggermente la base di una piccola teglia (15-16 cm di diametro) e infornate a 170° per 15 minuti.
Per la ganache al cioccolato.
1. Fate sciogliere 60 g di cioccolato fondente a bagnomaria.
2. Scaldate 100 ml di latte di riso in un pentolino e unitelo al cioccolato ancora caldo, mescolando bene.
3. In un altro pentolino, unite una piccola quantità di latte di riso al cioccolato con mezzo cucchiaio di amido di mais (mescolando energicamente). In modo molto graduale, aggiungete tutto il latte al cioccolato, poi fate rassodare la ganache sul fuoco a fiamma bassa, per qualche minuto (continuando a mescolare).
4. Spegnete il fuoco e aggiungete 1 cucchiaio di sciroppo d’agave (oppure 2 cucchiai di miele). Mescolate ancora, poi lasciate raffreddare.
Per guarnire.
1. Versate la crema sulla base della crostata e mettete in frigorifero per 30 minuti.
2. Guarnite con un doppio strato di lamponi e scaglie di cioccolato.
Yesterday, a friend and I decided to take a break. We had lunch at a nice coffee shop and walked for a couple of hours. Sometimes you just have to take a walk to clear your mind, relax and recharge your energy….
Yes, this was the view! 🙂


Do you have a favourite place when you feel like to take a break?

This week we are going to prepare plain fresh egg pasta, using flour 00. This pasta can be used as a base for making a variety dishes, prepared with all sorts of creative stuffings and sauces, but we will see this in the next posts.
I generally tend to use more complex and heavier types of flour, because they are tastier and rich in nutrients. In some recipes , however, it’s better to use a finer and more delicate flour, in order to avoid covering the flavour of the other ingredients. For this recipe the Italian flour 00 is perfect for making pasta, because it is finer than normal flour, however, if you can’t find it use plain flour.

tips.
1. The ingredients listed are for 400 g of (uncooked) pasta, but if you need a different quantity, just bear in mind that for every 100g of flour you have to add an egg. For example, if you need 200 g of pasta just halve the ingredients (and use 2 small eggs).
2 . It is important to sift the flour before using it to avoid lumps or impurities (I don’t usually say this but you should always do it).
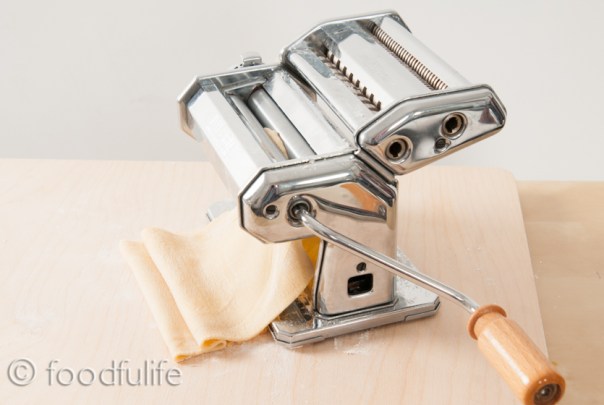
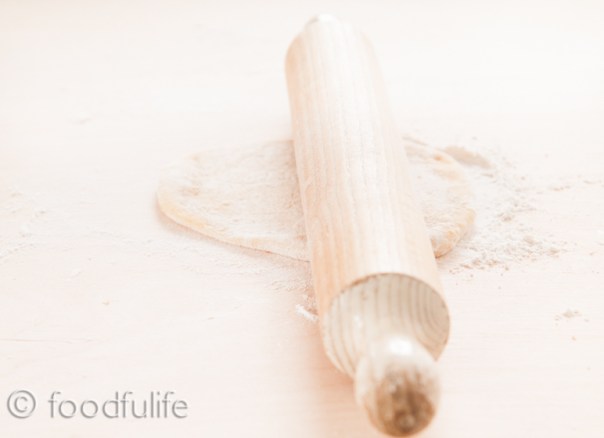
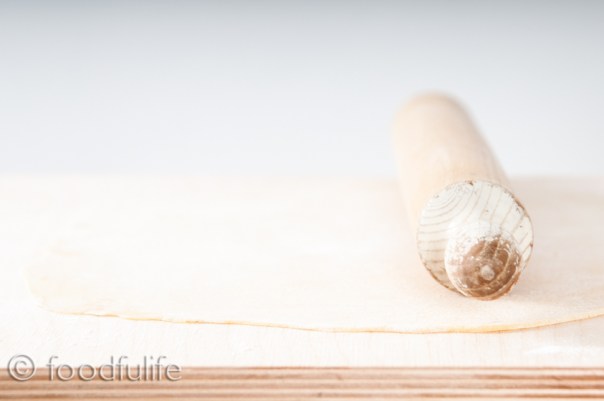
3. Here I am using a rolling pin, but if you are planning to make large quantities of fresh pasta I strongly advise you to get a pasta machine, to make things easier.
Fresh Egg Pasta (with flour 00)
Ingredients
for 400 g (14 oz) of pasta (approximately)
300 g (10.5 oz) flour 00 (or plain flour)
3 eggs
salt to taste
Tools
a clean kitchen cloth
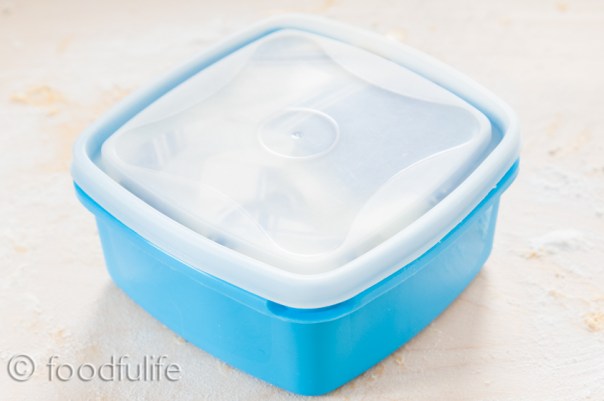
an airtight container
a long rolling pin
a wooden board (with a rough surface) or a table
Method
1. Sift the flour with a sieve, add some salt, make a well and crack three eggs in the centre. With a fork, beat the eggs lightly, in order to mix the whites with the yolks. Still using a fork, combine the flour with the eggs starting from the outer edge, then continue mixing the ingredients with your fingers and begin to knead.


2. Knead until you get a smooth dough, then wrap in a clean cloth and place in an airtight container (or use cling film). Let stand for about an hour at room temperature (if you don’t have much time, 30 minutes is fine).


3. After an hour (or 30 minutes), take the dough and divide it into 3-4 pieces. Dust the working surface with some flour and, using a rolling pin, roll a very thin sheet of pasta. Repeat this process with the other pieces and cut the sheets as required by the recipe you are going to prepare.

Notes.
You can make lasagne, ravioli, cannelloni and many varieties of pasta from these sheets. We will see how in the next few weeks. See also the post on spelt (farro) pasta for more ideas.
Pasta fresca all’uovo.
Ingredienti
per circa 400g di pasta
300g di farina 00
3 uova
sale q.b.
Utensili
uno panno pulito
un contenitore a chiusura ermetica
un matterello lungo
una spianatoia di legno (con superficie ruvida)
Preparazione.
1. Setacciate la farina con un colino grande (oppure un setaccio) e disponetela a fontana con tre uova al centro. Con una forchetta sbattete leggermente le uova, in modo da mischiare il bianco al tuorlo. Sempre con una forchetta, unite la farina all’uovo partendo del bordo esterno, poi proseguite con le dita e incominciate ad impastare.
2. Lavorate bene l’impasto, poi avvolgetelo in un panno pulito e mettetelo in un contenitore con chiusura ermetica (potete anche utilizzare la pellicola). Lasciate riposare un’ oretta (oppure 30 minuti, se non avete molto tempo).
3. Prendete l’impasto, dividetelo in 3-4 pezzi e incominciate a stendere la pasta (infarinando bene le superfici), fino ad ottenere una sfoglia molto sottile. Ripetete l’operazione con gli altri pezzi e tagliate la pasta come richiede la ricetta che state preparando.

I adore gnocchi! Gnocchi with pesto has been my favourite pasta dish since I was a kid. In Italy there are numerous variations of this wonderful pasta, some of which are really colourful and tasty. Today we are going to prepare a gluten-free version made with buckwheat flour. This flour might be a little expensive, but I decided to use it because of the benefits that introducing gluten-free meals in our every-day diet have. Even though I don’t have intolerances or allergies, but also because I think it’s delicious. Of course, it is also a good alternative to traditional gnocchi for celiac people.

A few words about Buckwheat.
Buckwheat is related to sorrel, knotweed and rhubarb. The seeds are fruit seeds, not cereals, very similar to sunflower seeds, and with a distinctive triangular shape. They are rich in protein, important minerals ( iron, phosphorus, zinc, selenium and potassium.) and vitamins B. Buckwheat is normally used in flour or grains. The flour is very tasty and perfect for pasta recipes, in fact, in Italy it is widely used in many traditional dishes.
Ingredients
Preparation: 25 minutes
Potatoes Cooking time: 15-20 minutes + time to cool
Gnocchi Cooking time: 5 minutes
Serves 4-5
1 kg (35.2 oz) large potatoes
200 g (7.05 oz) buckwheat flour (and a little bit more for dusting)
50 g (1.76 oz) potato starch
salt to taste
Tools
wooden board or table
A large pan (with a steaming basket or you can use a steamer if you prefer this cooking method)
a large sieve (to sift the flour)
potato ricer (or a potato masher)
a knife
a fork (or a gnocchi board)

Method
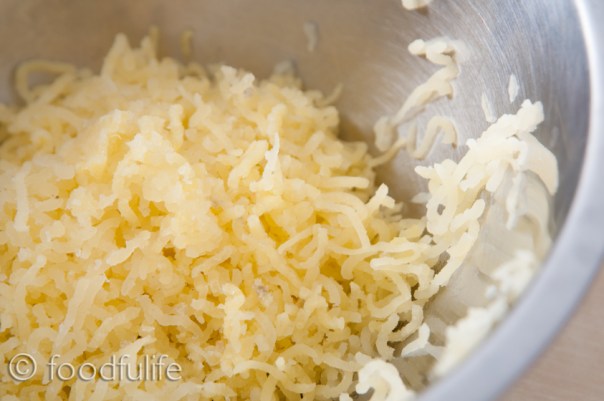
1.Wash, then steam or boil the potatoes for 15-20 minutes (if you boil, put them in cold salted water and then, bring to the boil). Mash the potatoes and let cool. Once they have cooled down, add the flour and starch (previously sifted and mixed).

2. Combine all the ingredients, add some salt and work until you get a soft and smooth dough (adding some flour, if necessary).

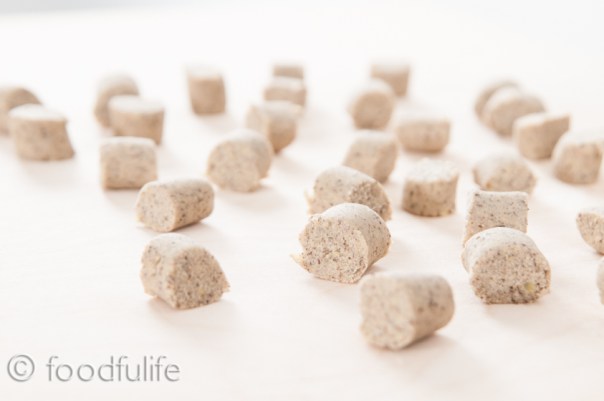
3. Dust the board, then divide the dough into 4-5 equal pieces and roll each piece into long ropes (the ropes should be 1,5 cm [0.39 uk inches] high). Cut each rope into small pieces (3 cm [ 1.18 uk inches] long and 1,5 cm [ 0.39 uk inches] high).


4. Use a fork to indent the gnocchi by pressing the centre and roll each piece on the fork (watch the video below) , in this way the gnocchi will absorb the condiment better.


Watch the video:

Tips.
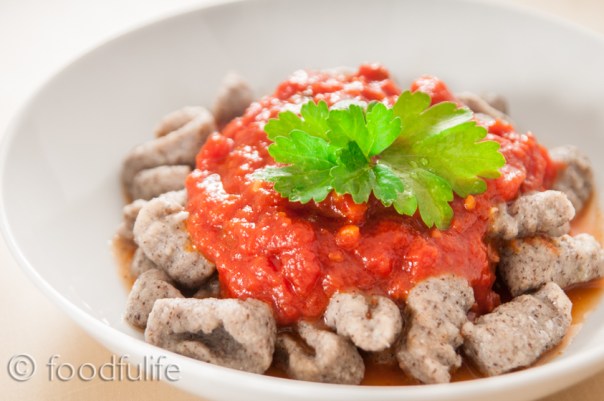
Boil in plenty of salted water for a few minutes. Once they rise, gently drain and season as you prefer (serve these wonderful gnocchi with pesto or with a nice tomato sauce. If you don’t follow a vegan or a low-cal diet I suggest you try them with a gorgonzola sauce).
Gnocchi di patate e grano saraceno.
Preparazione: 25 minuti
Cottura delle patate: 15-20 minuti + il tempo di farle un po’ raffreddare
Cottura degli gnocchi: 5 minuti
Ingredienti
per 4-5 persone
1 kg di patate farinose
200 g di farina di grano saraceno ( e un po’ di più per infarinare)
50 g di fecola di patate
sale q.b.
Utensili
una spianatoia di legno abbastanza grande
Una pentola grande (con cestello per cottura a vapore oppure una vaporiera, se preferite questo tipo di cottura)
un setaccio o un colino grande (per setacciare la farina)
uno schiaccia patate
un coltello
una forchetta
Preparazione
1. Lavate bene le patate e fate cuocere a vapore per 15-20 minuti (o lessatele mettendole in acqua fredda salata e portando a bollore). Schiacciate le patate e lasciate raffreddare. Aggiungete la farina e la fecola (setacciate e mescolate in precedenza).
2. Amalgamate gli ingredienti con un po’ di sale, fino ad ottenere un impasto morbido ed uniforme. Nel caso fosse necessario, aggiungete un po’ di farina.
3. Infarinate la superficie della spianatoia, dividete l’impasto in 4-5 pezzi uguali e rotolate ogni pezzo fino a formare dei filoncini molto lunghi e alti 1,5 cm. Tagliate ogni cilindro di pasta in piccoli gnocchi (lunghi 3 cm e alti 1,5 cm circa).
4. Usate una forchetta per rigare gli gnocchi (guarda il video).
5. Appoggiate gli gnocchi distanti tra loro su un tavolo coperto da strofinacci puliti, leggermente infarinati (nelle foto uso un piatto perché ho preparato una porzione sola).
Note.
Per la cottura consiglio di far bollire in acqua abbondante e salata per qualche minuto. Poi scolate e condite come preferite. Un ottimo condimento per gli gnocchi di grano saraceno potrebbe essere una salsa al gorgonzola, oppure condite semplicemente con del buon pesto o una salsa al pomodoro, se seguite una dieta vegana o a basso contenuto calorico.

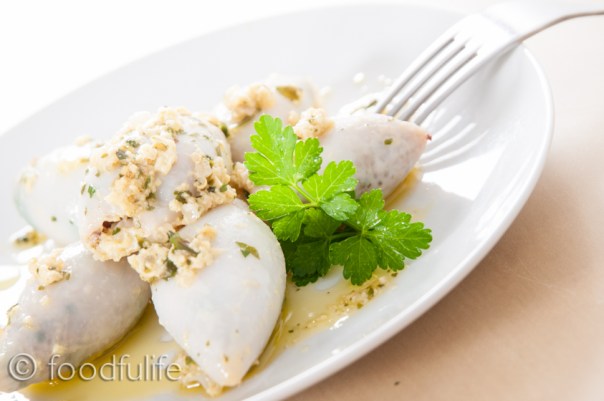
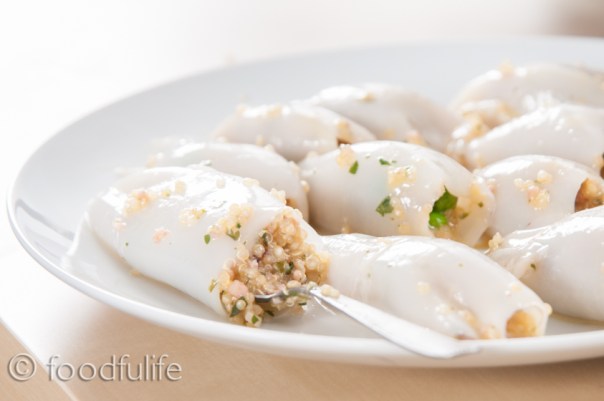
Stuffed calamari (calamari ripieni) is a very popular dish in Italy. Normally, the recipe is made with bread stuffing and some variation on the other ingredients. This time, we are going to prepare a quinoa stuffing with peas, anchovies and garlic. It is a wonderful starter and a great main meal served with vegetables. It might seem a little complex to prepare, but it’s such a delicious full-flavoured dish that it’s worth a try!
Tip. Calamari ( squid) should be fresh and properly cleaned before you start the preparation. It’s very important not to over cook the seafood, because calamari can become very chewy and unpleasant to eat. If that happens continue to cook them until they become tender again (in this case, remember to add more wine and some vegetable or fish stock).

Stuffed Calamari (quinoa recipe)
Ingredients
for 3 servings
Preparation: 40 minutes
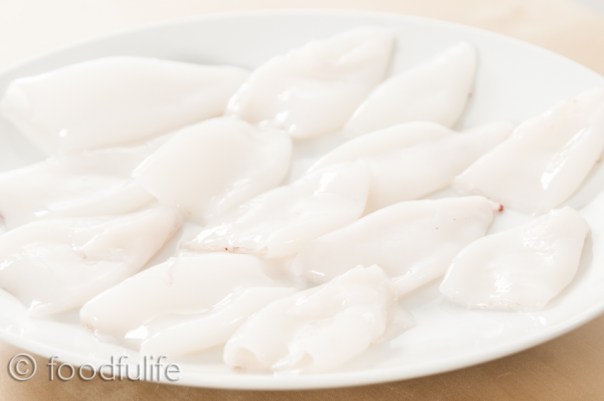
400g (14.1 oz) cleaned calamari (squid)
1 clove of garlic
2 tablespoons extra virgin olive oil
1 splash of white wine (non-acidic)
salt and pepper to taste
For the filling
50 g (1.76 oz) quinoa (uncooked)
3 tablespoons extra virgin olive oil
2 cloves of garlic
2 anchovies
3 tablespoons finely chopped fresh parsley
20 g (0.7 oz) of frozen peas
1 egg
30 g (1.05 oz) grated Parmesan cheese
White wine (good quality)
Salt and pepper to taste
Method
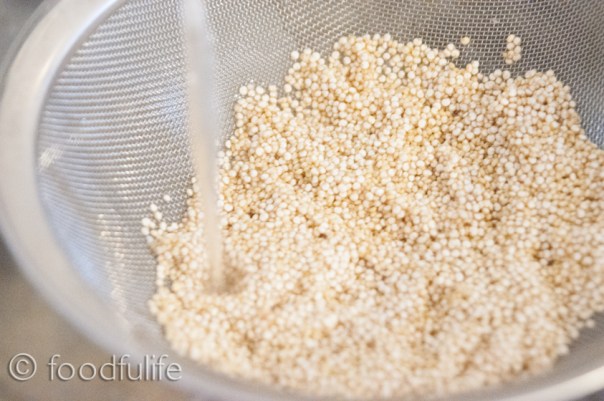
1. Wash the quinoa, using a strainer under running water, for a few minutes (to remove the natural bitter taste).
2 . Cook for 15 minutes in 200 ml (6.76 us oz fl, 0.35 uk pt) of water, then cover with a lid and set aside.
3. Separate the tentacles from the top of the body of the calamari. Finely chop the tentacles.

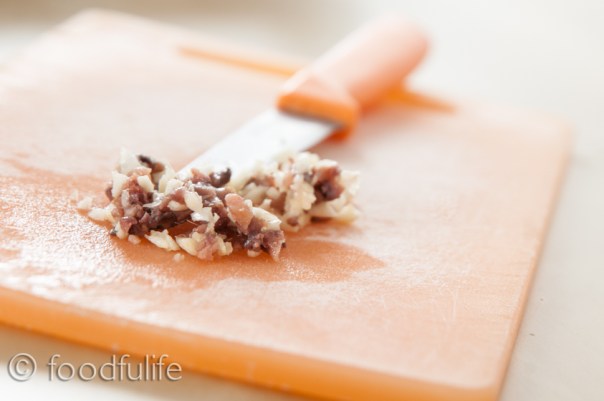
4. Chop two cloves of garlic and two anchovies and gently fry them over a low heat with three tablespoons of extra virgin olive oil.
5. Add the chopped tentacles with the peas and (after a couple of minutes) drizzle with a little bit of white wine.


6. Add the quinoa with two tablespoons of parsley, then stir and after a few minutes turn off the heat.

7. Combine the ingredients with an egg, the Parmesan cheese, some salt and pepper and mix well. Stuff the calamari using a teaspoon (and your fingers) or a piping bag ( fill only 2/3 to avoid braking the calamari during the cooking time) . Seal the calamari with toothpicks.


8. Put the calamari in a frying pan with two tablespoons of extra virgin olive oil, a chopped clove of garlic, a splash of white wine and season with salt and pepper. Cook for 10 minutes at a medium heat, after 5 minutes add a tablespoon of parsley and stir. Serve warm.


Calamari ripieni con quinoa.
Ingredienti
per 3 persone
400 g di calamari puliti (senza dente)
1 spicchio d’aglio
2 cucchiai di olio extra vergine d’oliva
1 spruzzata di vino bianco (non acido)
sale e pepe q b
Per il ripieno
50 g quinoa (cruda)
3 cucchiai di olio extra vergine d’oliva
2 spicchi d’aglio
3 cucchiai di prezzemolo (tritato finemente)
20 g di piselli surgelati
Sale e pepe q b
1 uova
30 g Parmigiano Reggiano grattugiato
vino bianco (non acido) q b
2 acciughe sott’ olio (alici)
Preparazione
1. Lavate la quinoa, utilizzando un colino sotto l’acqua del rubinetto, per qualche minuto (questa operazione serve a togliere il sapore amaro della quinoa).
2. Fate bollire per 15 minuti in 200 ml d’acqua, poi spegnete il fuoco, coprite con un coperchio e mettete da parte.
3. Usando un coltello, separate i tentacoli dalle tasche dei calamari. Tritate finemente i tentacoli.
4. Tritate e fate soffriggere a fuoco basso due spicchi d’aglio e due acciughe con tre cucchiai di olio extra vergine d’oliva.
5. Aggiungete i tentacoli tritati con i piselli e annaffiate con un po’ di buon vino. Fate ritirare a fuoco lento.
6. Aggiungete la quinoa con due cucchiai di prezzemolo, mescolando per qualche minuto e poi spegnete il fuoco.
7. Unite agli ingredienti un uovo, del parmigiano, sale, pepe e mescolate bene. Riempite i calamari usando un cucchiaino o la saccapoche (riempite solo 2/3, per evitare che si rompano durante la cottura). Chiudete con degli stuzzicadenti.
8. Mettete i calamari in una padella con due cucchiai d’olio, uno spicchio d’aglio tritato, uno spruzzo di vino bianco e un po’ di sale e pepe. Fate cuocere per 10 minuti a fuoco medio, aggiungendo un cucchiaio di prezzemolo dopo 5 minuti. Spegnete e servite.

This week we are going to prepare home-made spelt (farro) pasta. In Italy there are several kinds of pasta, made with different ingredients, colours and shapes. Each type has its own precise measurements, name and tradition. Today we are going to make pappardelle. This pasta is very similar to tagliatelle, only a little bit easier to cut, with a thin and long rectangular shape (about 1,5- 2 cm wide).
Pappardelle is made by mixing flour (usually 00 or plain) with a few eggs. In the next posts I’ll show you how to prepare different kinds of pasta, some without eggs and some gluten-free recipes as well. First of all, let’s make a list of the things we need.

Spelt Flour (Farro) Pappardelle.
Preparation: 30 minutes +1 hour refrigeration
Cooking: 10-15 minutes
Ingredients
3-4 servings
100g (3.5 oz) plain flour (best if you find 00 flour, which is very fine)
200g (7 oz ) wholemeal spelt flour (whole wheat farro flour)
50 g (1.76 oz) of plain flour, for dusting
a pinch of salt
3 eggs
Tools
a large knife
a large wooden board (or a large table will do)
a long rolling pin

Method.
1. Mix the flours with salt on a wooden board and make a well in the centre. Put three eggs in it, then mix them slightly using a fork.

2. Starting from the outside edges, slowly combine the flour with the eggs.

3. Work the dough until smooth.


4. Fold a kitchen cloth around the dough and place it in an airtight container for about an hour (during this time the dough becomes more elastic).


5. After an hour, take the dough (dust with some flour), divide it into two parts and using a rolling pin make two thin sheets of pasta.


6. Using a rolling pin, roll the pasta from the outside inwards (see the picture).


7. Cut the pasta (each cut should be about 2 cm, 0.70 inches, from the next). Roll and cut both sheets of pasta.

8. Dust with more flour and separate the pappardelle on the wooden board, then cook and serve.


Tip. Boil the pasta in plenty of hot water, with 1/2 a tablespoon of salt (no oil needed) for 10-15 minutes. Then drain and serve with fresh pesto or tomato sauce.

Pappardelle di farina di farro.
Preparazione: 30 minuti+1 ora in frigorifero
Cottura: 10-15 minuti
ingredienti
per 3-4 persone
100g di farina 00
200 g di farina di farro (preferibilmente integrale)
50 g di farina 00 (per non fare attaccare la pasta)
un pizzico di sale
3 uova
Utensili
un grosso coltello
una spianatoia in legno (abbastanza grande e con superficie ruvida)
un matterello lungo
1. Mescolate le farine e il sale su una spianatoia. Disponete la farina a fontana con tre uova al centro, poi sbattete leggermente le uova usando una forchetta. Unite gli ingredienti, partendo dal bordo esterno.
2. Lavorate fino ad ottenere un impasto omogeneo. Ricopritelo con un panno e mettetelo in un contenitore ermetico per circa un’ora (in questo modo l’impasto diventerà più elastico).
3. Dopo un’ora, prendete l’impasto (dividetelo in due) infarinate bene tutto e fate due sfoglie sottili con il matterello. Sempre aiutandovi con il matterello, arrotolare la pasta per tagliarla (vedi la foto).
4. Tagliate la pasta (ogni taglio deve essere distante 2 cm circa dal successivo). Infarinate e separate le pappardelle sulla tavola. Cuocete le pappardelle per 10-15 minuti e condite come preferite.

Some ideas for a romantic dinner for two…
Steamed prawn and bell pepper kebabs (divide the ingredients by two to make 4 kebabs)

Salmon with rocket and oranges

Double chocolate panna cotta with caramel sauce (single serving to share)
 or
or
Bavarian cream with chocolate caramel sauce
(divide by two the ingredients to make a 2-servings dessert, but make the sauce as indicated in the recipe because it’ s already a small quantity)

After publishing my last post on home-made yogurt, we thought that my yogurt needed some testing…
See also: https://foodfulife.com/2014/01/31/make-the-best-home-made-yogurt/


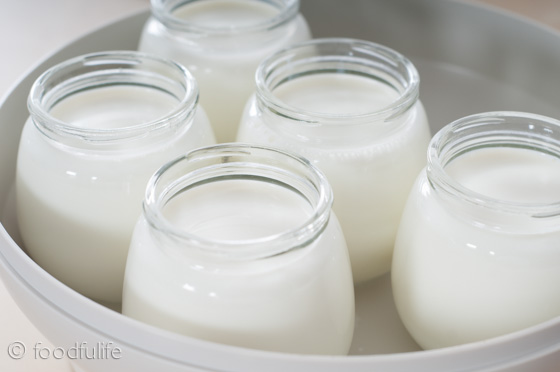
Home-made yogurt is cheap, healthy and delicious! There are several ways to make yogurt at home, today I am going to show you the easiest method, using a yogurt maker, some milk and live culture yogurt bacteria.
First, there are a few things that you have to keep in mind when choosing the ingredients…

You’ll need :
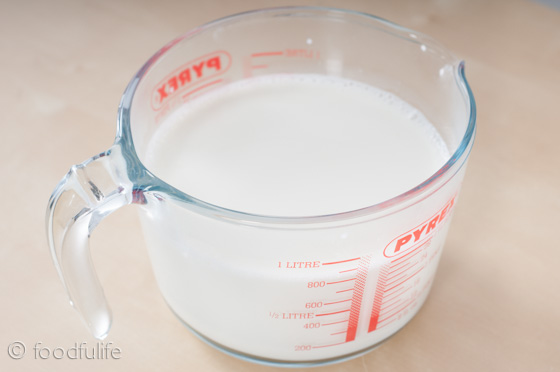
1. One litre (33.8 fl oz, 1.75 pt uk ) of good quality milk, possibly organic, to avoid that the antibiotics contained in the milk might compromise the development of the good bacteria in the process. Unless you are on a low-fat diet, choose full-fat milk to make a creamier and smoother yogurt.
2. A live culture yogurt or a yogurt culture packet (here I am going to use a yogurt culture packet).
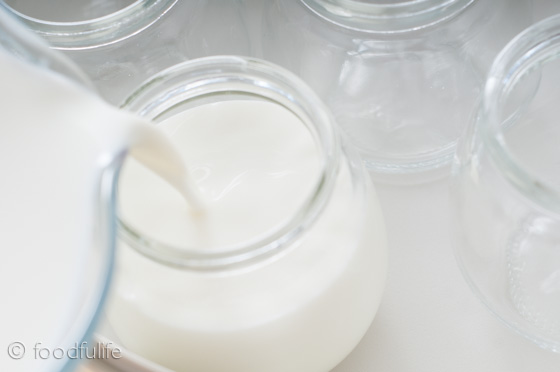
3. Sterilised glass jars. You can sterilise the jars by putting them (of course, without the lids) in a pre-heated oven at 100° C (212 F°) for about 8-10 minutes. Let cool before using.

Home-made yogurt (basic recipe)
Ingredients
1 litre (33.8 fl oz, 1.75 pt uk ) of good quality milk
1 live culture yogurt (1 cup) or a yogurt culture packet
Tools
a food thermometer
a yogurt maker (possibly with glass jars)
a stainer, or a cheese cloth
a spoon
a pan
a cup, or a small bowl to strain the yogurt
a measuring cup

The Method.
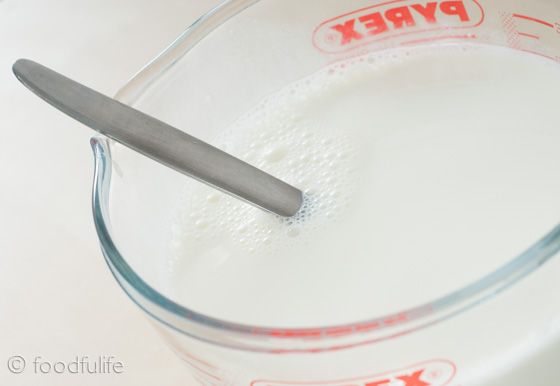
1. Pasteurise your milk. Heat the milk up to 85°C (185°F ), checking the temperature using a food thermometer (avoid boiling the milk, this way you can preserve the nutrients contained in it). This process will take a few minutes.
Variation. If you prefer thick yogurt, you have to boil the milk for at least 5-10 minutes and then remove the skin on the surface.


2. Let the milk cool (you have to use the milk at room temperature to make the yogurt).
3. Add the healthy bacteria. You can use a live culture yogurt (unflavoured, unsweetened and to be added at room temperature) or you can buy a yogurt culture packet. If you use a yogurt culture packet, you have to mix the culture with 2 tablespoons of milk first.

4. Mix the live culture with 1 litre of milk (or less, if you have boiled the milk to make thick yogurt). Mix everything well.
5. Set the timer (or an alarm) and keep the mixture at 38-40 °C (100-104°F) for 8-12 h. Use a yogurt maker, in this way your temperature will be constant at all times.
6. Strain your yogurt (this is optional). If you desire a thicker yogurt, you can strain the liquid using a cheese cloth (or a tea towel or a strainer). This process might take from a few up to several hours, depending on the device you use and on the thickness of the yogurt you wish to achieve. Leave the yogurt in the fridge while you do this.

Notes.
1. Store your yogurt in sterilised jars. Seal the jars with a lid and keep them in the fridge for 5-7 days (your yogurt might last even longer, if properly stored). You can freeze it and it will last up to a month.
2. If you are going to use your home-made yogurt as a starter to make a new batch, you have to do this within 5 days from the day you’ve made it, to make sure that the bacteria is fully active.
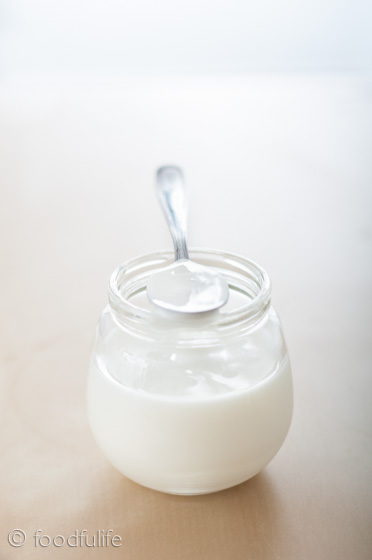
Comparing yogurts.
In the picture above the yogurt was made without boiling the milk.

In this picture the yogurt was made boiling the milk during the process.
I hope this post was helpful. Please let me know if you having troubles with the process.
Thank you!
Come fare lo yogurt in casa.
Lo yogurt fatto in casa è economico, sano e delizioso! Ci sono diversi modi per fare lo yogurt, oggi vi mostrerò il metodo più semplice utilizzando la yogurtiera, del latte bio e dei fermenti lattici.
Prima di tutto, ci sono alcuni accorgimenti da seguire quando scegliete gli ingredienti…
Per avere un ottimo yogurt fatto in casa è necessario:
1. Acquistare latte di buona qualità (possibilmente biologico), per evitare che gli antibiotici contenuti in esso possano compromettere lo sviluppo dei batteri buoni durante il processo. A meno che non stiate seguendo una dieta povera di grassi, è consigliabile scegliere del latte intero di buona qualità per ottenere yogurt denso e cremoso.
2. Utilizzare uno yogurt con i fermenti lattici vivi, oppure acquistare un pacchetto di fermenti lattici liofilizzati, che potete trovare in farmacia (in questa dimostrazione utilizzerò i fermenti in pacchetto).
3. Sterilizzare i vasetti di vetro. Se volete uno yogurt perfettamente conservato è necessario sterilizzare i contenitori che si utilizzeranno per conservare il prodotto. È possibile farlo mettendo i vasetti (senza il coperchio) in forno preriscaldato a 100 ° C per circa 8-10 minuti, oppure si possono far bollire (eseguite questo passaggio solo se utilizzate dei contenitori di vetro, non fatelo con la plastica!). Lasciate raffreddare prima dell’uso.
Ingredienti
1 litro di latte di buona qualità
1 yogurt con fermenti lattici vivi o un pacchetto di fermenti liofilizzati per fare lo yogurt
Utensili
un termometro per alimenti
una yogurtiera (possibilmente con vasetti di vetro)
un colino molto fitto, o un panno e un colino normale
un cucchiaio
una pentola
una tazza, o una piccola ciotola per scolare lo yogurt
una caraffa graduata per misurare i liquidi
Il Metodo.
1. Pastorizzate il latte. Scaldare il latte fino a 85 ° C (185 ° F), controllando la temperatura con un termometro per alimenti. E’ bene non portare a bollore il latte per conservarne al meglio le sostanze nutritive. Questo processo richiederà alcuni minuti. Per ottenere invece uno yogurt più denso, fate bollire il latte per 5-10 minuti, poi rimuovete la pellicola che si forma in superficie e proseguite con il procedimento.
2. Lasciate raffreddare il latte. Utilizzare il latte a temperatura ambiente per fare lo yogurt.
3. Aggiungete i fermenti lattici. È possibile utilizzare uno yogurt con i fermenti lattici vivi come base per farne altro, oppure si può acquistare un pacchetto di fermenti lattici liofilizzati. Nel secondo caso, è necessario miscelare i fermenti con 2 cucchiai di latte prima di procedere.
4. Mescolate il latte con i fermenti. Utilizzate 1 litro di latte, o quello che rimane se ne avete già mischiata una parte o avete fatto bollire il latte. Mescolare bene tutto.
5. Impostate il timer (o un allarme) e mantenete la miscela a 38-40 ° C (100-108 ° F) per 8-12 h. Vi consiglio di utilizzare una yogurtiera, in questo modo la temperatura sarà mantenuta costante in ogni momento ed eviterete sorprese.
6. Filtrate il vostro yogurt. Se volete lo yogurt più denso, potete filtrarlo per eliminare il siero con un panno, un canovaccio oppure un colino molto fitto. Lasciate lo yogurt in frigo durante questa operazione. Questo passaggio può richiedere da poche a svariate ore, dipende da ciò che utilizzate e dal risultato che volete ottenere (il filtraggio è facoltativo).
Note.
Conservate lo yogurt in vasetti sterilizzati. Sigillate i vasetti con un coperchio e riponeteli in frigo per 5-7 giorni (ma il vostro yogurt potrebbe durare anche più a lungo, se correttamente conservato). Potete anche congelarlo e durerà fino a un mese. Se avete intenzione di utilizzare lo yogurt fatto in casa come base per farne di nuovo, dovete farlo entro 5 giorni dalla produzione, per essere sicuri che i batteri siano pienamente attivi.
Nelle ultime due immagini del post, potete vedere chiaramente la differente consistenza di uno yogurt fatto con il latte pastorizzato (non bollito o scaldato) e uno yogurt fatto facendo bollire il latte durante il procedimento (ultima immagine).
