Category Archives: Gluten-free

Crepes With Swiss Chard And Borage Filling

This week I am sharing a recipe with some traditional Genoese flavours, adapted for you with the usual healthy twist. Perfect for the holiday season, these crepes with swiss chard and borage filling are light, packed with fibres, deliciously crispy on the outside and juicy on the inside. As a final touch, we are going to serve this dish with plenty of light béchamel sauce, an extra creamy and gluten-free parmesan-flavoured sauce perfect for this recipe.

DSC_4581

In this preparation I used borage because it is a popular ingredient in Genoese traditional recipes, however, if you have problems finding fresh borage you can replace it with spinach or chards.

DSC_4566

Crepes with swiss chard and borage filling

Serves 4-6

Ingredients

for the filling

500 g of Swiss chard

200 g of borage

150 g fresh ricotta

80 g of Parmesan Cheese

2 eggs

salt and pepper to taste

for the crepes

6 buckwheat crepes (see the buckwheat crepes recipe)

extra virgin olive oil

salt and pepper to taste

Method.

1. Put all the ingredients for the filling in a blender and then blend everything together until creamy.

DSC_4460

2. Fill 6 buckwheat crepes with the mixture, then place the crepes on a baking tray, previously lined with baking paper and greased with extra virgin olive oil.

3. Season the crepes with more extra virgin olive oil and bake at 180 ° C (356° F) for 25-30 minutes.

DSC_4537

4. Serve the crepes with plenty of warm béchamel sauce (see the gluten-free béchamel sauce recipe).

DSC_4545

DSC_4599

DSC_4593

Crepes con ripieno di bietole e borragine.

Ingredienti

Per 4-6 persone

Per il ripieno

500 g di bietole

200 g di borragine

150 g di ricotta

80 g di Parmigiano Reggiano

2 uova

Per le crepes

6 crepes di grano saraceno (guardate anche la ricetta delle crepes di grano saraceno)

olio extravergine d’oliva

sale e pepe q. b.

Preparazione.

1. Mettete tutti gli ingredienti (senza l’olio) in un mixer e amalgamate bene tutto fino ad ottenere un composto cremoso.

2. Riempite le crepes di grano saraceno con il ripieno, poi mettetele su una teglia ricoperta con carta da forno, unta con un po’ d’olio extra vergine d’oliva.

3. Condite anche le crepes con un po’ d’olio e infornate a 180° C per 25-30 minuti.

4. Servite le crepes con sopra la besciamella calda (guardate anche la ricetta della besciamella senza glutine).

Buckwheat Crepes (Gluten-free, High in fibre)

Rich in flavour and fibre, buckwheat crepes are incredibly delicious, healthy and can make a simple meal look quite impressive! You can be a little intimidated when you first make crepes….Well, I was when I made crepes for the first time! It is not so difficult to make nice crepes, as long as you remember to occasionally grease the frying pan during the preparation method, you move quickly when you shape the crepes and you cook the crepes over a low heat.

Crepe on round wooden cutting board on a table mat

Tips.
It might take a little bit of practice at first, however the best way to shape the crepes is to quickly move the pan around, in order to spread and flatten the batter evenly. During this process the frying pan shouldn’t be too hot, otherwise the batter will cook too quickly, leaving you with thick and uneven crepes.
During the cooking time, the crepes will start curling around the edges and lifting up from the pan; at this point the crepes are ready to be flipped around, to cook both sides.

You can be very creative with this dish and serve your crepes with lots of savoury or sweet fillings, experimenting with a great variety of ingredients, textures and flavour combinations.
Enjoy the recipe and have fun with it!

crepes on rectangular cutting board on a beige cutting mat, with white background

Buckwheat crepes

Ingredients

For 10 crepes

2 eggs

300 g of buckwheat flour

400 ml of milk

100 ml of water

extra virgin olive oil

salt or sugar (depending if you are making a sweet or savoury recipe)

extra virgin olive oil

Method.

1. In a bowl, gradually mix the flour with milk, water and salt (or sugar). Separately, beat the eggs and then make the batter incorporating the eggs and 1 tablespoon of extra virgin olive oil into the flour mixture. Place the batter to cool for two hours in the refrigerator.

crepes batter with whisk in white plastic bowl

2. Heat a large frying pan over a low heat, then grease the base with a tablespoon of extra virgin olive oil.

3. Using a ladle, pour the batter in centre of the pan, then spread evenly and let cook for a few minutes.

raw crepe in a stone pan with olive oil on blue painted table

4. When the crepe starts curling around the edges, turn it around and cook the other side.

Repeat the process until you have made all the crepes, occasionally greasing the pan with a little extra virgin olive oil.

pile of crepes on round wooden cutting table on beige table mat

Also see the Gluten-free Béchamel sauce recipe and the Crepes with swiss chard and borage filling recipe.

SER_0750

SER_0753

SER_0780

Crepes di grano saraceno

Ingredienti

Per 10 crepes

2 uova

300 g di farina di grano saraceno

400 ml di latte

100 ml di acqua

olio extra vergine d’oliva

zucchero o sale (dipende se la ricetta è dolce o salata)

Preparazione.

1. Amalgamate la farina e il sale (o zucchero) con il latte mischiato all’acqua. A parte, sbattete le uova e incorporatele al composto con un cucchiaio d’olio extra vergine d’oliva. Lasciate riposare la pastella nel frigorifero per almeno due ore.

2. Fate scaldare, a fuoco moderato, una padella con un cucchiaio d’olio extra vergine d’oliva.

3. Usando un mestolo, versate il composto al centro della padella, poi muovete energicamente la pentola per stendere uniformemente la pastella.

4. Lasciate cuocere per qualche minuto. Quando la crepe incomincia ad arricciarsi sui bordi potete girarla per cuocerla su entrambi i lati.

Preparate tutte le crepes, ricordandovi di ungere ogni tanto la padella con un filo d’olio.

Guardate anche la ricetta della Besciamella con amido di mais e la ricetta delle Crepes con ripieno di bietole e borragine.

Light Béchamel Sauce (Gluten-free White Sauce)

Béchamel sauce is a delicious white sauce, traditionally used to enrich various recipes like lasagna, cannelloni, crepes and other oven-baked pasta dishes.  Usually made with butter and flour, today we are going to make a lighter gluten-free and Parmesan-flavoured version of this wonderful sauce.
It is a fairly easy and quick recipe to make, just mix the cornstarch with the milk and cook the sauce really gradually and slowly….Take your time with it, heat it gently and stir it constantly during the entire preparation method and you’ll be all right!

Tip. The béchamel sauce might thicken a little too much when it cools down. You can solve this problem by heating the sauce up with some hot milk over a low heat and then blending everything using a mixer. With this method you should get a smooth sauce with the desired consistency.

DSC_4484

Gluten-free Béchamel sauce (white sauce with cornstarch)

Ingredients

600 ml of milk

80 g of cornstarch

4 tablespoons of Parmesan cheese

a pinch of grated nutmeg (optional)

salt and pepper to taste

Method.

1. In a pan, mix the milk with 80 g of cornstarch (add the milk very gradually).

2. Warm the milk up over a low heat, then bring slowly to a boil, stirring constantly and vigorously. When the sauce has thickened, add the grated Parmesan cheese and stir for a few more minutes. Remove from the heat.

DSC_4468

3. Season with one tablespoon of extra virgin olive oil, a pinch of grated nutmeg (optional), salt, pepper and serve.

DSC_4486

DSC_4510

Also see the Crepes with swiss chard and borage filling recipe and the Buckwheat Crepes recipe

Besciamella con amido di mais (senza glutine)

Ingredienti

600 ml di latte

80 g di amido di mais

4 cucchiai di Parmigiano Reggiano

sale e pepe q. b.

un pizzico di noce moscata

un cucchiaio d’olio extra vergine d’oliva

Preparazione.

1. Mescolate il latte freddo con 80 g di amido di mais (aggiungete il latte molto gradualmente).

2. Mettete il latte sul fuoco e portate ad ebollizione, mescolando energicamente. Quando la crema si sarà addensata, aggiungete il parmigiano grattugiato e mescolate per qualche minuto.

3. Spegnete il fuoco, condite con un cucchiaio di olio extra vergine d’oliva, un pizzico di noce moscata, sale, pepe e servite.

DSC_4515

Guardate anche la ricetta delle Crepes di grano saraceno e la ricetta delle Crepes con ripieno di bietole e borragine.

Traditional Recipe: Easy Spinach Flan

DSC_4335

This week we are going to prepare a light spinach flan, made with lots of spinach, fresh ricotta, eggs and parmesan cheese. It is an incredibly easy dish to make and so tasty, it can be served as a main vegetarian meal with some fresh salad on the side, but it is also a wonderful side dish.
My mother prepares this flan very often and we love it! I hope you enjoy the recipe!

Easy spinach flan

Ingredients

Serves 4-6

500 g of fresh spinach, washed and ready to cook

80 g of Parmigiano Reggiano

2 large eggs

250 g ricotta

3 tablespoons of polenta (or breadcrumbs)

4 tablespoons extra virgin olive oil

a pinch of nutmeg

salt and pepper to taste

Method.

1. Soften the spinach in a large pan with two tablespoons of water, over a low heat for a few minutes.

2. Drain the spinach and let cool (as the spinach will release some water when they cook). Then vigorously squeeze the vegetables for a few minutes.

3. Coarsely chop the spinach using a knife.

DSC_4293

4. In a large bowl, mix 250g ricotta with two large eggs, 80 g Parmesan cheese, then season with salt, pepper, a pinch of nutmeg and two tablespoons of extra virgin olive oil. Mix well.

DSC_4298

5. Line a small baking pan with a sheet of baking paper (I used a 22 cm x 6 cm round pan), then grease the base with 2 tablespoons of extra virgin olive oil.

6. Pour the spinach mixture into the pan, sprinkle with lots of polenta (or breadcrumbs) and bake at 180 ° C (356 °F) until the flan is golden brown around the edges. Serve warm or cold, as you prefer.

DSC_4310

DSC_4312

DSC_4315

Follow foodfulife on Facebook for more mouth-watering recipes!

DSC_4346

Sformato di spinaci (facile)

Ingredienti

per 4-6 persone

500 g di spinaci freschi in busta

80 g di Parmigiano Reggiano

2 uova medio-grandi

250 g di ricotta

polenta (o pangrattato)

4 cucchiai di olio extra vergine d’oliva

Noce moscata

sale e pepe q. b.

Preparazione.

1. Fate ammorbidire gli spinaci in una pentola con due cucchiai d’acqua, a fuoco molto basso per qualche minuto.

2. Scolate e lasciate raffreddare gli spinaci, poi strizzateli energicamente.

3. Tritate grossolanamente gli spinaci usando un coltello.

4. Unite 250 g di ricotta a due uova con 80 g di Parmigiano Reggiano grattugiato, poi condite con sale, pepe, un pizzico di noce moscata e due cucchiai d’olio extra vergine d’oliva. Mescolate bene.

5. Ricoprite una teglia con carta da forno (uso una casseruola di 22 cm x 6 cm) e ungete la base con due cucchiai di olio extra vergine d’oliva.

6. Versate il contenuto nella teglia, cospargete la superficie con abbondante polenta e infornate a 180° C, fino a quando lo sformato sarà dorato sulla parte superiore.

Pear And Gorgonzola Risotto (no oil, no butter)

DSC_4422

This pear and gorgonzola risotto is definitely another highly addictive dish!….One of those dishes that you just can’t stop eating, even when you have picked up the last grain of rice and swept up the all the traces of what was left on the plate with a spoon!

A truly delicious risotto, where the flavours blends perfectly together and the consistency is perfectly creamy and yet quite “light”. In fact, there is no need to add any oil or butter, because the cheese already does the job!

DSC_4405

Cooking tips.

1. For the preparation of this dish you’ll need quite a good quantity of pepper and salt to balance out the flavours and sweetness of the pears.

2. It is important to keep the vegetable broth quite warm during the whole cooking process, in this way the rice won’t stop cooking when you add the broth to the risotto.

3. Always get the best quality ingredients when making a risotto! For this dish I used the best quality of fresh Gorgonzola, sweet, tangy and so creamy that it literally melts in the mouth.

Pear and gorgonzola risotto.

Preparation and cooking time: 25 minutes

Easy

Ingredients

Serves 4

320 g risotto rice (Carnaroli or Arborio)

3 kaiser pears (or any pear suitable for cooking)

200 g good quality Gorgonzola cheese, cut into small pieces

80 g of Grana Padano cheese

salt to taste

plenty of ground black pepper

2 tablespoons of fresh parsley, finely chopped (optional)

1 litre of hot vegetable stock (I used an organic cube stock, without glutamate)

Method

1. Peel and clean the pears, then cut the fruit into little pieces.

2. Toast the rice grains in a pan (without any oil or butter) for a few minutes.

DSC_4393

3. Add the pieces of fruit with two ladles of broth and let shimmer over a low heat.

DSC_4394

4. Once the liquid has almost completely evaporated, add more broth and let evaporate again, then continue this process until the rice is cooked (the rice will take about 18-20 minutes to cook).

DSC_4396

5. When the rice is properly cooked, add 200 g of Gorgonzola cheese, 80 g of Grana Padano, salt and pepper. Mix well.

DSC_4398

6. Mix well, then cover the pan with a lid and let sit for a few minutes. Sprinkle with fresh parsley and serve.

DSC_4406

DSC_4423

Note.

At the end of the cooking process the risotto should be very creamy, however it might thicken a little when you add the cheeses (see step 5). It’s ok, you can solve this problem by adding one or two ladles of warm vegetable broth to the risotto, which will make it creamier.

Risotto alle pere e gorgonzola

Tempo di preparazione e cottura: 25 minuti

Facile

Ingredienti

Per 4 persone

320 g di riso da risotto (Carnaroli o Arborio)

3 pere kaiser (o altre pere adatte alla cottura)

200 g di gorgonzola di buona qualità, tagliato a cubetti piccoli

1 litro di brodo vegetale caldo (uso del dado biologico senza glutammato)

80 g di Grana Padano

prezzemolo fresco tritato molto finemente (facoltativo)

sale q. b.

pepe a volontà

Preparazione.

1. Pelate e pulite le pere, poi tagliate la polpa a pezzi piccoli.

2. Fate tostare i chicchi di riso in una pentola (senza olio o burro) per qualche minuto.

3. Unite la polpa delle pere con due mestoli di brodo al riso. Mescolate e lasciate evaporare il liquido a fuoco molto basso.

4. Aggiungete gradualmente altro brodo e fate evaporare, continuando così per tutto il tempo di cottura (il risotto cuoce in 18-20 minuti).

5. A cottura terminata, aggiungete 200 g di Gorgonzola, 80 g di Grana grattugiato, sale e tanto pepe.

6. Mescolate bene, coprite la pentola con un coperchio e lasciate mantecare per qualche minuto. Aggiungete del prezzemolo tritato finemente e servite.

Nota.

Se a fine cottura il risotto dovesse risultare poco cremoso, aggiungete un po’ di brodo caldo, quindi mescolate e fate mantecare.

DSC_4427

DSC_4435

Pear And Passion Fruit Smoothie

A delicious and delicate smoothie, high in fibre, vitamins A, C and also contains a good quantity of iron, calcium, manganese and potassium. I added some chia seeds for extra fibre, omega 3 fatty acid and vegetable proteins.
If I was to describe it in a few words, I’d say that this smoothie tastes like spring! So take a sip of this wonderful drink, relax and enjoy the flavours!

DSC_4349

Pear and passion fruit smoothie.

for 2 smoothies

Ingredients

2 Williams pears (Bartlett pears)

2 passion fruit (maracujà)

200 ml almond milk (or the vegetable milk of your choice)

2 tablespoons of chia seeds (optional)

4 ice cubes

Method

1. Wash peel and clean the pears then, using a teaspoon, scoop out all the pulp form the passion fruit.

2. Using a blender, blend the fruit with 200 ml of almond milk, two tablespoons of chia seeds and 4 ice cubes.

3. Garnish with fresh mint leaves and serve.

DSC_4363

DSC_4373

DSC_4379

Frullato di pere e frutto della passione.

per 2 frullati

Ingredienti

2 pere Williams

2 frutti della passione (maracujà)

200 ml di latte di mandorle (o il latte vegetale di vostra scelta)

2 cucchiai di semi di chia (facoltativo)

4 cubetti di ghiaccio

Preparazione.

1. Sbucciate e pulite le pere poi, utilizzando un cucchiaino, estraete tutta la polpa dai frutti della passione.

2. Frullate la frutta con 200 ml di latte di mandorla, due cucchiai di semi di chia e 4 cubetti di ghiaccio.

3. Guarnite con qualche foglia di menta fresca e servite.

DSC_4366

Dark Chocolate Soufflé With Fresh Raspberries

Dark Chocolate Soufflé With Fresh Raspberries-8

A melt-in-the-mouth dark chocolate and raspberry soufflé is definitely a wonderful way to indulge during a romantic Valentine’s evening.
I know, making a soufflé for the first time can be a little bit scary, however it is quite a simple dessert to make, despite its reputation….Just remember to handle the soufflé with great care and serve it as soon as it comes out of the oven, otherwise this dessert will lose its lift.

Cooking tip. Grease and chill the soufflé dishes for at least 5 minutes before cooking, then grease again with a little butter before pouring in the soufflé mixture. This operation will prevent the soufflé sticking to the dishes during the cooking process.

DSC_3822

Dark chocolate soufflé with raspberries.

Medium difficulty

Ingredients

Serves 2-3

2 small egg yolks (at room temperature)

3 small egg whites (at room temperature)

60 g dark chocolate (70% cocoa solids)

60 g fresh raspberries, washed and dried (at room temperature)

15 g butter, plus a little bit more for greasing the moulds

45 g honey, or agave syrup

1 teaspoon lemon juice

Method.

1. Melt the chocolate in a bain-marie.

DSC_3814

2. Grease 2-3 soufflé moulds (8 cm in diameter, or larger if you use only 2).

3. Stirring gently, add the butter and the honey to the melted chocolate. Let cool a little.

4. Add the egg yolks and then the raspberries, crushing them lightly using a fork. Mix well.

Dark Chocolate Soufflé With Fresh Raspberries-4

5. Separately, whip the egg whites with a teaspoon of lemon juice (the lemon juice will help the whipping process).

Dark Chocolate Soufflé With Fresh Raspberries-3

6. Combine the whipped egg whites with the other ingredients. Mix all the ingredients gently using a spatula.

7. Fill the moulds up to 2/3 and bake at 160 ° C for 20 minutes. Garnish with fresh raspberries and serve immediately.

Dark Chocolate Soufflé With Fresh Raspberries-6

Dark Chocolate Soufflé With Fresh Raspberries-8

Dark Chocolate Soufflé With Fresh Raspberries-9

Dark Chocolate Soufflé With Fresh Raspberries-10

Soufflé di cioccolato ai lamponi.

Media difficoltà

Ingredienti

Per 2-3 persone

2 tuorli piccoli (a temperatura ambente)

3 albumi piccoli (a temperatura ambiente)

60 g di cioccolato findente al 70 %

60 g di lamponi freschi (a temperatura ambiente)

15 g di burro e un po’ di più per imburrare gli stampi

45 g di miele (oppure sciroppo d’agave)

1 cucchiaino di succo di limone (per montare meglio gli albumi)

Preparazione.

1. Fate sciogliere il cioccolato a bagnomaria.

2. Imburrate 2-3 stampini da soufflé di circa 8 cm di diametro (o anche un po’ più grandi, se ne usate solo due).

3. Unite il miele e il burro al cioccolato sciolto, mescolando dolcemente. Lasciate intiepidire.

4. Aggiungete gradualmente anche i tuorli e i lamponi. Schiacciate leggermente i lamponi con una forchetta e mescolate bene.

5. A parte, montate a neve gli albumi con un cucchiaino di succo di limone.

6. Unite gli albumi montati agli altri ingredienti, mescolando delicatamente dal basso verso l’alto.

7. Riempite gli stampini fino a 2/3 e infornate a 160° C per 20 minuti. Guarnite con dei lamponi freschi e servite subito.

How To Make Almond Milk ( Step By Step )

Rich in calcium, antioxidants and vitamin E, almond milk is a wonderful healthy drink, widely used in vegan recipes… And today we are going to make it from scratch!

This recipe is very easy to prepare, it doesn’t require any fancy equipment and is quite quick to make! As you’ll see in the recipe method, we are basically going to separate the almond pulp from the juice, in order to extract the milk.

How to make almond milk, foodfulife.com

Almond milk is another incredibly versatile ingredient, as it can be used in the preparation of smoothies and can replace dairy products in many recipes, both sweet and savoury; while the almond paste, obtained during the process, can be used in cake and biscuit recipes.

How to make almond milk, foodfulife.com

Almond milk (basic recipe).

Soaking: 30 minutes

Preparation time: 20 minutes

Ingredients

for 1 bottle (1 l.)

100 g of raw shelled almonds (better unpeeled)

1 l. of water

a few ice cubes

a pinch of salt

You need

1 blender

1 bowl

1 funnel

1 glass bottle

1 strainer

a cloth (like a cotton napkin)

DSC_3633

Note.

To make a slightly sweeter almond milk you can add 3 boneless dry dates and blend them with the almonds, then sift everything, as described in the recipe.

Method.

1. Place the almonds in a bowl and fill with 200 ml of hot water. Soak the almonds in the water for 30 minutes, then drain (keep the soaking water, you’ll need it later!) and remove the skin from the almonds.

DSC_3636

How to make almond milk, foodfulife.com

2. In a blender, blend the almonds with a few ice cubes and then gradually add the soaking water (this will preserve part of the substances contained in the almond skin). Blend everything, until you have a creamy mixture.

How to make almond milk, foodfulife.com

3. Pour in 800 ml of water, add a pinch of salt and blend for a few more minutes.

How to make almond milk, foodfulife.com

4. Using a funnel and a strainer, sift the mixture and pour the milk into a bottle. Use a cloth (or a cotton napkin) to squeeze all the juice out of the almond paste.

How to make almond milk, foodfulife.com

5. Put the lid on the bottle and place the milk in the fridge. Use within three days.

How to make almond milk, foodfulife.com

Method variation.

In the method described above, we soak the almonds in hot water, in order to soften the pulp and remove the skin (this method is particularly useful if you want to use the pulp in another recipe). However, you can soak the almonds for 30 minutes in cold water, instead, and then blend them with the skin. Then you have to strain the almonds with a strainer through a cloth, pressing the mixture with a spatula. This process might take a little longer, but it’s better if you want to make sure you use raw almonds.

You can flavour your almond milk with honey, maple or agave syrup, vanilla extract, cocoa powder…You choose!

Latte di mandorla (ricetta base)

tempo di riposo: 30 minuti

tempo di preparazione: 20 minuti

Ingredienti

Per una bottiglia (da 1 litro)

100 g di mandorle sgusciate (meglio non pelate)

1 l. d’acqua

qualche cubetto di ghiaccio

un pizzico di sale

cosa serve

1 frullatore

1 ciotola

1 imbuto

1 bottiglia di vetro (da un litro)

1 colino a maglie fitte

un tovagliolo di cotone (oppure un canovaccio)

Nota.

Per rendere più dolce il latte di mandorla potete aggiungere 3-4 datteri (senza seme) e frullarli insieme alle mandorle, poi filtrate tutto, come descritto nella ricetta.

Preparazione.

1. Mettete le mandorle in una ciotola e ricoprite con 200 ml d’acqua bollente. Fate riposare per 30 minuti circa, poi scolate (mettete il liquido d’ammollo da parte) e spellate le mandorle.

2. Mettete le mandorle con qualche cubetto di ghiaccio nel frullatore e incominciate a frullare, versando a filo l’acqua dell’ammollo (questo per dare sapore e conservare parte delle sostanze contenute nella buccia). Continuate a frullare fino ad ottenere una cremina senza grumi.

3. Versate nel composto cremoso 800 ml di acqua con un pizzico di sale e frullate ancora per qualche minuto.

4. Utilizzando un imbuto e un colino, filtrate il composto e versate il liquido in una bottiglia. Dopo aver filtrato tutto il liquido, strizzate bene la polpa di mandorle con un tovagliolo.

5. Mettete la bottiglia con il latte di mandorla in frigorifero e consumate la bevanda entro tre giorni.

Una variante della preparazione.

Nel metodo descritto qui sopra, utilizziamo l’acqua calda per rimuovere con facilità la pellicina e ammorbidire le mandorle (questo metodo è particolarmente indicato se si vuole riutilizzare la polpa ottenuta dalle mandorle in altre ricette). Come variante, potete immergere le mandorle in acqua fredda per 30 minuti e poi frullarle con la loro pellicina. In questo caso, dovrete filtrare bene il composto attraverso un panno e un colino, premendo con una spatola per accelerare il processo. Questo metodo richiederà un po’ più di tempo, ma è meglio, se volete essere sicuri di utilizzare mandorle crude.

How to make almond milk, foodfulife.com

Artichoke And Leek Frittata

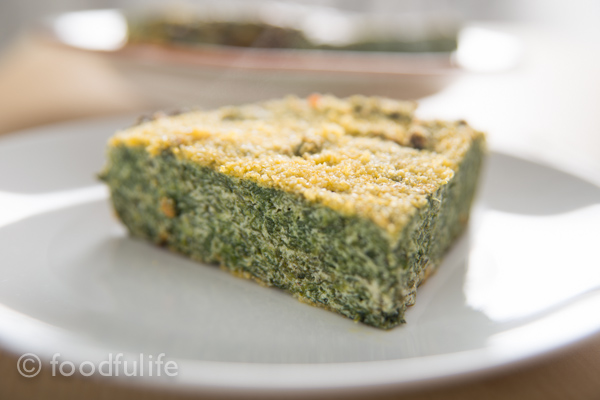
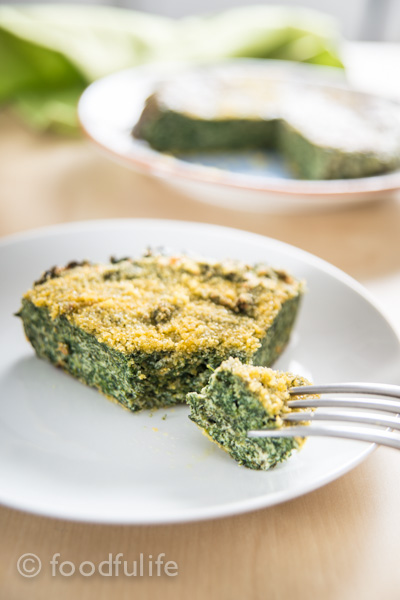
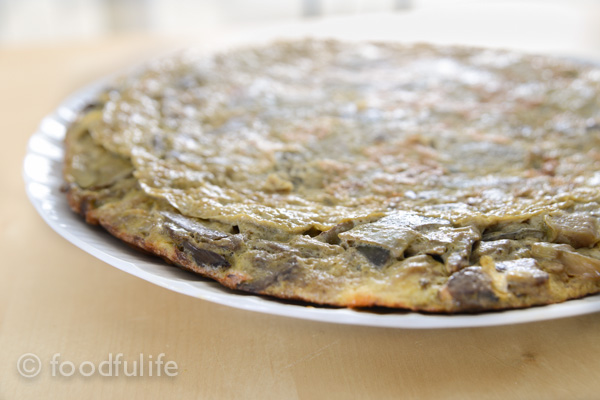
Frittata is basically a thick omelette packed with seasonal vegetables and freshly grated Parmesan cheese! it is a fairly easy dish to make and quite versatile, because you can be very creative with the ingredients and then you can serve the frittata either as a delicious side dish or a light vegetarian meal.

Frittata with artichokes, leeks and potatoes

Feel free to personalise your frittata and let your creativity be the limit! Go wild with it!! 🙂

Notes.

There are two methods you can use, to properly cook the top layer of the frittata (see step 7 of the recipe).

Cooking method 1 (using a large dish on top of the pan)
In order to cook both sides of your frittata you might have to turn it upside down during the cooking time. To do that, you can follow these steps:

1. Place a large dish on top of the frying pan (as you do with a lid),
2. Then, firmly pressing the dish against the pan, turn the whole thing upside down and carefully place the frittata on the plate.
3. Finally, slide the frittata back onto the pan and continue cooking for a few minutes.

Cooking method 2
The second, and simplest way to cook the top layer of the frittata would be to place the frittata in the oven for 10 minutes with the grill on, at the end of the cooking process (see step 7 of the recipe). Of course, in order to do that you need a flat metal pan, without plastic handles.

Frittata with artichokes, leeks and potatoes

Artichoke and leek frittata.

Ingredients

Serves 6-8

2 cloves of garlic (peeled)

4 artichokes, washed and cleaned

1 large potato, peeled and washed

2 leeks, peeled and washed (remove the hard part)

6 eggs

4 tablespoons Parmigiano Reggiano

1 tablespoon chopped parsley

1 tablespoon chopped marjoram (fresh or dried)

5 tablespoons of extra virgin olive oil

salt and pepper to taste

You need

a large frying pan  (28 cm)

a large flat plate (same diameter as the pan)

a large bowl

Method.

1. Remove all the hard bits of the artichokes, then cut into slices.

2. Sauté the artichoke slices with 2 garlic cloves (coarsely chopped) and 3 tablespoons of extra virgin olive oil.

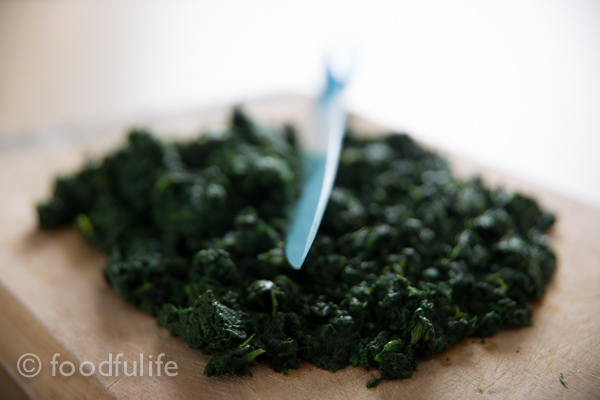
3. When the artichokes have softened, add the leeks (roughly sliced) and the potatoes, cut into small pieces. Then add some water and simmer over a low heat, keeping the lid on until all the vegetables have slightly softened.

Frittata with artichokes, leeks and potatoes

4. Remove the lid, add the herbs and turn up the heat, until all the excess water evaporates. Turn off the heat and set aside.

Frittata with artichokes, leeks and potatoes

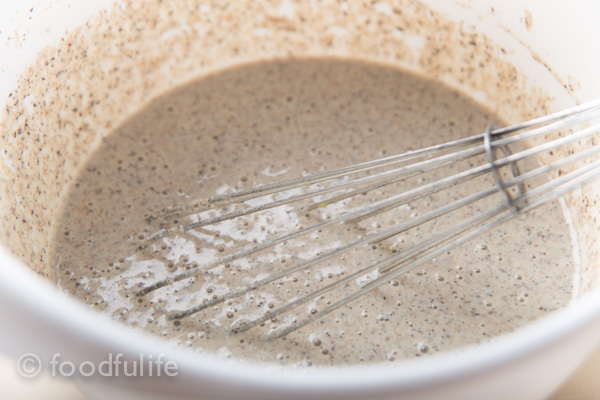
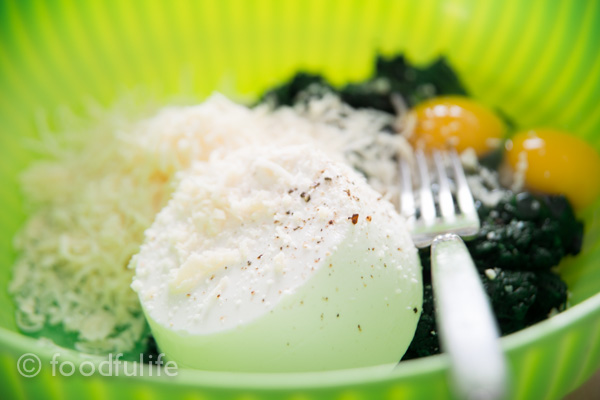
5. In a large bowl lightly beat 6 eggs using a fork, then add the cooked vegetables, 4 tablespoons of Parmesan cheese, salt and pepper. Mix well.

Frittata with artichokes, leeks and potatoes

Frittata with artichokes, leeks and potatoes

6. Put two tablespoons of extra virgin olive oil in a large frying pan, then pour in the egg mixture. Cook over a medium-low heat, until you get a nice crust underneath the frittata.

7. Turn the frittata upside down (using a large plate against the pan) and cook for another 5 minutes and turn off the heat.

Frittata with artichokes, leeks and potatoes

Frittata with artichokes, leeks and potatoes

Frittata with artichokes, leeks and potatoes

Frittata with artichokes, leeks and potatoes

Frittata di carciofi, porri e patate.

Ingredienti

Per 6-8 persone

2 spicchi d’aglio (senza buccia)

4 carciofi, lavati e puliti

1 patata grande, pelata e lavata

2 porri, lavati e puliti

6 uova

4 cucchiai di Parmigiano Reggiano

1 cucchiaio di prezzemolo tritato

1 cucchiaio di maggiorana tritata (fresca o secca)

olio extravergine d’oliva q. b.

sale e pepe q. b.

Cosa serve

una padella grande (28 cm)

un piatto grande ( dello stesso diametro della padella)

una terrina grande

Preparazione.

1. Rimuovete tutte le parti dure del carciofo, poi tagliate a spicchi abbastanza sottili.

2. Fate soffriggere i carciofi con 2 spicchi d’aglio (tagliati grossolanamente) in 3 cucchiai d’olio extra vergine d’oliva.

3. Quando i carciofi si saranno ammorbiditi, aggiungete i porri tagliati a fettine e le patate tagliate a pezzi (non tanto grossi). Aggiungete un po’ d’acqua e lasciate cuocere a fuoco basso, con il coperchio, fino a quando le verdure si saranno ammorbidite.

4. A fine cottura, aggiungete le erbe aromatiche, poi alzate il fuoco e fate ritirare l’acqua in eccesso. Quando tutta l’aqua si sarà ritirata, spegnete il fuoco e mettete da parte.

5. In una terrina grande, sbattete leggermente 6 uova con una forchetta, poi aggiungete le verdure cotte, il parmigiano, il sale, il pepe e mescolate bene.

6. Mettete due cucchiai d’olio extravergine d’oliva in una padella, poi versatevi le uova con la verdura. Fate cuocere a fuoco medio-basso, fino a quando si sarà formata una bella crosticina sul fondo.

7. Appoggiate un piatto piano sulla parte superiore della frittata, girate la padella (in modo da appoggiare la frittata sul piatto), poi fate scivolare la frittata delicatamente sulla padella (così la parte meno cotta sarà sul fondo). Fate cuocere ancora per 5 minuti e spegnete il fuoco.

Frittata with artichokes, leeks and potatoes

Quick And Easy: Mango And Apple Smoothie

Apples and mango.

Packed with vitamins and minerals (vitamins A, C and calcium, to name a few) and enriched with all the nutrients contained in the chia seeds (rich in vegetable proteins and omega 3), this smoothie is not just sunshine in a glass but a proper energy booster!

…And it tastes better than any dessert that you can ever imagine!

DSC_3411

Mango And Apple Smoothie.

Easy

Preparation time:10 minutes

Serves 4

2 ripe mangoes

2 sweet apples (I used golden delicious apples)

400 ml of almond milk

the juice of a lemon

ground cinnamon to taste

2 tablespoons chia seeds

a handful of ice cubes (optional)

To garnish

4 slices of an organic lemon

grated lemon zest to taste

colourful straws

Method.

1. Peel the apples and skin the mangoes, then remove the stem, seeds and the stone from the fruits. Chop roughly.

2. Add the juice of a lemon and blend the fruit using a food processor, then add the almond milk, the chia seeds, a few ice cubes (optional) and the cinnamon. Blend everything well.

3. Pour in 4 tall glasses, then garnish each glass with a slice of lemon, 2 colourful straws and add some lemon zest on top.

I hope you enjoyed my first smoothie recipe! 🙂

DSC_3439

DSC_3420

Frullato di Mango e Mela.

Facile

Tempo di preparazione: 10 minuti

Serve 4

2 manghi maturi

2 mele golden (oppure le dolci mele che preferite)

400 ml di latte di mandorla

il succo di un limone

cannella in polvere q b

2 cucchiai di semi di chia

una manciata di cubetti di ghiaccio (facoltativo)

per guarnire

4 fette di limone (non trattato)

la scorza grattugiata di un limone (non trattato)

cannucce colorate

Preparazione.

1. Sbucciate, pulite e tagliate le mele e i manghi (rimuovendo i semi e parti indesiderate), poi mettete nel frullatore.

2. Unite ai pezzi di frutta il succo di un limone e frullate bene.  Aggiungete al composto anche il latte di mandorla, i semi di chia, alcuni cubetti di ghiaccio (facoltativo) e la cannella. Frullate bene tutto, per qualche minuto.

3. Versate il composto in 4 bicchieri alti; quindi guarnite ogni bicchiere con una fetta di limone, poi aggiungete le cannucce colorate e un po’ di scorza di limone.