Category Archives: How to

Traditional Recipe: Roasted Bell Peppers With Garlic Vinaigrette

Bell peppers are delicious, rich in vitamin C and antioxidants and come in a variety of colours. In Italy we usually cook red and yellow peppers and we don’t use green peppers as much, because they are more acidic and bitter in taste. Bell peppers are usually roasted, fried, grilled or stewed with different ingredients. Today we are going to roast the peppers and season them with a light vinaigrette made with extra virgin olive oil, a splash of balsamic vinegar and enriched with fresh herbs and garlic.

Roasted peppers are a very simple but effective appetiser or side dish, I personally really like them and I could eat lots! If you prefer a more complex dish you can use them to make a sauce to complement or season pasta and meat dishes, or simply used them as a tasty ingredient in salads.

DSC_0574

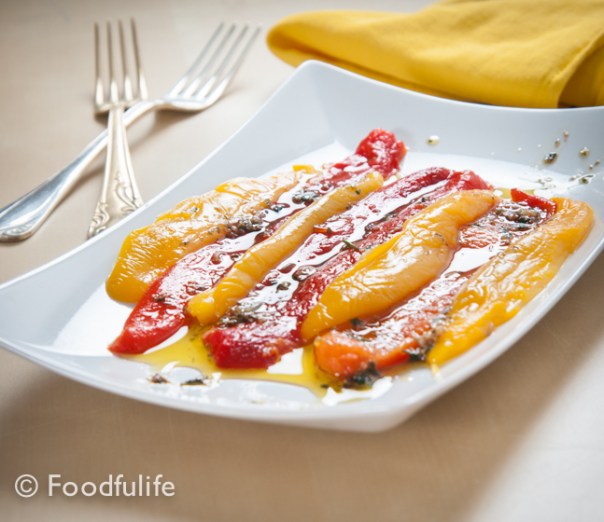
Roasted bell peppers with garlic vinaigrette.

medium difficulty

Ingredients

for 4 people

3 large bell peppers.

DSC_0545

For the garlic vinaigrette.

4 tablespoons of extra virgin olive oil

1 clove of garlic, crushed

1/2 tablespoon of dried oregano

1/2 tablespoon of finely chopped fresh parsley

1 tablespoon of good balsamic vinegar

salt and pepper to taste

Method.

1. Wash and dry the bell peppers.

DSC_0523

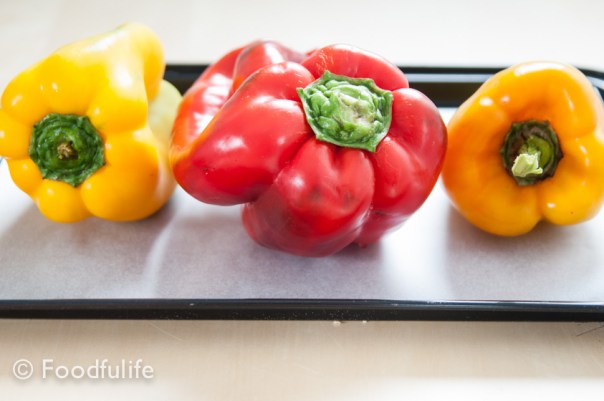
2. Roast the whole peppers in the oven at 200°C (392° F ) on a baking sheet (The cooking time will vary depending on the size and thickness of the peppers. When the skin starts darkening slightly and detaching from the flesh, the peppers are ready).

DSC_0531

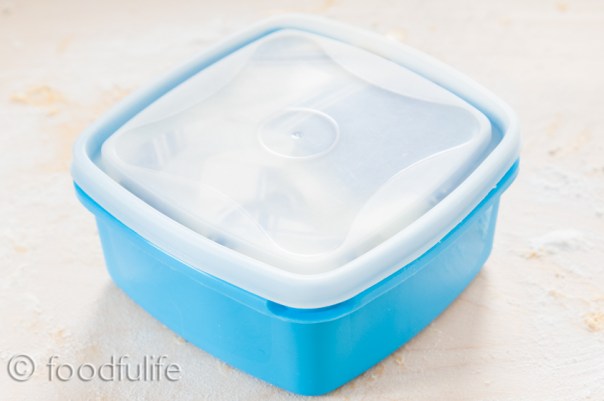
3. Once the peppers are slightly soft, turn off the oven. Put the hot peppers in plastic bags (or an airtight container) and seal well (In this way, the steam will make removing the skin from the flesh mush easier).

4. Let cool, then remove the pepper from the bag and throw away the water created from the steam. Remove the skin on each pepper, using a small sharp knife.

DSC_0538

5. Slice the peppers vertically into two, then remove and discard the stem and the seeds. Slice each pepper vertically into 8 pieces and serve cold with the garlic and herb vinaigrette.

DSC_0546

DSC_0579

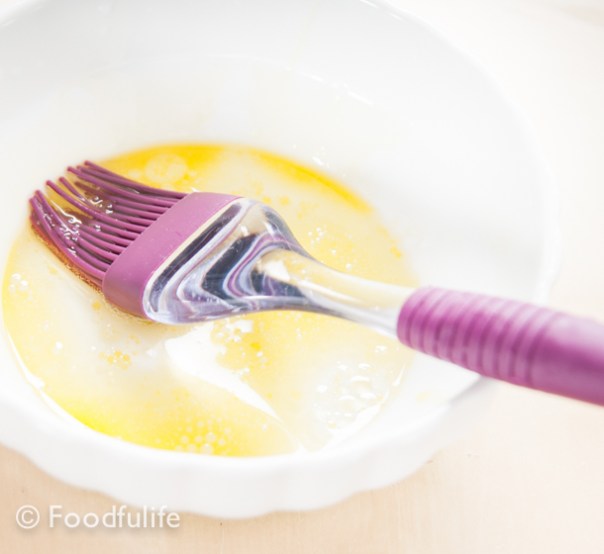
For the vinaigrette.

Mix 4 tablespoons of extra virgin olive oil with the herbs, the garlic and some salt and pepper. Season and serve.

Tip. For extra flavour you can add half a tablespoon of anchovy paste to the sauce.

DSC_0543

DSC_0571

Peperoni arrosto con vinaigrette all’ aglio.

media difficoltà

Ingredienti

Per 4 persone

3 peperoni abbastanza grossi (rossi e gialli)

Per la vinaigrette all’ aglio

4 cucchiai di olio extra vergine di oliva

1 spicchio d’aglio, sbucciato e ben schiacciato

1/2 cucchiaio di origano essiccato

1/2 cucchiaio di prezzemolo fresco tritato

1 cucchiaio di aceto balsamico

sale e pepe q.b.

Preparazione.

1. Lavate bene i peperoni e asciugateli.

2. Mettete i peperoni interi a cuocere in forno a 200° C ( uso una teglia grande ricoperta da un foglio di carta da forno). Il tempo di cottura varierà a seconda della grandeza e dello spessore dei peperoni; quando la buccia si colorirà e si staccherà dalla polpa, i peperoni sono pronti.

3. Mettete i peperoni ancora caldi in un contenitore con il coperchio, poi chiudete bene e lasciate raffreddare (con questo metodo il vapore farà staccare con più facilità la buccia dalla polpa).

4. Aprite e buttate via l’acqua che si è formata per il vapore. Con un coltello, levate la buccia ai peperoni.

5. Tagliate a metà i peperoni e rimuovete la parte interna con i semi. Tagliate ancora i peperoni in verticale fino ad ottenere 6-8 fette lunghe per peperone.

Per la vinaigrette.

Mescolate l’olio extra vergine di oliva con le erbe, l’aglio, il sale e pepe. Condite i peperoni e servire.

Tip. Per insaporire ulteriormente si può aggiungere mezzo cucchiaio di pasta d’acciughe al condimento.

DSC_0588

Light Wholemeal Spelt Brioches

Brioche and cappuccino are, without a doubt, Italians’ favourite breakfast! Yes, our ideal breakfast would be a brioche filled with plenty of custard and a nice warm cappuccino, topped with a lot of cocoa powder! It’s not something we would have every day (even though some people might do) but it’s something we’d treat ourself with during weekends and special occasions. Sometimes waking up to a warm brioche and a cappuccino is a really nice way to start the day in full swing!

DSC_8493

Since I started this blog, I have always wanted to try and make my own brioches, but for one reason or another I kept on postponing it…Last week I finally gave it a go and here is my brioche recipe! I have to say, I thought it was going to be much more complicated! The method is not too difficult if you follow all the steps of the recipe, it just takes some time and care. You can prepare your brioches in your spare time and store them in the freezer, where they will last up to a month. They are very nice when you warm them up in the morning!

Italian brioches have a similar shape to croissants but the dough is sweeter and softer. This recipe is quite light, it has some fibres and it’s not too sweet, so you can fill the brioches with whatever you like, if you wish.

Wholemeal Spelt Brioches (sourdough recipe).

Medium difficulty

Ingredients

For 2 trays (approximately 12-14 brioches)

For the starter

100 g (3.5 oz)  manitoba flour

50 g (1.7 oz) semisolid sourdough (made with manitoba flour, or plain flour)

water

For the dough

150 g (5.29 oz) manitoba flour

100 g (3.5 oz) plain flour

100 g (3.5 oz) wholemeal spelt flour

100 ml (3.38 us fl oz) milk (at room temperature)

2 egg (1 egg for the dough and 1egg to brush on top of the brioches)

1 egg yolk

60 g (2.1 oz) butter, softened

a pinch of salt

50 g (1.7 oz) brown sugar

1 teaspoon of honey

2 drops of vanilla extract

a little bit of grated lemon zest (use an organic lemon)

icing sugar

DSC_8377

Method.

1. Prepare the sourdough starter the night before and let it rise overnight at room temperature. Mix 100 g manitoba flour with 50 g of sourdough and enough water to get a smooth and moist dough. Cover it with cling film and let it rise for 12 hours.

DSC_8372

2. The next morning, mix the rest of the flour with the starter, then add 1 egg, the egg yolk, the brown sugar, a few drops of vanilla extract, a little bit of grated lemon zest and honey. Mix well. Add the butter and a pinch of salt. Knead well, adding a little ‘flour if necessary.

DSC_8379

3. Allow the dough to rise until it doubles in volume (it will take a few hours).

DSC_8400

4. When risen, gently roll out the dough using a rolling pin. Then divide the sheet of dough into 2 and cut a few triangles (see the picture).

DSC_8403

DSC_8410

5. Roll each triangle and shape the brioches like small croissants. Then place them on 2 baking sheets greased with butter and dusted with flour. Brush your brioches with a beaten egg (or milk).

DSC_8416

DSC_8417

DSC_8418

DSC_8425

DSC_8434

6. Bake at 200 ° C (392° F) for about 20 minutes with steam (you can do that by putting a small pan filled with boiling water in the oven; while the brioches are cooking the water will release steam and the brioches will remain soft inside). Let cool and dust with icing sugar.

DSC_8457

DSC_8469

DSC_8508

DSC_8505

Brioches semi-integrali di farro (con lievito madre).

media difficoltà

Ingredienti

Per 2 teglie (circa 12-14 brioches)

Panetto di lievito o biga

100 g di farina manitoba

50 g di lievito madre semisolido (con base di farina manitoba o farina 00)

acqua q. b.

Per l’impasto

150 g di farina manitoba

100 g di farina 00

100 g di farina integrale di farro

100 ml di latte a temperatura ambiente

2 uova (1 uovo servirà per lucidare le brioches)

1 tuorlo

60 g di burro ammorbidito

un pizzico di sale

50 g di zucchero integrale di canna

1 cucchiaino di miele

2 gocce di estratto di vaniglia

un po’ di buccia grattugiata di un limone biologico

zucchero a velo q. b.

Preparazione.

1. Preparate il panetto di lievito la sera prima e lasciate lievitare tutta la notte a temperatura ambiente. Mescolate 100 g di farina manitoba e 50 g di lievito madre con un po’ d’acqua. Coprite con la pellicola e lasciate lievitare per 12 ore (a temperatura ambiente).

2. La mattina dopo mischiate le farine e aggiungete il panetto lievitato, un uovo intero, un tuorlo, 50 g di zucchero di canna, l’estratto di vaniglia, la buccia di limone e il miele. Amalgamate bene, poi aggiungete il burro e un pizzico di sale. Lavorate bene l’impasto, aggiungendo un po’ di farina se necessario.

3. Lasciate lievitare l’impasto fino a quando sarà raddoppiato di volume.

4. Dopo la lievitazione stendete l’impasto delicatamente con un matterello, poi dividetelo in due e tagliate dei triangoli.

5. Arrotolate le brioches e mettetele su due teglie imburrate e infarinate. Spennellate le brioches con dell’uovo sbattuto per lucidarle (potete anche usare del latte al posto dell’uovo).

6. Cuocete a 200 °C per circa 20 minuti con del vapore (cioè mettete nel forno anche un pentolino di metallo colmo d’acqua bollente; con questo metodo le brioches resteranno morbide dentro e non si asciugheranno). Lasciate raffreddare e spolverate con zucchero a velo.

Traditional Recipe: Focaccia Alla Genovese (Genoese Focaccia Bread)

DSC_6297

Shiny and crunchy on the outside, soft and moist on the inside, only genoese focaccia has certain qualities which, all together, define one of the best focaccias you can ever taste. Focaccia alla genovese has a distinctive olive oil taste and it requires a long leavening time in order to be so soft and delicious. Apparently, you can only taste the real thing in Genoa and this might depend on several factors (the ingredients, the humidity in the air, the water and, last but not least, the old traditional recipe).

DSC_6304

Today I am going to give you two recipes that you can use to make an amazing focaccia, either with normal yeast or sourdough. In the second recipe, the recipe with normal yeast, I reduced the leavening time to make it more manageable, but, of course, if you let it rise for longer it will get softer and the result will be much better.

Focaccia Alla Genovese (with sourdough).

Ingredients

350 g (12.3 oz) plain flour

6-7 tablespoons of extra virgin olive oil

100 g (3.52 oz) semiliquid sourdough (you can replace the sourdough with 20 g of yeast)

8 g  (0.28 oz) ground sea salt

a pinch of barley malt

water

Method.

1. In a bowl, make a starter by mixing 150 g (5.29 oz) flour with 100 g (3.52 oz) of semiliquid sourdough, a little bit of water, a pinch of barley malt. Mix everything, wrap the bowl with cling film and let rise overnight (at room temperature).

DSC_6146

2. Mix the starter with the rest of the flour, some water, some salt and a tablespoon of olive oil. Knead vigorously until you get a smooth dough (make a moist dough).

DSC_6115

3. Cover with a damp kitchen towel and let rise for, at least, 3 hours. After 3 hours, knead again for a few minutes then let rise for another 3 hours (actually until the dough doubles in volume).

DSC_6118

4. Gently roll out the dough on a baking sheet, previously greased with 3 tablespoons of extra virgin olive oil. Make some wells by pressing with your fingers in the dough.

DSC_6126

DSC_6159

5. Let rise for 2 hours, then brush with plenty extra virgin olive oil mixed with a little bit of water and bake at 190° C (374° F) for about 30 minutes.

DSC_6203

6. Remove from the oven, brush with more olive oil (add water if the dough is too dry), then season with salt and serve.

DSC_6215

DSC_6238

DSC_6263

Focaccia bread (quicker recipe with yeast).

ingredients

350 g (12.3 oz) plain flour

6-7 tablespoons extra virgin olive oil

20 g (0.70 oz) yeast

7 g (0.24 oz) ground sea salt

a pinch of barley malt

some water

Method.

1. In a bowl, combine the yeast with 3 tablespoons of warm water, a pinch of barley malt and 4 tablespoons of flour. Mix well, cover with cling film and let it rise for 1 hour.

2. Mix the yeast with the rest of the flour, a tablespoon of olive oil, some water and a little bit of salt. Knead well until dough is smooth.

3. Allow to rise for 1-2 hours, then roll out the dough with a rolling pin (without pressing too much).

4. Let rise again for 30 minutes, then make some wells in the surface of the dough, by pressing with your fingers. Brush with plenty of extra virgin olive oil mixed with some water and bake at 190° C (374° F) for about 30 minutes.

5. Remove from the oven, brush with more olive oil (add water if the dough is too dry), then season with the rest of the salt and serve.

DSC_6308

Focaccia Alla Genovese (con lievito madre).

Ingredienti

350 g di farina 00

6-7 cucchiai d’olio extra vergine d’oliva

100 g di lievito madre semiliquido

8 g di sale marino macinato

malto d’orzo

acqua q. b.

Preparazione.

1. In una ciotola, mischiate 150 g di farina con 100 g di lievito madre, un po’ d’acqua e pochissimo malto d’orzo. Mescolate energicamente, poi sigillate con la pellicola e lasciate lievitare per tutta la notte (a temperatura ambiente).

2. Unite al lievito il resto della farina, poi aggiungete un pizzico di sale, poca acqua e un cucchiaio d’olio. Lavorate energicamente fino ad ottenere un impasto omogeneo (l’impasto deve essere anche umido).

3. Coprite con un panno umido e fate lievitare per almeno 3 ore. Raggiunta la prima lievitazione, impastate ancora per qualche minuto e lasciate lievitare finché l’impasto sarà raddoppiato di volume.

4. Stendete delicatamente l’impasto su una teglia (unta abbondantemente).

5. Create dei piccoli crateri con le dita e spennellate l’impasto con acqua e olio. Fate lievitare per altre 2 ore, poi infornate a 190° C per circa 30 minuti.

6. Spennellate ancora con olio abbondante (aggiungete un po’ d’acqua se la focaccia è troppo secca), salate e servite.

Focaccia (preparazione veloce).

Ingredienti

350 g di farina 00

6-7 cucchiai di olio extra vergine d’oliva

20 g di lievito di birra

7 g di sale marino macinato

malto d’orzo

acqua q. b.

Preparazione.

1. In una ciotola, mischiate il lievito con 3 cucchiai di acqua tiepida, pochissimo malto d’orzo e 4 cucchiai di farina. Mescolate bene, ricoprite con la pellicola e lasciate lievitare per 1 ora.

2. Unite l’impasto con il lievito al resto della farina, poi aggiungete un cucchiaio d’olio, un po’ d’acqua e un po’ di sale. Mescolate bene, fino ad ottenere un impasto liscio.

3. Lasciate lievitare per 1-2 ore, poi stendete l’impasto con il matterello (senza schiacciarlo troppo) e formate dei piccoli crateri con la punta delle dita.

4. Fate lievitare ancora per 30 minuti, poi spennellate con abbondante olio d’oliva mischiato ad acqua. Infornate a 190° per circa 30 minuti.

5. Sfornate la focaccia e spennellate con olio abbondante (aggiungete un po’ d’ acqua se è secca). Salate con il sale rimasto e servite.

How To Make Seitan (Home-made Meat Substitute)

DSC_4598

What is seitan?

Seitan is a high-protein product made of wheat flour, used as a meat substitute. Tofu and Seitan are both very versatile when it comes to making meat-like dishes. While tofu has an egg-like texture, seitan’s consistency is chewy and more similar to meat. It is widely used because it absorbs the condiments well, however it has high gluten content, which can cause allergies, therefore, is not suitable for everyone.

I often think that meat-like products are not really what a vegetarian would want to eat, because (and I speak from a personal point of view) I believe, if you don’t want to eat meat you don’t really want to be reminded what meat is like. However, I think you can be really creative with either tofu or seitan in the kitchen, therefore, it’s worth giving it a try!

DSC_4592-2

Making seitan.

Many things can be used to flavour seitan; you can add herbs to the dough or flavour it with different ingredients such as: soy sauce, kombu, herbs, vegetables, spices and seeds. All these ingredients are added to the vegetable broth in which the dough is cooked or simply added as flavourings before kneading. Seitain can be also made using spelt flour or gluten flour.

Making seitan requires a lot of time. Basically, you mix the ingredients, make a dough and then rinse it under running water for about 15-20 minutes, to remove the starch. As a result, you will end up with a considerably smaller amount of product, in the end, but it’s worth it! The main reason to prepare home-made seitan is that you can be really creative with it and you can add all the flavours that you like to it!

What you need

1 large bowl

1 large pan with a lid

1 wooden spoon

1 measuring cup

Ingredients 

For the dough

2 tablespoons of nutritional yeast (optional)

4-5 tablespoons of ground spices and seeds (black pepper, paprika, sesame seeds, fennel seeds, coriander seeds, a few cloves, a few chillies)

1 kg (35.2 oz) flour (I use Manitoba, you can use plain or spelt flour)

900 ml (30.4 us fl oz) of water (the amount of water vary depending on the flour)

200 ml (6.76 us fl oz) of soy sauce

For the broth

3 tablespoons extra virgin olive oil

1 clove of garlic

1 large onion

2 stalk of celery

2 carrot

2 bay leaves

a bunch of rosemary

vegetable stock

200 ml (6.76 us fl oz) soy sauce (optional)

DSC_4564

Method.

1. In a large bowl, mix the flour, the nutritional yeast, the seeds and the spices.

DSC_4567

2. Then add 200 ml of soy sauce with the 900 ml of water. Mix with the spoon, then knead with your hands, until you get a smooth dough.

DSC_4568

3. Let it rest for a few minutes.

DSC_4570

4. Meanwhile, prepare the stock. Fry the vegetables in 3 tablespoons of extra virgin olive oil, for a few minutes. Then, fill the pan with vegetable stock (enough to cook the dough in), add the herbs, 200 ml of soy sauce and bring to a boil. Cook for 10 minutes, then turn off the heat, sift the broth and let cool.

DSC_4573

DSC_4574

5. Now knead the dough, in a large bowl, under running water for 20-30 minutes (basically, until the running water in the bowl and in which you are washing the dough, becomes clear). With this operation you are removing the starch and therefore keeping only the protein of the wheat.

DSC_4577

DSC_4579

DSC_4581

DSC_4583

6. After about 20-30 minutes, drain nicely and let the dough sit for a few minutes.

7. Put the seitan in the cold stock ( the broth has to be cold otherwise the seitan will lose its shape) and turn on the heat. Bring to a boil, then turn down the heat and simmer for 45 minutes. Once is ready, turn off the heat and let it cool. Let it drain completely and then store it in an airtight container (in the fridge) for 5 days or freeze it for up to 1-2 months.

DSC_4584

DSC_4587

DSC_4602

Tip.

1. Basically, this is the traditional method, with a personal touch for the flavouring. However, you can shorten the process using gluten wheat flour and avoid the rinsing operation. In this way, you can knead the dough, cook directly in the broth and save a lot of time and water! I strongly recommend this method as it’s quicker and much more ecological.

2. You can replace meat with seitan in many recipes. It’s perfect in stir-fry and slow cooker dishes.

DSC_4593

Seitan fatto in casa (metodo tradizionale).

Utensili 

1 ciotola grande

1 pentola grande, con il coperchio

1 cucchiaio di legno

1 caraffa graduata

Ingredienti

Per l’impasto

2 cucchiai di nutritional yeast (facoltativo, per il sapore)

4-5 cucchiai di spezie e semi misti macinati (pepe nero, paprika, semi di sesamo, semi di finocchio, semi di coriandolo, qualche seme di garofano, peperoncino)

1 kg di farina (ho usato Manitoba, ma è possibile utilizzare la farina normale, integrale o di farro)

900 ml di acqua (la quantità di acqua può variare a seconda della farina utilizzata)

200 ml di salsa di soia

Per il brodo

3 cucchiai di olio extra vergine di oliva

1 spicchio di aglio

1 cipolla grande

2 gambo di sedano

2 carota

2 foglie di alloro

2 rametti di rosmarino

brodo vegetale

200 ml di salsa di soia (facoltativo)

Preparazione.

1. In una ciotola grande, mescolate la farina, il nutritional yeast, i semi e le spezie.

2. Poi aggiungete 200 ml di salsa di soia con 900 ml di acqua. Mescolate con il cucchiaio, poi impastate con le mani, fino ad ottenere un impasto liscio.

3. Lasciate riposare per qualche minuto.

4. Preparate il brodo. Fate soffriggere le verdure in 3 cucchiai di olio extra vergine d’oliva (per qualche minuto). Riempite la pentola con abbondante brodo vegetale (sufficiente per cuocere tutto il seitan), aggiungete le erbe, 200 ml di salsa di soia e portate ad ebollizione. Fate bollire per 10 minuti. Spegnete il fuoco, togliete la verdura e lasciate raffreddare il brodo.

5. In una ciotola molto grande, impastate il composto di farina e spezie sotto l’acqua corrente per 20-30 minuti (fino a quando l’acqua sarà limpida). Questa operazione serve a rimuovere l’amido dalle proteine del grano.

6. Scolate e lasciate riposare l’impasto per qualche minuto.

7. Tagliate e mettete il seitan nel brodo freddo (il brodo deve essere freddo o il seitan perderà la sua forma) e accendete il fuoco. Portate ad ebollizione, poi abbassate il fuoco al minimo e fate cuocere per 50 minuti. Una volta pronto, spegnete il fuoco, scolate bene e lasciate raffreddare. Il seitan si può conservare in un contenitore ermetico (in frigorifero) per 5 giorni o congelare per 1 o 2 mesi.

Note.

1. Questo è il metodo tradizionale, con un tocco personale per aromatizzare il seitan. E’ possibile abbreviare il metodo di preparazione utilizzando la farina di glutine ed evitare il risciacquo. In questo modo, è possibile impastare il seitan, cuocerlo direttamente nel brodo e risparmiare un sacco di tempo ed acqua. Consiglio vivamente questo metodo perché è molto più veloce ed ecologico.

2. Si può sostituire la carne con il seitan in moltissime ricette. Il seitan è ottimo saltato in padella con le verdure, oppure utilizzato al posto della carne negli stufati.

Make The Best Pizza Dough ( Part 2)

I already published a basic pizza dough recipe with normal yeast a few weeks ago, this is basically the same recipe adapted for sourdough. Before getting started with the recipe, let me say a few things about sourdough.

Why sourdough?
Sourdough is a natural yeast created by fermenting flour with water. It is a long process, which is not particularly complicated, but it takes some time and care.
Basically, you create the natural yeast, then you feed it and keep it in good shape, that’s really all there is to it! In exchange, your sourdough will reward you with a lot of flavour, leavening strength and satisfaction!
Moreover, sourdough is healthier and much more digestible than commonly used yeast. Another good reason to use it is the difference in taste, as sourdough’s flavour is much more delicate and pleasant than all the other yeasts.
So, don’t give up if you haven’t tried yet, instead give it a go and you’ll see the difference, I promise you!
To get started with sourdough you can follow the step by step recipe here.

DSC_7541

Some things you have to know before you go on with the recipe:

1. The flour-sourdough ratio in recipes is usually 3 to 1 (3 parts of flour plus 1 part of sourdough). In order to prepare approximately 500 g of dough we will use 375 g of flour with 125 g of sourdough. You can use this recipe to make sourdough bread as well as pizza.

2. Semi-liquid sourdough contains a lot of water, therefore you have to add less water than in normal yeast pizza and bread recipes. My advice is to add a little bit of water gradually.

3. Sometimes it’s useful to make the dough in the evening and then keep it in the fridge with some extra water over night. The following day, take it out of the fridge two hours before you use it (knead the dough a little, then make the pizzas and let them rise for a couples of hours at room temperate). During this process the dough will rise much better and faster.

DSC_7548

Sourdough Pizza Crust.

Ingredients

For 2 large pizzas

Recipe No. 1

210 g flour 00 (or plain, unbleached all-purpuse flour)

135 g whole spelt flour

30 g durum wheat flour (semolina)

125 g sourdough (semi-liquid and made ​​with manitoba flour)

10 g salt

a pinch of barley malt (optional)

extra virgin olive oil to taste

water

Note.

If you use the sourdough starter made ​​from flour 00 (or plain, unbleached all-purpose flour) the ingredient ratio changes slightly:

Recipe No. 2

130 g flour 00 (or plain, unbleached all-purpuse flour)

135 g whole spelt flour

80 g Manitoba flour

30 g durum wheat flour (semolina)

125 g sourdough (semi-liquid and made with flour 00 of plain, unbleached all-purpuse flour)

10 g salt

a pinch of barley malt (optional)

extra virgin olive oil to taste

water

Method.

1. Sift and mix the flour on a wooden board or a large bowl (use a fine sieve). Mix the flour with the sourdough and a little bit of water. Add the salt and, if you want, you can also add 2 tablespoons of extra virgin olive oil with a pinch of malt.

DSC_7477-2

2. knead vigorously, until you get an elastic dough. Let the dough rise in a sheltered place for 3-6 hours (the rising time varies depending on different factors, the dough is ready when it has doubled in volume).

DSC_7487

DSC_7490

3. Take two large oven trays, cover them with baking paper and brush them with plenty of extra virgin olive oil. Roll out the dough with a rolling pin, make two pizza bases and then add the other ingredients (I am going to make a pizza with mozzarella cheese and crescenza, a nice sweet and creamy Italian cheese)

DSC_7509

DSC_7512

DSC_7519

4. Let the pizzas rise for about 1 hour, then bake in a preheated oven at 190° (374°F) for 20-30 minutes.

DSC_7533

DSC_7555

Impasto base per la pizza con lievito madre.

Ingredienti

2 pizze grandi

Ricetta n°1

210 g di farina 00

135 g di farina di farro integrale

30 g di semola rimacinata

125 g di lievito madre (semiliquido, a base di farina manitoba)

acqua q. b.

10 g di sale

pochissimo malto d’orzo (facoltativo)

olio extra vergine d’olio d’oliva q. b.

Nota.

Se usate il lievito madre a base di farina 00 gli ingredienti variano leggermente:

Ricetta n° 2

130 g di farina 00

135 g di farina di farro integrale

80 g di farina manitoba

125 g di lievito madre (semiliquido con base di farina 00)

30 g di semola rimacinata

10 g di sale

acqua q. b.

pochissimo malto d’orzo (facoltativo)

olio extra vergine d’olio d’oliva q. b.

Metodo.

1. Mescolate, setacciate le farine e sistematele a fontana su una spianatoia o mettetele in una ciotola grande. Unite il lievito madre alla farina con un po d’acqua. Mescolate leggermente, poi aggiungere il sale con cucchiai d’ olio extra vergine di oliva e un pizzico di malto, se desiderate aggiungerli.

2. Lavorate energicamente gli ingredienti, fino ad ottenere un impasto omogeneo ed elastico. Lasciate lievitare l’impasto in un luogo riparato per 3-6 ore (il tempo di lievitazione varia a seconda di diversi fattori, l’impasto è pronto quando sarà raddoppiato di volume).

3. Prendete due teglie grandi, ricopritele con carta da forno e spennellatele con abbondante olio extra vergine d’oliva. Stendete la pasta con un matterello e fate due basi per pizza, poi aggiungere gli altri ingredienti (in questo caso faremo una pizza bianca con crescenza e mozzarella).

4. Lasciate lievitare le pizze per circa 1 ora, poi fate cuocere a 190° C in forno preriscaldato per 20-30 minuti (dipende dallo spessore della pasta).

DSC_7558

How To Make Sourdough (re-edited).

DSC_7382

What is sourdough?

Sourdough is a natural yeast, obtained by fermenting flour and water. It can have a solid or a liquid consistency, depending on the amount of water used to feed it. Liquid sourdough usually rises better.

I personally recommend the preparation and use of this great ingredient because it’s completely natural, therefore much healthier and more digestible than other yeasts. Sourdough can be used to make a variety of breads, pizzas, pies and cakes with surprising results. Moreover, it makes everything taste better!

Preparing the sourdough starter.

1. First you have to make a starter. Mix 1 cup of organic wholemeal flour (the wholemeal flour is necessary for the first feed) with 1/2 cup of cool water (use non-chlorinated water, you can mix tap water with still drinking water from a bottle).
Put the ingredients in a glass, stainless steel or a plastic container for food.

DSC_7335

2. Stir all the ingredients together, until creamy and smooth, then cover the container with a damp cloth and let it sit for 24 hours.

DSC_7367

DSC_7348

3. After 24 hours remove the top half of the mixture, then feed the starter again with 1 cup of plain flour (you can use manitoba, whole spelt or wholemeal flour, if you prefer) and half a cup of water. Stir well, cover with a damp cloth and let it sit for another 24 hours.

DSC_7355

DSC_7363

DSC_7367

4. Now you can start feeding the starter every two days. Repeat this process for about 10 days.

DSC_7376

5. After 10 days, you can start feeding your sourdough every 4-5 days and you can use it for your recipes.

Store the sourdough.

1. Store the sourdough in a glass jar and keep it in the fridge (with the lid on).

2. Each time you feed the sourdough let it sit for 1-2 hours at room temperature in a glass jar covered with a damp cloth (with no lid on). Then remove the cloth, close the container and put it back in the refrigerator.

DSC_7385

Doses.

1. Feed the sourdough the day before you use it (12 hours before). To feed the sourdough, weight the natural yeast, then add the same amount of  flour and half the amount of water.

2. In the quickest recipes, the ratio of flour and sourdough used must be 3 to 1. (e.g. for 900 g of flour use 300 g of sourdough).

3. The rising time of the dough will depend on the age and strength of the yeast, at first it may take 3 to 6 hours (however, when it doubles in size it is ready for use).

DSC_7378

DSC_6085

DSC_6203

La pasta madre.
La pasta madre è un lievito naturale che si ottiene facendo fermentare farina e acqua. Questo lievito può avere una consistenza più solida o liquida, a seconda della quantità d’acqua utilizzata, normalmente la versione più liquida ha una lievitazione migliore.

Consiglio vivamente la preparazione e l’utilizzo di questo ingrediente, essendo un lievito completamente naturale e quindi molto più digeribile e salutare rispetto ad altri lieviti comunemente utilizzati. Inoltre può essere usato facilmente nella preparazione di svariati tipi di pane, pizze torte salate e dolci con risultati sorprendenti.

Preparazione della pasta madre.

1. Per prima cosa, preparate un piccolo impasto unendo 1 tazza di farina integrale biologica (la farina integrale è necessaria per il primo impasto) a 1/2 tazza d’acqua fredda (utilizzate acqua con poco cloro, potete miscelare l’acqua del rubinetto con acqua minerale naturale).

2. Mettere gli ingredienti in un contenitore (è consigliabile utilizzare un contenitore di vetro oppure acciaio inossidabile, ma anche la plastica per alimenti va bene) e mescolare fino ad ottenere un composto cremoso. Coprire il contenitore con un panno umido e lasciate riposare per 24 ore.

3. Passate 24 ore, levate la parte dura in superficie e rinfrescare quello che resta del lievito, cioè aggiungete al composto 1 tazza di farina (potete utilizzare la 00, manitoba oppure farina integrale, come preferite) e mezzo bicchiere d’ acqua. Mescolare bene, coprire con un panno umido e lasciate riposare per altre 24 ore.

4. Ora potete rinfrescare il lievito ogni 2 giorni, utilizzando sempre una tazza di farina e 1/2 tazza d’acqua. Continuate con questa procedura per circa 10 giorni.

5. Dopo 10 giorni, potete incominciare a rinfrescare la pasta madre ogni 4-5 giorni. Arrivati a questo punto, la vostra pasta madre è pronta per essere utilizzata nelle vostre ricette.

La conservazione.

1. Conservate la pasta madre in un vasetto di vetro, chiuso con il coperchio e tenuto in frigorifero.

2. Dopo ogni rinfresco, lasciate riposare il lievito madre per una o due ore in un vasetto coperto da un panno umido a temperatura ambiente, poi chiudete il contenitore e rimettetelo nel frigorifero.

Le dosi consigliate.

1. Nutrite la pasta madre il giorno prima di utilizzarla (almeno 12 ore prima). Per nutrire la pasta madre, prima pesate il lievito naturale, poi aggiungere la stesso peso di farina e metà del peso di acqua.

2. Nelle ricette più rapide, il rapporto tra farina e pasta madre deve essere di 3 a 1, cioè su 900 g di farina utilizzeremo 300 g di lievito naturale.

3. Il tempo di lievitazione dipenderà dall’età e dalla forza della pasta madre. I tempi possono variare dalle 3 alle 6 ore, consiglio però di non guardare l’orologio ma di osservare il volume dell’impasto, quando raddoppia è pronto per l’uso.

Super Tasty and Healthy Rocket Pesto

The most famous Italian pesto is made with fresh basil and is a traditional Genoese dish. In Italy, however many variations exist of this lovely condiment.
My mother, for example, prepares a delicious rocket pesto made with pine nuts and Parmesan, using the plants she has in the garden. Today I am going to share this lovely recipe, but instead of pine nuts I am using a few hazelnuts, walnuts and almonds.
Pesto is a very healthy condiment that you should definitely have in your fridge.
The rocket leaves are rich in vitamin C and also contain potassium, iron, calcium and phosphorus. They have a slightly bitter peppery flavour, which I love.

DSC_7274 copy2

Tips.

1. Making pesto is very easy. Use an immersion blander and mix all the dry ingredients first and then add the extra virgin olive oil at the end. Add just a couple of tablespoons of iced water with the dry ingredients when you first use the blender, because this will cool the blades down and avoid ruining the leaves.

2. In the traditional Genoese pesto recipe we use Parmesan cheese and Pecorino Sardo. You can buy both cheeses nicely-aged, which is important because they have a distinctive strong taste. However, if you can’t find aged Pecorino Sardo you can replace it with Parmesan. Both these cheeses are quite salty, so it is very important to put just a pinch of salt in the recipe, then you can always add it at the end, if needed.

3. In order to get a creamier pesto, when you cook the pasta you can dilute your condiment with a couple of tablespoons of cooking water (the water in which the pasta is cooking), just before serving.

DSC_7259

Rocket (Arugula) Pesto.

Preparation: 10 minutes

Easy

Ingredienti

For a cup of pesto

1/2 clove of garlic

60 g (2.11 oz) rocket (arugula), washed

30 g (1.05 oz) aged Parmesan cheese, cut into small pieces

30 g (1.05 oz) aged Pecorino Sardo cheese

6 tablespoons of extra virgin olive oil

2 walnuts, shelled

2 almonds, shelled

2 hazelnuts, shelled

a pinch of salt

pepper to taste

DSC_7215

Method.

1. In a tall container, put all the ingredients, without the extra virgin olive oil.

DSC_7220

DSC_7223

2. Using an immersion blender, chop the ingredients for a few minutes, adding just a little bit of iced water to cool the blade in the process.

3. Pour in the extra virgin olive oil (a little at a time) and blend everything together, until you get a creamy mixture.

DSC_7238

4. Serve with your favourite pasta.

DSC_7278

DSC_7272-3

DSC_7307

Pesto di rucola.

Ingredienti

Preparazione: 10 minuti

Facile

Per un vasetto

1/2 spicchio d’aglio

60 g di rucola, lavata e asciugata

30 g di parmigiano reggiano (tagliato a pezzi piccoli)

30g di pecorino sardo stagionato (tagliato a pezzi piccoli)

6 cucchiai d’olio extra vergine d’oliva

2 noci, senza guscio

2 nocciole, senza guscio

2 mandorle, senza guscio

un pizzico di sale

pepe q.b.

Preparazione.

1. In un contenitore alto e stretto mettete tutti gli ingredienti, senza l’olio.

2. Usando un frullatore ad immersione, tritate per qualche minuto gli ingredienti, aggiungendo un po’ d’acqua molto fredda, per evitare che la lama si scaldi.

3. Versate anche l’olio extra vergine d’oliva nel composto (poco alla volta e continuando a tritare), fino ad ottenere una consistenza cremosa.

4. Condite la pasta e servite.

DSC_7292

Make the Best Pizza Dough (Part 1)

Making your own pizza dough, for the first time, is probably one of the most satisfying things you can ever experience in your kitchen. There is something magical about the whole process, from the moment you first see the dough rising, up to the moment you actually see your beautiful creation coming out of the oven. I personally enjoy everything about this process and this is why I don’t buy it anymore. Moreover, once you start experimenting with different flours and ingredients, especially if you use natural yeast (but we will see this in part 2), home-made pizza can become a truly special dish to make.

DSC_6063

 A few words on the preparation.

To prepare (approximately) 500 g of dough for pizza or bread you must use 500 g of flour, 15 g of yeast, 10 g salt and some water.

For this recipe I used different kinds of organic flour which have very different qualities from one another and help to create a certain harmony of flavours and textures. The amount of water in the dough and the leavening time may vary, depending on the ingredients used. This type of dough can be used, not only to make pizza but it’s also great to make focaccia and other breads.

Notes. You can decide to add extra virgin olive oil and barley malt (or honey) to the recipe or not, depending on your personal taste. The extra virgin olive oil gives a crunchier crust and the malt (or honey) will help the leavening process, but both these ingredients will add some extra calories to your recipe, so if you are on a diet,  don’t use them.

DSC_5964

I am giving you two options here, choose the dough with the ingredients that you prefer.

Basic pizza dough (with normal yeast)

 Ingredients 

For two large pizzas

to prepare (approximately) 500 g of bread dough or pizza base

 for a wholemeal dough 

250 g plain flour (unbleached all-purpose flour)

100 g whole spelt flour (or farro flour)

100 g Manitoba flour

50 g durum wheat semolina flour

15 g yeast

200-250 ml warm water (but add more if necessary)

10 g salt

extra virgin olive oil to taste

a big pinch of barley malt or honey (optional)

 for a plain flour dough 

If you prefer a dough made mostly with plain flour, then use:

250 g plain flour

250 g manitoba flour (or durum wheat semolina flour)

15 g yeast

200-250 ml warm water (add more if you need to)

10 g salt

extra virgin olive oil to taste

a big pinch of barley malt or honey (optional)

DSC_5972

 Method (for both doughs). 

1. Break up the yeast into small pieces and mix it with a bit ‘of warm water and a few tablespoons of flour. Create a small dough and let it double in volume.

DSC_5991

DSC_5998

DSC_6019

2. Sift the remaining flour with a fine sieve and make a well on a wooden board, then pour 200-250 ml warm water (gradually) and salt in the centre (also add 1 tablespoon of extra virgin olive oil and a pinch of malt, if you wish). Mix the ingredients.

DSC_6022

3. Add the yeast dough (from step 1) to the mixture and knead vigorously.

DSC_6027

4. Let it rise in a sheltered place until the dough has doubled volume (it might take between one or two hours).

DSC_6030

5. Take two large oven trays, cover them with baking paper and brush the paper with plenty of extra virgin olive oil. Roll out the dough with a rolling pin and then add the other ingredients (mozzarella, tomatoes, olives etc.).

DSC_6089

DSC_6090

DSC_6100

6. Let it rise again for 30 minutes, then bake in preheated oven at 190 ° C (374° F) for 20-30 minutes.

DSC_6134-2

This pizza is called “Marinara” and is made with anchovies, tomatoes and crushed garlic. A very cheap and simple dish, but full of flavour!

DSC_6170

See also Make the best pizza dough part 2 (with sourdough)

Impasto per la pizza (con lievito di birra).

Per preparare 500 g di pasta per la pizza o da pane generalmente si utilizzano 500 g di farina, 15 g di lievito di birra, 10 g di sale e acqua.

In questo caso utilizzerò farine biologiche di vario tipo, che presentano qualità molto diverse tra loro e che aiutano a creare una certa armonia di fragranza e croccantezza. La quantità d’ acqua necessaria da utilizzare potrebbe variare leggermente, a seconda delle farine e degli altri ingredienti utilizzati, così come il tempo di lievitazione. Questo tipo di impasto può esse utilizzato anche per preparare focacce e pane.

Nota. Ho aggiunto l’ olio extravergine d’oliva e il malto d’orzo nella lista degli ingredienti, perché servono a creare una crosta più croccante e a far lievitare meglio l’impasto (nel caso del malto).

Vi darò due ricette, così potete scegliere l’impasto con gli ingredienti che preferite.

Impasto base per la pizza (con lievito di birra)

Ingredienti 

Per due pizze grandi

per preparare 500 g di pasta da pane o per pizza

Impasto con farina integrale

250 g farina 00

100 g farina di farro integrale

100 g Manitoba

50 g semola di grano duro rimacinata

15 g di lievito di birra

200-250 ml di acqua tiepida

10 g di sale

olio extra vergine d’oliva q. b.

una punta di cucchiaio di malto d’orzo (facoltativo)

Impasto con farina 00

Se preferite un’impasto semplice con farina bianca allora utilizzate i seguenti ingredienti:

250 g di farina 00

250 g di farina Manitoba

15 g di lievito di birra

200-250 ml di acqua tiepida

10 g di sale

olio extra vergine d’oliva q. b.

una punta di cucchiaio di malto d’orzo (facoltativo)

 Metodo (per entrambi gli impasti). 

1. Spezzate il lievito in piccoli pezzi e mischiatelo con un po’ d’ acqua tiepida e qualche cucchiaio di farina, fino a creare un panetto. Lasciate raddoppiare il panetto di volume.

2. Setacciate il resto della farina e disponetela a fontana su una spianatoia con 200-250 ml d’ acqua tiepida e il sale (aggiungete anche l’olio e il malto, se volgete utilizzarli). Mescolate leggermente.

3. Aggiungete il panetto di lievito e impastate tutto energicamente.

4. Lasciate lievitare in un luogo riparato, finché il volume dell’impasto sarà raddoppiato (una o due ore).

5. Utilizzate due teglie grandi, ricopritele con della carta da forno e spennellate con abbondante olio extra vergine d’oliva. Stendete l’impasto con un matterello, aggiungete gli   altri ingredienti (mozzarella, pomodori, origano ecc.) e infornate a forno preriscaldato a 190° C per 20-30 minuti.

Fresh Egg Pasta with Flour 00 (Step by Step)

This week we are going to prepare plain fresh egg pasta, using flour 00. This pasta can be used as a base for making a variety dishes, prepared with all sorts of creative stuffings and sauces, but we will see this in the next posts.

I generally tend to use more complex and heavier types of flour, because they are tastier and rich in nutrients. In some recipes , however, it’s better to use a finer and more delicate flour, in order to avoid covering the flavour of the other ingredients. For this recipe the Italian flour 00 is perfect for making pasta, because it is finer than normal flour, however, if you can’t find it use plain flour.

DSC_5166

tips.

1. The ingredients listed are for 400 g of (uncooked) pasta, but if you need a different quantity, just bear in mind that for every 100g of flour you have to add an egg. For example, if you need 200 g of pasta just halve the ingredients (and use 2 small eggs).

2 . It is important to sift the flour before using it to avoid lumps or impurities (I don’t usually say this but you should always do it).

3. Here I am using a rolling pin, but if you are planning to make large quantities of fresh pasta I strongly advise you to get a pasta machine, to make things easier.

DSC_5342-4

Fresh Egg Pasta (with flour 00)

 Ingredients

for 400 g (14 oz) of pasta (approximately)

300 g (10.5 oz)  flour 00 (or plain flour)

3 eggs

salt to taste

 Tools

a clean kitchen cloth

an airtight container

a long rolling pin

a wooden board (with a rough surface) or a table

 Method

1. Sift the flour with a sieve, add some salt, make a well and crack three eggs in the centre. With a fork, beat the eggs lightly, in order to mix the whites with the yolks. Still using a fork, combine the flour with the eggs starting from the outer edge, then continue mixing the ingredients with your fingers and begin to knead.

DSC_5018

DSC_5022

DSC_5024

DSC_5029

2. Knead until you get a smooth dough, then wrap in a clean cloth and place in an airtight container (or use cling film). Let stand for about an hour at room temperature (if you don’t have much time, 30 minutes is fine).

DSC_5037

DSC_5045

DSC_5047

3. After an hour (or 30 minutes), take the dough and divide it into 3-4 pieces. Dust the working surface with some flour and, using a rolling pin, roll a very thin sheet of pasta. Repeat this process with the other pieces and cut the sheets as required by the recipe you are going to prepare.

DSC_5128

DSC_5140

DSC_5163

Notes.

You can make lasagne, ravioli, cannelloni and many varieties of pasta from these sheets. We will see how in the next few weeks. See also the post on spelt (farro) pasta for more ideas.

Pasta fresca all’uovo.

Ingredienti

per circa 400g di pasta

300g di farina 00

3 uova

sale q.b.

 Utensili

uno panno pulito

un contenitore a chiusura ermetica

un matterello lungo

una spianatoia di legno (con superficie ruvida)

 Preparazione.

1. Setacciate la farina con un colino grande (oppure un setaccio) e disponetela a fontana con tre uova al centro. Con una forchetta sbattete leggermente le uova, in modo da mischiare il bianco al tuorlo. Sempre con una forchetta, unite la farina all’uovo partendo del bordo esterno, poi proseguite con le dita e incominciate ad impastare.

2. Lavorate bene l’impasto, poi avvolgetelo in un panno pulito e mettetelo in un contenitore con chiusura ermetica (potete anche utilizzare la pellicola). Lasciate riposare un’ oretta (oppure 30 minuti, se non avete molto tempo).

3. Prendete l’impasto, dividetelo in 3-4 pezzi e incominciate a stendere la pasta (infarinando bene le superfici), fino ad ottenere una sfoglia molto sottile. Ripetete l’operazione con gli altri pezzi e tagliate la pasta come richiede la ricetta che state preparando.

Gluten-free Buckwheat Gnocchi (Step by Step)

I adore gnocchi! Gnocchi with pesto has been my favourite pasta dish since I was a kid. In Italy there are numerous variations of this wonderful pasta, some of which are really colourful and tasty. Today we are going to prepare a gluten-free version made with buckwheat flour. This flour might be a little expensive, but I decided to use it because of the benefits that introducing gluten-free meals in our every-day diet have. Even though I don’t have intolerances or allergies, but also because I think it’s delicious. Of course, it is also a good alternative to traditional gnocchi for celiac people.

DSC_4831

 A few words about Buckwheat. 

Buckwheat is related to sorrel, knotweed and rhubarb. The seeds are fruit seeds, not cereals, very similar to sunflower seeds, and with a distinctive triangular shape. They are rich in protein, important minerals ( iron, phosphorus, zinc, selenium and potassium.) and vitamins B. Buckwheat is normally used in flour or grains. The flour is very tasty and perfect for pasta recipes, in fact, in Italy it is widely used in many traditional dishes.

DSC_4890

Ingredients

Preparation: 25 minutes

Potatoes Cooking time: 15-20 minutes + time to cool

Gnocchi Cooking time: 5 minutes

Serves 4-5

1 kg (35.2 oz) large potatoes

200 g (7.05 oz) buckwheat flour (and a little bit more for dusting)

50 g  (1.76 oz) potato starch

salt to taste

 Tools 

wooden board or table

A large pan (with a steaming basket  or you can use a steamer if you prefer this cooking method)

a large sieve (to sift the flour)

potato ricer (or a potato masher)

a knife

a fork (or a gnocchi board)

DSC_4828

 Method

1.Wash, then steam or boil the potatoes for 15-20 minutes (if you boil, put them in cold salted water and then, bring to the boil). Mash the potatoes and let cool. Once they have cooled down, add the flour and starch (previously sifted and mixed).

DSC_4863

DSC_4864

2. Combine all the ingredients, add some salt and work until you get a soft and smooth dough (adding some flour, if necessary).

DSC_4871

3. Dust the board, then divide the dough into 4-5 equal pieces and roll each piece into long ropes (the ropes should be 1,5 cm [0.39 uk inches] high). Cut each rope into small pieces (3 cm [ 1.18 uk inches] long and 1,5 cm [ 0.39 uk inches] high).

DSC_4878

DSC_4882

4. Use a fork to indent the gnocchi by pressing the centre and roll each piece on the fork (watch the video below) , in this way the gnocchi will absorb the condiment better.

DSC_1055

DSC_1060

Watch the video:

5. Add more flour to prevent the gnocchi from sticking together and lay them a little apart from each other on a table, previously covered with clean kitchen cloths (I used a plate because I prepared only one portion). Cook as soon as possible.

DSC_4965

 Tips.

Boil in plenty of salted water for a few minutes. Once they rise, gently drain and season as you prefer (serve these wonderful gnocchi with pesto or with a nice tomato sauce. If you don’t follow a vegan or a low-cal diet I suggest you try them with a gorgonzola sauce).

DSC_4981

Gnocchi di patate e grano saraceno.

Preparazione: 25 minuti

Cottura delle patate: 15-20 minuti + il tempo di farle un po’ raffreddare

Cottura degli gnocchi: 5 minuti

Ingredienti

per 4-5 persone

1 kg di patate farinose

200 g di farina di grano saraceno ( e un po’ di più per infarinare)

50 g di fecola di patate

sale q.b.

Utensili

una spianatoia di legno abbastanza grande

Una pentola grande (con cestello per cottura a vapore oppure una  vaporiera, se preferite questo tipo di cottura)

un setaccio o un colino grande (per setacciare la farina)

uno schiaccia patate

un coltello

una forchetta

 Preparazione

1. Lavate bene le patate e fate cuocere a vapore per 15-20 minuti (o lessatele mettendole in acqua fredda salata e portando a bollore). Schiacciate le patate e lasciate raffreddare. Aggiungete la farina e la fecola (setacciate e mescolate in precedenza).

2. Amalgamate gli ingredienti con un po’ di sale, fino ad ottenere un impasto morbido ed uniforme. Nel caso fosse necessario, aggiungete un po’ di farina.

3. Infarinate la superficie della spianatoia, dividete l’impasto in 4-5 pezzi uguali e rotolate ogni pezzo fino a formare dei filoncini molto lunghi e alti 1,5 cm. Tagliate ogni cilindro di pasta in piccoli gnocchi (lunghi 3 cm e alti 1,5 cm circa).

4. Usate una forchetta per rigare gli gnocchi (guarda il video).

5. Appoggiate gli gnocchi distanti tra loro su un tavolo coperto da strofinacci puliti, leggermente infarinati (nelle foto uso un piatto perché ho preparato una porzione sola).

 Note.

Per la cottura consiglio di far bollire in acqua abbondante e salata per qualche minuto. Poi scolate e condite come preferite. Un ottimo condimento per gli gnocchi di grano saraceno potrebbe essere una salsa al gorgonzola, oppure condite semplicemente con del buon pesto o una salsa al pomodoro, se seguite una dieta vegana o a basso contenuto calorico.