Today’s brunch was a lovely spelt bread (made following this sourdough pizza base recipe) with home-made hummus. Yummy!!!!

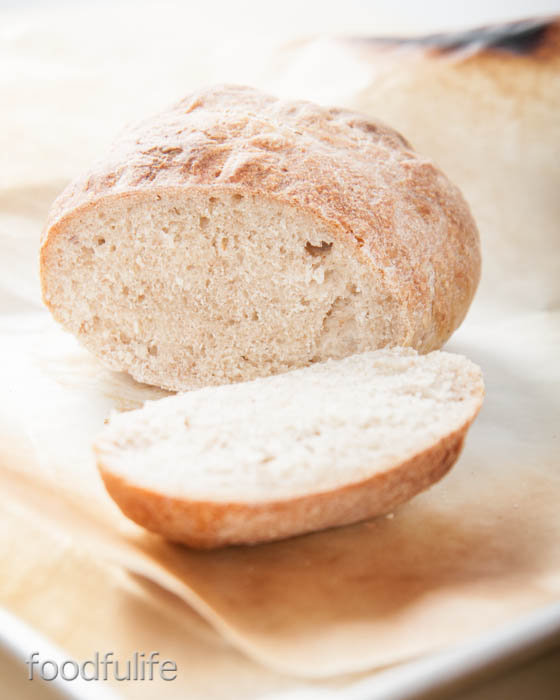
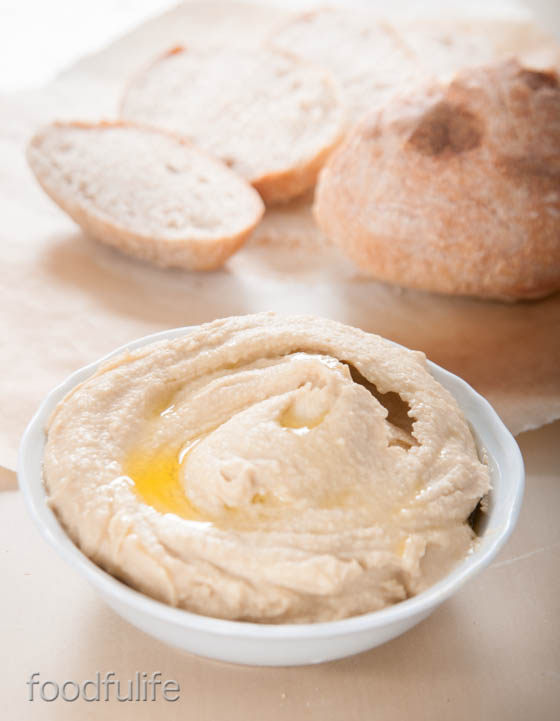
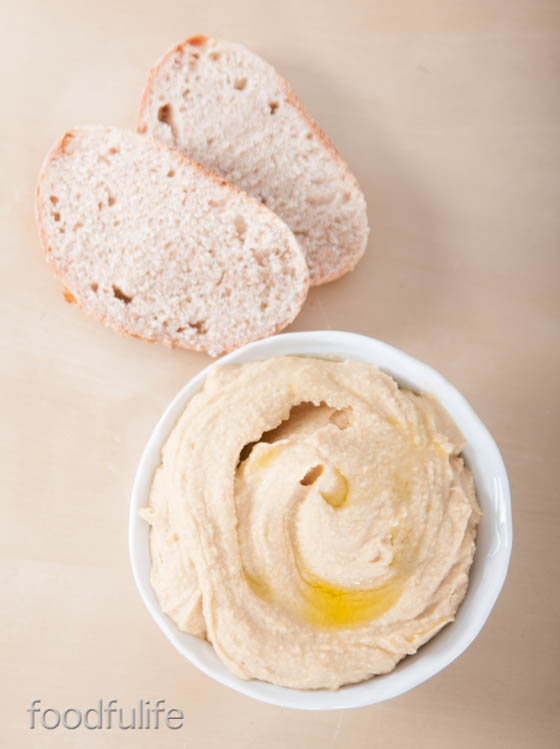

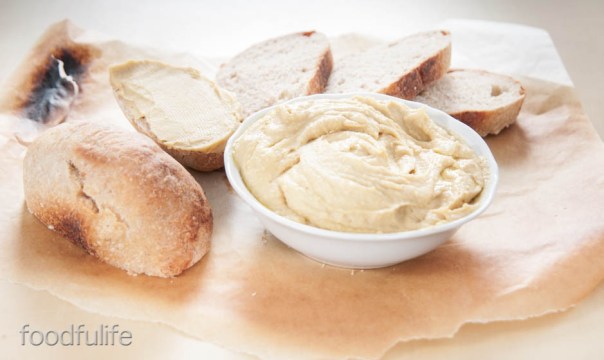
Today’s brunch was a lovely spelt bread (made following this sourdough pizza base recipe) with home-made hummus. Yummy!!!!

Quinoa has become a very popular ingredient in recent years. Besides being very versatile, it’s considered by nutritionists to be one of the most important super foods for its numerous nutritional properties and it’s often used as a substitute for couscous in gluten-free recipes. Quinoa is also an excellent source of protein and amino acids, therefore is perfect for vegetarian and vegan diets.
I must thank my mother for this awesome recipe! She usually prepares meat dishes using artichokes, peas and potatoes. Being a vegetarian, I thought of using this amazing combination of flavours in a quinoa recipe, in order to create a delicious and perfectly balanced meal.
Cooking tip. After cutting the artichokes dip them in cold water and some lemon juice for a few minutes, to preserve the colour.

Artichoke and Pea Quinoa.
Ingredients
for 4 servings
4 artichokes
200 g ( 7 oz) of peas
1 large potato
1 organic vegetable stock cube
1 large onion
1 clove of garlic
a bunch of parsley
a sprig of fresh marjoram
5 tablespoons extra virgin olive oil
salt and pepper to taste
400 ml (14 fl. oz) of vegetable stock (made with 400 ml of hot water and 1 organic vegetable stock cube)
For the quinoa.
1 cup quinoa
2 cups water
a pinch of salt
Quinoa preparation.
1. Wash the quinoa, using a strainer, under running water for a few minutes.
2. Put 1 cup of quinoa, 2 cups of water and a pinch of salt in a small pan, then cook for 15 minutes.
3. Turn off the heat and cover with the lid.
How to prepare the Vegetables.
1. Peel, wash and finely cut the onion. Fry over a low heat for a few minutes. Cut the garlic clove, remove the green core, then chop and fry with the onion.


2. Wash and trim the artichokes, removing all the sharp, hard and hairy bits. Cut each artichoke into 8 parts (also peel and cut the stems into small pieces) then add to the ingredients.


3. Wash, peel and cut the potato into very small cubes. Add the potato, pour 400 ml of vegetable stock into the pan and mix well.

4. Then add the peas and cook for about 30 minutes over a low heat (cover with the lid and stir from time to time).

5. Five minutes before the end of the cooking time, add the herbs ( finely chopped) and season with salt and pepper.

6. Turn off the heat and serve the vegetables with the quinoa in the middle.


Quinoa con Carciofi e Piselli.
Ingredienti
per 4 persone
4 carciofi
200 g di piselli
1 patata grande
1 cipolla grande
1 spicchio d’aglio
1 dado vegetale biologico
un mazzetto di prezzemolo
un mazzetto di maggiorana fresca
5 cucchiai di olio extra vergine d’ oliva
400 ml di brodo vegetale (fatto con 400 ml d’acqua bollente e un dado vegetale)
sale e pepe q b
per la quinoa
80 g di quinoa
200 ml d’acqua (ancora meglio se usate del brodo vegetale)
un pizzico di sale
Preparazione della quinoa.
1. Lavate la quinoa, usando un colino, sotto il getto d’acqua del rubinetto per qualche minuto.
2. Fate cuocere in acqua leggermente salata (o brodo) la quinoa per circa 15 minuti.
3. Spegnete il fuoco, coprite con il coperchio e lasciate riposare.
Preparazione delle verdure.
1. Pulite, tagliate finemente la cipolla e fate soffriggere a fuoco basso. Tagliate in due lo spicchio d’aglio, togliete l’anima, tritate e aggiungete al soffritto.
2. Lavate e pulite i carciofi, togliendo tutte le spine, le parti dure e fastidiose. Tagliate ciascun carciofo in 8 parti, tagliate anche il gambo a pezzetti e aggiungete al soffritto.
3. Pelate, lavate e tagliate la patata a cubetti molto piccoli. Mettete a cuocere la patata e aggiungete del brodo vegetale. Mescolate bene.
4. Aggiungete i piselli e fate cuocere a fuoco lento per 30 minuti con il coperchio semi chiuso, mescolando occasionalmente.
5. Quasi a fine cottura, aggiungete le erbe tritate finemente e condite con il sale e pepe.
6. A cottura terminata, spegnete il fuoco e servite le verdure con la quinoa nel centro.

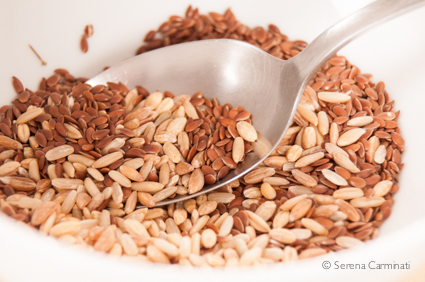
Hummus is a delicious chickpea spread, easy to make and suitable for every occasion. Served with this special multigrain bread it becomes a real treat! This dish is rich in vegetable protein, fiber and omega 3, found in flaxseed. It is a great balanced meal when served with salad or fresh vegetables, while served with bread it is a wonderful starter.
Mutigrain pita bread.
For 4 flat breads.
ingredients
70 g (2.46 oz) wholemeal flour (whole wheat flour)
70 g (2.46 oz) wholemeal spelt flour
40 g (1.41) Manitoba flour
90 g (3.17 oz) sourdough
3 tablespoons 6 mixed grains (hulled oats, hulled barley, hulled spelt, wheat, rye, brown rice)
1 tablespoon flax seeds (linseeds)
1 tablespoon extra virgin olive oil
1 tea spoon of salt
1/2 teaspoon honey or barley malt (unsweetened) syrup (it helps the dough to rise and gives a nice crust to the bread, optional)
water as needed
For the hummus.
Ingredients
1 can chickpeas (240 g, 8.46 oz, drained chickpeas)
1 clove garlic
the juice 1/2 a lemon
1 teaspoon sesame seeds finely chopped
a few crystal of sea salt
4 tablespoons extra virgin olive oil
1/2 cup water
paprika to taste
Method (Multi Grain Pita Bread).
1. Wash the seeds in a bowl, changing the water several times, until it’s completely clear.
2. Leave the seeds to soak for 6-8 hours.

3. Mix the flour with the sourdough, adding some water and a little bit of malt (or honey). Sprinkle the seeds on top of the mixture, add a teaspoon of salt and knead everything well (adding flour or water if necessary, as the dough should be neither too sticky nor too hard and dry).
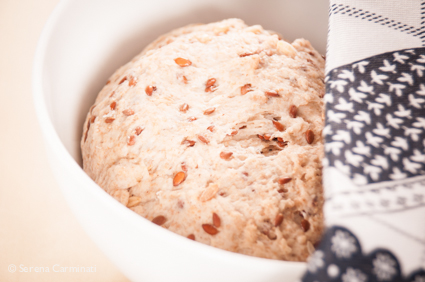
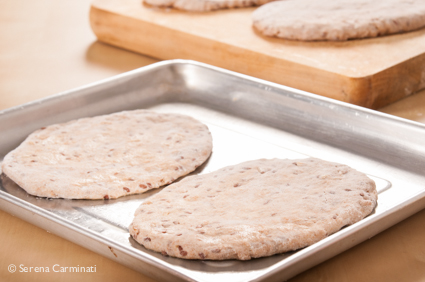
4. Let it rise for 3 to 6 hours. When the dough has doubled in volume, divide it into 4 pieces and shape them into flat breads, using a rolling pin, if necessary.
5. Lay your breads on a baking sheet lightly oiled and bake at 200 ° C (392° F) for 15 minutes.

Method (Chickpea Hummus).
1. Wash and drain the chickpeas (you can boil them for a few minutes to be safe).
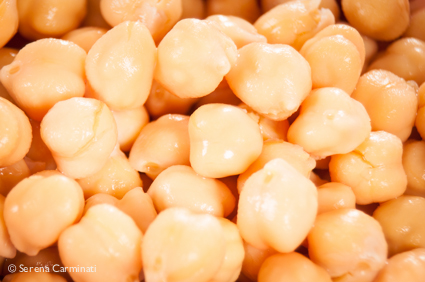
2. Using a food processor, process the chickpeas until very finely chopped with the garlic, sesame seeds and salt (for better a result, I use mortar and pestle to break the sesame seeds with just a few sea salt crystals, before putting them in the food processor)

3. Continue to process adding the lemon juice, water, and gradually the olive oil, until you have a nice creamy sauce.

4. Put the hummus in a small bowl, top with some paprika and serve with the multigrain bread.

Hummus di ceci con pane arabo ai cereali e semi di lino.
Per 4 panini piatti (tipo pita) ai cereali.
Ingredienti
70 g di farina integrale
70 g di farina integrale di farro
40 g di manitoba
90 g di lievito madre
3 cucchiaio di 6 cereali misti ( avena decorticata, orzo decorticato, farro decorticato, frumento, segale,riso integrale)
1 cucchiaio di semi di lino
1 cucchiaio di olio extravergine di oliva
1 cucchiaino di sale
1/2 cucchiaino di miele o di malto (fa lievitare meglio l’impasto e aiuta il formarsi di una bella crosta, ma é facoltativo)
acqua q b
Per l’hummus di ceci
1 scatola di ceci (240 g di ceci scolati)
1 spicchio d’aglio
Il succo di 1/2 limone
! cucchiaino di semi di sesamo tritati
qualche cristallo di sale grosso
4 cucchiai di olio extravergine d’oliva
1/ 2 bicchiere d’acqua
una spolverata di paprika
Preparazione (pane pita ai cereali).
1. Mettete a bagno in una ciotola tutti i semi, cambiando l’acqua più volte, finché non sarà completamente limpida. Lasciate i semi immersi in acqua per 6 ore.
2. Unite le farine al lievito madre, aggiungendo un po’ d’acqua e un po’ di malto (o di miele). Unite i semi all’impasto, aggiungete un cucchiaino di sale e impastate bene.
3. Aggiungete farina o acqua se necessario, l’impasto ottenuto non dovrebbe essere né troppo appiccicoso, né troppo duro e asciutto.
4. Fate lievitare dalle 3 alle 6 ore, fino a quando l’impasto sarà raddoppiato di volume.
5. Formate 4 pagnotte e stendetele su una teglia leggermente unta con olio d’oliva. Infornate a 200° C per 15 minuti.
Preparazione ( hummus di ceci).
1. Lavate e scolate i ceci (potete anche bollirli per qualche minuto, per sicurezza). Frullate i legumi molto finemente con l’aglio, i semi di sesamo e il sale (per un risultato migliore, uso prima un mortaio per sbriciolare i semi di sesamo con qualche cristallo di sale grosso e poi li metto con il resto degli ingredienti nel tritatutto).
2. Continuate a frullare e aggiungete il succo di mezzo limone, l’acqua e in fine l’olio molto gradualmente, fino ad ottenere una crema.
3. Mettete l’hummus in una ciotola, aggiungete una spolverata di paprika e servite con il pane ancora cado.

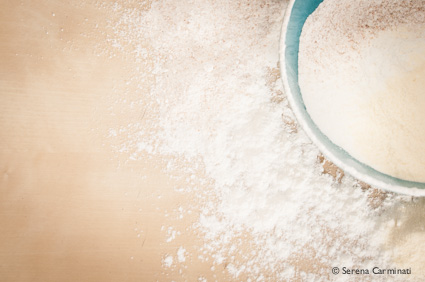
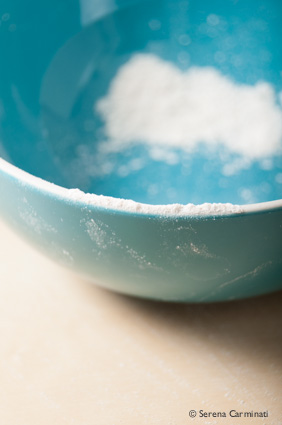
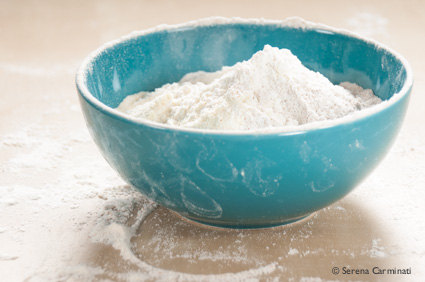
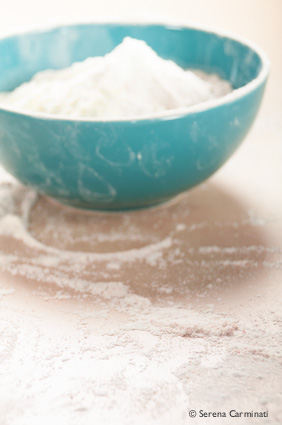
Understanding flour strength.
In Italy, flour strength is indicated by a number followed by W. The W number is usually not indicated on the packaging of the product you buy at the supermarket. it’s possible to understand the strength of a flour by looking at the protein content indicated on the packaging.

Below you will find some reference data that might help you to understand the relationship between protein, flour strengths ![]() and their uses.
and their uses.
|
|
|
|
|
|
|
|
|
|
|
|
|
|
|
|
|
|
|
|
|
|
|
|
|
|
|
The data shown here was taken from the teaching material of the Cereal Technology Course at Parma University (Italy), courtesy of Prof. Franco Antoniazzi.
Guida alle farine.
Capire la forza delle farine.
In Italia, la forza della farina si indica con un numero seguito da W. Nella confezione al supermercato non troverete questi parametri riportati sulla confezione. E’ possibile però farsi un’idea sulla forza di panificazione della farina leggendo le percentuali di proteine riportate sulla confezione del prodotto.
In questa tabella troverete alcuni dati di riferimento per capire meglio il rapporto tra le proteine,la forza di panificazione ![]() delle farine e i loro utilizzi.
delle farine e i loro utilizzi.
|
|
|
|
|
|
|
|
|
|
|
|
|
|
|
|
|
|
|
|
|
|
|
|
|
|
|
I dati riportati nella tabella sono stati presi dal materiale didattico del corso di Tecnologia dei Cereali dell’Univeristà di Parma, per gentile concessione del Prof. Franco Antoniazzi.

Falafel is delicious middle eastern food, usually prepared with dried chickpeas or dried broad beans (fava beans). Broad bean falafel is a traditional egyptian recipe. Being rich in vegetable protein, this food is an excellent alternative to meatballs in vegetarian diet. In this recipe, I changed a few steps in order to get a little lighter dish. Falafels can be served with a yogurt and cucumber sauce, or with fresh tomato salad.

Oven-cooked broad bean falafels.
Ingredients
Serves 2-4 (16 falafel)
preparation: 20 minutes + 12 hours to soak the beans in water + 30 minutes (minimum) refrigeration
cooking time: 30 minutes
150 g (5.2 oz) dried broad beans
1 large onion
1 clove of garlic
2 tablespoons chopped fresh parsley
1 teaspoon cumin seeds (ground)
1 teaspoon coriander seeds (ground)
1 tablespoon sesame seeds (ground)
1 tablespoon wholemeal flour (or plain flour)
1 teaspoon baking powder or baking soda
3 tablespoon extra virgin olive oil
1 teaspoon salt (maybe a little less)
pepper to taste
Method.
1. Let the beans soak in a bowl overnight (12 hours, at least).. Lay a kitchen towel on a table and rub the broad beans to dry them up.

2. Put the beans in a food processor and chop finely with the onion, garlic and parsley. Add the seeds (already finely ground), flour , salt , pepper and baking powder. Mix well.


3. Place the mixture to cool for 30 minutes in the refrigerator (sometimes I leave it in the fridge for hours, I think my falafels taste even better afterwards). Form small balls with the mixture.

4. In a frying pan, heat 3 tablespoons of olive oil, then fry the balls until they are golden on all sides. Place all the falafels in a greased baking tray and cook in the oven at 170 ° C (338° F) for about 20 minutes. Serve while still warm.

Falafel di fave cotti al forno.
Ingredienti
2-4 persone (16 falafel)
Preparazione: 20 minuti + 12 ore per fare ammorbidire le fave in acqua + 30 minuti (minimo) per far riposare l’impasto nel frigo.
Cottura: 30 minuti
150 g di fave secche
1 cipolla grande
1 spicchio d’aglio
2 cucchiai di prezzemolo fresco tritato
1 cucchiaino di semi di cumino tritati
1 cucchiaino di semi di coriandolo tritati
1 cucchiaio di semi di sesamo tritati
1 cucchiaio di farina integrale (o farina normale)
3 cucchiai di olio extravergine d’oliva
1 cucchiaino di lievito in polvere o bicarbonato per uso alimentare
1 cucchiaino scarso di sale e pepe q. b.
Preparazione.
1. Lasciate le fave a bagno in una ciotola per tutta la notte. Stendete un panno sul tavolo e asciugate le fave strofinandole bene.
2. Mettete i legumi in un tritatutto e tritateli molto finemente con la cipolla, l’aglio e il prezzemolo. Aggiungete i semi ( già finemente tritati), la farina, il sale , il pepe e il lievito in polvere (o bicarbonato). Mescolate bene tutto.
3. Lasciate riposare l’impasto per almeno 30 minuti nel frigorifero ( lasciandolo riposare più a lungo, ho dei risultati anche migliori). Con l’impasto ottenuto, formate tante polpette di piccole dimensioni.
4. In una padella scaldate 3 cucchiai di olio extravergine d’oliva, poi fate soffriggere le polpette facendole dorare su tutti i lati. Quando le polpette saranno completamente dorate, mettetele in una teglia leggermente unta e fatele cuocere a 170° per 20 minuti. Servite i falafel quando sono ancora caldi.
