Tag Archives: Food photography

How To Make Sourdough (re-edited).

DSC_7382

What is sourdough?

Sourdough is a natural yeast, obtained by fermenting flour and water. It can have a solid or a liquid consistency, depending on the amount of water used to feed it. Liquid sourdough usually rises better.

I personally recommend the preparation and use of this great ingredient because it’s completely natural, therefore much healthier and more digestible than other yeasts. Sourdough can be used to make a variety of breads, pizzas, pies and cakes with surprising results. Moreover, it makes everything taste better!

Preparing the sourdough starter.

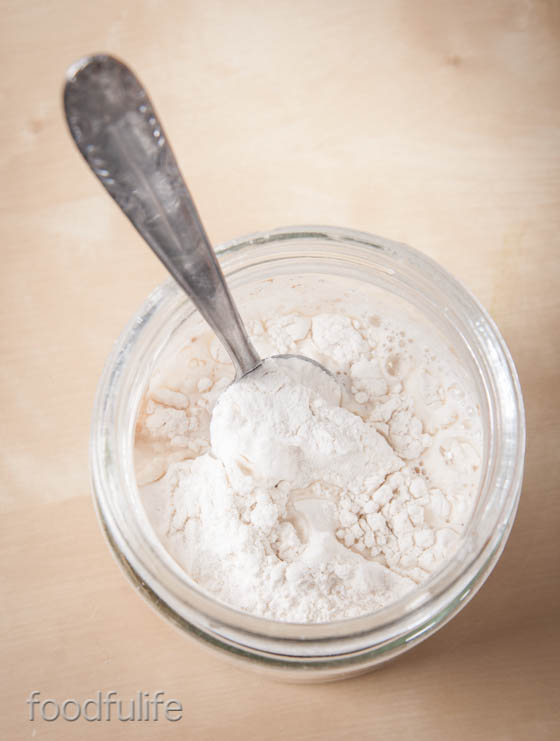
1. First you have to make a starter. Mix 1 cup of organic wholemeal flour (the wholemeal flour is necessary for the first feed) with 1/2 cup of cool water (use non-chlorinated water, you can mix tap water with still drinking water from a bottle).
Put the ingredients in a glass, stainless steel or a plastic container for food.

DSC_7335

2. Stir all the ingredients together, until creamy and smooth, then cover the container with a damp cloth and let it sit for 24 hours.

DSC_7367

DSC_7348

3. After 24 hours remove the top half of the mixture, then feed the starter again with 1 cup of plain flour (you can use manitoba, whole spelt or wholemeal flour, if you prefer) and half a cup of water. Stir well, cover with a damp cloth and let it sit for another 24 hours.

DSC_7355

DSC_7363

DSC_7367

4. Now you can start feeding the starter every two days. Repeat this process for about 10 days.

DSC_7376

5. After 10 days, you can start feeding your sourdough every 4-5 days and you can use it for your recipes.

Store the sourdough.

1. Store the sourdough in a glass jar and keep it in the fridge (with the lid on).

2. Each time you feed the sourdough let it sit for 1-2 hours at room temperature in a glass jar covered with a damp cloth (with no lid on). Then remove the cloth, close the container and put it back in the refrigerator.

DSC_7385

Doses.

1. Feed the sourdough the day before you use it (12 hours before). To feed the sourdough, weight the natural yeast, then add the same amount of  flour and half the amount of water.

2. In the quickest recipes, the ratio of flour and sourdough used must be 3 to 1. (e.g. for 900 g of flour use 300 g of sourdough).

3. The rising time of the dough will depend on the age and strength of the yeast, at first it may take 3 to 6 hours (however, when it doubles in size it is ready for use).

DSC_7378

DSC_6085

DSC_6203

La pasta madre.
La pasta madre è un lievito naturale che si ottiene facendo fermentare farina e acqua. Questo lievito può avere una consistenza più solida o liquida, a seconda della quantità d’acqua utilizzata, normalmente la versione più liquida ha una lievitazione migliore.

Consiglio vivamente la preparazione e l’utilizzo di questo ingrediente, essendo un lievito completamente naturale e quindi molto più digeribile e salutare rispetto ad altri lieviti comunemente utilizzati. Inoltre può essere usato facilmente nella preparazione di svariati tipi di pane, pizze torte salate e dolci con risultati sorprendenti.

Preparazione della pasta madre.

1. Per prima cosa, preparate un piccolo impasto unendo 1 tazza di farina integrale biologica (la farina integrale è necessaria per il primo impasto) a 1/2 tazza d’acqua fredda (utilizzate acqua con poco cloro, potete miscelare l’acqua del rubinetto con acqua minerale naturale).

2. Mettere gli ingredienti in un contenitore (è consigliabile utilizzare un contenitore di vetro oppure acciaio inossidabile, ma anche la plastica per alimenti va bene) e mescolare fino ad ottenere un composto cremoso. Coprire il contenitore con un panno umido e lasciate riposare per 24 ore.

3. Passate 24 ore, levate la parte dura in superficie e rinfrescare quello che resta del lievito, cioè aggiungete al composto 1 tazza di farina (potete utilizzare la 00, manitoba oppure farina integrale, come preferite) e mezzo bicchiere d’ acqua. Mescolare bene, coprire con un panno umido e lasciate riposare per altre 24 ore.

4. Ora potete rinfrescare il lievito ogni 2 giorni, utilizzando sempre una tazza di farina e 1/2 tazza d’acqua. Continuate con questa procedura per circa 10 giorni.

5. Dopo 10 giorni, potete incominciare a rinfrescare la pasta madre ogni 4-5 giorni. Arrivati a questo punto, la vostra pasta madre è pronta per essere utilizzata nelle vostre ricette.

La conservazione.

1. Conservate la pasta madre in un vasetto di vetro, chiuso con il coperchio e tenuto in frigorifero.

2. Dopo ogni rinfresco, lasciate riposare il lievito madre per una o due ore in un vasetto coperto da un panno umido a temperatura ambiente, poi chiudete il contenitore e rimettetelo nel frigorifero.

Le dosi consigliate.

1. Nutrite la pasta madre il giorno prima di utilizzarla (almeno 12 ore prima). Per nutrire la pasta madre, prima pesate il lievito naturale, poi aggiungere la stesso peso di farina e metà del peso di acqua.

2. Nelle ricette più rapide, il rapporto tra farina e pasta madre deve essere di 3 a 1, cioè su 900 g di farina utilizzeremo 300 g di lievito naturale.

3. Il tempo di lievitazione dipenderà dall’età e dalla forza della pasta madre. I tempi possono variare dalle 3 alle 6 ore, consiglio però di non guardare l’orologio ma di osservare il volume dell’impasto, quando raddoppia è pronto per l’uso.

Super Tasty and Healthy Rocket Pesto

The most famous Italian pesto is made with fresh basil and is a traditional Genoese dish. In Italy, however many variations exist of this lovely condiment.
My mother, for example, prepares a delicious rocket pesto made with pine nuts and Parmesan, using the plants she has in the garden. Today I am going to share this lovely recipe, but instead of pine nuts I am using a few hazelnuts, walnuts and almonds.
Pesto is a very healthy condiment that you should definitely have in your fridge.
The rocket leaves are rich in vitamin C and also contain potassium, iron, calcium and phosphorus. They have a slightly bitter peppery flavour, which I love.

DSC_7274 copy2

Tips.

1. Making pesto is very easy. Use an immersion blander and mix all the dry ingredients first and then add the extra virgin olive oil at the end. Add just a couple of tablespoons of iced water with the dry ingredients when you first use the blender, because this will cool the blades down and avoid ruining the leaves.

2. In the traditional Genoese pesto recipe we use Parmesan cheese and Pecorino Sardo. You can buy both cheeses nicely-aged, which is important because they have a distinctive strong taste. However, if you can’t find aged Pecorino Sardo you can replace it with Parmesan. Both these cheeses are quite salty, so it is very important to put just a pinch of salt in the recipe, then you can always add it at the end, if needed.

3. In order to get a creamier pesto, when you cook the pasta you can dilute your condiment with a couple of tablespoons of cooking water (the water in which the pasta is cooking), just before serving.

DSC_7259

Rocket (Arugula) Pesto.

Preparation: 10 minutes

Easy

Ingredienti

For a cup of pesto

1/2 clove of garlic

60 g (2.11 oz) rocket (arugula), washed

30 g (1.05 oz) aged Parmesan cheese, cut into small pieces

30 g (1.05 oz) aged Pecorino Sardo cheese

6 tablespoons of extra virgin olive oil

2 walnuts, shelled

2 almonds, shelled

2 hazelnuts, shelled

a pinch of salt

pepper to taste

DSC_7215

Method.

1. In a tall container, put all the ingredients, without the extra virgin olive oil.

DSC_7220

DSC_7223

2. Using an immersion blender, chop the ingredients for a few minutes, adding just a little bit of iced water to cool the blade in the process.

3. Pour in the extra virgin olive oil (a little at a time) and blend everything together, until you get a creamy mixture.

DSC_7238

4. Serve with your favourite pasta.

DSC_7278

DSC_7272-3

DSC_7307

Pesto di rucola.

Ingredienti

Preparazione: 10 minuti

Facile

Per un vasetto

1/2 spicchio d’aglio

60 g di rucola, lavata e asciugata

30 g di parmigiano reggiano (tagliato a pezzi piccoli)

30g di pecorino sardo stagionato (tagliato a pezzi piccoli)

6 cucchiai d’olio extra vergine d’oliva

2 noci, senza guscio

2 nocciole, senza guscio

2 mandorle, senza guscio

un pizzico di sale

pepe q.b.

Preparazione.

1. In un contenitore alto e stretto mettete tutti gli ingredienti, senza l’olio.

2. Usando un frullatore ad immersione, tritate per qualche minuto gli ingredienti, aggiungendo un po’ d’acqua molto fredda, per evitare che la lama si scaldi.

3. Versate anche l’olio extra vergine d’oliva nel composto (poco alla volta e continuando a tritare), fino ad ottenere una consistenza cremosa.

4. Condite la pasta e servite.

DSC_7292

New food photography portfolio

Have  you noticed some changes on Foodfulife lately? This week I have been working on the blog, adding some menus, changing the logo and updating my food photography portfolio. Take a look if you wish!

Click on the photograph below to view the gallery.

Comments are very welcome!

DSC_1084

Smoked aubergine puree with egg sauce and tomatoes.

This week I am posting a recipe elaborated and prepared by Anahita Tcheraghali, an Iranian friend. It’s a revisitation of the traditional Iranian dish “mirzà ghasemì”. The combination of egg sauce (a light hollandaise sauce) and smoked aubergines in this recipe is quite unusual and a little surprising. You might want to add a little more lemon, in my opinion the lemon helps to bring the flavours together. Overall, as I said, quite an uncommon but interesting dish, quick and easy to prepare.

Anahita prepared this dish in the most traditional way, directly on the flame, however as a healthier and safer cooking method,  you can use the oven instead.

Ingredients
Serves 4
2 medium size aubergines (eggplants)
300 g (10.58 oz) piccadilly tomatoes or cherry tomatoes
3 egg yolks
250 ml (8.45 fl oz) milk
1 clove of garlic
1 tablespoon of butter
sesame seeds, a handful
a dash of lemon juice
a pinch of ground nutmeg
salt, pepper and extra virgin olive oil to taste
1. Pierce the aubergines and put them to roast on a high heat, directly on the flame (or you can use the oven).
DSC_0118
DSC_0129
2. Peel the aubergines, add the garlic and salt, then puree the vegetables using a fork.
DSC_0151
DSC_0161
DSC_0165
3. Separately, wash, clean and cut the tomatoes, removing the seeds.
DSC_0171
4. Toast the sesame seeds for about ten minutes in a frying pan.
DSC_0142
5. In a small thick saucepan, mix the egg yolks with milk, then stir for about ten minutes over a low heat (be careful not to boil the mixture)
6. Turn off the heat. Add the butter (cut into small pieces) with salt and some nutmeg.
DSC_0178
Preparation of the dish.
1. Shape a dome with the aubergine puree and make a hole in the centre.
2. Pour the egg sauce onto the puree and onto the plate.
DSC_0189
3. Sprinkle the tomatoes (cut into small pieces) and sesame seeds on top.
4. Season with salt, pepper, a dash of lemon and a drizzle of olive oil.
DSC_0208

Purea di melanzane affumicate con crema all’uovo.

2 melanzane di media grandezza lunghe o tonde

300 g di pomodorini piccadilly o datterini

3 tuorli d’uovo

250 ml di latte

1 spicchio d’aglio

1 cucchiaio da tavola di burro

una manciata di semi di sesamo

un pizzico di noce montata

un po’ di succo di limone

olio extra vergine di oliva, sale e pepe q b

1. Forate le melanzane e mettetele ad abbrustolire su fiamma viva (oppure potete usare il forno).

2. Spellate le melanzane, aggiungete una testa d’aglio (a cui è stata tolta l’anima) ,un po’ di sale e riducetele in purea.

3. A parte, lavate, pulite e tagliate i pomodorini a dadini.

4.Tostate i semi di sesamo per una decina di minuti in una padella.

5. In un pentolino, mischiate i tuorli con il latte. Fate pastorizzare la crema a fuoco basso per una decina di minuti, senza portare a bollore.

6. Spegnete la fiamma. Aggiungere il burro a tocchetti con della noce moscata e un pizzico di sale.

Preparazione del piatto.

1. Formate una cupola con la purea di melanzane e create un buco al centro.

2. Versate la crema all’uovo prima sulla purea e poi sulla base del piatto.

3. Cospargete i pomodorini e i semi di sesamo sulla crema.

4. Condite con olio, sale, pepe e una spruzzatina di limone.

Bell peppers and onion with black background

DSC_9577

How to make a healthier hazelnut-chocolate spread in 5 easy steps!

Today we are going to prepare a healthier version of nutella-like chocolate spread. Of course, this is no low-fat spread, however, this yummy treat contains a lot of vegetable proteins, potassium, iron and calcium, so you might feel a little bit less guilty about it now…It’s very easy to prepare and, I guarantee, it’s much better than the commercial stuff!

Ingredients

for half a glass

Preparation: 20 minutes

100 g (3.52 oz) of hazelnuts

20 g (0.70 oz) dark chocolate (with 70% cocoa )

2 tablespoons of sunflower oil

2 teaspoons honey

1. Toast the hazelnuts in a frying pan over low heat for 10 minutes.

2. Using a cloth remove the skin from the hazelnuts.

DSC_1496

3. Grind the hazelnuts in a food processor, while still warm.

DSC_1502

4. Add the vegetable oil and honey, then stir.

DSC_1508

5. Melt the chocolate over a bain-marie and add it to the rest of the ingredients.

DSC_1512

DSC_1523

That’s it! Your wonderful chocolate-hazelnut spread is ready!

DSC_1543

 Crema spalmabile alle nocciole e cioccolato.

Ingredienti

per 1/2 bicchiere

100 g di nocciole

20 g di cioccolato fondente al 70%

2 cucchiai di olio di semi di girasole

2 cucchiaini di miele d’acacia

1. Fate tostare le nocciole a fiamma bassa in una padella per 10 minuti.

2. Togliete la buccia delle nocciole con l’aiuto di un panno.

3. Tritate finemente le nocciole (ancora calde) in un mixer.

4. Aggiungete l’olio di semi con il miele e mescolate.

5. Sciogliete il cioccolato a bagnomaria e unitelo al resto degli ingredienti.

La crema di cioccolato e nocciole è pronta da spalmare!

Black Pepper and Fennel Seed Shortbread Cookies.

A few weeks ago, I decided to try out some unusual flavour combinations…By chance, after spending some time experimenting in my kitchen, I discovered that pepper, fennel seeds and lemon work really well with the shortbread dough. This unusual flavour combination will shake up your taste buds so much so that they’ll be asking for more… 🙂

I am not going to say anything more about these delicious and surprising cookies…Just try them and let me know! 

Ingredients

For 24-30 cookies

100 g (3.52 oz) whole spelt flour (farro flour)

100 g (3..52 oz) plain flour

1 tablespoon honey

the grated zest of half a lemon (or 2 drops of lemon essential oil)

1/2 teaspoon fennel seeds (these actually come from my parents’ garden)

1 teaspoon peppercorns

the juice of half a lemon (small) 

100 g (3.52 oz) brown sugar, plus 1 tablespoon to add for decoration

130 g (4.58 oz) softened butter

a pinch of salt

DSC_0221

Method.

1. Grind the peppercorns and the fennel seeds using a mortar or an electric grinder and set aside.

DSC_0245

2. Separately, mix the flour with butter and then add 100 g (3.52 oz) of sugar, 1 tablespoon of honey, the grated zest and the juice of half a lemon with a pinch of salt. 

DSC_0248

DSC_0260

3. Mix until smooth, then put the dough to cool in the refrigerator for 30 minutes. 

DSC_0271

4. In a small bowl mix together the brown sugar with the ground peppercorns and fennel seeds.

DSC_0289

5. Roll out the dough and give it the desired shape. Decorate your cookies with the mixture of brown sugar, black pepper and ground fennel seeds.

DSC_0278

6. Bake for 20 minutes at 120°C (248°F) on a greased oven tray.

DSC_0280

DSC_0310

Biscotti di pasta frolla con pepe e semi di finocchio.

Ingredienti

Per 24-30 biscotti

100 g di farina di farro integrale

100 g di farina 00

1 cucchiaio di miele

la scorza grattugiata di mezzo limone, non trattato (oppure 2 gocce di olio essenziale di limone)

1/2 cucchiaino di semi di finocchio

1 cucchiaino di pepe

il succo di mezzo limone (piccolo)

100 g di zucchero di canna, più un cucchiaio da aggiungere per la decorazione

130 g di burro morbido

un pizzico di sale

Preparazione.

1. Tritate, con un pestello o un macinino elettrico, i semi di finocchio e il pepe. A parte, unite le farine al burro, poi aggiungete all’impasto 100 g di zucchero, il miele, la scorza e il succo di mezzo limone con un pizzico di sale.

2. Amalgamate bene tutti gli ingredienti fino a creare un impasto omogeneo. Lasciate raffreddare in frigorifero per 30 minuti.

3. In una piccola scodella unite un cucchiaio di zucchero di canna con il pepe e i semi di finocchio macinati. Mescolate bene.

4. Stendete l’impasto e date la forma desiderata ai biscotti. Decorate i biscotti con la miscela di zucchero di canna, pepe e semi di finocchio macinati.

5. Infornate a 120° C per 20 minuti.

Cake Design Tutorial: Silk Clutch Bag (advanced).

Some time ago I helped a friend make a cake design tutorial. Although it’s definitely not a simple one, actually quite complicated, we decided to put it online anyway. Laura made a very sleek silk clutch bag cake design and it took several pictures and steps to be able to partially explain the process. We did our best, we hope you enjoy it. Feel free to comment on this post.

If you wish to see more of Laura Barcellonio’s cake design visit her facebook page : https://www.facebook.com/pages/Cake-Deluxe/265825503502411?fref=ts

Follow us on facebook : https://www.facebook.com/Foodfulife

Silk Clutch Bag Cake

Designed by Laura Barcellonio

dsc_5137

The material used:
A chopping board and a wide, pointed knife (small size)
A pizza or pastry cutting wheel (with a straight blade)
A metal working board to use as a cut mat and a cutting knife (a scalpel)
paper, pencil and scissors
Basic kitchen tools, a silicone spatula and a food brush
Few toothpick and straws
A base for cakes (a thick cardboard coated ) and a white ribbon

For the cake:

1 kg white sugar paste for the cake, plus 500 g for the base

ivory and black food colouring, (and edible pearl food dust optional)

vanilla buttercream

A sponge or a madeira cake ( quite thick)

A few raw pieces of spaghetti

Coloring the sugar paste:

Take 1 kg of white sugar paste. Using a toothpick, start mixing some ivory food colouring with a small amount of white sugar paste. Increase the amount of white sugar paste until you get the desired colour. Take a small piece of ivory paste and add the black color (just a little) , to create a uniform grey paste.

DSC_5145

Preparation of the pieces to dry:

With the ivory paste shape and cut the handle of the bag. Make 6 grey pearls (1 cm in diameter each) and insert them, three at a time, into two small pieces of spaghetti.

 Untitled-2.4

Then shape two grey drops, just a little bit bigger than the pearls. Let all the pieces dry for about an hour.

 DSC_5172

Cake shaping technique.

Using tracing paper, draw and cut the outlines of your clutch bag. Draw the base of the bag (22 x 12 cm, considering the widest points) , and the side ( 22 x 18 cm, considering the maximum width and height),then cut out your sketches. Take the sponge cake, mark the base and cut out two equal pieces in order to overlap them.

Untitled 1

You can use part of the buttercream to make the filling. Following the outline of your drawings, cut the cake until you obtain the desired shape.

Coat crumb with plenty of butter cream and put the cake to cool in the refrigerator for 15 minutes.

Roll out some ivory paste with a rolling pin, until you have a thin sheet, then cut out a rectangular shape and place it gently over the cake.

Untitled 2.1

Cut a trapeze out of the sugar paste sheet and use the straws to calculate 9 folds. Now shape the folds with your fingers and cut out any excess paste. Brush one side of the cake with water and cover it with the sugar paste layer. Repeat this procedure to cover both sides.

Untitled-2.2

DSC_5251

Cut another two smaller trapezoids and calculate 6 folds for each piece. Shape the folds, brush the surface, and apply the trapezoids to the small sides.

Untitled-3

For the handle:

Roll out the grey sugar paste, shape a small thick sheet and cut out two narrow strips, equal in size. Moisten the part on top of the cake with water, then place and mould the strips.

Take the two pieces of spaghetti with the pearls, pierce the grey stripes and place the handle on top of the cake. Using two pieces of spaghetti place the two drops in the center (see the final picture).

Untitled-4

For roses:

Roll out a thin sheet of ivory sugar paste ( 25 cm x 10 cm). Fold the sheet in half and roll it up to shape a rose. Remove any excess paste. Pierce the back of the rose with a small piece of spaghetti and place the rose on the cake.

Untitled-5

For the base:

Roll out a large chunk of ivory paste and cover the entire base of the cake. Roll out some thin stripes of white sugar paste, then fold them to create a fabric-like effect on the base of the cake.

Use a white ribbon to cover the edges. Place the cake on top of the base and brush the surface of the clutch bag with a pearl food colour powder,  diluted in a little bit of alcohol (this step is optional).

Untitled-2.3

Some tips to keep your sourdough in good shape!

My sourdough is one year old! I keep it strong and healthy in a nice big jar in the fridge. I usually feed it once a week (or refresh it, as we say) , but the refreshment time varies depending on my needs. I’ve never had any problems with my natural yeast, however, at times, it’s possible that the yeast becomes sourer, or less responsive to leavening, therefore less active. These elements depend on many factors. There are some steps you can take to keep your sourdough in the best shape and correct any of problems. Of course, if you want a sour product, in order to let the bacteria produce acidity you have to do the opposite of what is indicated below.

To increase the leavening strength:

⁃ increase the temperature during leavening

⁃ decrease the ratio refreshments / flour

⁃ increase the ratio water / flour

⁃ increase humidity

In case of over-acidity:

⁃ change the type of flour (change microflora)

⁃ decrease the rising time

⁃ decrease ratio refreshments / flour

⁃ decrease the amount of water with the flour (to make a harder dough)

⁃ lower the temperature of the dough

DSC_7787

Some of this information belongs to the teaching material of the Cereal Technology Course at Parma University (Italy), courtesy of Prof. Franco Antoniazzi.

Come mantenere il lievito madre al meglio.

Il mio lievito madre ha un anno di vita! Lo tengo in un vasetto di vetro nel frigorifero e lo rinfresco generalmente una volta a settimana, ma a volte anche più spesso se ne uso in grandi quantità. Non ho mai avuto grossi problemi, ma è possibile che il lievito naturale a volte diventi più acido, oppure sia meno reattivo alla lievitazione, questo dipende da molti fattori. Ci sono comunque degli accorgimenti che si possono adottare per mantenere il lievito madre al meglio e correggere eventuali anomalie.

Interventi sui rinfreschi del lievito naturale.

Per aumentare la forza lievitante:

  • aumentare la temperatura di lievitazione
  • diminuire il rapporto rinfreschi/farina
  • aumentare il rapporto acqua/farina
  • aumentare l’umidità

Interventi in caso di acidità eccessiva:

  • cambiare tipo di farina (microflora diversa)
  • diminuire i tempi di lievitazione
  • diminuire i rapporti rinfreschi/farina
  • diminuire la quantità di acqua rispetto alla farina (impasto più duro)
  • abbassare le temperature degli impasti

Alcune delle informazioni riportate in questo articolo, fanno parte del materiale didattico del corso di Tecnologia dei Cereali dell’Univeristà di Parma, per gentile concessione del Prof. Franco Antoniazzi.