Tag Archives: Healthy

Vegan Menu (High In Fibre And Vegetable Protein)

This week I am inviting you to try this truly delicious vegan menu, for everyone who enjoys tasty and healthy food! Click on the pictures or links  to view all the recipes.

A lots of wonderful colours and flavours in this menu!

A menu for 2-3 servings

Home-made Hummus

DSC_7597

Insalapizza (Pizza-Salad) 

DSC_9299

Crunchy and Colourful Salad.

DSC_6693

Rich Chocolate Tart With Fresh Raspberries.

DSC_5793

Make The Best Pizza Dough ( Part 2)

I already published a basic pizza dough recipe with normal yeast a few weeks ago, this is basically the same recipe adapted for sourdough. Before getting started with the recipe, let me say a few things about sourdough.

Why sourdough?
Sourdough is a natural yeast created by fermenting flour with water. It is a long process, which is not particularly complicated, but it takes some time and care.
Basically, you create the natural yeast, then you feed it and keep it in good shape, that’s really all there is to it! In exchange, your sourdough will reward you with a lot of flavour, leavening strength and satisfaction!
Moreover, sourdough is healthier and much more digestible than commonly used yeast. Another good reason to use it is the difference in taste, as sourdough’s flavour is much more delicate and pleasant than all the other yeasts.
So, don’t give up if you haven’t tried yet, instead give it a go and you’ll see the difference, I promise you!
To get started with sourdough you can follow the step by step recipe here.

DSC_7541

Some things you have to know before you go on with the recipe:

1. The flour-sourdough ratio in recipes is usually 3 to 1 (3 parts of flour plus 1 part of sourdough). In order to prepare approximately 500 g of dough we will use 375 g of flour with 125 g of sourdough. You can use this recipe to make sourdough bread as well as pizza.

2. Semi-liquid sourdough contains a lot of water, therefore you have to add less water than in normal yeast pizza and bread recipes. My advice is to add a little bit of water gradually.

3. Sometimes it’s useful to make the dough in the evening and then keep it in the fridge with some extra water over night. The following day, take it out of the fridge two hours before you use it (knead the dough a little, then make the pizzas and let them rise for a couples of hours at room temperate). During this process the dough will rise much better and faster.

DSC_7548

Sourdough Pizza Crust.

Ingredients

For 2 large pizzas

Recipe No. 1

210 g flour 00 (or plain, unbleached all-purpuse flour)

135 g whole spelt flour

30 g durum wheat flour (semolina)

125 g sourdough (semi-liquid and made ​​with manitoba flour)

10 g salt

a pinch of barley malt (optional)

extra virgin olive oil to taste

water

Note.

If you use the sourdough starter made ​​from flour 00 (or plain, unbleached all-purpose flour) the ingredient ratio changes slightly:

Recipe No. 2

130 g flour 00 (or plain, unbleached all-purpuse flour)

135 g whole spelt flour

80 g Manitoba flour

30 g durum wheat flour (semolina)

125 g sourdough (semi-liquid and made with flour 00 of plain, unbleached all-purpuse flour)

10 g salt

a pinch of barley malt (optional)

extra virgin olive oil to taste

water

Method.

1. Sift and mix the flour on a wooden board or a large bowl (use a fine sieve). Mix the flour with the sourdough and a little bit of water. Add the salt and, if you want, you can also add 2 tablespoons of extra virgin olive oil with a pinch of malt.

DSC_7477-2

2. knead vigorously, until you get an elastic dough. Let the dough rise in a sheltered place for 3-6 hours (the rising time varies depending on different factors, the dough is ready when it has doubled in volume).

DSC_7487

DSC_7490

3. Take two large oven trays, cover them with baking paper and brush them with plenty of extra virgin olive oil. Roll out the dough with a rolling pin, make two pizza bases and then add the other ingredients (I am going to make a pizza with mozzarella cheese and crescenza, a nice sweet and creamy Italian cheese)

DSC_7509

DSC_7512

DSC_7519

4. Let the pizzas rise for about 1 hour, then bake in a preheated oven at 190° (374°F) for 20-30 minutes.

DSC_7533

DSC_7555

Impasto base per la pizza con lievito madre.

Ingredienti

2 pizze grandi

Ricetta n°1

210 g di farina 00

135 g di farina di farro integrale

30 g di semola rimacinata

125 g di lievito madre (semiliquido, a base di farina manitoba)

acqua q. b.

10 g di sale

pochissimo malto d’orzo (facoltativo)

olio extra vergine d’olio d’oliva q. b.

Nota.

Se usate il lievito madre a base di farina 00 gli ingredienti variano leggermente:

Ricetta n° 2

130 g di farina 00

135 g di farina di farro integrale

80 g di farina manitoba

125 g di lievito madre (semiliquido con base di farina 00)

30 g di semola rimacinata

10 g di sale

acqua q. b.

pochissimo malto d’orzo (facoltativo)

olio extra vergine d’olio d’oliva q. b.

Metodo.

1. Mescolate, setacciate le farine e sistematele a fontana su una spianatoia o mettetele in una ciotola grande. Unite il lievito madre alla farina con un po d’acqua. Mescolate leggermente, poi aggiungere il sale con cucchiai d’ olio extra vergine di oliva e un pizzico di malto, se desiderate aggiungerli.

2. Lavorate energicamente gli ingredienti, fino ad ottenere un impasto omogeneo ed elastico. Lasciate lievitare l’impasto in un luogo riparato per 3-6 ore (il tempo di lievitazione varia a seconda di diversi fattori, l’impasto è pronto quando sarà raddoppiato di volume).

3. Prendete due teglie grandi, ricopritele con carta da forno e spennellatele con abbondante olio extra vergine d’oliva. Stendete la pasta con un matterello e fate due basi per pizza, poi aggiungere gli altri ingredienti (in questo caso faremo una pizza bianca con crescenza e mozzarella).

4. Lasciate lievitare le pizze per circa 1 ora, poi fate cuocere a 190° C in forno preriscaldato per 20-30 minuti (dipende dallo spessore della pasta).

DSC_7558

How To Make Sourdough (re-edited).

DSC_7382

What is sourdough?

Sourdough is a natural yeast, obtained by fermenting flour and water. It can have a solid or a liquid consistency, depending on the amount of water used to feed it. Liquid sourdough usually rises better.

I personally recommend the preparation and use of this great ingredient because it’s completely natural, therefore much healthier and more digestible than other yeasts. Sourdough can be used to make a variety of breads, pizzas, pies and cakes with surprising results. Moreover, it makes everything taste better!

Preparing the sourdough starter.

1. First you have to make a starter. Mix 1 cup of organic wholemeal flour (the wholemeal flour is necessary for the first feed) with 1/2 cup of cool water (use non-chlorinated water, you can mix tap water with still drinking water from a bottle).
Put the ingredients in a glass, stainless steel or a plastic container for food.

DSC_7335

2. Stir all the ingredients together, until creamy and smooth, then cover the container with a damp cloth and let it sit for 24 hours.

DSC_7367

DSC_7348

3. After 24 hours remove the top half of the mixture, then feed the starter again with 1 cup of plain flour (you can use manitoba, whole spelt or wholemeal flour, if you prefer) and half a cup of water. Stir well, cover with a damp cloth and let it sit for another 24 hours.

DSC_7355

DSC_7363

DSC_7367

4. Now you can start feeding the starter every two days. Repeat this process for about 10 days.

DSC_7376

5. After 10 days, you can start feeding your sourdough every 4-5 days and you can use it for your recipes.

Store the sourdough.

1. Store the sourdough in a glass jar and keep it in the fridge (with the lid on).

2. Each time you feed the sourdough let it sit for 1-2 hours at room temperature in a glass jar covered with a damp cloth (with no lid on). Then remove the cloth, close the container and put it back in the refrigerator.

DSC_7385

Doses.

1. Feed the sourdough the day before you use it (12 hours before). To feed the sourdough, weight the natural yeast, then add the same amount of  flour and half the amount of water.

2. In the quickest recipes, the ratio of flour and sourdough used must be 3 to 1. (e.g. for 900 g of flour use 300 g of sourdough).

3. The rising time of the dough will depend on the age and strength of the yeast, at first it may take 3 to 6 hours (however, when it doubles in size it is ready for use).

DSC_7378

DSC_6085

DSC_6203

La pasta madre.
La pasta madre è un lievito naturale che si ottiene facendo fermentare farina e acqua. Questo lievito può avere una consistenza più solida o liquida, a seconda della quantità d’acqua utilizzata, normalmente la versione più liquida ha una lievitazione migliore.

Consiglio vivamente la preparazione e l’utilizzo di questo ingrediente, essendo un lievito completamente naturale e quindi molto più digeribile e salutare rispetto ad altri lieviti comunemente utilizzati. Inoltre può essere usato facilmente nella preparazione di svariati tipi di pane, pizze torte salate e dolci con risultati sorprendenti.

Preparazione della pasta madre.

1. Per prima cosa, preparate un piccolo impasto unendo 1 tazza di farina integrale biologica (la farina integrale è necessaria per il primo impasto) a 1/2 tazza d’acqua fredda (utilizzate acqua con poco cloro, potete miscelare l’acqua del rubinetto con acqua minerale naturale).

2. Mettere gli ingredienti in un contenitore (è consigliabile utilizzare un contenitore di vetro oppure acciaio inossidabile, ma anche la plastica per alimenti va bene) e mescolare fino ad ottenere un composto cremoso. Coprire il contenitore con un panno umido e lasciate riposare per 24 ore.

3. Passate 24 ore, levate la parte dura in superficie e rinfrescare quello che resta del lievito, cioè aggiungete al composto 1 tazza di farina (potete utilizzare la 00, manitoba oppure farina integrale, come preferite) e mezzo bicchiere d’ acqua. Mescolare bene, coprire con un panno umido e lasciate riposare per altre 24 ore.

4. Ora potete rinfrescare il lievito ogni 2 giorni, utilizzando sempre una tazza di farina e 1/2 tazza d’acqua. Continuate con questa procedura per circa 10 giorni.

5. Dopo 10 giorni, potete incominciare a rinfrescare la pasta madre ogni 4-5 giorni. Arrivati a questo punto, la vostra pasta madre è pronta per essere utilizzata nelle vostre ricette.

La conservazione.

1. Conservate la pasta madre in un vasetto di vetro, chiuso con il coperchio e tenuto in frigorifero.

2. Dopo ogni rinfresco, lasciate riposare il lievito madre per una o due ore in un vasetto coperto da un panno umido a temperatura ambiente, poi chiudete il contenitore e rimettetelo nel frigorifero.

Le dosi consigliate.

1. Nutrite la pasta madre il giorno prima di utilizzarla (almeno 12 ore prima). Per nutrire la pasta madre, prima pesate il lievito naturale, poi aggiungere la stesso peso di farina e metà del peso di acqua.

2. Nelle ricette più rapide, il rapporto tra farina e pasta madre deve essere di 3 a 1, cioè su 900 g di farina utilizzeremo 300 g di lievito naturale.

3. Il tempo di lievitazione dipenderà dall’età e dalla forza della pasta madre. I tempi possono variare dalle 3 alle 6 ore, consiglio però di non guardare l’orologio ma di osservare il volume dell’impasto, quando raddoppia è pronto per l’uso.

Super Tasty and Healthy Rocket Pesto

The most famous Italian pesto is made with fresh basil and is a traditional Genoese dish. In Italy, however many variations exist of this lovely condiment.
My mother, for example, prepares a delicious rocket pesto made with pine nuts and Parmesan, using the plants she has in the garden. Today I am going to share this lovely recipe, but instead of pine nuts I am using a few hazelnuts, walnuts and almonds.
Pesto is a very healthy condiment that you should definitely have in your fridge.
The rocket leaves are rich in vitamin C and also contain potassium, iron, calcium and phosphorus. They have a slightly bitter peppery flavour, which I love.

DSC_7274 copy2

Tips.

1. Making pesto is very easy. Use an immersion blander and mix all the dry ingredients first and then add the extra virgin olive oil at the end. Add just a couple of tablespoons of iced water with the dry ingredients when you first use the blender, because this will cool the blades down and avoid ruining the leaves.

2. In the traditional Genoese pesto recipe we use Parmesan cheese and Pecorino Sardo. You can buy both cheeses nicely-aged, which is important because they have a distinctive strong taste. However, if you can’t find aged Pecorino Sardo you can replace it with Parmesan. Both these cheeses are quite salty, so it is very important to put just a pinch of salt in the recipe, then you can always add it at the end, if needed.

3. In order to get a creamier pesto, when you cook the pasta you can dilute your condiment with a couple of tablespoons of cooking water (the water in which the pasta is cooking), just before serving.

DSC_7259

Rocket (Arugula) Pesto.

Preparation: 10 minutes

Easy

Ingredienti

For a cup of pesto

1/2 clove of garlic

60 g (2.11 oz) rocket (arugula), washed

30 g (1.05 oz) aged Parmesan cheese, cut into small pieces

30 g (1.05 oz) aged Pecorino Sardo cheese

6 tablespoons of extra virgin olive oil

2 walnuts, shelled

2 almonds, shelled

2 hazelnuts, shelled

a pinch of salt

pepper to taste

DSC_7215

Method.

1. In a tall container, put all the ingredients, without the extra virgin olive oil.

DSC_7220

DSC_7223

2. Using an immersion blender, chop the ingredients for a few minutes, adding just a little bit of iced water to cool the blade in the process.

3. Pour in the extra virgin olive oil (a little at a time) and blend everything together, until you get a creamy mixture.

DSC_7238

4. Serve with your favourite pasta.

DSC_7278

DSC_7272-3

DSC_7307

Pesto di rucola.

Ingredienti

Preparazione: 10 minuti

Facile

Per un vasetto

1/2 spicchio d’aglio

60 g di rucola, lavata e asciugata

30 g di parmigiano reggiano (tagliato a pezzi piccoli)

30g di pecorino sardo stagionato (tagliato a pezzi piccoli)

6 cucchiai d’olio extra vergine d’oliva

2 noci, senza guscio

2 nocciole, senza guscio

2 mandorle, senza guscio

un pizzico di sale

pepe q.b.

Preparazione.

1. In un contenitore alto e stretto mettete tutti gli ingredienti, senza l’olio.

2. Usando un frullatore ad immersione, tritate per qualche minuto gli ingredienti, aggiungendo un po’ d’acqua molto fredda, per evitare che la lama si scaldi.

3. Versate anche l’olio extra vergine d’oliva nel composto (poco alla volta e continuando a tritare), fino ad ottenere una consistenza cremosa.

4. Condite la pasta e servite.

DSC_7292

Salmon with lime and balsamic vinaigrette

I must admit, I came across the salmon-balsamic vinegar combination totally by accident. I was trying out a new dish that went horribly wrong, when I dropped some balsamic vinegar on a piece of salmon by mistake…Yes, in my kitchen these kind of things can happen! 🙂

DSC_6967

Anyway, I loved it! So I changed the recipe completely and I made a light balsamic vinaigrette as a salmon dressing. I know it is not a new combination, but it was the first time for me.
I love the way in which the balsamic vinegar aroma enhances the natural sweetness of salmon without covering its delicate flavour. The aniseed-tinged wild fennel leaves add a note of distinctive freshness to the recipe. If you can’t find wild fennel, you can use normal fennel leaves, they are probably a little bit easier to get and very similar in taste.

DSC_6993

Salmon with lime and balsamic vinaigrette.

Preparation: 15 minutes

Ingredients

For 2 servings

2 salmon steaks

1 lime

a few sprigs of fresh wild fennel, washed

6 radishes, washed

a stalk of celery, washed

for the balsamic vinaigrette

2 tablespoons of extra virgin olive oil

2 tablespoons of balsamic vinegar

a few drops of lime juice

Black pepper and salt to taste

DSC_6873

DSC_6883

DSC_6910

Method

1. Wash and cut a lime into thin slices, then put a few slices on top of the salmon, with a sprig of wild fennel.

DSC_6924

2. Steam the salmon steaks for 8-10 minutes.

3. Place the salmon steaks on the plates, garnish with a few radishes and the celery, both finely sliced. Then, add some wild fennel leaves (roughly chopped).

DSC_6978

For the vinaigrette.

1. Mix 2 tablespoons of extra virgin olive oil with 2 tablespoons of balsamic vinegar, a few drops of lime juice, salt and pepper to taste.

DSC_6943

2. Serve with the vinaigrette on the side.

DSC_6961

DSC_7011

Salmone con lime e aceto balsamico vinaigrette.

Preparation: 15 minutes

Ingredienti

Per due persone

2 tranci di salmone

1 lime intero

6 ravanelli, lavati

un gambo di sedano, lavato

qualche rametto di finocchio selvatico, lavato

Per la vinaigrette di aceto balsamico

2 cucchiai di olio extra vergine d’oliva

2 cucchiai di aceto balsamico

qualche goccia di succo di lime

Pepe e sale q.b.

Preparazione.

1. Lavate e tagliate un lime a fette molto sottili. Mettete le fette di lime sul salmone, con qualche rametto di finocchio selvatico.

2. Fate cuocere a vapore i tranci di salmone per 8-10 minuti.

3. Disponete il salmone sui piatti, guarnite ogni piatto con tre ravanelli tagliati a fette molto sottili e con un gambo di sedano tagliato alla julienne.

Per la vinaigrette.

1. Mescolate 2 cucchiai di olio extravergine d’oliva con 2 cucchiai di aceto balsamico, qualche goccia di succo di lime, sale e pepe.

2. Servite il salmone con il condimento a parte.

DSC_7021

DSC_6958

Crunchy and Colourful Salad (Low-fat And Packed With Vitamin C!!)

Spring is here and with it comes the time of serious dieting! From this week on I want to dedicate a little time to preparing light recipes and meals.
To start with, I prepared a beautiful and super-healthy salad with only a little amount of calories, but full of crunchy flavours!

DSC_6721

This salad can definitely be a very satisfying low-cal lunch, low in fat and carb, but rich in fibres, potassium, protein and vitamin C.
As a side dish, it goes well with several courses and you can serve it with feta cheese, if you prefer a richer kind of salad.
If I were to imagine this salad as a dress, it would be a feel-good garment made ​​of a strong natural fibre, with a very cheerful but elegant floral pattern. Suitable for mid-season, with a comfortable slimming line. Definitely a perfect fit!… I know, It’s just a salad! 🙂

Corn salad with red cabbage, fava beans and apples.

Ingredients

Preparation: 15 minutes

For 2 servings

60 g (2 oz) corn salad (or lamb’s lettuce)

a handful of almonds, shelled

50 g (1.76 oz) fresh fava beans (with the pods removed)

2 small apples, washed

130 g (4.58 oz) red cabbage

the juice of 1/2 a lemon

salt and pepper to taste

4 tablespoons of extra virgin olive oil to taste

DSC_6693

Method.

1. Wash, and clean and dry the corn salad.

2. Wash, and slice the cabbage finely and arrange it on the plates.

3. Place the fava beans over the cabbage, then add the salad leaves.

DSC_6668

4. Cut and marinate the apples in the juice of half a lemon for a few minutes. Then, mix the apples and the almonds with the salad (breaking some almonds into pieces).

DSC_6673

DSC_6680

DSC_6724

5. Season with plenty of extra virgin olive oil, salt and pepper.

DSC_6709

DSC_6742

Insalata croccante con cavolo rosso, fave e valerianella.

Ingredienti

Per 2 persone

Preparazione:15 minuti

60 g di valerianella

una manciata di mandorle sgusciate

50 g di fave fresche, senza scorza

2 mele, lavate

130 g di cavolo rosso

il succo di mezzo limone

sale e pepe q.b.

4 cucchiai di olio extravergine d’oliva q.b.

Preparazione.

1. Lavate e asciugate la valerianella.

2. Lavate il cavolo e tagliatelo finemente. Sistematelo sul fondo dei piatti.

3. Aggiungete le fave, posizionatele sopra il cavolo con la valerianella.

4. Aggiungete le mandorle (sbriciolandone solo alcune) con le mele tagliate a pezzetti e precedentemente marinate nel succo di mezzo limone per qualche minuto.

5. Condite con abbondante olio extra vergine d’oliva, sale e pepe.

Mom’s Amazing Salted Cod Recipe

First of all, I shall introduce this recipe explaining that salted and dried cod (Baccalà and Stoccafisso) are both very popular in Genoa, where I live. We use them in many traditional dishes, although they are widely used in several countries, I know. Both these cod require some care in the process, but they are very healthy and versatile.

This weekend I had the great pleasure to try a lovely salted-cod recipe, prepared by my mother, who was extremely enthusiastic about it.  It is indeed a delicious dish, full of flavour but also quite delicate, despite the fact that salted cod usually has quite a strong and distinctive taste; so we decided to publish it on Foodfulife. I must admit, I am so excited to share one of my mom’s wonderful recipes with you this week!!!!!

Tips.

1. Salted cod is cod preserved in salt. The salt used to preserve the fish should have been completely removed when you buy it, however, it’s better to check the fish. You can always remove the excess salt by soaking the cod in water overnight ( in the fridge), before preparing the recipe.

2. Use two large frying pans, wide enough to contains all the fish, which will be moved from one pan to the other during the cooking process. Always lay the fish skin-side down, to avoid breaking it.

3. If you wish, you can replace salted cod with swordfish and monkfish, all of these fish are well suited for this recipe.

DSC_6529

Mom’ s Baccalà With Tasty Tomato Sauce

Preparation 10 minutes

Cooking 20 minutes

Ingredients

4 tablespoons extra virgin olive oil for the sauce and extra oil (also use extra virgin olive oil) for frying the fish

1/2 medium size red onion, finally chopped

1 clove of garlic, finely crushed

1 tablespoon fresh chopped parsley

1 anchovy

800 g (28.2 oz) salted cod

1 tablespoon salted capers

5 pickled green olives

5 pickled black olives

1/2 tablespoon of tomato paste

2 cups Italian passata (Italian tomato puree in glass jars)

Flour for dusting

Salt and pepper to taste (salt only if necessary)

Method

1. Fry the onion, parsley and anchovy in 4 tablespoons of extra virgin olive oil. When the onion is almost golden add the garlic. After a few minutes, add the capers and all the olives with tomato paste and the passata, stir well and lower the heat.

DSC_6510

2. Separately, cut the salted cod into thick slices (leave the skin on) and remove the bones.

DSC_6535

3. Flour the pieces of cod and then fry them in a large pan with plenty of extra virgin olive oil until golden.

DSC_6555

4. Using a pair of kitchen tongs, place the fried fish in tomato sauce (prepared in step 1) and then cook for about 10 minutes. While cooking, season the top of the fish using a spoon (during this process do not flip the fish, to avoid breaking it).

DSC_6564

DSC_6571

DSC_6579-2

5. Turn off the heat and season with salt and pepper (salt only if necessary). Cover with a lid, let it sit for a few minutes and then serve.

DSC_6585-2

The cod was served with a huge salad and some amazing wholemeal bread, made with a lot of tasty seeds! Lovely!!!

DSC_6604

DSC_6609

I only wish I took better photographs for this recipe…But I didn’t have the proper equipment with me and It wasn’t easy to work with my mother cooking/complaining in the kitchen…Believe me!!!  🙂 When she cooks she gets really nervous! :-)))

DSC_6592

Baccalà al sugo saporito della mamma.

Preparazione 10 minuti

Cottura 20 minuti

Ingredienti

4 cucchiai di olio d’oliva per la salsa e extra olio (sempre olio extra vergine d’oliva) per friggere

1/2 cipolla rossa, tritata finemente

1 spicchio d’aglio tritato

1 cucchiaio di prezzemolo fresco tritato

1 acciuga sott’olio

800 g di baccalà

1 cucchiaio di capperi sotto sale

5 olive verdi

5 olive nere

1/2 cucchiaio di concentrato di pomodoro

1 bicchiere grande di passata di pomodoro

Farina q.b. per infarinare

Sale e pepe q. b. (sale solo se è necessario)

Preparazione.

1. Fate soffriggere la cipolla, il prezzemolo e l’acciuga con 4 cucchiai d’olio extra vergine d’oliva. Poco dopo aggiungete anche l’aglio (giusto per non farlo bruciare). Dopo qualche minuto, unite al soffritto i capperi, tutte le olive, il concentrato di pomodoro e la passata. Mescolate bene il sugo e abbassate il fuoco.

2. A parte, tagliate il baccalà a tranci (con la pelle) e levate le lische.

3. Infarinate i pezzi di baccalà e fateli friggere in padella con abbondante olio extra vergine d’oliva. Lasciate dorare.

4. Usando delle pinze da cucina, mettete tutto il pesce nel sugo saporito al pomodoro che abbiamo preparato, appoggiandolo delicatamente dalla parte della pelle.  Fate cuocere ancora per qualche minuto, non girando il pesce per evitare di romperlo (condite aiutandovi con un cucchiaio).

5. Spegnete il fuoco e aggiungete il sale e il pepe (il sale solo se necessario). Lasciate riposare per qualche minuto e poi servite.

Rich Chocolate Tart with Fresh Raspberries…Yes, but it’s different!

Vegan, dairy-free, gluten-free, egg-free, with only a little refined sugar and absolutely delicious!!!!

I must admit I was a little bit sceptical about vegan desserts, I thought that without dairy products, desserts would just taste dull! So I decided to give it a try and make this vegan chocolate tart, because I usually like to try things before I make a judgement, especially when I am talking about recipes. I am glad to say that I was wrong! I might even dedicate an entire post to the lovely vegan chocolate ganache that I’ve made for this recipe, because I think it deserves a little place on its own in this blog and a few more words given over to it.

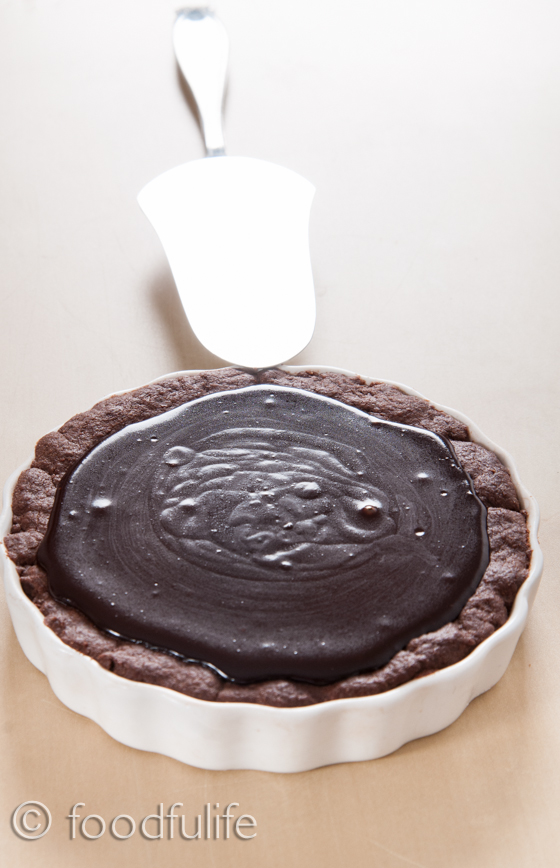
So, today we are going to prepare a delicious mini chocolate tart with a lot of fresh raspberries on top! As a filling, I made a rich dark chocolate ganache. Usually, the chocolate ganache is prepared with heavy whipping cream or butter, I used rice milk instead and I thickened the sauce with a little cornstarch. The result is a velvety smooth chocolate filling that contains little refined sugar and is dairy-free.

This is an amazing vegan dessert that everyone can enjoy!

DSC_5795

DSC_5793

Rich Chocolate Tart with Fresh Raspberries

 Ingredients

For the pastry

2-3 servings. 

50 g (1.7 oz) skinless almonds (or hazelnuts, if you prefer)

60 g (2 oz) dark chocolate (organic, with 70% cocoa solids)

60 g (2 oz) rice flour

30 g (1 oz) of potato starch

1/2 teaspoon of baking powder

2 tablespoons of sunflower oil

1 tablespoon of agave syrup (or 1 tablespoon of honey, if you are not on a vegan diet)

a pinch of salt

For the dark chocolate ganache 

60 g (2 oz) of dark chocolate (organic, 70 % cocoa)

100 ml (3.38 fl oz US, 0.175 pt UK) rice milk (replace with soya or almond milk, if you prefer)

1 tablespoon of agave syrup (or 2 tablespoon of honey, if you are not on a vegan diet)

1/2 a tablespoon of cornstarch

To garnish

100 g (3.5 oz) raspberries, fresh and washed

a few chocolate chips

DSC_5601

Method. 

For the pastry. 

Preparation: 20 minutes

Cooking: 15 minutes

1. In a double boiler (bain-marie), melt 60 g (2 oz) of dark chocolate.

DSC_5626

2. Finely grind the almonds using a food processor, until you get a fine paste.

DSC_5619

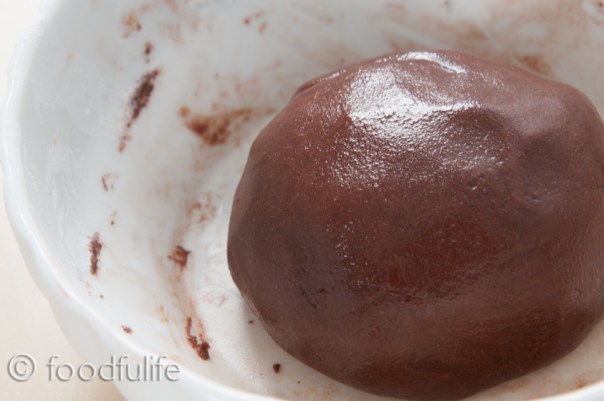
3. In a small bowl, sift the flour and the potato starch using a fine strainer. Then, mix in the melted chocolate, the almond paste, 1/2 a teaspoon of baking powder, a pinch of salt, 2 tablespoons of sunflower oil and 1 tablespoon of agave syrup (or 1 tablespoon of honey).

DSC_5630

4. Place the dough in the refrigerator for 15 minutes.

DSC_5632

5. Lightly grease the base of a small cake pan (15-17 cm or 6 – 7 inches of diameter) and bake at 170 ° C (338° F) for about 15 minutes.

DSC_5643

For the chocolate ganache.

Preparation: 20 minutes

1. In a double boiler (or bain-marie), melt 60 g (2 oz) of dark chocolate.

2. In a small pan, heat 100 ml (3.38 fl oz US) of rice milk and add it (gradually and stirring) to the melted chocolate (both must be warm).

DSC_5639

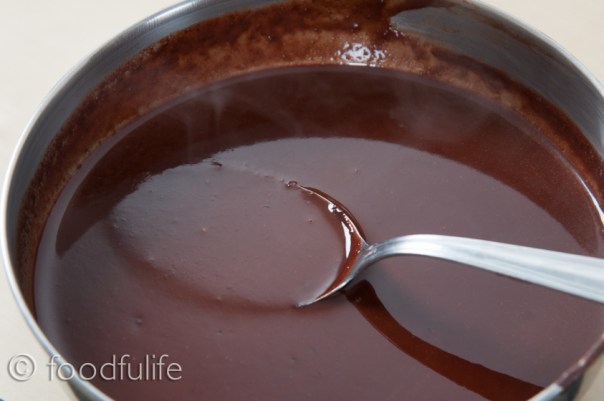
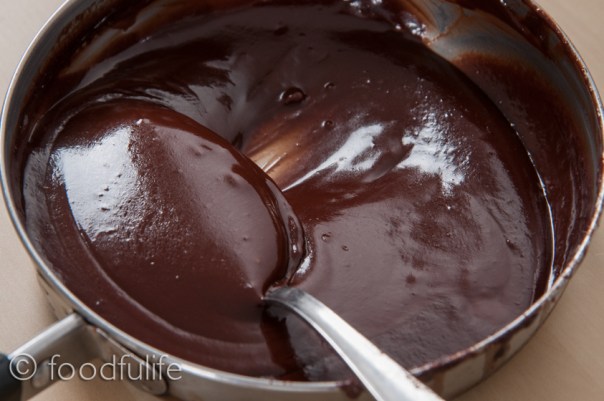
3. In another pan, mix 1/2 a tablespoon of cornstarch with 1 tablespoon of the chocolate mixture and stir well. Gradually add the rest of the chocolate mixture, then cook over a low heat and stir until the chocolate ganache has thickened (it will take only a few minutes).

DSC_5646

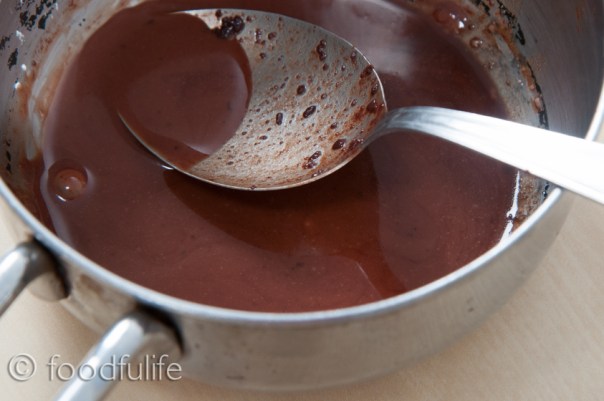
4. Turn off the heat, add 1 tablespoon of agave syrup (or 2 tablespoon of honey) and mix well. Let cool.

DSC_5650

To garnish.

Refrigeration: 30 minutes

1. Pour the chocolate ganache into the base of the tart, then put the cake in the refrigerator for about 30 minutes.

DSC_5689

2. Garnish with plenty of raspberries and some chocolate chips.

DSC_5698

DSC_5794

DSC_5800

DSC_5808

 Crostata di lamponi con ganache di cioccolato fondente.

Ingredienti

Per la base.

2-3 porzioni.

50 g di mandorle, senza pelle (oppure nocciole, se preferite)

60 g di farina di riso

30 g di fecola di patate

60 g di cioccolato fondente bio ( con 70% di cacao)

1/2 cucchiaino di lievito per torte

2 cucchiai di olio di semi di girasole

1 cucchiaio di sciroppo d’agave (oppure 1 cucchiaio di miele bio, se non seguite una dieta vegana)

un pizzico di sale

Per la ganache al cioccolato fondente

100 ml di latte di riso (oppure latte di mandorle, soia o latte normale)

1 cucchiaio di sciroppo d’agave (oppure 2 cucchiai di miele bio, se non seguite una dieta vegana)

60 g di cioccolato fondente bio (con 70% di cacao)

1/2 cucchiaio di amido di mais

Per guarnire

100 g di lamponi (freschi e ben lavati)

un po’ di scaglie di cioccolato per decorare

Preparazione.

Per la base.

1. Fate sciogliere 60 g di cioccolato fondente a bagnomaria.

2. Tritate molto finemente le mandorle usando un tritatutto.

3. In una terrina, setacciate la farina e la fecola di patate usando un colino molto fine. Aggiungete il cioccolato sciolto, la pasta di mandorle, il lievito per dolci, un pizzico di sale, due cucchiai d’olio di semi di girasole e 1 cucchiaio di sciroppo d’agave (oppure 1 cucchiaio di miele).

4. Impastate bene e mettete in frigo per 15 minuti.

5. Ungete leggermente la base di una piccola teglia (15-16 cm di diametro) e infornate a 170° per 15 minuti.

Per la ganache al cioccolato.

1. Fate sciogliere 60 g di cioccolato fondente a bagnomaria.

2. Scaldate 100 ml di latte di riso in un pentolino e unitelo al cioccolato ancora caldo, mescolando bene.

3. In un altro pentolino, unite una piccola quantità di latte di riso al cioccolato con mezzo cucchiaio di amido di mais (mescolando energicamente). In modo molto graduale, aggiungete tutto il latte al cioccolato, poi fate rassodare la ganache sul fuoco a fiamma bassa, per qualche minuto (continuando a mescolare).

4. Spegnete il fuoco e aggiungete 1 cucchiaio di sciroppo d’agave (oppure 2 cucchiai di miele). Mescolate ancora, poi lasciate raffreddare.

 Per guarnire.

1. Versate la crema sulla base della crostata e mettete in frigorifero per 30 minuti.

2. Guarnite con un doppio strato di lamponi e scaglie di cioccolato.

Gluten-free Buckwheat Gnocchi (Step by Step)

I adore gnocchi! Gnocchi with pesto has been my favourite pasta dish since I was a kid. In Italy there are numerous variations of this wonderful pasta, some of which are really colourful and tasty. Today we are going to prepare a gluten-free version made with buckwheat flour. This flour might be a little expensive, but I decided to use it because of the benefits that introducing gluten-free meals in our every-day diet have. Even though I don’t have intolerances or allergies, but also because I think it’s delicious. Of course, it is also a good alternative to traditional gnocchi for celiac people.

DSC_4831

 A few words about Buckwheat. 

Buckwheat is related to sorrel, knotweed and rhubarb. The seeds are fruit seeds, not cereals, very similar to sunflower seeds, and with a distinctive triangular shape. They are rich in protein, important minerals ( iron, phosphorus, zinc, selenium and potassium.) and vitamins B. Buckwheat is normally used in flour or grains. The flour is very tasty and perfect for pasta recipes, in fact, in Italy it is widely used in many traditional dishes.

DSC_4890

Ingredients

Preparation: 25 minutes

Potatoes Cooking time: 15-20 minutes + time to cool

Gnocchi Cooking time: 5 minutes

Serves 4-5

1 kg (35.2 oz) large potatoes

200 g (7.05 oz) buckwheat flour (and a little bit more for dusting)

50 g  (1.76 oz) potato starch

salt to taste

 Tools 

wooden board or table

A large pan (with a steaming basket  or you can use a steamer if you prefer this cooking method)

a large sieve (to sift the flour)

potato ricer (or a potato masher)

a knife

a fork (or a gnocchi board)

DSC_4828

 Method

1.Wash, then steam or boil the potatoes for 15-20 minutes (if you boil, put them in cold salted water and then, bring to the boil). Mash the potatoes and let cool. Once they have cooled down, add the flour and starch (previously sifted and mixed).

DSC_4863

DSC_4864

2. Combine all the ingredients, add some salt and work until you get a soft and smooth dough (adding some flour, if necessary).

DSC_4871

3. Dust the board, then divide the dough into 4-5 equal pieces and roll each piece into long ropes (the ropes should be 1,5 cm [0.39 uk inches] high). Cut each rope into small pieces (3 cm [ 1.18 uk inches] long and 1,5 cm [ 0.39 uk inches] high).

DSC_4878

DSC_4882

4. Use a fork to indent the gnocchi by pressing the centre and roll each piece on the fork (watch the video below) , in this way the gnocchi will absorb the condiment better.

DSC_1055

DSC_1060

Watch the video:

5. Add more flour to prevent the gnocchi from sticking together and lay them a little apart from each other on a table, previously covered with clean kitchen cloths (I used a plate because I prepared only one portion). Cook as soon as possible.

DSC_4965

 Tips.

Boil in plenty of salted water for a few minutes. Once they rise, gently drain and season as you prefer (serve these wonderful gnocchi with pesto or with a nice tomato sauce. If you don’t follow a vegan or a low-cal diet I suggest you try them with a gorgonzola sauce).

DSC_4981

Gnocchi di patate e grano saraceno.

Preparazione: 25 minuti

Cottura delle patate: 15-20 minuti + il tempo di farle un po’ raffreddare

Cottura degli gnocchi: 5 minuti

Ingredienti

per 4-5 persone

1 kg di patate farinose

200 g di farina di grano saraceno ( e un po’ di più per infarinare)

50 g di fecola di patate

sale q.b.

Utensili

una spianatoia di legno abbastanza grande

Una pentola grande (con cestello per cottura a vapore oppure una  vaporiera, se preferite questo tipo di cottura)

un setaccio o un colino grande (per setacciare la farina)

uno schiaccia patate

un coltello

una forchetta

 Preparazione

1. Lavate bene le patate e fate cuocere a vapore per 15-20 minuti (o lessatele mettendole in acqua fredda salata e portando a bollore). Schiacciate le patate e lasciate raffreddare. Aggiungete la farina e la fecola (setacciate e mescolate in precedenza).

2. Amalgamate gli ingredienti con un po’ di sale, fino ad ottenere un impasto morbido ed uniforme. Nel caso fosse necessario, aggiungete un po’ di farina.

3. Infarinate la superficie della spianatoia, dividete l’impasto in 4-5 pezzi uguali e rotolate ogni pezzo fino a formare dei filoncini molto lunghi e alti 1,5 cm. Tagliate ogni cilindro di pasta in piccoli gnocchi (lunghi 3 cm e alti 1,5 cm circa).

4. Usate una forchetta per rigare gli gnocchi (guarda il video).

5. Appoggiate gli gnocchi distanti tra loro su un tavolo coperto da strofinacci puliti, leggermente infarinati (nelle foto uso un piatto perché ho preparato una porzione sola).

 Note.

Per la cottura consiglio di far bollire in acqua abbondante e salata per qualche minuto. Poi scolate e condite come preferite. Un ottimo condimento per gli gnocchi di grano saraceno potrebbe essere una salsa al gorgonzola, oppure condite semplicemente con del buon pesto o una salsa al pomodoro, se seguite una dieta vegana o a basso contenuto calorico.

Gluten-free Valentine’s Day Menu

Some ideas for a romantic dinner for two…

Steamed prawn and bell pepper kebabs (divide the ingredients by two to make 4 kebabs)

DSC_3570

Salmon with rocket and oranges

DSC_3892

Double chocolate panna cotta with caramel sauce (single serving to share)

DSC_4151   or

Bavarian cream with chocolate caramel sauce

(divide by two the ingredients to make a 2-servings dessert, but make the sauce as indicated in the recipe because it’ s already a small quantity)

DSC_5894