More pics from this season


More pics from this season

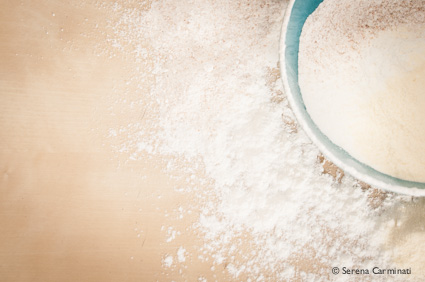
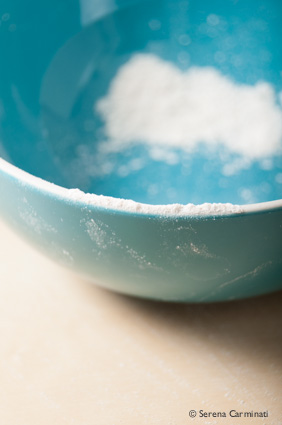
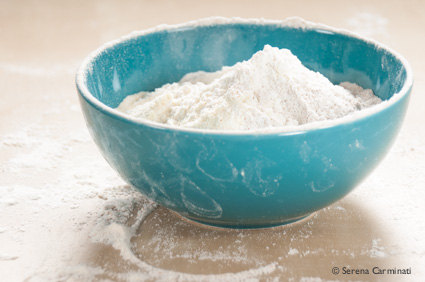
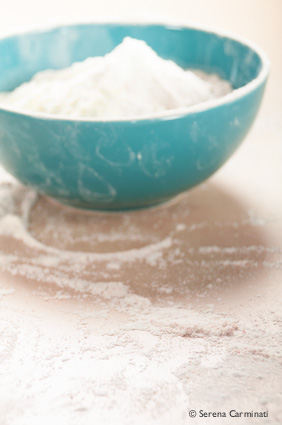
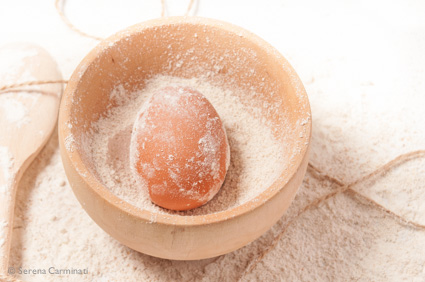
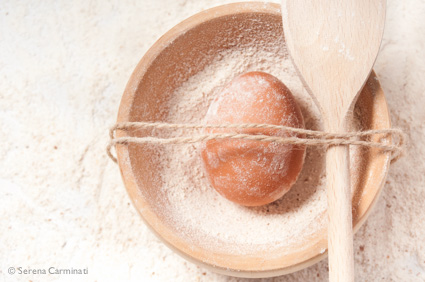
No recipes today, only a few pics from my balcony…


My sourdough is one year old! I keep it strong and healthy in a nice big jar in the fridge. I usually feed it once a week (or refresh it, as we say) , but the refreshment time varies depending on my needs. I’ve never had any problems with my natural yeast, however, at times, it’s possible that the yeast becomes sourer, or less responsive to leavening, therefore less active. These elements depend on many factors. There are some steps you can take to keep your sourdough in the best shape and correct any of problems. Of course, if you want a sour product, in order to let the bacteria produce acidity you have to do the opposite of what is indicated below.
To increase the leavening strength:
⁃ increase the temperature during leavening
⁃ decrease the ratio refreshments / flour
⁃ increase the ratio water / flour
⁃ increase humidity
In case of over-acidity:
⁃ change the type of flour (change microflora)
⁃ decrease the rising time
⁃ decrease ratio refreshments / flour
⁃ decrease the amount of water with the flour (to make a harder dough)
⁃ lower the temperature of the dough

Some of this information belongs to the teaching material of the Cereal Technology Course at Parma University (Italy), courtesy of Prof. Franco Antoniazzi.
Come mantenere il lievito madre al meglio.
Il mio lievito madre ha un anno di vita! Lo tengo in un vasetto di vetro nel frigorifero e lo rinfresco generalmente una volta a settimana, ma a volte anche più spesso se ne uso in grandi quantità. Non ho mai avuto grossi problemi, ma è possibile che il lievito naturale a volte diventi più acido, oppure sia meno reattivo alla lievitazione, questo dipende da molti fattori. Ci sono comunque degli accorgimenti che si possono adottare per mantenere il lievito madre al meglio e correggere eventuali anomalie.
Interventi sui rinfreschi del lievito naturale.
Per aumentare la forza lievitante:
Interventi in caso di acidità eccessiva:
Alcune delle informazioni riportate in questo articolo, fanno parte del materiale didattico del corso di Tecnologia dei Cereali dell’Univeristà di Parma, per gentile concessione del Prof. Franco Antoniazzi.
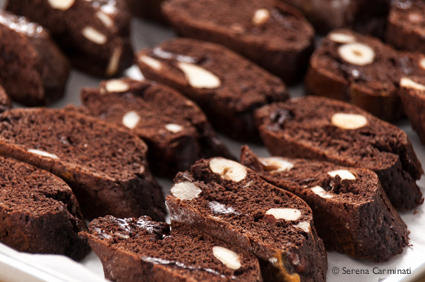
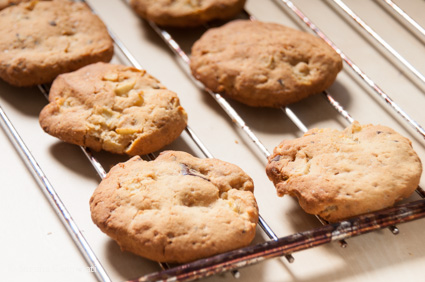
This is a chocolate version of Biscotti, or Cantucci cookies. Usually made with plain flour and almonds, I made these wholemeal cookies adding chocolate, hazelnuts and spelt flour to the traditional recipe. I also tried using less sugar, but they didn’t taste as good. These cookies go well with coffee and tea, and kept a tin box they last for a long time.

Chocolate spelt biscotti with hazelnuts and almonds.
Ingredients
for 2 large trays of biscotti
150 g (5.29 oz) plain flour (unbleached all-purpuse flour)
150 g (5.29 oz) whole spelt flour
70 g (2.46 oz) hazelnuts, whole and some crushed
70 g (2.46 oz) almonds, whole and some crushed
3 eggs
170 g (5.99 oz) sugar
2 drops sweet orange essential oil (or some grated orange zest)
3 tablespoons unsweetened cocoa powder
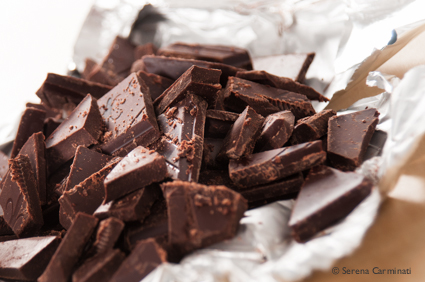
80 g (2.82 oz) dark chocolate (70% cocoa solids) finely chopped
1/2 tablespoon acacia honey
4 g baking soda
marsala wine to taste (or milk )
a pinch of salt
Method.

1. Sift the flour with the baking soda and cocoa powder.

2. Add the chocolate, the hazelnuts, the almonds and a pinch of salt to the flour. Stir well.

3. Separately, mix two eggs, with the honey, the orange essential oil and sugar.

4. Combine all the ingredients together and mix well, adding some marsala wine (or milk) if the mixture is too dry.
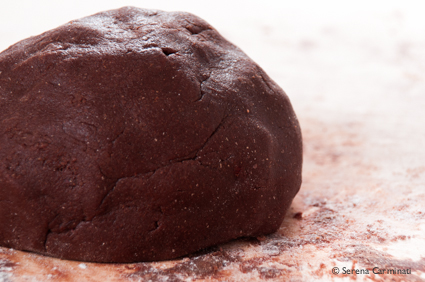
5. Divide the dough into four equal pieces, roll into the shape of four ropes and then brush the dough with an egg.

6. Bake at 190 ° C (374 °F) for 15-20 minutes. Remove from the oven and cut the cookies at a 45° angle, then bake for 5-10 minutes more at 190 ° C (374 °F).

7. Let the cookies completely cool and store in a sealed tin box.

Cantucci di farina di farro al cioccolato.
Ingredienti
per 2 teglie di biscotti
150 g di farina 00
150 g di farina integrale di farro
70 g di nocciole, intere e sbriciolate
70 g di mandorle, intere e sbriciolate
3 uova
170 g di zucchero
2 gocce di olio essenziale di arancio dolce (oppure un po’ di buccia d’arancia)
3 cucchiai di cacao amaro
80 g di cioccolato fondente al 70% tagliato a pezzetti
1/2 cucchiaio di miele d’acacia
4 g di bicarbonato
marsala q. b. (o latte, a scelta)
un pizzico di sale
Preparazione.
1. Setacciate la farina con il bicarbonato e il cacao.
2. Aggiungete alla farina il cioccolato, le nocciole, le mandorle e un pizzico di sale. Mescolate con cura.
3. A parte, amalgamate due uova con il miele, l’olio essenziale d’arancia e lo zucchero.
4. Unite tutti gli ingredienti, aggiungendo un po’ di marsala (o latte) nel caso il composto fosse troppo asciutto.
5. Formate quattro filoni della stessa misura e spennellate la superficie con un uovo. Infornate a 190° C per 15-20 minuti.
6. Sfornate e tagliate i biscotti in obliquo (per dare la forma dei cantucci), quindi infornate nuovamente per 5-10 minuti (sempre a 190° C).
7. Lasciate raffreddare e conservate in un contenitore di latta ben chiuso.

Understanding flour strength.
In Italy, flour strength is indicated by a number followed by W. The W number is usually not indicated on the packaging of the product you buy at the supermarket. it’s possible to understand the strength of a flour by looking at the protein content indicated on the packaging.

Below you will find some reference data that might help you to understand the relationship between protein, flour strengths ![]() and their uses.
and their uses.
|
|
|
|
|
|
|
|
|
|
|
|
|
|
|
|
|
|
|
|
|
|
|
|
|
|
|
The data shown here was taken from the teaching material of the Cereal Technology Course at Parma University (Italy), courtesy of Prof. Franco Antoniazzi.
Guida alle farine.
Capire la forza delle farine.
In Italia, la forza della farina si indica con un numero seguito da W. Nella confezione al supermercato non troverete questi parametri riportati sulla confezione. E’ possibile però farsi un’idea sulla forza di panificazione della farina leggendo le percentuali di proteine riportate sulla confezione del prodotto.
In questa tabella troverete alcuni dati di riferimento per capire meglio il rapporto tra le proteine,la forza di panificazione ![]() delle farine e i loro utilizzi.
delle farine e i loro utilizzi.
|
|
|
|
|
|
|
|
|
|
|
|
|
|
|
|
|
|
|
|
|
|
|
|
|
|
|
I dati riportati nella tabella sono stati presi dal materiale didattico del corso di Tecnologia dei Cereali dell’Univeristà di Parma, per gentile concessione del Prof. Franco Antoniazzi.

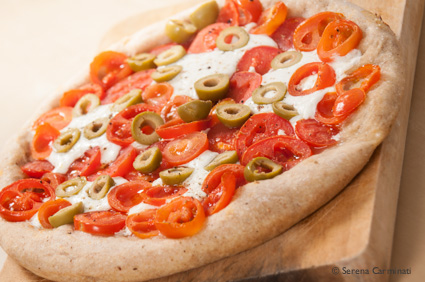
This is a great veggy pizza! The dough, once cooked, is perfectly crunchy on the outside and soft on the inside. I used a mixture of manitoba, semolina and wholemeal flour to give elasticity, crispness and flavour to the pizza. Instead of using sourdough you can use 6 g of yeast to significantly reduce the rising time of the dough. At this link https://foodfulife.wordpress.com/2013/01/02/how-to-make-natural-yeast-sourdough/ you will find a short article that explains how to make sourdough at home.
Wholemeal pizza with goat’s cheese, olives and rocket (arugula).
Ingredients
For 1 thick pizza
50 g (1.76 oz) manitoba flour
50 g (1.76 oz) wholemeal (whole wheat) flour
40 g (1.41 oz) fine semolina flour
50 g (1.76 oz) sourdough
70 g (2.46 oz) fresh and creamy goat’s cheese
70 g (2.46 oz) sweet and creamy soft cheese (crescienza or stracchino)
3 tablespoons extra virgin olive oil
1 teaspoon salt
A handful of rocket (arugula)
A handful of pitted olives
6-7 ripe cherry tomatoes
salt and pepper as needed (for seasoning the pizza)
100 ml (3.38 fl. oz) water (or more)
1/2 teaspoon honey
Create a starter dough with 50 g (1.76 oz ) wholemeal flour, 50 g manitoda flour and 50 g sourdough. Knead the starter dough with 100 ml (3.38 fl. oz) water and half a teaspoon of honey.

Cover and set for a couple of hours. After 2 hours, take the starter dough and mix with the semolina flour ( adding some water or flour if needed). Add a teaspoon of salt and a tablespoon of oil and work until smooth.

Let rise for a few hours, and then the dough will ready when it doubles in volume. Roll out the dough and place in a baking tray, previously evenly greased with a tablespoon of olive oil.

Cut the tomatoes and the olives into thin slices. In a small bowl, mix the goat’s cheese with crescenza until smooth.

Alternating, place the tomatoes and cheese on top of the dough, then garnish with some slices of olives. Season your pizza with a tablespoon of olive oil, some salt and pepper.

Bake at 200 ° C (392° F) for 25-30 minutes.
Top the pizza with fresh rocket and serve.


Pizza integrale con formaggio di capra, olive e rucola.
Ingredienti
per 1 pizza
50g di farina manitoba
50g di farina integrale
40g di semola (rimacinata)
50g di lievito madre (oppure 6 g di lievito di birra con aggiunta di acqua)
70 g di formaggio fresco (cremoso) di capra
70 g di crescenza o stracchino
3 cucchiai di olio extravergine d’oliva
Una manciata di olive verdi snocciolate
Una manciata di rucola
1 cucchiaino scarso di sale
6-7 pomodorini ciliegia ben maturi
sale e pepe qb (sulla pizza finita)
100 ml di acqua (o più)
1/2 cucchiaino di miele
Create un lievitino con 50g di farina integrale, 50g di farina manitoda e 50 g di lievito madre. Impastate il lievitino con 100 ml di acqua e mezzo cucchiaino di miele. Coprite e lasciate lievitare per un paio d’ore. Dopo la prima lievitazione, prendete il lievitino e impastate con la semola (aggiungendo un po’ d’acqua o di farina se necessario). Aggiungete un cucchiaino di sale e un cucchiaio d’olio all’impasto. Lasciate lievitare per qualche ora ( tenete presente che l’impasto è pronto quando raddoppia di volume).
Stendete l’impasto su una teglia, uniformemente unta con un cucchiaio di olio extravergine d’oliva. Tagliate i pomodorini e le olive a fettine. In una terrina piccola, unite e mescolate bene la crescenza con il formaggio di capra, fino ad ottenere una crema abbastanza omogenea. Cospargete i pomodorini alternandoli al formaggio sulla base della pizza e finite di decorare con delle fettine di olive. Condite la pizza con un cucchiaio di olio, un po’ di sale e pepe.
Fate cuocere a 200° di per 25-30 minuti. Sfornate la pizza, aggiungete la rucola e servite.
A few nights ago I had a couple of friends round for dinner, it was a special occasion, so I prepared a simple and delicious dessert recipe. I made a soft vanilla bavarian cream which I divided into individual portions and garnished with chocolate-caramel sauce and a few toasted walnuts. This dessert is very easy to prepare, very satisfying and deliciously creamy. A bavarian cream is basically a rich but delicate custard, blended with gelatin to have a light and airy texture. The chocolate sauce served with walnuts adds crunchiness and flavour to the cream. We spent a wonderful evening and the dessert was fully appreciated…

Bavarian cream with chocolate-caramel sauce.
Ingredients
Serves 4
250 ml (8.45 fl. oz) whipping cream
150 ml (5 fl. oz) milk
50 g (1.76 oz) sugar
2 gelatin leaves (5 g)
2 egg yolks
2 drops vanilla extract
For the chocolate-caramel sauce
100 g (3.52 oz) brown sugar
1 teaspoon cocoa powder
6 toasted walnuts (toast the unshelled walnuts in the oven on a tray for 5 minutes at 190°C, 374 °F)
1 teaspoon of dark rum
100 ml (3.38 fl.oz) of milk
Preparation method.
1. Soften the gelatin in warm water for 10 minutes.

2. In a saucepan, work the eggs with the sugar until creamy. Gradually add hot milk and the vanilla extract, stirring on low heat.

3. Drain the gelatin, melt into the creamy mixture and continue to stir on low heat for about ten minutes (do not boil). Let cool. Stir the whipped cream very gently into the mixture.


4. Pour the dessert into molds and put in the refrigerator to set for at least 3 hours.

Preparation of the caramel sauce.

1. Pour the sugar (100 g) with the cocoa powder into the milk (100 ml), add some rum and stir. Melt the sugar at a low heat and cook until the sauce has thickened.
2. Garnish the bavarian cream with a few toasted walnuts and serve with the chocolate-caramel sauce.

Crema bavarese con salsa di caramello al cacao.
Ingredienti
per 4 porzioni
250 ml di panna da montare
150 ml di latte
50 g di zucchero
2 fogli di colla di pesce (5 g)
2 tuorli d’uovo
due gocce di estratto di vaniglia
Per la crema di caramello al cacao
100 g di zucchero di canna
1 cucchiaino di cacao
1 cucchiaino di rum scuro
100 ml di latte
qualche noce tostata per guarnire
Preparazione della crema.
1. Fate ammorbidire la colla di pesce in acqua tiepida per 10 minuti. In un pentolino, lavorate le uova con lo zucchero fino a creare una crema spumosa.
2. Continuando a mescolare, allungate gradualmente il composto con del latte bollente. Aggiungete l’estratto di vaniglia e fate cuocere per dieci minuti a fiamma molto bassa.
3. Scolate bene la colla di pesce e fatela sciogliere nel latte ( continuando a mescolare). Spegnete il fuoco e lasciate raffreddare.
4. Unite la panna montata al composto, mescolando delicatamente dal basso verso l’alto. Versate la crema negli stampi e mettetela nel frigorifero a solidificare per almeno 3 ore.
Preparazione del caramello.
1. Versate lo zucchero (100 g) con il cacao e un cucchiaino di rum in 100 ml di latte. Fate sciogliere lo zucchero a fiamma bassa e fate ritirare fino ad ottenere una salsa densa. Lasciate raffreddare.
2. Servite la crema bavarese con la salsa di caramello al cacao e guarnite con qualche noce (fatta leggermente tostare prima) sopra.

I made this recipe for a celiac friend. I used gluten-free flours, trying to create a smooth and homogeneous dough. The result is excellent! These soft and delicate cookies melt nicely in the mouth, slowly releasing an intense dark chocolate flavour.
If you prepare this recipe for a gluten-intolerant friend , use only flour, potato starch and corn starch specific for celiac people, and make sure that the absence of gluten is clearly indicated on the packaging.

Apple and chocolate chip cookies (gluten-free).
Ingredients
for about 25 cookies
70 g ( 2.4 oz) corn flour
70 g (2.4 oz) rice flour
70 g (2.4 oz) corn starch
70 g (2.4 oz) potato starch
150 g (5.29 oz) butter
130 g (4.5 oz) brown sugar
150 g (5.29 oz) dark chocolate for cooking
1 teaspoon baking soda
1 whole egg
1 large golden sweet apple
2 tablespoons yogurt
2 drops vanilla essence
a pinch of salt
Method.
1. In a bowl, sift the flour with the corn and potato starch.

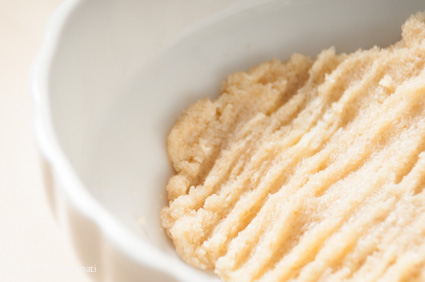
2. Separately, mix the butter with sugar.

3. Add an egg with two drops of vanilla essence to the butter. Mix well, then add two tablespoons of yogurt and a teaspoon of baking soda to the mixture. Knead the dough.

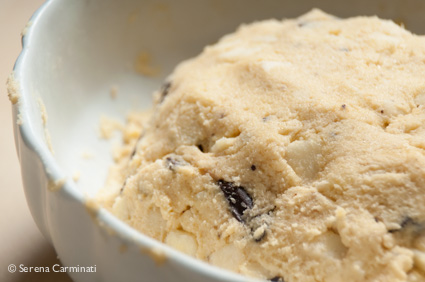
4. Peel and cut the apple into very small cubes, break the chocolate into pieces and add them with a pinch of salt to the mixture.

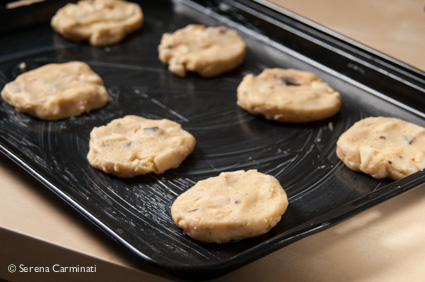
5. Put the dough to cool in the refrigerator for 30 minutes. Grease two or three baking sheets (depending on the size), shape the dough into small balls (4.5 cm each) and place them on the baking sheets, quite far apart from one another.

6. Slightly flatten the dough balls to make the cookies.
7. Bake at 170 ° C (338°F) for 15-18 minutes. Place the cookies to cool on a rack.
Biscotti morbidi con cioccolato e mele (senza glutine).
Ingredienti
per 25 biscotti circa
70 g di farina di mais
70 g di farina di riso
70 g di amido di mais
70 g di fecola di patate
150 g di burro
130 g zucchero di canna
150 g di cioccolato fondente per cucinare
1 cucchiaino di bicarbonato
1 uovo intero
1 mela grossa golden
2 cucchiai di yogurt
2 gocce di essenza di vaniglia
un pizzico di sale
Preparazione.
1. In una terrina, setacciate le farine con l’amido di mais e la fecola di patate. A parte, lavorate il burro con lo zucchero.
2. Aggiungete l’uovo con le gocce di essenza di vaniglia al burro lavorato.
3. Amalgamate bene e unite alla farina, aggiungendo due cucchiai di yogurt e un cucchiaino di bicarbonato. Impastate tutto.
4. Sbucciate e tagliate la mela a cubetti molto piccoli, rompete il cioccolato in pezzi ed aggiungeteli, con un pizzico di sale, all’impasto.
5. Mettete l’impasto a riposare per 30 minuti nel frigorifero. Imburrate due o tre teglie (dipende dalla grandezza), formate delle palline di circa 4,5 cm e mettetele sulle teglie, abbastanza distanti l’una dall’altra.
6. Schiacciate l’impasto per dare la forma ai biscotti.
7. Infornate a 170 ° per 15-18 minuti, poi lasciate raffreddare i biscotti su una griglia.
This is a real self-celebratory treat! Something different from the usual Valentine’s Day recipes…A very special panna cotta, a single serving dessert made with cream and two types of chocolate, sprinkled with ground hazelnuts and served with rum caramel sauce. A mouth-watering delight! Not to be missed!
Eat it or share it, you decide! 🙂

20 g (0.705 oz) dark chocolate (70% cocoa solids)
30 g (1.05 oz) milk chocolate
130 ml (4.4 fl.oz) liquid whipping cream
8 toasted hazelnuts
1 gelatin sheet (2 g), or you can use agar agar
1 teaspoon honey (full)
rum caramel sauce ( see the recipe below)
Method.
1. Roast the hazelnuts at 170 ° C (338° F) for 10 minutes, then remove the hazelnut skin with a kitchen towel. Let cool and then grind the hazelnuts with a food processor.

2. Put the gelatin sheet to soften in a glass of warm water (for about 10 minutes), then drain and gently squeeze to remove the excess water.
3. In a saucepan, gently heat the cream with the chocolate. Dissolve the gelatin into the melted chocolate, stirring constantly over a low heat (do not boil). When the gelatin is completely dissolved turn off the heat, then add the honey and stir well.


4. Let cool. Gently pour the cream into a mold (I am using a silicone mold 7cm maximum width x 3,5 cm maximum height) and place in the fridge for about 2 hours.

5. Dip the mould into warm water for a few seconds, place the panna cotta onto a dish and serve with the ground hazelnuts and the rum caramel sauce.


Rum caramel sauce.
Ingredients
50 g brown sugar
50 ml (1.7 fl. oz) water
1 tablespoon dark rum

1. In a small saucepan, heat the water with sugar. Melt the sugar over a medium-low heat. When the sugar is liquid, add the rum and stir.
2. Cook the caramel sauce until is golden brown and thick enough to coat a spoon. When the caramel sauce is ready, turn off the heat and let cool. Serve the rum sauce with the chocolate panna cotta.

Panna cotta ai due cioccolati con salsa di caramello al rum.
Ingredienti
Per 1-2 porzioni
20 g di cioccolato fondente al 70 %
30 g di cioccolato al latte
130 ml di panna da montare
8 nocciole tostate
1 foglio di colla di pesce (2g).
1 cucchiaino abbondante di miele
salsa di caramello al rum (vedi la ricetta sotto)
Metodo di preparazione.
1. Fate tostare le nocciole a 170° C per 10 minuti. Spellate le nocciole strofinandole con un panno, poi tritatele finemente e mettete da parte.
2. Mettete 1 foglio di colla di pesce ad ammorbidire in un bicchiere d’acqua tiepida per 10 minuti, poi strizzate bene.
3. Fate sciogliere il cioccolato nella panna, scaldandola dolcemente sul fornello (non portando mai ad ebollizione). Quando il cioccolato sarà completamente sciolto, aggiungete la colla di pesce e continuate a mescolare (senza portare ad ebollizione).
4. Fate sciogliere la gelatina e spegnete il fornello. Aggiungete il miele, poi mescolate bene e lasciate raffreddare.
5. Versate delicatamente la crema nello stampino (utilizzo uno stampo in silicone di 7 cm di larghezza massima x 3,5 cm di altezza) e mettete nel frigo per un paio d’ore. Trascorso il tempo necessario, immergete per qualche secondo lo stampo in acqua calda, rovesciate la pancetta sul piatto. servite con la granella di nocciole, accompagnandola con una salsa di caramello al rum.
Per il caramello al rum
Ingredienti
Per 1 porzione
50 g di zucchero di canna
50 ml d’acqua
1 cucchiaio di rum scuro
Preparazione.
1. In un pentolino fate scaldare l’acqua con lo zucchero, fino a far sciogliere completamente lo zucchero. Quando lo zucchero sarà liquido aggiungete il rum.
2. Fate dorare e ritirare leggermente il caramello, poi spegnete il fornello e fate raffreddare. Servite la salsa al caramello con la panna cotta al cioccolato.
