Tag Archives: Vegetarian

Make The Best Pizza Dough ( Part 2)

I already published a basic pizza dough recipe with normal yeast a few weeks ago, this is basically the same recipe adapted for sourdough. Before getting started with the recipe, let me say a few things about sourdough.

Why sourdough?
Sourdough is a natural yeast created by fermenting flour with water. It is a long process, which is not particularly complicated, but it takes some time and care.
Basically, you create the natural yeast, then you feed it and keep it in good shape, that’s really all there is to it! In exchange, your sourdough will reward you with a lot of flavour, leavening strength and satisfaction!
Moreover, sourdough is healthier and much more digestible than commonly used yeast. Another good reason to use it is the difference in taste, as sourdough’s flavour is much more delicate and pleasant than all the other yeasts.
So, don’t give up if you haven’t tried yet, instead give it a go and you’ll see the difference, I promise you!
To get started with sourdough you can follow the step by step recipe here.

DSC_7541

Some things you have to know before you go on with the recipe:

1. The flour-sourdough ratio in recipes is usually 3 to 1 (3 parts of flour plus 1 part of sourdough). In order to prepare approximately 500 g of dough we will use 375 g of flour with 125 g of sourdough. You can use this recipe to make sourdough bread as well as pizza.

2. Semi-liquid sourdough contains a lot of water, therefore you have to add less water than in normal yeast pizza and bread recipes. My advice is to add a little bit of water gradually.

3. Sometimes it’s useful to make the dough in the evening and then keep it in the fridge with some extra water over night. The following day, take it out of the fridge two hours before you use it (knead the dough a little, then make the pizzas and let them rise for a couples of hours at room temperate). During this process the dough will rise much better and faster.

DSC_7548

Sourdough Pizza Crust.

Ingredients

For 2 large pizzas

Recipe No. 1

210 g flour 00 (or plain, unbleached all-purpuse flour)

135 g whole spelt flour

30 g durum wheat flour (semolina)

125 g sourdough (semi-liquid and made ​​with manitoba flour)

10 g salt

a pinch of barley malt (optional)

extra virgin olive oil to taste

water

Note.

If you use the sourdough starter made ​​from flour 00 (or plain, unbleached all-purpose flour) the ingredient ratio changes slightly:

Recipe No. 2

130 g flour 00 (or plain, unbleached all-purpuse flour)

135 g whole spelt flour

80 g Manitoba flour

30 g durum wheat flour (semolina)

125 g sourdough (semi-liquid and made with flour 00 of plain, unbleached all-purpuse flour)

10 g salt

a pinch of barley malt (optional)

extra virgin olive oil to taste

water

Method.

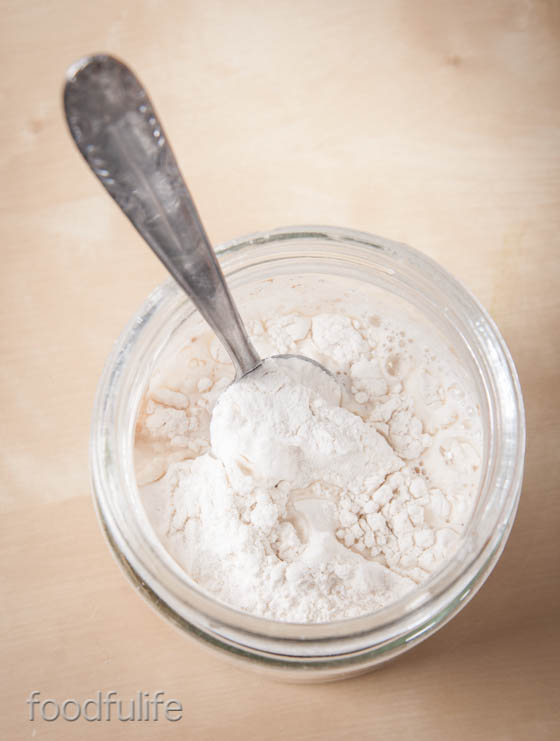
1. Sift and mix the flour on a wooden board or a large bowl (use a fine sieve). Mix the flour with the sourdough and a little bit of water. Add the salt and, if you want, you can also add 2 tablespoons of extra virgin olive oil with a pinch of malt.

DSC_7477-2

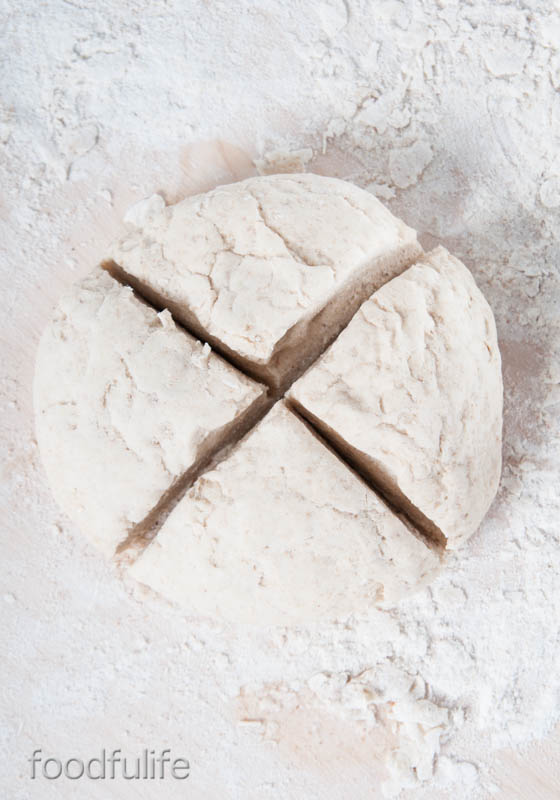
2. knead vigorously, until you get an elastic dough. Let the dough rise in a sheltered place for 3-6 hours (the rising time varies depending on different factors, the dough is ready when it has doubled in volume).

DSC_7487

DSC_7490

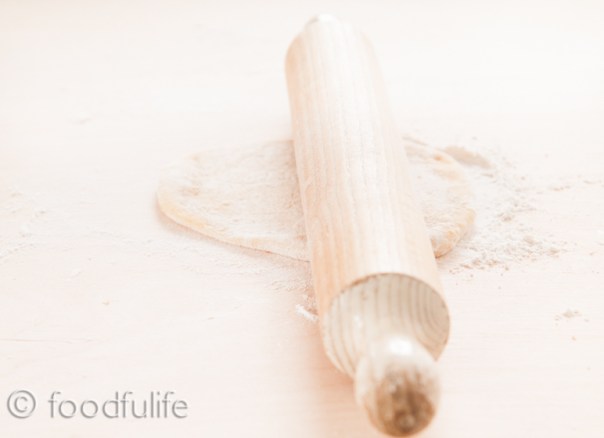
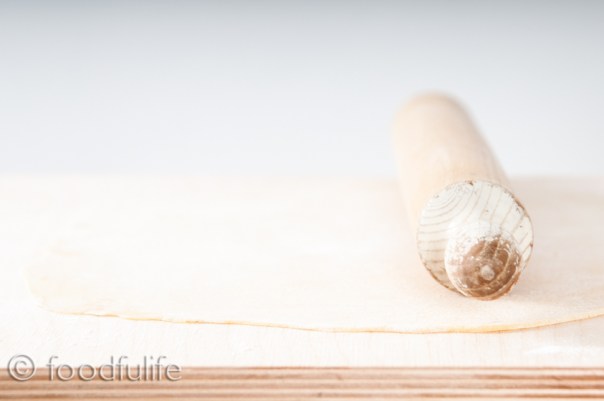
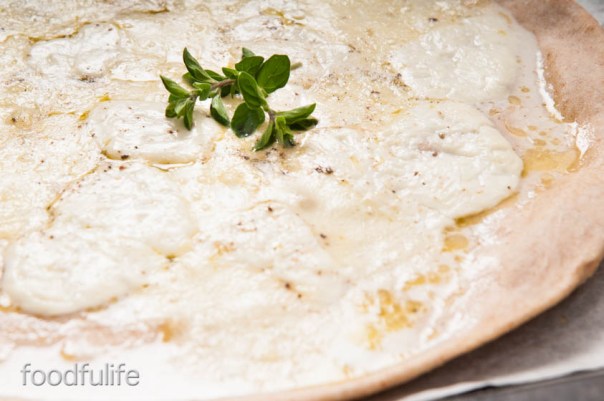
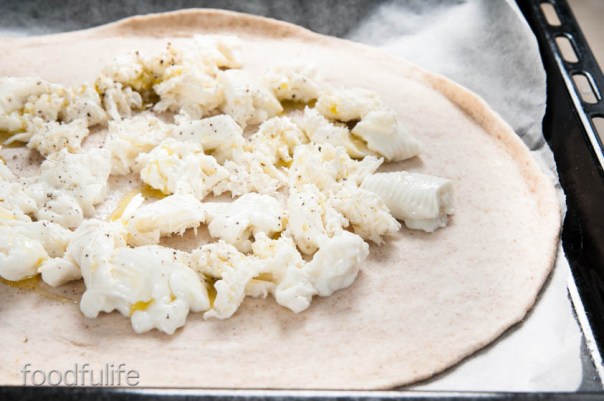
3. Take two large oven trays, cover them with baking paper and brush them with plenty of extra virgin olive oil. Roll out the dough with a rolling pin, make two pizza bases and then add the other ingredients (I am going to make a pizza with mozzarella cheese and crescenza, a nice sweet and creamy Italian cheese)

DSC_7509

DSC_7512

DSC_7519

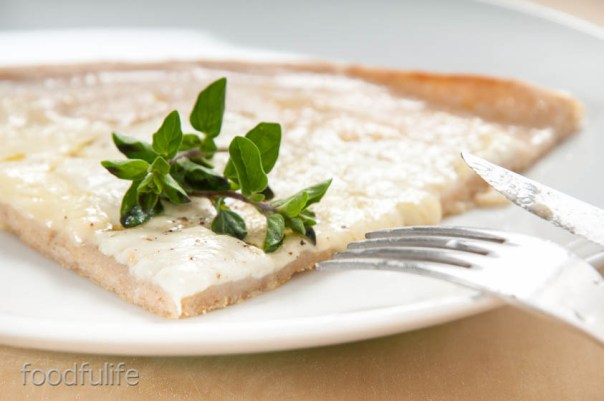
4. Let the pizzas rise for about 1 hour, then bake in a preheated oven at 190° (374°F) for 20-30 minutes.

DSC_7533

DSC_7555

Impasto base per la pizza con lievito madre.

Ingredienti

2 pizze grandi

Ricetta n°1

210 g di farina 00

135 g di farina di farro integrale

30 g di semola rimacinata

125 g di lievito madre (semiliquido, a base di farina manitoba)

acqua q. b.

10 g di sale

pochissimo malto d’orzo (facoltativo)

olio extra vergine d’olio d’oliva q. b.

Nota.

Se usate il lievito madre a base di farina 00 gli ingredienti variano leggermente:

Ricetta n° 2

130 g di farina 00

135 g di farina di farro integrale

80 g di farina manitoba

125 g di lievito madre (semiliquido con base di farina 00)

30 g di semola rimacinata

10 g di sale

acqua q. b.

pochissimo malto d’orzo (facoltativo)

olio extra vergine d’olio d’oliva q. b.

Metodo.

1. Mescolate, setacciate le farine e sistematele a fontana su una spianatoia o mettetele in una ciotola grande. Unite il lievito madre alla farina con un po d’acqua. Mescolate leggermente, poi aggiungere il sale con cucchiai d’ olio extra vergine di oliva e un pizzico di malto, se desiderate aggiungerli.

2. Lavorate energicamente gli ingredienti, fino ad ottenere un impasto omogeneo ed elastico. Lasciate lievitare l’impasto in un luogo riparato per 3-6 ore (il tempo di lievitazione varia a seconda di diversi fattori, l’impasto è pronto quando sarà raddoppiato di volume).

3. Prendete due teglie grandi, ricopritele con carta da forno e spennellatele con abbondante olio extra vergine d’oliva. Stendete la pasta con un matterello e fate due basi per pizza, poi aggiungere gli altri ingredienti (in questo caso faremo una pizza bianca con crescenza e mozzarella).

4. Lasciate lievitare le pizze per circa 1 ora, poi fate cuocere a 190° C in forno preriscaldato per 20-30 minuti (dipende dallo spessore della pasta).

DSC_7558

Traditional Recipe: Pasta e Fagioli

DSC_7416

Budget friendly, easy and delicious, pasta e fagioli (pasta and borlotti beans) is one of the most appreciated and popular recipes in Italy. Like many traditional recipes many variations exist of this wonderful Italian dish. We use different herbs, sometimes we add bacon or lard and we can replace borlotti beans with cannellini. The recipe that I am going to share today is one of my favourite dishes since I was a child. Pasta e fagioli is a complete meal with high protein content, perfect for vegetarian and vegan diets. As a vegan or low fat version, you can serve it without Parmesan, it’s delicious anyway! 🙂

DSC_7386

Pasta e Fagioli.

Ingredients

for 2 Servings

Easy

Preparation: 10 minutes

Cooking: 25 minutes

110 g (3.88 oz) ditaloni rigati (or broken spaghetti or tagliatelle)

2 cans borlotti beans (keep 1 cup of borlotti beans to add at the end of the cooking process)

4 tablespoons of extra virgin olive oil

6 cherry tomatoes (or piccadilly), washed and diced (optional)

1 medium onion, finely chopped

2 cloves of garlic, finely chopped

2 sprigs of fresh rosemary

2 bay leaves, washed

2 sprigs of fresh sage

500 ml (16.9 us fl oz) organic vegetable broth (made with water and organic vegetable stock)

1/2 tablespoon tomato paste

Parmesan to taste (optional, but nice!)

salt and black pepper to taste

Method.

1. Wash and chop the sage and rosemary (removing the hard stems).

2. In a large sauce pan, gently fry the onion with 3 tablespoons of extra virgin olive oil, then (after a few minutes) add the garlic.

DSC_7408

3. Drain and rinse the borlotti beans.  Put the beans with the tomatoes in the pan. Sauté for a few minutes, then pour in the vegetable broth with 1/2 a tablespoon of tomato paste and 2 bay leaves. Stir well.

DSC_7404

4. Cook over a medium heat for about 15 minutes, until the broth is partially absorbed, then add the chopped herbs.

DSC_7416

5. Turn off the heat. Using an immersion blender, mix everything well. Turn on the heat, add 1 cup of borlotti beans and the pasta. Stir well and simmer for another 10 minutes.

DSC_7446

DSC_7451

6. Season with salt and pepper, turn off the heat. Serve with a tablespoon of extra virgin olive oil and plenty of parmesan (optional).

DSC_7461

DSC_7472

Pasta e Fagioli

Ingredienti

Per 2 persone

Facile

Preparazione: 10 minuti

Cottura: 25 minuti

110 g di ditaloni rigati (oppure spaghetti spezzettati o tagliatelle)

2 scatole di fagioli borlotti (tenete una tazza di borlotti da aggiungere a fine cottura)

4 cucchiai d’olio extra vergine d’oliva

1 cipolla media, tritata finemente

6 pomodorini (piccadilly o ciliegino), lavati e tagliati a dadini (facoltativo)

2 spicchi d’aglio, tritato finemente

2 rametti di rosmarino

2 foglie di alloro, lavate

un mazzetto di salvia fresca

500 ml di brodo vegetale (biologico)

1/2 cucchiaio di concentrato di pomodoro

Parmigiano q. b. (facoltativo)

sale e pepe q. b.

Preparazione.

1. Lavate e tritate la salvia con il rosmarino (togliendo i gambi).

2. Fate soffriggete la cipolla con 3 cucchiai d’olio extra vergine d’oliva. Dopo qualche minuto aggiungete l’aglio.

3. Scolate, sciacquate i fagioli e aggiungeteli con i pomodorini al soffritto. Fate rosolare per qualche minuto, poi aggiungete il brodo vegetale con 1/2 cucchiaio di concentrato di pomodoro e le foglie d’alloro. Mescolate bene.

4. Fate ritirare il brodo per 15 minuti, poi levate le foglie d’alloro e aggiungete le erbe tritate.

5. Spegnate il fuoco e con un frullatore ad immersione frullate bene tutto.  Aggiungete la pasta e i borlotti che avete tenuto da parte. Fate cuocere a fuoco moderato (mescolando continuativamente) per altri 10 minuti.

6. Spegnete il fuoco e condite con un po’ d’olio extra vergine d’oliva, sale e pepe. Servite con abbondante parmigiano.

DSC_7443

How To Make Sourdough (re-edited).

DSC_7382

What is sourdough?

Sourdough is a natural yeast, obtained by fermenting flour and water. It can have a solid or a liquid consistency, depending on the amount of water used to feed it. Liquid sourdough usually rises better.

I personally recommend the preparation and use of this great ingredient because it’s completely natural, therefore much healthier and more digestible than other yeasts. Sourdough can be used to make a variety of breads, pizzas, pies and cakes with surprising results. Moreover, it makes everything taste better!

Preparing the sourdough starter.

1. First you have to make a starter. Mix 1 cup of organic wholemeal flour (the wholemeal flour is necessary for the first feed) with 1/2 cup of cool water (use non-chlorinated water, you can mix tap water with still drinking water from a bottle).
Put the ingredients in a glass, stainless steel or a plastic container for food.

DSC_7335

2. Stir all the ingredients together, until creamy and smooth, then cover the container with a damp cloth and let it sit for 24 hours.

DSC_7367

DSC_7348

3. After 24 hours remove the top half of the mixture, then feed the starter again with 1 cup of plain flour (you can use manitoba, whole spelt or wholemeal flour, if you prefer) and half a cup of water. Stir well, cover with a damp cloth and let it sit for another 24 hours.

DSC_7355

DSC_7363

DSC_7367

4. Now you can start feeding the starter every two days. Repeat this process for about 10 days.

DSC_7376

5. After 10 days, you can start feeding your sourdough every 4-5 days and you can use it for your recipes.

Store the sourdough.

1. Store the sourdough in a glass jar and keep it in the fridge (with the lid on).

2. Each time you feed the sourdough let it sit for 1-2 hours at room temperature in a glass jar covered with a damp cloth (with no lid on). Then remove the cloth, close the container and put it back in the refrigerator.

DSC_7385

Doses.

1. Feed the sourdough the day before you use it (12 hours before). To feed the sourdough, weight the natural yeast, then add the same amount of  flour and half the amount of water.

2. In the quickest recipes, the ratio of flour and sourdough used must be 3 to 1. (e.g. for 900 g of flour use 300 g of sourdough).

3. The rising time of the dough will depend on the age and strength of the yeast, at first it may take 3 to 6 hours (however, when it doubles in size it is ready for use).

DSC_7378

DSC_6085

DSC_6203

La pasta madre.
La pasta madre è un lievito naturale che si ottiene facendo fermentare farina e acqua. Questo lievito può avere una consistenza più solida o liquida, a seconda della quantità d’acqua utilizzata, normalmente la versione più liquida ha una lievitazione migliore.

Consiglio vivamente la preparazione e l’utilizzo di questo ingrediente, essendo un lievito completamente naturale e quindi molto più digeribile e salutare rispetto ad altri lieviti comunemente utilizzati. Inoltre può essere usato facilmente nella preparazione di svariati tipi di pane, pizze torte salate e dolci con risultati sorprendenti.

Preparazione della pasta madre.

1. Per prima cosa, preparate un piccolo impasto unendo 1 tazza di farina integrale biologica (la farina integrale è necessaria per il primo impasto) a 1/2 tazza d’acqua fredda (utilizzate acqua con poco cloro, potete miscelare l’acqua del rubinetto con acqua minerale naturale).

2. Mettere gli ingredienti in un contenitore (è consigliabile utilizzare un contenitore di vetro oppure acciaio inossidabile, ma anche la plastica per alimenti va bene) e mescolare fino ad ottenere un composto cremoso. Coprire il contenitore con un panno umido e lasciate riposare per 24 ore.

3. Passate 24 ore, levate la parte dura in superficie e rinfrescare quello che resta del lievito, cioè aggiungete al composto 1 tazza di farina (potete utilizzare la 00, manitoba oppure farina integrale, come preferite) e mezzo bicchiere d’ acqua. Mescolare bene, coprire con un panno umido e lasciate riposare per altre 24 ore.

4. Ora potete rinfrescare il lievito ogni 2 giorni, utilizzando sempre una tazza di farina e 1/2 tazza d’acqua. Continuate con questa procedura per circa 10 giorni.

5. Dopo 10 giorni, potete incominciare a rinfrescare la pasta madre ogni 4-5 giorni. Arrivati a questo punto, la vostra pasta madre è pronta per essere utilizzata nelle vostre ricette.

La conservazione.

1. Conservate la pasta madre in un vasetto di vetro, chiuso con il coperchio e tenuto in frigorifero.

2. Dopo ogni rinfresco, lasciate riposare il lievito madre per una o due ore in un vasetto coperto da un panno umido a temperatura ambiente, poi chiudete il contenitore e rimettetelo nel frigorifero.

Le dosi consigliate.

1. Nutrite la pasta madre il giorno prima di utilizzarla (almeno 12 ore prima). Per nutrire la pasta madre, prima pesate il lievito naturale, poi aggiungere la stesso peso di farina e metà del peso di acqua.

2. Nelle ricette più rapide, il rapporto tra farina e pasta madre deve essere di 3 a 1, cioè su 900 g di farina utilizzeremo 300 g di lievito naturale.

3. Il tempo di lievitazione dipenderà dall’età e dalla forza della pasta madre. I tempi possono variare dalle 3 alle 6 ore, consiglio però di non guardare l’orologio ma di osservare il volume dell’impasto, quando raddoppia è pronto per l’uso.

Budget Friendly And Full Of Flavour!

This week we are going to prepare a lovely spring risotto with corn salad and fresh peas. This is a cheap and easy risotto to make, perfect for this season! You don’t usually cook corn salad, but a few weeks ago I had some left in the fridge, so I made a soup with it to use it up and It was really lovely!

Corn salad can be used instead of spinach or asparagus, and in fact the taste is somewhere in between the two vegetables, but very delicate. Moreover, It’s cheaper than a bunch of asparagus, which is great! Give it a try, you’ll love it!!!

DSC_7108

DSC_7063

Risotto With Fresh Peas And Corn Salad.

Cooking time: 35 minutes

Preparation: 20 minutes

Ingredients

for 2 servings

160 g (5.6 oz, 3/4 cup) arborio rice

100 g (3.5 oz) fresh peas without the pods (about 200 g ,7 oz, with the pods)

100 g (3.5 oz) of corn salad (lamb’s lettuce), washed and roughly chopped

3 shallots, peeled and finely chopped

1 clove garlic, peeled and finely chopped

3 tablespoons extra virgin olive oil

a small piece of butter (which you can replace with 1 tablespoon of olive oil, if you wish)

700 ml (3 cups vegetable stock), warm (made with an organic stock cube and water)

4 tablespoons of grated Parmesan cheese

salt and pepper to taste

a hint of nutmeg (optional, but very nice!)

DSC_7045

DSC_7075

Method.

1. In a large heavy based pan, pour 3 tablespoons of extra virgin olive oil, add a small piece of butter and gently fry the shallots over a low heat (without burning them). After a few minutes add the garlic, then stir.

DSC_7079

2. Add the rice and the peas and stir. After 2 minutes, gradually pour in the vegetable stock.

DSC_7081

DSC_7085

3. Simmer and stir at a moderate heat until the broth is mostly absorbed. Add the corn salad, then lower the heat and simmer for another 10 minutes (stirring continuously) until creamy.

DSC_7086

DSC_7096

4. Turn off the heat, season with a hint of nutmeg, 2 tablespoons of Parmesan cheese, salt and pepper; then put the lid on the pan and let the risotto sit for a few minutes. Serve with plenty of grated Parmesan on top.

DSC_7103

Tip. Garnish the dish with some fresh corn salad leaves.

Risotto Con Piselli Freschi e Valerianella.

Preparazione: 20 minuti

Cottura: 35 minuti

Ingredienti

per 2 persone

160 g riso arborio

100 g di piselli freschi sbucciati (200 g circa di peso con il bacello)

100 g di valerianella, lavata e tagliata grossolanamente

50 g di scalogno, sbucciato e tritato finemente

1 spicchio d’aglio, sbucciato e tritato

3 cucchiai di olio extra vergine d’oliva

una nonce di burro (che potete sostituire con 1 cucchiaio d’olio in più, se lo desiderate)

700 ml di brodo vegetale, caldo (fatto con un dado biologico)

un pizzico di noce moscata

sale e pepe q. b.

parmigiano grattugiato q. b.

Preparazione.

1. In una pentola grande a fondo spesso, versate 3 cucchiai di olio extra vergine d’oliva, aggiungete il burro e fate soffriggere lo scalogno a fiamma bassa. Dopo qualche minuto aggiungete l’aglio.

2. Unite al soffritto anche il riso e i piselli. Fate rosolare per qualche minuto, poi annaffiate con abbondante brodo vegetale. Continuate ad aggiungere il brodo gradualmente, durante la cottura.

3. Fate cuocere a fuoco moderato (mescolando sempre), finché il brodo si sarà ritirato quasi completamente. Aggiungete la valerianella verso fine cottura, poi abbassate il fuoco e fate cuocere per altri 10 minuti (sempre mescolando).

4. Spegnete il fuoco, condite con un pizzico di noce moscata, qualche cucchiaio di parmigiano, sale e pepe; lasciate riposare per qualche minuto il risotto, chiudendo la pentola con un coperchio. Servite con abbondante parmigiano.

DSC_7125

Crunchy and Colourful Salad (Low-fat And Packed With Vitamin C!!)

Spring is here and with it comes the time of serious dieting! From this week on I want to dedicate a little time to preparing light recipes and meals.
To start with, I prepared a beautiful and super-healthy salad with only a little amount of calories, but full of crunchy flavours!

DSC_6721

This salad can definitely be a very satisfying low-cal lunch, low in fat and carb, but rich in fibres, potassium, protein and vitamin C.
As a side dish, it goes well with several courses and you can serve it with feta cheese, if you prefer a richer kind of salad.
If I were to imagine this salad as a dress, it would be a feel-good garment made ​​of a strong natural fibre, with a very cheerful but elegant floral pattern. Suitable for mid-season, with a comfortable slimming line. Definitely a perfect fit!… I know, It’s just a salad! 🙂

Corn salad with red cabbage, fava beans and apples.

Ingredients

Preparation: 15 minutes

For 2 servings

60 g (2 oz) corn salad (or lamb’s lettuce)

a handful of almonds, shelled

50 g (1.76 oz) fresh fava beans (with the pods removed)

2 small apples, washed

130 g (4.58 oz) red cabbage

the juice of 1/2 a lemon

salt and pepper to taste

4 tablespoons of extra virgin olive oil to taste

DSC_6693

Method.

1. Wash, and clean and dry the corn salad.

2. Wash, and slice the cabbage finely and arrange it on the plates.

3. Place the fava beans over the cabbage, then add the salad leaves.

DSC_6668

4. Cut and marinate the apples in the juice of half a lemon for a few minutes. Then, mix the apples and the almonds with the salad (breaking some almonds into pieces).

DSC_6673

DSC_6680

DSC_6724

5. Season with plenty of extra virgin olive oil, salt and pepper.

DSC_6709

DSC_6742

Insalata croccante con cavolo rosso, fave e valerianella.

Ingredienti

Per 2 persone

Preparazione:15 minuti

60 g di valerianella

una manciata di mandorle sgusciate

50 g di fave fresche, senza scorza

2 mele, lavate

130 g di cavolo rosso

il succo di mezzo limone

sale e pepe q.b.

4 cucchiai di olio extravergine d’oliva q.b.

Preparazione.

1. Lavate e asciugate la valerianella.

2. Lavate il cavolo e tagliatelo finemente. Sistematelo sul fondo dei piatti.

3. Aggiungete le fave, posizionatele sopra il cavolo con la valerianella.

4. Aggiungete le mandorle (sbriciolandone solo alcune) con le mele tagliate a pezzetti e precedentemente marinate nel succo di mezzo limone per qualche minuto.

5. Condite con abbondante olio extra vergine d’oliva, sale e pepe.

Fresh Egg Pasta with Flour 00 (Step by Step)

This week we are going to prepare plain fresh egg pasta, using flour 00. This pasta can be used as a base for making a variety dishes, prepared with all sorts of creative stuffings and sauces, but we will see this in the next posts.

I generally tend to use more complex and heavier types of flour, because they are tastier and rich in nutrients. In some recipes , however, it’s better to use a finer and more delicate flour, in order to avoid covering the flavour of the other ingredients. For this recipe the Italian flour 00 is perfect for making pasta, because it is finer than normal flour, however, if you can’t find it use plain flour.

DSC_5166

tips.

1. The ingredients listed are for 400 g of (uncooked) pasta, but if you need a different quantity, just bear in mind that for every 100g of flour you have to add an egg. For example, if you need 200 g of pasta just halve the ingredients (and use 2 small eggs).

2 . It is important to sift the flour before using it to avoid lumps or impurities (I don’t usually say this but you should always do it).

3. Here I am using a rolling pin, but if you are planning to make large quantities of fresh pasta I strongly advise you to get a pasta machine, to make things easier.

DSC_5342-4

Fresh Egg Pasta (with flour 00)

 Ingredients

for 400 g (14 oz) of pasta (approximately)

300 g (10.5 oz)  flour 00 (or plain flour)

3 eggs

salt to taste

 Tools

a clean kitchen cloth

an airtight container

a long rolling pin

a wooden board (with a rough surface) or a table

 Method

1. Sift the flour with a sieve, add some salt, make a well and crack three eggs in the centre. With a fork, beat the eggs lightly, in order to mix the whites with the yolks. Still using a fork, combine the flour with the eggs starting from the outer edge, then continue mixing the ingredients with your fingers and begin to knead.

DSC_5018

DSC_5022

DSC_5024

DSC_5029

2. Knead until you get a smooth dough, then wrap in a clean cloth and place in an airtight container (or use cling film). Let stand for about an hour at room temperature (if you don’t have much time, 30 minutes is fine).

DSC_5037

DSC_5045

DSC_5047

3. After an hour (or 30 minutes), take the dough and divide it into 3-4 pieces. Dust the working surface with some flour and, using a rolling pin, roll a very thin sheet of pasta. Repeat this process with the other pieces and cut the sheets as required by the recipe you are going to prepare.

DSC_5128

DSC_5140

DSC_5163

Notes.

You can make lasagne, ravioli, cannelloni and many varieties of pasta from these sheets. We will see how in the next few weeks. See also the post on spelt (farro) pasta for more ideas.

Pasta fresca all’uovo.

Ingredienti

per circa 400g di pasta

300g di farina 00

3 uova

sale q.b.

 Utensili

uno panno pulito

un contenitore a chiusura ermetica

un matterello lungo

una spianatoia di legno (con superficie ruvida)

 Preparazione.

1. Setacciate la farina con un colino grande (oppure un setaccio) e disponetela a fontana con tre uova al centro. Con una forchetta sbattete leggermente le uova, in modo da mischiare il bianco al tuorlo. Sempre con una forchetta, unite la farina all’uovo partendo del bordo esterno, poi proseguite con le dita e incominciate ad impastare.

2. Lavorate bene l’impasto, poi avvolgetelo in un panno pulito e mettetelo in un contenitore con chiusura ermetica (potete anche utilizzare la pellicola). Lasciate riposare un’ oretta (oppure 30 minuti, se non avete molto tempo).

3. Prendete l’impasto, dividetelo in 3-4 pezzi e incominciate a stendere la pasta (infarinando bene le superfici), fino ad ottenere una sfoglia molto sottile. Ripetete l’operazione con gli altri pezzi e tagliate la pasta come richiede la ricetta che state preparando.

An Oscar Winning Menu!

Are you planning a menu for your Oscar party? Don’t worry, because I am going to do that for you! Do you fancy a sophisticated Italian meal for you and your friends? If the answer is yes, then follow the links and enjoy your meal! 🙂

Appetizers

Special Stuffed Calamari (healthy and tasty!)

DSC_4810

and

Spring Onion Stuffed Focaccia Bread 

DSC_1641

Main Dish

Spaghetti with Prawns and Trumpet Gourds ( or Zucchini)

DSC_0170

Dessert

Seriously Decadent Mini Chocolate Trifles

DSC_3220

or

Mini Strawberry Pavlovas with Brown Sugar Meringues 

DSC_8763

Let me know if you like my choice…

Amazing Artichoke and Pea Quinoa.

DSC_3748

Quinoa has become a very popular ingredient in recent years. Besides being very versatile, it’s considered by nutritionists to be one of the most important super foods for its numerous nutritional properties and it’s often used as a substitute for couscous in gluten-free recipes. Quinoa is also an excellent source of protein and amino acids, therefore is perfect for vegetarian and vegan diets.

I must thank my mother for this awesome recipe! She usually prepares meat dishes using artichokes, peas and potatoes. Being a vegetarian, I thought of using this amazing combination of flavours in a quinoa recipe, in order to create a delicious and perfectly balanced meal.

Cooking tip. After cutting the artichokes dip them in cold water and some lemon juice for a few minutes, to preserve the colour.

DSC_3741

Artichoke and Pea Quinoa.

 Ingredients 

for 4 servings

4 artichokes

200 g ( 7 oz) of peas

1 large potato

1 organic vegetable stock cube

1 large onion

1 clove of garlic

a bunch of parsley

a sprig of fresh marjoram

5 tablespoons extra virgin olive oil

salt and pepper to taste

400 ml (14 fl. oz) of vegetable stock (made with 400 ml of hot water and 1 organic vegetable stock cube)

For the quinoa.

1 cup quinoa

2 cups water

a pinch of salt

Quinoa preparation.

1. Wash the quinoa, using a strainer, under running water for a few minutes.

2. Put 1 cup of quinoa, 2 cups of water and a pinch of salt in a small pan, then cook for 15 minutes.

3. Turn off the heat and cover with the lid.

How to prepare the Vegetables. 

1. Peel, wash and finely cut the onion. Fry over a low heat for a few minutes. Cut the garlic clove, remove the green core, then chop and fry with the onion.

DSC_0908

DSC_3642

2. Wash and trim the artichokes, removing all the sharp,  hard and hairy bits.  Cut each artichoke into 8 parts (also peel and cut the stems into small pieces) then add to the ingredients.

DSC_3638

DSC_3656

DSC_3675

3. Wash, peel and cut the potato into very small cubes.  Add the potato, pour 400 ml of vegetable stock into the pan and mix well.

DSC_3686

4. Then add the peas and cook for about 30 minutes over a low heat (cover with the lid and stir from time to time).

DSC_3691

5. Five minutes before the end of the cooking time, add the herbs ( finely chopped) and season with salt and pepper.

DSC_3711

6. Turn off the heat and serve the vegetables with the quinoa in the middle.

DSC_3783

DSC_3751

Quinoa con Carciofi e Piselli.

Ingredienti

per 4 persone

4 carciofi

200 g di piselli

1 patata grande

1 cipolla grande

1 spicchio d’aglio

1 dado vegetale biologico

un mazzetto di prezzemolo

un mazzetto di maggiorana fresca

5 cucchiai di olio extra vergine d’ oliva

400 ml di brodo vegetale (fatto con 400 ml d’acqua bollente e un dado vegetale)

sale e pepe q b

per la quinoa

80 g di quinoa

200 ml d’acqua (ancora meglio se usate del brodo vegetale)

un pizzico di sale

 Preparazione della quinoa.

1. Lavate la quinoa, usando un colino, sotto il getto d’acqua del rubinetto per qualche minuto.

2. Fate cuocere in acqua leggermente salata (o brodo)  la quinoa per circa 15 minuti.

3. Spegnete il fuoco, coprite con il coperchio e lasciate riposare.

Preparazione delle verdure.

1. Pulite, tagliate finemente la cipolla e fate soffriggere a fuoco basso. Tagliate in due lo spicchio d’aglio, togliete l’anima, tritate e aggiungete al soffritto.

2. Lavate e pulite i carciofi, togliendo tutte le spine, le parti dure e fastidiose. Tagliate ciascun carciofo in 8 parti, tagliate anche il gambo a pezzetti e aggiungete al soffritto.

3. Pelate, lavate e tagliate la patata a cubetti molto piccoli. Mettete a cuocere la patata e aggiungete del brodo vegetale. Mescolate bene.

4. Aggiungete i piselli e fate cuocere a fuoco lento per 30 minuti con il coperchio semi chiuso, mescolando occasionalmente.

5. Quasi a fine cottura, aggiungete le erbe tritate finemente e condite con il sale e pepe.

6. A cottura terminata, spegnete il fuoco e servite le verdure con la quinoa nel centro.

Crock Pot Quinoa and Veggie Stew.

 This dish is very healthy and nourishing, perfect for the winter.
Quinoa is a plant that can be used as a grain, in fact it is quite similar to couscous. It takes 15 minutes to cook, usually it’s boiled and added to the dish, however here I cook it together with the vegetables at end of the preparation of the recipe.
Quinoa is considered a superfood because it contains important amino acids and it’s gluten-free. As a matter of fact it’s not a cereal, but it can be used like one in many recipes.
Cooking tips.
To cook this stew I used an eco-friendly crock pot.  Some crock pots can release harmful chemicals contained in their paint, when they are used at high temperatures for slow cooking recipes. There are specialised shops that sell these eco-friendly crock pots, painted with harmless natural paint, they are a little bit expensive, but you’ll only need one….Although, a crock pot is nice, but it is not strictly necessary, you can also use a normal stainless steel pan or a slow cooker to prepare this recipe.
DSC_0540
Ingredients
Serves 4
1 large onion
2 cloves of garlic
2 medium carrots
2 stalks of celery
2 large potatoes
3 zucchini / courgettes
1 red bell pepper
300 g (10.6 oz) sweet tomatoes, like cherry tomatoes
1 can of cannellini beans (or baked beans)
150 g (5.3 oz) quinoa
3 bay leaves
700 ml (23.6 oz fl) water
extra virgin olive oil, salt and pepper to taste
1. Peel and cut all the vegetables into small pieces.
DSC_0508
2. Fry the onion with plenty of olive oil, then add the garlic after a few minutes.
DSC_0504
3. When the onions are golden, add all the vegetables with the bay leaves and 700 ml of water.
DSC_0516
DSC_0518-2
4. Stir and continue to cook over a low heat for 1 hour and 20 minutes (but add the beans after 40 minutes of cooking time).
DSC_0522
5. Wash the quinoa, using a strainer, under running water for a few minutes.
6. When the vegetables are cooked add the quinoa, then stir and cook for another 10 minutes.
DSC_0527
7.  Turn off the heat and cover with a lid. Season with a little olive oil, salt, pepper and serve after 5 minutes.
DSC_0545
Zuppa di quinoa con verdure.

Ingredienti

4 persone 

1 cipolla grossa

3 zucchini

2 spicchi d’aglio

2 carote medie

2 gambi di sedano

2 patate grosse

1 peperone rosso

300 g di pomodorini piccoli e dolci

1 scatola di fagioli cannellini

150 g di quinoa

3 foglie di alloro

700 ml d’acqua

olio extra vergine d’oliva, sale e pepe q b

1. Mondate e tagliate tutte le verdure a dadini.

2. Mettete a soffriggere la cipolla, aggiungendo l’aglio dopo qualche minuto per non farlo bruciare.

3. Quando il soffritto sarà dorato, aggiungete tutte le verdure con le foglie di alloro. Innaffiate con 700 ml d’acqua, poi coprite con il coperchio e fate cuocere lentamente.

4. Mescolate e continuate a cuocere a fuoco molto lento per 1 ora e 20 minuti (aggiungete i fagioli dopo 40 minuti di cottura).

5. Lavate la quinoa, usando un colino, sotto il getto d’acqua del rubinetto per qualche minuto.

6. Poco prima di spegnere il fuoco aggiungente la quinoa (circa 10 minuti prima), spegnete e coprite con il coperchio.

7. Lasciate riposare per 5 minuti. Condite con un po’ d’olio, sale e pepe e servite.

Smoked aubergine puree with egg sauce and tomatoes.

This week I am posting a recipe elaborated and prepared by Anahita Tcheraghali, an Iranian friend. It’s a revisitation of the traditional Iranian dish “mirzà ghasemì”. The combination of egg sauce (a light hollandaise sauce) and smoked aubergines in this recipe is quite unusual and a little surprising. You might want to add a little more lemon, in my opinion the lemon helps to bring the flavours together. Overall, as I said, quite an uncommon but interesting dish, quick and easy to prepare.

Anahita prepared this dish in the most traditional way, directly on the flame, however as a healthier and safer cooking method,  you can use the oven instead.

Ingredients
Serves 4
2 medium size aubergines (eggplants)
300 g (10.58 oz) piccadilly tomatoes or cherry tomatoes
3 egg yolks
250 ml (8.45 fl oz) milk
1 clove of garlic
1 tablespoon of butter
sesame seeds, a handful
a dash of lemon juice
a pinch of ground nutmeg
salt, pepper and extra virgin olive oil to taste
1. Pierce the aubergines and put them to roast on a high heat, directly on the flame (or you can use the oven).
DSC_0118
DSC_0129
2. Peel the aubergines, add the garlic and salt, then puree the vegetables using a fork.
DSC_0151
DSC_0161
DSC_0165
3. Separately, wash, clean and cut the tomatoes, removing the seeds.
DSC_0171
4. Toast the sesame seeds for about ten minutes in a frying pan.
DSC_0142
5. In a small thick saucepan, mix the egg yolks with milk, then stir for about ten minutes over a low heat (be careful not to boil the mixture)
6. Turn off the heat. Add the butter (cut into small pieces) with salt and some nutmeg.
DSC_0178
Preparation of the dish.
1. Shape a dome with the aubergine puree and make a hole in the centre.
2. Pour the egg sauce onto the puree and onto the plate.
DSC_0189
3. Sprinkle the tomatoes (cut into small pieces) and sesame seeds on top.
4. Season with salt, pepper, a dash of lemon and a drizzle of olive oil.
DSC_0208

Purea di melanzane affumicate con crema all’uovo.

2 melanzane di media grandezza lunghe o tonde

300 g di pomodorini piccadilly o datterini

3 tuorli d’uovo

250 ml di latte

1 spicchio d’aglio

1 cucchiaio da tavola di burro

una manciata di semi di sesamo

un pizzico di noce montata

un po’ di succo di limone

olio extra vergine di oliva, sale e pepe q b

1. Forate le melanzane e mettetele ad abbrustolire su fiamma viva (oppure potete usare il forno).

2. Spellate le melanzane, aggiungete una testa d’aglio (a cui è stata tolta l’anima) ,un po’ di sale e riducetele in purea.

3. A parte, lavate, pulite e tagliate i pomodorini a dadini.

4.Tostate i semi di sesamo per una decina di minuti in una padella.

5. In un pentolino, mischiate i tuorli con il latte. Fate pastorizzare la crema a fuoco basso per una decina di minuti, senza portare a bollore.

6. Spegnete la fiamma. Aggiungere il burro a tocchetti con della noce moscata e un pizzico di sale.

Preparazione del piatto.

1. Formate una cupola con la purea di melanzane e create un buco al centro.

2. Versate la crema all’uovo prima sulla purea e poi sulla base del piatto.

3. Cospargete i pomodorini e i semi di sesamo sulla crema.

4. Condite con olio, sale, pepe e una spruzzatina di limone.