All posts by Serena @ foodfulife

Chickpea hummus with multigrain pita bread (sourdough bread recipe).

Hummus is a delicious chickpea spread, easy to make and suitable for every occasion. Served with this special multigrain bread it becomes a real treat! This dish is rich in vegetable protein, fiber and omega 3, found in flaxseed. It is a great balanced meal when served with salad or fresh vegetables, while served with bread it is a wonderful starter.

Mutigrain pita bread.

For 4 flat breads.

ingredients

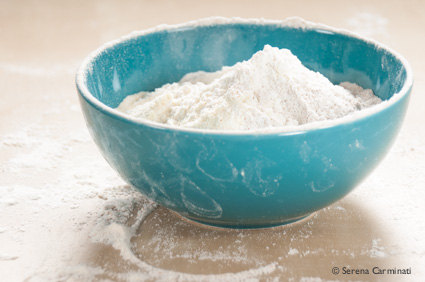
70 g (2.46 oz) wholemeal flour (whole wheat flour)

70 g (2.46 oz) wholemeal spelt flour

40 g (1.41) Manitoba flour

90 g (3.17 oz) sourdough

3 tablespoons 6 mixed grains (hulled oats, hulled barley, hulled spelt, wheat, rye, brown rice)

1 tablespoon flax seeds (linseeds)

1 tablespoon extra virgin olive oil

1 tea spoon of salt

1/2 teaspoon honey or barley malt (unsweetened) syrup (it helps the dough to rise and gives a nice crust to the bread, optional)

water as needed

For the hummus.

Ingredients

1 can chickpeas (240 g, 8.46 oz, drained chickpeas)

1 clove garlic

the juice 1/2 a lemon

1 teaspoon sesame seeds finely chopped

a few crystal of sea salt

4 tablespoons extra virgin olive oil

1/2 cup water

paprika to taste

Method (Multi Grain Pita Bread).

1. Wash the seeds in a bowl, changing the water several times, until it’s completely clear.

Step 1. Wash the seeds until the water is clear.

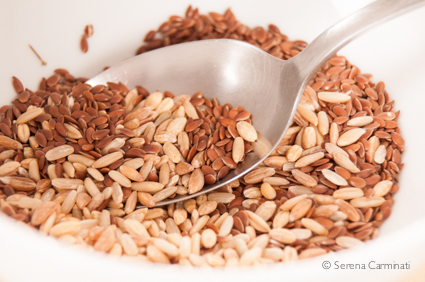
2. Leave the seeds to soak for 6-8 hours.

Step 2. Leave to soak for 6-8 hours.

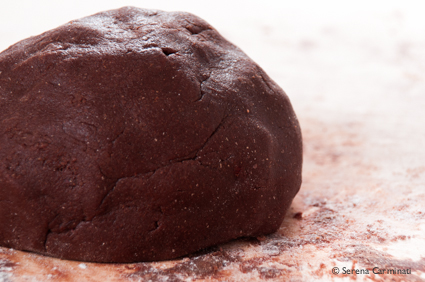
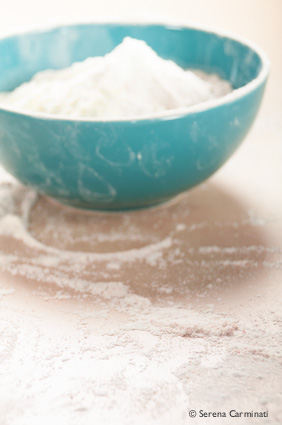
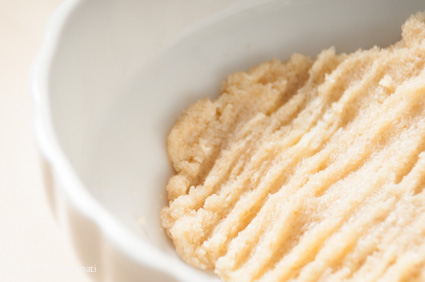
3. Mix the flour with the sourdough, adding some water and a little bit of malt (or honey). Sprinkle the seeds on top of the mixture, add a teaspoon of salt and knead everything well (adding flour or water if necessary, as the dough should be neither too sticky nor too hard and dry).

Step 3. Mix the flour, the sourdough,the seeds,some malt and water.

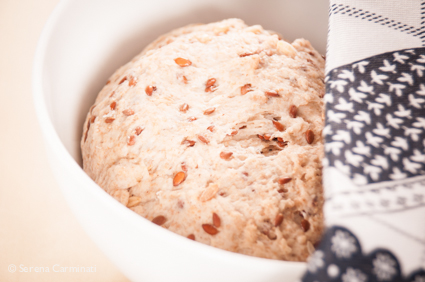
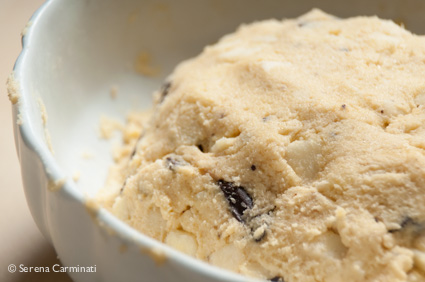
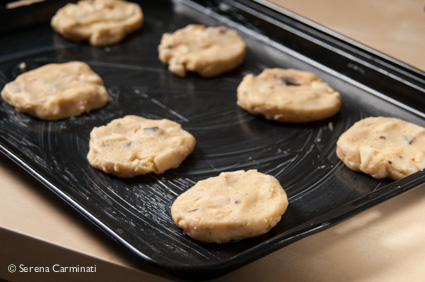
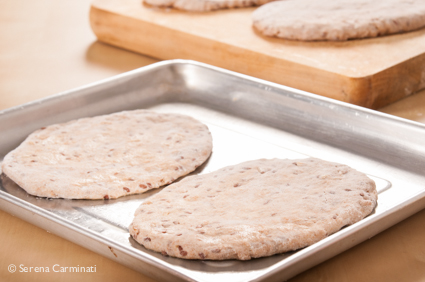
4. Let it rise for 3 to 6 hours. When the dough has doubled in volume, divide it into 4 pieces and shape them into flat breads, using a rolling pin, if necessary.

5. Lay your breads on a baking sheet lightly oiled and bake at 200 ° C (392° F) for 15 minutes.

Step 4 and 5. Let rise, then shape the breads and bake them.

Chickpea hummus with multigrain pita bread (front shot pita bread)

Method (Chickpea Hummus).

1. Wash and drain the chickpeas (you can boil them for a few minutes to be safe).

Chickpea Hummus. Step 1. Wash and dry the chickpeas

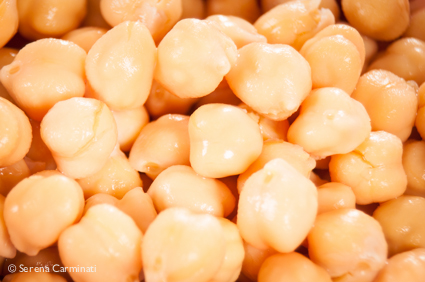
2. Using a food processor, process the chickpeas until very finely chopped with the garlic, sesame seeds and salt (for better a result, I use mortar and pestle to break the sesame seeds with just a few sea salt crystals, before putting them in the food processor)

Chickpea Hummus. Step 2. Process the chickpeas with the garlic, the sesame seeds and salt.

3. Continue to process adding the lemon juice, water, and gradually the olive oil, until you have a nice creamy sauce.

Chickpea Hummus. Step 3. Add lemon juice, water and olive oil and process until creamy.

4. Put the hummus in a small bowl, top with some paprika and serve with the multigrain bread.

Step 4. Serve the hummus in a small bowl with the multigrain pita bread.

Hummus di ceci con pane arabo ai cereali e semi di lino.

Per 4 panini piatti (tipo pita) ai cereali.

Ingredienti

70 g di farina integrale

70 g di farina integrale di farro

40 g di manitoba

90 g di lievito madre

3 cucchiaio di 6 cereali misti ( avena decorticata, orzo decorticato, farro decorticato, frumento, segale,riso integrale)

1 cucchiaio di semi di lino

1 cucchiaio di olio extravergine di oliva

1 cucchiaino di sale

1/2 cucchiaino di miele o di malto (fa lievitare meglio l’impasto e aiuta il formarsi di una bella crosta, ma é facoltativo)

acqua q b

Per l’hummus di ceci

1 scatola di ceci (240 g di ceci scolati)

1 spicchio d’aglio

Il succo di 1/2 limone

! cucchiaino di semi di sesamo tritati

qualche cristallo di sale grosso

4 cucchiai di olio extravergine d’oliva

1/ 2 bicchiere d’acqua

una spolverata di paprika

Preparazione (pane pita ai cereali).

1. Mettete a bagno in una ciotola tutti i semi, cambiando l’acqua più volte, finché non sarà completamente limpida. Lasciate i semi immersi in acqua per 6 ore.

2. Unite le farine al lievito madre, aggiungendo un po’ d’acqua e un po’ di malto (o di miele). Unite i semi all’impasto, aggiungete un cucchiaino di sale e impastate bene.

3. Aggiungete farina o acqua se necessario,  l’impasto ottenuto non dovrebbe essere né troppo appiccicoso, né troppo duro e asciutto.

4. Fate lievitare dalle 3 alle 6 ore, fino a quando l’impasto sarà raddoppiato di volume.

5. Formate 4 pagnotte e stendetele su una teglia leggermente unta con olio d’oliva. Infornate a 200° C per 15 minuti.

Preparazione ( hummus di ceci).

1. Lavate e scolate i ceci (potete anche bollirli per qualche minuto, per sicurezza). Frullate i legumi molto finemente con l’aglio, i semi di sesamo e il sale (per un risultato migliore, uso prima un mortaio per sbriciolare i semi di sesamo con qualche cristallo di sale grosso e poi li metto con il resto degli ingredienti nel tritatutto).

2. Continuate a frullare e aggiungete il succo di mezzo limone,  l’acqua e in fine l’olio molto gradualmente, fino ad ottenere una crema.

3. Mettete l’hummus in una ciotola, aggiungete una spolverata di paprika e servite con il pane ancora cado.

Spelt Flour Apple Cake (no refined sugar, no butter)

A remaking of the classic! Today we are going to make a very special apple cake… This dessert is very easy to prepare, great for breakfast or as a snack, it contains no butter, milk or refined sugar and is absolutely delicious!!! For this recipe I used only organic ingredients.

Spelt flour apple cake (no refined sugar).

ingredients

400 g (14.1 oz) peeled golden apples

100g (3.5 oz) wholemeal spelt flour

1 egg

50 ml  (1.69 fl oz) almond milk

3 tablespoons barley malt

3 tablespoons honey

3 tablespoons sunflower oil

1 pinch of salt

1/2 teaspoon of baking powder

1 pinch of cinnamon (optional)

the zest of 1 organic lemon and the juice of 1/2

Method.

1. Cut the apples into thin slices, then add the juice and the zest of the lemon and mix well.

Step 1. Cut the apples, add the lemon juice and mix.

2. Separately, mix the egg with malt and honey, to obtain a creamy mixture. Add the flour with the baking powder and stir.

Step 2. Mix the egg with malt and honey, then add the flour and baking powder.

Step 2. Mix the egg with malt and honey, then add the flour and baking powder.

Step 2. Mix the egg with malt and honey, then add the flour and baking powder.

3. Add also the apples, 3 tablespoons of sunflower oil, a pinch of salt, 50 ml of almond milk and some grated cinnamon.

Step 3. Add the apple, the oil, a pinch of salt, cinnamon and the almond milk to the flour.

4. Mix well. Pour the mixture into a loaf tin (I use a 25 cm long x10 cm wide tin, lined with baking paper) and bake at 180 ° C (356°F) for 25-35 minutes.

Step 4. Mix and bake at 180° C (356 °F ) for 25-35 minutes.

Step 4. Mix and bake at 180° C (356 °F ) for 25-35 minutes.

If you like this recipe give us a like on our facebook page:  https://www.facebook.com/Foodfulife

Torta di mele con farina di farro, malto e miele.
Una rivisitazione della classica torta rustica alle mele. Un dolce facilissimo da preparare, ottimo a colazione o a merenda. Questa ricetta non contiene burro, latte o zucchero raffinato, ma è buonissima!!! Per la preparazione ho usato solo ingredienti biologici.
Ingredienti

400 g di mele golden

100 g di farina integrale di farro

1 uova

scorza di un limone biologico e il succo di 1/2 limone

50 ml di latte di mandorla

3 cucchiai di malto d’orzo

3 cucchiai di miele

3 cucchiai di olio di girasole

1 pizzico di sale

1/2 bustina di lievito chimico per dolci

1 pizzico di cannella (facoltativo)

Preparazione.

1. Tagliate le mele a fettine sottili, aggiungete il succo e la scorza di limone e mescolate bene.

2. A parte, amalgamate l’uovo con il malto e il miele, fino ad ottenere una crema. Aggiungete la farina e il lievito, continuando a mescolare.

3. Unite al composto le mele con il limone, l’olio, le cannella, un pizzico di sale e il latte di mandorla.

4. Versate il composto in una teglia, foderata con carta da forno (uso una teglia rettangolare di 25 cm di lunghezza x10 cm di larghezza) e infornate a 180° C per 25-35 minuti.

Buona torta a tutti!!

Spring colors

More pics from this season

Spring! Colori e profumi…

No recipes today, only a few pics from my balcony…

DSC_6839DSC_7801DSC_6866DSC_7823DSC_7826DSC_6835DSC_7878DSC_7813DSC_6863DSC_7896

Some tips to keep your sourdough in good shape!

My sourdough is one year old! I keep it strong and healthy in a nice big jar in the fridge. I usually feed it once a week (or refresh it, as we say) , but the refreshment time varies depending on my needs. I’ve never had any problems with my natural yeast, however, at times, it’s possible that the yeast becomes sourer, or less responsive to leavening, therefore less active. These elements depend on many factors. There are some steps you can take to keep your sourdough in the best shape and correct any of problems. Of course, if you want a sour product, in order to let the bacteria produce acidity you have to do the opposite of what is indicated below.

To increase the leavening strength:

⁃ increase the temperature during leavening

⁃ decrease the ratio refreshments / flour

⁃ increase the ratio water / flour

⁃ increase humidity

In case of over-acidity:

⁃ change the type of flour (change microflora)

⁃ decrease the rising time

⁃ decrease ratio refreshments / flour

⁃ decrease the amount of water with the flour (to make a harder dough)

⁃ lower the temperature of the dough

DSC_7787

Some of this information belongs to the teaching material of the Cereal Technology Course at Parma University (Italy), courtesy of Prof. Franco Antoniazzi.

Come mantenere il lievito madre al meglio.

Il mio lievito madre ha un anno di vita! Lo tengo in un vasetto di vetro nel frigorifero e lo rinfresco generalmente una volta a settimana, ma a volte anche più spesso se ne uso in grandi quantità. Non ho mai avuto grossi problemi, ma è possibile che il lievito naturale a volte diventi più acido, oppure sia meno reattivo alla lievitazione, questo dipende da molti fattori. Ci sono comunque degli accorgimenti che si possono adottare per mantenere il lievito madre al meglio e correggere eventuali anomalie.

Interventi sui rinfreschi del lievito naturale.

Per aumentare la forza lievitante:

  • aumentare la temperatura di lievitazione
  • diminuire il rapporto rinfreschi/farina
  • aumentare il rapporto acqua/farina
  • aumentare l’umidità

Interventi in caso di acidità eccessiva:

  • cambiare tipo di farina (microflora diversa)
  • diminuire i tempi di lievitazione
  • diminuire i rapporti rinfreschi/farina
  • diminuire la quantità di acqua rispetto alla farina (impasto più duro)
  • abbassare le temperature degli impasti

Alcune delle informazioni riportate in questo articolo, fanno parte del materiale didattico del corso di Tecnologia dei Cereali dell’Univeristà di Parma, per gentile concessione del Prof. Franco Antoniazzi.

Biscotti As You Have Never Seen Them Before!

This is a chocolate version of Biscotti, or Cantucci cookies. Usually made with plain flour and almonds, I made these wholemeal cookies adding chocolate, hazelnuts and spelt flour to the traditional recipe. I also tried using less sugar, but they didn’t taste as good.  These cookies go well with coffee and tea, and kept a tin box they last for a long time.

DSC_7780

Chocolate spelt biscotti with hazelnuts and almonds.

Ingredients

for 2 large trays of biscotti

150 g (5.29 oz) plain flour (unbleached all-purpuse flour)

150 g (5.29 oz) whole spelt flour

70 g (2.46 oz) hazelnuts, whole and some crushed

70 g (2.46 oz) almonds, whole and some crushed

3 eggs

170 g (5.99 oz) sugar

2 drops sweet orange essential oil (or some grated orange zest)

3 tablespoons unsweetened cocoa powder

80 g (2.82 oz) dark chocolate (70% cocoa solids) finely chopped

1/2 tablespoon acacia honey

4 g baking soda

marsala wine to taste (or milk )

a pinch of salt

Method.

DSC_7634

1. Sift the flour with the baking soda and cocoa powder.

DSC_7588

2. Add the chocolate, the hazelnuts, the almonds and a pinch of salt to the flour. Stir well.

DSC_7650

DSC_7642

3. Separately, mix two eggs, with the honey, the orange essential oil and sugar.

DSC_7661

4. Combine all the ingredients together and mix well, adding some marsala wine (or milk) if the mixture is too dry.

DSC_7614

5. Divide the dough into four equal pieces, roll into the shape of four ropes and then brush the dough with an egg.

DSC_7673

6. Bake at 190 ° C (374 °F) for 15-20 minutes. Remove from the oven and cut the cookies at a 45° angle, then bake for 5-10 minutes more at 190 ° C (374 °F).

DSC_7707

DSC_7723

7. Let the cookies completely cool and store in a sealed tin box.

 DSC_7763

Cantucci di farina di farro al cioccolato.

Ingredienti

per 2 teglie di biscotti

150 g di farina 00

150 g di farina integrale di farro

70 g di nocciole, intere e sbriciolate

70 g di mandorle, intere e sbriciolate

3 uova

170 g  di zucchero

2 gocce di olio essenziale di arancio dolce (oppure un po’ di buccia d’arancia)

3 cucchiai di cacao amaro

80 g di cioccolato fondente al 70% tagliato a pezzetti

1/2 cucchiaio di miele d’acacia

4 g di bicarbonato

marsala q. b. (o latte, a scelta)

un pizzico di sale

Preparazione.

1. Setacciate la farina con il bicarbonato e il cacao.

2. Aggiungete alla farina il cioccolato, le nocciole, le mandorle e un pizzico di sale. Mescolate con cura.

3. A parte, amalgamate due uova con il miele, l’olio essenziale d’arancia e lo zucchero.

4. Unite tutti gli ingredienti, aggiungendo un po’ di marsala (o latte) nel caso il composto fosse troppo asciutto.

5. Formate quattro filoni della stessa misura e spennellate la superficie con un uovo. Infornate a 190° C per 15-20 minuti.

6. Sfornate e tagliate i biscotti in obliquo (per dare la forma dei cantucci), quindi infornate nuovamente per 5-10 minuti (sempre a 190° C).

7. Lasciate raffreddare e conservate in un contenitore di latta ben chiuso.

Bread making: choosing the right flour.

DSC_6642
  1. A good dough depends on the quality of the flour used. A good stone ground flour preserves most of the original nutritional values of the cereals.
  2. A few important factors determine the quality of a particular flour: tolerance to fermentation, good ability to absorb water, good consistency, extensibility and resistance.
  3. There are weak (soft) and strong (hard) flours. It’s important to understand the difference between these types of flour in order to use them in the best possible way.
  4. The strength of a flour is determined by the amount of protein (gluten) contained in the product. The higher the amount of protein (gluten), the stronger the flour.
  5. Weak flours have low protein (gluten) content and poor water absorption ability, consequently they are less active when leavening. For these reasons weak flours are mainly used for simple and dry preparations (e.g.to make cookies or bread sticks), while strong flours (e.g. manitoba) are used in more elaborate leavening processes.
  6. A plain strong flour dough is harder to work, therefore less extensible than a weaker one.

DSC_6554

Understanding flour strength.

In Italy, flour strength is indicated by a number followed by W. The W number is usually not indicated on the packaging of the product you buy at the supermarket. it’s possible to understand the strength of a flour by looking at the protein content indicated on the packaging.

DSC_6597

Below you will find some reference data that might help you to understand the relationship between protein, flour strengths (W) and their uses.


  • W
  • Protein
  • Use
  • 90/130
  • 9/10,5
  • Cookies (dough with baking powder)
  • 130/200
  • 10/11
  • Breadsticks, Crackers
  • 170/200
  • 10,5/11,5
  • Ciabatta, sandwich, focaccia bread, pizza, plain bread dough (with yeast or baking powder)
  • 220/240
  • 12/12,5
  • Baguettes, ciabatta bread, bread dough ( with yeast or baking powder) and biga (or sourdough) 5/6 h rising time
  • 300/310
  • 13
  • Worked bread, pastry dough with biga (or sourdough) up to 15 h rising time
  • 340/400
  • 13,5/15
  • Puffed bread, Pandoro, Panettone, dough leavened with long fermentation, pastry dough with biga (or sourdough) over 15 h rising time

The data shown here was taken from the teaching material of the Cereal Technology Course at Parma University (Italy), courtesy of Prof. Franco Antoniazzi.

DSC_6644

Guida alle farine.

  1. Un buon impasto dipende dalla qualità della farina utilizzata. Una buona farina ottenuta dalla macinazione in pietra (il metodo tradizionale) preserva al meglio le proprietà e i valori nutrizionali dei cereali macinati.
  2. Le caratteristiche da ricercare in una buona farina per fare il pane sono: tollerabilità alla fermentazione, buon assorbimento dell’acqua, buona consistenza, estensibilità dell’impasto e resistenza alla lavorazione.
  3. Esistono farine deboli e forti. E’ importante capire la differenza tra queste farine per utilizzarne al meglio le caratteristiche.
  4. Il fattore di panificabilità, o forza di panificazione, dipende dal contenuto di proteine (glutine) nella farina. Più alta è la percentuale di proteine contenuta nella farina e maggiore è la forza di panificazione.
  5. Le farine deboli hanno un basso contenuto di glutine, scarsa capacità di assorbimento dell’acqua e di conseguenza reagiscono meno attivamente alla lievitazione. Le farine deboli vengono quindi utilizzate nelle lavorazioni più fini e secche (per fare i biscotti o grissini), mante le farine forti (ad esempio la manitoba) si utilizzano per le lievitazioni più lunghe ed elaborate.
  6. Un impasto semplice, fatto con la farina forte, è più tenace e meno estensibile di un impasto fatto con la farina debole.

DSC_6595
Capire la forza delle farine.

In Italia, la forza della farina si indica con un numero seguito da W. Nella confezione al supermercato non troverete questi parametri riportati sulla confezione. E’ possibile però farsi un’idea sulla forza di panificazione della farina leggendo le percentuali di proteine riportate sulla confezione del prodotto.

In questa tabella troverete alcuni dati di riferimento per capire meglio il rapporto tra le proteine,la  forza di panificazione (W) delle farine e i loro utilizzi.

  • W
  • Proteine
  • Utilizzo
  • 90/130
  • 9/10,5
  • Biscotti ad impasto diretto (con lievito chimico)
  • 130/200
  • 10/11
  • Grissini, Crackers
  • 170/200
  • 10,5/11,5
  • Pane comune, impasto diretto (cioè con lievito chimico o lievito di birra), ciabatte, pancarré, pizze, focacce, fette biscottate
  • 220/240
  • 12/12,5
  • Baguettes, pane comune a impasto diretto (cioè con lievito chimico o lievito di birra), maggiolini, ciabatte a impasto diretto e biga di 5/6 h
  • 300/310
  • 13
  • Pane lavorato, pasticceria lievitata con biga di 15 h e impasto diretto
  • 340/400
  • 13,5/15
  • Pane soffiato, pandoro, panettone, lievitati a lunga fermentazione, pasticceria lievitata con biga oltre le 15 h

I dati riportati nella tabella sono stati presi dal materiale didattico del corso di Tecnologia dei Cereali dell’Univeristà di Parma, per gentile concessione del Prof. Franco Antoniazzi.

DSC_6608

Posh and perfect! Wholemeal pizza with goat’s cheese, olives and rocket (arugula).

This is a great veggy pizza! The dough, once cooked, is perfectly crunchy on the outside and soft on the inside. I used a mixture of manitoba, semolina and wholemeal flour to give elasticity, crispness and flavour to the pizza. Instead of using sourdough you can use 6 g of yeast to significantly reduce the rising time of the dough. At this link https://foodfulife.wordpress.com/2013/01/02/how-to-make-natural-yeast-sourdough/  you will find a short article that explains how to make sourdough at home.

Wholemeal pizza with goat’s cheese, olives and rocket (arugula).

Ingredients

For 1 thick pizza

50 g (1.76 oz) manitoba flour

50 g (1.76 oz) wholemeal (whole wheat) flour

40 g (1.41 oz)  fine semolina flour

50 g (1.76 oz) sourdough

70 g (2.46 oz) fresh and creamy goat’s cheese

70 g (2.46 oz) sweet and creamy soft cheese (crescienza or stracchino)

3 tablespoons extra virgin olive oil

1 teaspoon salt

A handful of rocket (arugula)

A handful of pitted olives

6-7 ripe cherry tomatoes

salt and pepper as needed (for seasoning the pizza)

100 ml (3.38 fl. oz) water (or more)

1/2 teaspoon honey

Create a starter dough with 50 g (1.76 oz ) wholemeal flour, 50 g manitoda flour and 50 g sourdough. Knead the starter dough with 100 ml (3.38 fl. oz) water and half a teaspoon of honey.

DSC_6289

Cover and set for a couple of hours. After 2 hours, take the starter dough and mix with the semolina flour ( adding some water or flour if needed). Add a teaspoon of salt and a tablespoon of oil and work until smooth.

DSC_6357

Let rise for a few hours, and then the dough will ready when it doubles in volume. Roll out the dough and place in a baking tray, previously evenly greased with a tablespoon of olive oil.

DSC_6371-3

Cut the tomatoes and the olives into thin slices. In a small bowl, mix the goat’s cheese with crescenza until smooth.

DSC_6361-3

Alternating, place the tomatoes and cheese on top of the dough, then garnish with some slices of olives. Season your pizza with a tablespoon of olive oil, some salt and pepper.

DSC_6378-3

Bake at 200 ° C (392° F) for 25-30 minutes.

DSC_6395-3

Top the pizza with fresh rocket and serve.

DSC_6408-3

DSC_6425-3

Pizza integrale con formaggio di capra, olive e rucola.

Ingredienti

per 1 pizza

50g di farina manitoba

50g di farina integrale

40g di semola (rimacinata)

50g di lievito madre  (oppure 6 g di lievito di birra con aggiunta di acqua)

70 g di formaggio fresco (cremoso) di capra

70 g di crescenza o stracchino

3 cucchiai di olio extravergine d’oliva

Una manciata di olive verdi snocciolate

Una manciata di rucola

1 cucchiaino scarso di sale

6-7 pomodorini ciliegia ben maturi

sale e pepe qb (sulla pizza finita)

100 ml di acqua (o più)

1/2 cucchiaino di miele

Create un lievitino con 50g di farina integrale, 50g di farina manitoda e 50 g di lievito madre. Impastate il lievitino con 100 ml di acqua e mezzo cucchiaino di miele. Coprite e lasciate lievitare per un paio d’ore. Dopo la prima lievitazione, prendete il lievitino e impastate con la semola (aggiungendo un po’ d’acqua o di farina se necessario). Aggiungete un cucchiaino di sale e un cucchiaio d’olio all’impasto. Lasciate lievitare per qualche ora ( tenete presente che l’impasto è pronto quando raddoppia di volume).

Stendete l’impasto su una teglia, uniformemente unta con un cucchiaio di olio extravergine d’oliva. Tagliate i pomodorini e le olive a fettine. In una terrina piccola, unite e mescolate bene la crescenza con il formaggio di capra, fino ad ottenere una crema abbastanza omogenea. Cospargete i pomodorini alternandoli al formaggio sulla base della pizza e finite di decorare con delle fettine di olive. Condite la pizza con un cucchiaio di olio, un po’ di sale e pepe.

Fate cuocere a 200° di per 25-30 minuti. Sfornate la pizza, aggiungete la rucola e servite.

Deliciously soft bavarian cream with chocolate-caramel sauce.

A few nights ago I had a couple of friends round for dinner, it was a special occasion, so I prepared a simple and delicious dessert recipe. I made a soft vanilla bavarian cream which I divided into individual portions and garnished with chocolate-caramel sauce and a few toasted walnuts. This dessert is very easy to prepare, very satisfying and deliciously creamy. A bavarian cream is basically a rich but delicate custard, blended with gelatin to have a light and airy texture. The chocolate sauce served with walnuts adds crunchiness and flavour to the cream.  We spent a wonderful evening and the dessert was fully appreciated…

DSC_5894

Bavarian cream with chocolate-caramel sauce.

Ingredients

Serves 4

250 ml (8.45 fl. oz) whipping cream

150 ml (5 fl. oz) milk

50 g (1.76 oz) sugar

2 gelatin leaves (5 g)

2 egg yolks

2 drops vanilla extract

For the chocolate-caramel sauce

100 g (3.52 oz) brown sugar

1 teaspoon cocoa powder

6 toasted walnuts (toast the unshelled walnuts in the oven on a tray for 5 minutes at 190°C, 374 °F)

1 teaspoon of dark rum

100 ml (3.38 fl.oz) of milk

Preparation method.

1. Soften the gelatin in warm water for 10 minutes.

DSC_5720

2. In a saucepan, work the eggs with the sugar until creamy. Gradually add hot milk and the vanilla extract, stirring on low heat.

DSC_5728

3. Drain the gelatin, melt into the creamy mixture and continue to stir on low heat for about ten minutes (do not boil). Let cool. Stir the whipped cream very gently into the mixture.

DSC_5739

DSC_5769

DSC_5781

4. Pour the dessert into molds and put in the refrigerator to set for at least 3 hours.

DSC_5800

Preparation of the caramel sauce.

DSC_5832

1. Pour the sugar (100 g) with the cocoa powder into the milk (100 ml), add some rum and stir. Melt the sugar at a low heat and cook until the sauce has thickened.

2. Garnish the bavarian cream with a few toasted walnuts and serve with the chocolate-caramel sauce.

DSC_5859

Crema bavarese con salsa di caramello al cacao.

Ingredienti

per 4 porzioni

250 ml di panna da montare

150 ml di latte

50 g di zucchero

2 fogli di colla di pesce (5 g)

2 tuorli d’uovo

due gocce di estratto di vaniglia

Per la crema di caramello al cacao

100 g di zucchero di canna

1 cucchiaino di cacao

1 cucchiaino di rum scuro

100 ml di latte

qualche noce tostata per guarnire

Preparazione della crema.

1. Fate ammorbidire la colla di pesce in acqua tiepida per 10 minuti. In un pentolino, lavorate le uova con lo zucchero fino a creare una crema spumosa.

2. Continuando a mescolare, allungate gradualmente il composto con del latte bollente. Aggiungete l’estratto di vaniglia e fate cuocere per dieci minuti a fiamma molto bassa.

3. Scolate bene la colla di pesce e fatela sciogliere nel latte ( continuando a mescolare). Spegnete il fuoco e lasciate raffreddare.

4. Unite la panna montata al composto, mescolando delicatamente dal basso verso l’alto. Versate la crema negli stampi e mettetela nel frigorifero a solidificare per almeno 3 ore.

Preparazione del caramello.

1. Versate lo zucchero (100 g) con il cacao e un cucchiaino di rum in 100 ml di latte. Fate sciogliere lo zucchero a fiamma bassa e fate ritirare fino ad ottenere una salsa densa. Lasciate raffreddare.

2. Servite la crema bavarese con la salsa di caramello al cacao e guarnite con qualche noce (fatta leggermente tostare prima) sopra.

Gluten-Free Apple And Chocolate Chip Cookies

DSC_5033

I made this recipe for a celiac friend. I used gluten-free flours, trying to create a smooth and homogeneous dough. The result is excellent! These soft and delicate cookies melt nicely in the mouth, slowly releasing an intense dark chocolate flavour.

If you prepare this recipe for a gluten-intolerant friend , use only flour, potato starch and corn starch specific for celiac people, and make sure that the absence of gluten is clearly indicated on the packaging.

DSC_5063

Apple and chocolate chip cookies (gluten-free).

Ingredients

for about 25 cookies

70 g ( 2.4 oz) corn flour

70 g (2.4 oz) rice flour

70 g (2.4 oz) corn starch

70 g (2.4 oz) potato starch

150 g (5.29 oz) butter

130 g (4.5 oz) brown sugar

150 g (5.29 oz) dark chocolate for cooking

1 teaspoon baking soda

1 whole egg

1 large golden sweet apple

2 tablespoons yogurt

2 drops vanilla essence

a pinch of salt

Method.

1. In a bowl, sift the flour with the corn and potato starch.

DSC_4961

2. Separately, mix the butter with sugar.

DSC_4963

DSC_4973

3. Add an egg with two drops of vanilla essence to the butter. Mix well, then add two tablespoons of yogurt and a teaspoon of baking soda to the mixture. Knead the dough.

DSC_4975

4. Peel and cut the apple into very small cubes, break the chocolate into pieces and add them with a pinch of salt to the mixture.

DSC_4981

DSC_4991

5. Put the dough to cool in the refrigerator for 30 minutes. Grease two or three baking sheets (depending on the size), shape the dough into small balls (4.5 cm each) and place them on the baking sheets, quite far apart from one another.

DSC_4999

6. Slightly flatten the dough balls to make the cookies.

DSC_5003

7. Bake at 170 ° C (338°F) for 15-18 minutes. Place the cookies to cool on a rack.

DSC_5072

Biscotti morbidi con cioccolato e mele (senza glutine).

Ingredienti

per 25 biscotti circa

70 g di farina di mais

70 g di farina di riso

70 g di amido di mais

70 g di fecola di patate

150 g di burro

130 g zucchero di canna

150 g di cioccolato fondente per cucinare

1 cucchiaino di bicarbonato

1 uovo intero

1 mela grossa golden

2 cucchiai di yogurt

2 gocce di essenza di vaniglia

un pizzico di sale

Preparazione.

1. In una terrina, setacciate le farine con l’amido di mais e la fecola di patate. A parte, lavorate il burro con lo zucchero.

2. Aggiungete l’uovo con le gocce di essenza di vaniglia al burro lavorato.

3. Amalgamate bene e unite alla farina, aggiungendo due cucchiai di yogurt e un cucchiaino di bicarbonato. Impastate tutto.

4. Sbucciate e tagliate la mela a cubetti molto piccoli, rompete il cioccolato in pezzi ed aggiungeteli, con un pizzico di sale, all’impasto.

5. Mettete l’impasto a riposare per 30 minuti nel frigorifero. Imburrate due o tre teglie (dipende dalla grandezza), formate delle palline di circa 4,5 cm e mettetele sulle teglie, abbastanza distanti l’una dall’altra.

6. Schiacciate l’impasto per dare la forma ai biscotti.

7. Infornate a 170 ° per 15-18 minuti, poi lasciate raffreddare i biscotti su una griglia.